Vista de Lectura

Hay nuevos artículos disponibles. Pincha para refrescar la página.

Mining and Refining: Lead, Silver, and Zinc

If you are in need of a lesson on just how much things have changed in the last 60 years, an anecdote from my childhood might suffice. My grandfather was a junk man, augmenting the income from his regular job by collecting scrap metal and selling it to metal recyclers. He knew the current scrap value of every common metal, and his garage and yard were stuffed with barrels of steel shavings, old brake drums and rotors, and miles of copper wire.

But his most valuable scrap was lead, specifically the weights used to balance car wheels, which he’d buy as waste from tire shops. The weights had spring steel clips that had to be removed before the scrap dealers would take them, which my grandfather did by melting them in a big cauldron over a propane burner in the garage. I clearly remember hanging out with him during his “melts,” fascinated by the flames and simmering pools of molten lead, completely unconcerned by the potential danger of the situation.

Fast forward a few too many decades and in an ironic twist I find myself living very close to the place where all that lead probably came from, a place that was also blissfully unconcerned by the toxic consequences of pulling this valuable industrial metal from tunnels burrowed deep into the Bitterroot Mountains. It didn’t help that the lead-bearing ores also happened to be especially rich in other metals including zinc and copper. But the real prize was silver, present in such abundance that the most productive silver mine in the world was once located in a place that is known as “Silver Valley” to this day. Together, these three metals made fortunes for North Idaho, with unfortunate side effects from the mining and refining processes used to win them from the mountains.

All Together Now

Thanks to the relative abundance of their ores and their physical and chemical properties, lead, silver, and zinc have been known and worked since prehistoric times. Lead, in fact, may have been the first metal our ancestors learned to smelt. It’s primarily the low melting points of these metals that made this possible; lead, for instance, melts at only 327°C, well within the range of a simple wood fire. It’s also soft and ductile, making it easy enough to work with simple tools that lead beads and wires dating back over 9,000 years have been found.

Unlike many industrial metals, minerals containing lead, silver, and zinc generally aren’t oxides of the metals. Rather, these three metals are far more likely to combine with sulfur, so their ores are mostly sulfide minerals. For lead, the primary ore is galena or lead (II) sulfide (PbS). Galena is a naturally occurring semiconductor, crystals of which lent their name to the early “crystal radios” which used a lump of galena probed with a fine cat’s whisker as a rectifier or detector for AM radio signals.

Geologically, galena is found in veins within various metamorphic rocks, and in association with a wide variety of sulfide minerals. Exactly what minerals those are depends greatly on the conditions under which the rock formed. Galena crystallized out of low-temperature geological processes is likely to be found in limestone deposits alongside other sulfide minerals such as sphalerite, or zincblende, an ore of zinc. When galena forms under higher temperatures, such as those associated with geothermal processes, it’s more likely to be associated with iron sulfides like pyrite, or Fool’s Gold. Hydrothermal galenas are also more likely to have silver dissolved into the mineral, classifying them as argentiferous ores. In some cases, such as the mines of the Silver Valley, the silver is at high enough concentrations that the lead is considered the byproduct rather than the primary product, despite galena not being a primary ore of silver.

Like a Lead Bubble

How galena is extracted and refined depends on where the deposits are found. In some places, galena deposits are close enough to the surface that open-cast mining techniques can be used. In the Silver Valley, though, and in other locations in North America with commercially significant galena deposits, galena deposits follow deep fissures left by geothermal processes, making deep tunnel mining more likely to be used. The scale of some of the mines in the Silver Valley is hard to grasp. The galena deposits that led to the Bunker Hill stake in the 1880s were found at an elevation of 3,600′ (1,100 meters) above sea level; the shafts and workings of the Bunker Hill Mine are now 1,600′ (488 meters) below sea level, requiring miners to take an elevator ride one mile straight down to get to work.

Ore veins are followed into the rock using a series of tunnels or stopes that branch out from vertical shafts. Stopes are cut with the time-honored combination of drilling and blasting, freeing up hundreds of tons of ore with each blasting operation. Loose ore is gathered with a slusher, a bucket attached to a dragline that pulls ore back up the stope, or using mining loaders, low-slung payloaders specialized for operation in tight spaces.

Ore plus soap equals metal bubbles. Froth flotation of copper sulfide is similar to the process for extracting zinc sulfide. Source: Geomartin, CC BY-SA 4.0

Silver Valley galena typically assays at about 10% lead, making it a fairly rich ore. It’s still not rich enough, though, and needs to be concentrated before smelting. Most mines do the initial concentration on site, starting with the usual crushing, classifying, washing, and grinding steps. Ball mills are used to reduce the ore to a fine powder, mixed with water and surfactants to form a slurry, and pumped into a broad, shallow tank. Air pumped into the bottom of the tanks creates bubbles in the slurry that carry the fine lead particles up to the surface while letting the waste rock particles, or gangue, sink to the bottom. It seems counterintuitive to separate lead by floating it, but froth flotation is quite common in metal refining; we’ve seen it used to concentrate everything from lightweight graphite to ultradense uranium. It’s also important to note that this is not yet elemental lead, but rather still the lead sulfide that made up the bulk of the galena ore.

Once the froth is skimmed off and dried, it’s about 80% pure lead sulfide and ready for smelting. The Bunker Hill Mine used to have the largest lead smelter in the world, but that closed in 1982 after decades of operation that left an environmental and public health catastrophe in its wake. Now, concentrate is mainly sent to smelters located overseas for final processing, which begins with roasting the lead sulfide in a blast of hot air. This converts the lead sulfide to lead oxide and gaseous sulfur dioxide as a waste product:

2 PbS + 3 O{_2} \rightarrow2 PbO + 2 SO{_2}

After roasting, the lead oxide undergoes a reduction reaction to free up the elemental lead by adding everything to a blast furnace fueled with coke:

2 PbO + C \rightarrow2 Pb + CO{_2}

Any remaining impurities float to the top of the batch while the molten lead is tapped off from the bottom of the furnace.

Zinc!

A significant amount of zinc is also located in the ore veins of the Silver Valey, enough to become a major contributor to the district’s riches. The mineral sphalerite is the main zinc ore found in this region; like galena, it’s a sulfide mineral, but it’s a mixture of zinc sulfide and iron sulfide instead of the more-or-less pure lead oxide in galena. Sphalerite also tends to be relatively rich in industrially important contaminants like cadmium, gallium, germanium, and indium.
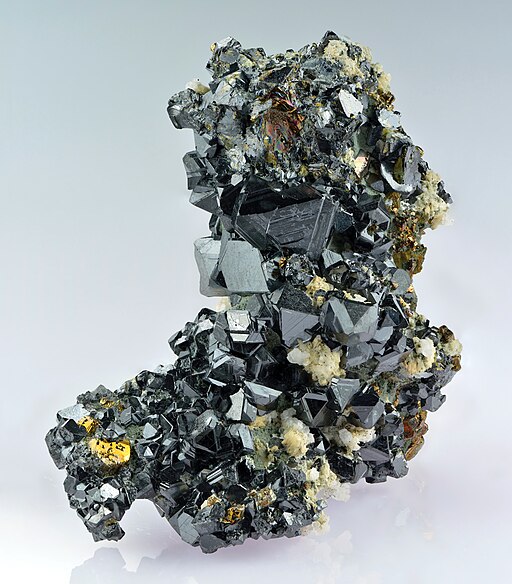
Most sphalerite ore isn’t this pretty. Source: Ivar Leidus, CC BY-SA 4.0.

Extraction of sphalerite occurs alongside galena extraction and uses mostly the same mining processes. Concentration also uses the froth flotation method used to isolate lead sulfide, albeit with different surfactants specific for zinc sulfide. Concentration yields a material with about 50% zinc by weight, with iron, sulfur, silicates, and trace metals making up the rest.

Purification of zinc from the concentrate is via a roasting process similar to that used for lead, and results in zinc oxide and more sulfur dioxide:

2 ZnS + 3 O{_2}\rightarrow2 ZnO + 2SO{_2}

Originally, the Bunker Hill smelter just vented the sulfur dioxide out into the atmosphere, resulting in massive environmental damage in the Silver Valley. My neighbor relates his arrival in Idaho in 1970, crossing over the Lookout Pass from Montana on the then brand-new Interstate 90. Descending into the Silver Valley was like “a scene from Dante’s Inferno,” with thick smoke billowing from the smelter’s towering smokestacks trapped in the valley by a persistent inversion. The pine trees on the hillsides had all been stripped of needles by the sulfuric acid created when the sulfur dioxide mixed with moisture in the stale air. Eventually, the company realized that sulfur was too valuable to waste and started capturing it, and even built a fertilizer plant to put it to use. But the damage was done, and it took decades for the area to bounce back.

Recovering metallic zinc from zinc oxide is performed by reduction, again in a coke-fired blast furnace which collects the zinc vapors and condenses them to the liquid phase, which is tapped off into molds to create ingots. An alternative is electrowinning, where zinc oxide is converted to zinc sulfate using sulfuric acid, often made from the sulfur recovered from roasting. The zinc sulfate solution is then electrolyzed, and metallic zinc is recovered from the cathodes, melted, further purified if necessary, and cast into ingots.

Silver from Lead

If the original ore was argentiferous, as most of the Silver Valley’s galena is, now’s the time to recover the silver through the Parke’s process, a solvent extraction technique. In this case, the solvent is the molten lead, in which silver is quite soluble. The dissolved silver is precipitated by adding molten zinc, which has the useful property of reacting with silver while being immiscible with lead. Zinc also has a higher melting point than lead, meaning that as the temperature of the mixture drops, the zinc solidifies, carrying along any silver it combined with while in the molten state. The zinc-silver particles float to the top of the desilvered lead where they can be skimmed off. The zinc, which has a lower boiling point than silver, is driven off by vaporization, leaving behind relatively pure silver.

To further purify the recovered silver, cupellation is often employed. Cupellation is a pyrometallurgical process used since antiquity to purify noble metals by exploiting the different melting points and chemical properties of metals. In this case, silver contaminated with zinc is heated to the point where the zinc oxidizes in a shallow, porous vessel called a cupel. Cupels were traditionally made from bone ash or other materials rich in calcium carbonate, which gradually absorbs the zinc oxide, leaving behind a button of purified silver. Cupellation can also be used to purify silver directly from argentiferous galena ore, by differentially absorbing lead oxide from the molten solution, with the obvious disadvantage of wasting the lead:

Ag + 2 Pb + O{_2}\rightarrow 2PbO + Ag

Cupellation can also be used to recover small amounts of silver directly from refined lead, such as that in wheel weights:

If my grandfather had only known.

Java Ring: One Wearable to Rule All Authentications

Today, you likely often authenticate or pay for things with a tap, either using a chip in your card, or with your phone, or maybe even with your watch or a Yubikey. Now, imagine doing all these things way back in 1998 with a single wearable device that you could shower or swim with. Sound crazy?

These types of transactions and authentications were more than possible then. In fact, the Java ring and its iButton brethren were poised to take over all kinds of informational handshakes, from unlocking doors and computers to paying for things, sharing medical records, making coffee according to preference, and much more. So, what happened?

Just Press the Blue Dot

Perhaps the most late-nineties piece of tech jewelry ever produced, the Java Ring is a wearable computer. It contains a tiny microprocessor with a million transistors that has a built-in Java Virtual Machine (JVM), non-volatile storage, and an serial interface for data transfer.

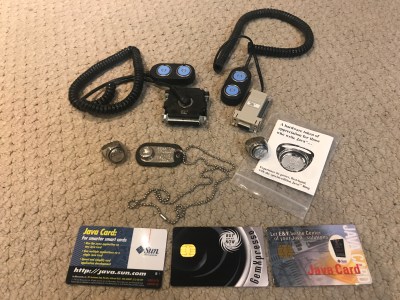
A family of Java iButton devices, including the Java Ring, a Java dog tag, and two Blue Dot readers -- one parallel, one serial.
A family of Java iButton devices and smart cards, including the Java Ring, a Java dog tag, and two Blue Dot readers. Image by [youbitbrain] via reddit
Technically speaking, this thing has 6 Kb of NVRAM expandable to 128 Kb, and up to 64 Kb of ROM (PDF). It runs the Java Card 2.0 standard, which is discussed in the article linked above.

While it might be the coolest piece in the catalog, the Java ring was just one of many ways to get your iButton. But wait, what is this iButton I keep talking about?

In 1989, Dallas Semiconductor created a storage device that resembles a coin cell battery and uses the 1-Wire communication protocol. The top of the iButton is the positive contact, and the casing acts as ground. These things are still around, and have many applications from holding bus fare in Istanbul to the immunization records of Canadian cows.

For $15 in 1998 money, you could get a Blue Dot receptor to go with it for sexy hardware two-factor authentication into your computer via serial or parallel port. Using an iButton was as easy as pressing the ring (or what have you) up against the Blue Dot.

Indestructible Inside and Out, Except for When You Need It

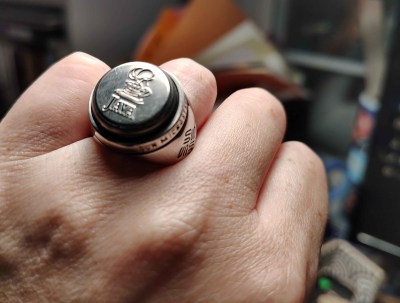
The mighty Java Ring on my left ring finger.
It’s a hefty secret decoder ring, that’s for sure.

Made of of stainless steel and waterproof grommets, this thing is built to be indestructible. The batteries were rated for a ten-year life, and the ring itself for one million hot contacts with Blue Dot receptors.

This thing has several types of encryption going for it, including 1024-bit RSA public-key encryption, which acts like a PGP key. There’s a random number generator and a real-time clock to disallow backdating transactions. And the processor is driven by an unstabilized ring oscillator, so it constantly varies its clock speed between 10 and 20 MHz. This way, the speed can’t be detected externally.

But probably the coolest part is that the embedded RAM is tamper-proof. If tampered with, the RAM undergoes a process called rapid zeroization that erases everything. Of course, while Java Rings and other iButton devices maybe be internally and externally tamper-proof, they can be lost or stolen quite easily. This is part of why the iButton came in many form factors, from key chains and necklaces to rings and watch add-ons. You can see some in the brochure below that came with the ring:

The front side of the Java Ring brochure, distributed with the rings.

The Part You’ve Been Waiting For

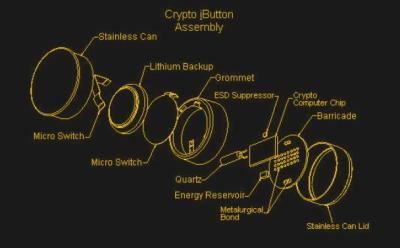
I seriously doubt I can get into this thing without totally destroying it, so these exploded views will have to do. Note the ESD suppressor.

An exploded view of the Java Ring showing the component parts. The construction of the iButton.

So, What Happened?

I surmise that the demise of the Java Ring and other iButton devices has to do with barriers to entry for businesses — even though receptors may have been $15 each, it simply cost too much to adopt the technology. And although it was stylish to Java all the things at the time, well, you can see how that turned out.

If you want a Java Ring, they’re on ebay. If you want a modern version of the Java Ring, just dissolve a credit card and put the goodies in resin.

Static Electricity And The Machines That Make It

Static electricity often just seems like an everyday annoyance when a wool sweater crackles as you pull it off, or when a doorknob delivers an unexpected zap. Regardless, the phenomenon is much more fascinating and complex than these simple examples suggest. In fact, static electricity is direct observable evidence of the actions of subatomic particles and the charges they carry.

While zaps from a fuzzy carpet or playground slide are funny, humanity has learned how to harness this naturally occurring force in far more deliberate and intriguing ways. In this article, we’ll dive into some of the most iconic machines that generate static electricity and explore how they work.

What Is It?

Before we look at the fancy science gear, we should actually define what we’re talking about here. In simple terms, static electricity is the result of an imbalance of electric charges within or on the surface of a material. While positively-charged protons tend to stay put, electrons, with their negative charges, can move between materials when they come into contact or rub against one another. When one material gains electrons and becomes negatively charged, and another loses electrons and becomes positively charged, a static electric field is created. The most visible result of this is when those charges are released—often in the form of a sudden spark.

Since it forms so easily on common materials, humans have been aware of static electricity for quite some time. One of the earliest recorded studies of the phenomenon came from the ancient Greeks. Around 1000 BC, they noticed that rubbing amber with fur would then allow it to attract small objects like feathers. Little came of this discovery, which was ascribed as a curious property of amber itself. Fast forward to the 17th century, though, and scientists were creating the first machines designed to intentionally store or generate static electricity. These devices helped shape our understanding of electricity and paved the way for the advanced electrical technologies we use today. Let’s explore a few key examples of these machines, each of which demonstrates a different approach to building and manipulating static charge.

The Leyden Jar

An 1886 drawing of Andreas Cunaeus experimenting with his apparatus. In this case, his hand is helping to store the charge. Credit: public domain

Though not exactly a machine for generating static electricity, the Leyden jar is a critical part of early electrostatic experiments. Effectively a static electricity storage device, it was independently discovered twice, first by a German named Ewald Georg von Kleist in 1745. However, it gained its common name when it was discovered by Pieter van Musschenbroek, a Dutch physicist, sometime between 1745 and 1746. The earliest versions were very simple, consisting of water in a glass jar that was charged with static electricity conducted to it via a metal rod. The experimenter’s hand holding the jar served as one plate of what was a rudimentary capacitor, the water being the other. The Leyden jar thus stored static electricity in the water and the experimenter’s hand.

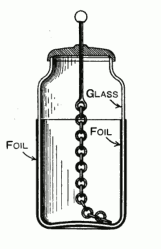
Eventually the common design became a glass jar with layers of metal foil both inside and outside, separated by the glass. Early experimenters would charge the jar using electrostatic generators, and then discharge it with a dramatic spark.

The Leyden jar is one of the first devices that allowed humans to store and release static electricity on command. It demonstrated that static charge could be accumulated and held for later use, which was a critical step in understanding the principles that would lead to modern capacitors. The Leyden jar can still be used in demonstrations of electrostatic phenomena and continues to serve as a fascinating link to the history of electrical science.

The Van de Graaff Generator

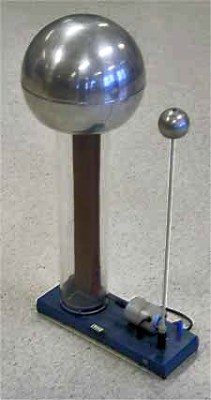
A Van de Graaff generator can be configured to run in either polarity, depending on the materials chosen and how it is set up. Here, we see the generator being used to feed negative charges into an attached spherical conductor. Credit: Omphalosskeptic, CC BY-SA 3.0

Perhaps the most iconic machine associated with generating static electricity is the Van de Graaff generator. Developed in the 1920s by American physicist Robert J. Van de Graaff, this machine became a staple of science classrooms and physics demonstrations worldwide. The device is instantly recognizable thanks to its large, polished metal sphere that often causes hair to stand on end when a person touches it.

The Van de Graaff generator works by transferring electrons through mechanical movement. It uses a motor-driven belt made of insulating material, like rubber or nylon, which runs between two rollers. At the bottom roller, plastic in this example, a comb or brush (called the lower electrode) is placed very close to the belt. As the belt moves, electrons are transferred from the lower roller onto the belt due to friction in what is known as the triboelectric effect. This leaves the lower roller positively charged and the belt carrying excess electrons, giving it a negative charge. The electric field surrounding the positively charged roller tends to ionize the surrounding air and attracts more negative charges from the lower electrode.

As the belt moves upward, it carries these electrons to the top of the generator, where another comb or brush (the upper electrode) is positioned near the large metal sphere. The upper roller is usually metal in these cases, which stays neutral rather than becoming intensely charged like the bottom roller. The upper electrode pulls the electrons off the belt, and they are transferred to the surface of the metal sphere. Because the metal sphere is insulated and not connected to anything that can allow the electrons to escape, the negative charge on the sphere keeps building up to very high voltages, often in the range of hundreds of thousands of volts. Alternatively, the whole thing can be reversed in polarity by changing the belt or roller materials, or by using a high voltage power supply to charge the belt instead of the triboelectric effect.

The result is a machine capable of producing massive static charges and dramatic sparks. In addition to its use as a demonstration tool, Van de Graaff generators have applications in particle physics. Since they can generate incredibly high voltages, they were once used to accelerate particles to high speeds for physics experiments. These days, though, our particle accelerators are altogether more complex. 

The Whimsical Wimshurst Machine

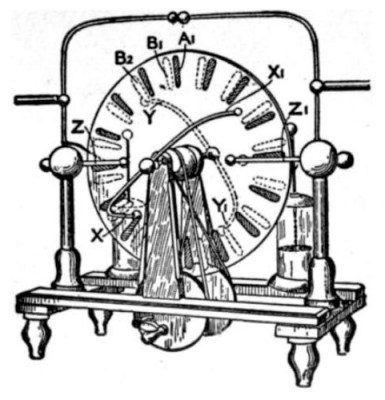
Two disks with metal sectors spin in opposite directions upon turning the hand crank. A small initial charge is able to induce charge in other sectors as the machine is turned. Credit: public domain

Another fascinating machine for generating static electricity is the Wimshurst machine, invented in the late 19th century by British engineer James Wimshurst. While less famous than the Van de Graaff generator, the Wimshurst machine is equally impressive in its operation and design.

The key functional parts of the machine are the two large, circular disks made of insulating material—originally glass, but plastic works too. These disks are mounted on a shared axle, but they rotate in opposite directions when the hand crank is turned. The surfaces of the disks have small metal sectors—typically aluminum or brass—which play a key role in generating static charge. As the disks rotate, brushes made of fine metal wire or other conductive material lightly touch their surfaces near the outer edges. These brushes don’t generate the initial charge but help to collect and amplify it once it is present.

The key to the Wimshurst machine’s operation lies in a process called electrostatic induction, which is essentially the influence that a charged object can exert on nearby objects, even without touching them. At any given moment, one small area of the rotating disk may randomly pick up a small amount of charge from the surrounding air or by friction. This tiny initial charge is enough to start the process. As this charged area on the disk moves past the metal brushes, it induces an opposite charge in the metal sectors on the other disk, which is rotating in the opposite direction.

For example, if a positively charged area on one disk passes by a brush, it will induce a negative charge on the metal sectors of the opposite disk at the same position. These newly induced charges are then collected by a pair of metal combs located above and below the disks. The combs are typically connected to Leyden jars to store the charge, until the voltage builds up high enough to jump a spark over a gap between two terminals.

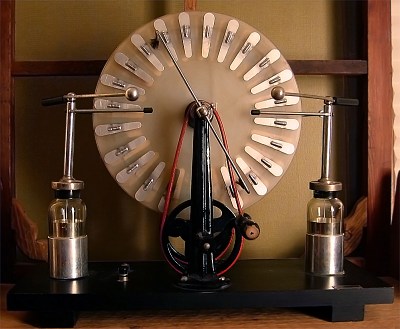
It is common to pair a Wimshurst machine with Leyden jars to store the generated charge. Credit: public domain

The Wimshurst machine doesn’t create static electricity out of nothing; rather, it amplifies small random charges through the process of electrostatic induction as the disks rotate. As the charge is collected by brushes and combs, it builds up on the machine’s terminals, resulting in a high-voltage output that can produce dramatic sparks. This self-amplifying loop is what makes the Wimshurst machine so effective at generating static electricity.

The Wimshurst machine is seen largely as a curio today, but it did have genuine scientific applications back in the day. Beyond simply using it to investigate static electricity, its output could be discharged into Crookes tubes to create X-rays in a very rudimentary way.

The Electrophorus: Simple Yet Ingenious

One of the simplest machines for working with static electricity is the electrophorus, a device that dates back to 1762. Invented by Swedish scientist Johan Carl Wilcke, the electrophorus consists of two key parts: a flat dielectric plate and a metal disk with an insulating handle. The dielectric plate was originally made of resinous material, but plastic works too. Meanwhile, the metal disk is naturally conductive.

An electrophorus device, showing the top metal disk, and the bottom dielectric material, at times referred to as the “cake.” The lower dielectric was classically charged by rubbing with fur. Credit: public domain

To generate static electricity with the electrophorus, the dielectric plate is first rubbed with a cloth to create a static charge through friction. This is another example of the triboelectric effect, as also used in the Van de Graaff generator. Once the plate is charged, the metal disk is placed on top of it. The disc then becomes charged by induction. It’s much the same principle as the Wimshurst machine, with the electrostatic field of the dielectric plate pushing around the charges in the metal plate until it too has a distinct charge.

For example, if the dielectric plate has been given a negative charge by rubbing, it will repel negative charges in the metal plate to the opposite side, giving the near surface a positive charge, and the opposite surface a negative charge. The net charge, though, remains neutral. But, if the metal disk is then grounded—for example, by briefly touching it with a finger—the negative charge on the disk can drained away, leaving it positively charged as a whole. This process does not deplete the charge on the dielectric, so it can be used to charge the metal disk multiple times, though the dielectric’s charge will slowly leak away in time.

Though it’s simple in design, the electrophorus remains a remarkable demonstration of static electricity generation and was widely used in early electrostatic experiments. A particularly well-known example is that of Georg Lichtenberg. He used a version a full two meters in diameter to create large discharges for his famous Lichtenberg figures. Overall, it’s an excellent tool for teaching the basic principles of electrostatics and charge separation—particularly given how simple it is in construction compared to some of the above machines.

Zap

Static electricity, once a mysterious and elusive force, has long since been tamed and turned into a valuable tool for scientific inquiry and education. Humans have developed numerous machines to generate, manipulate, and study static electricity—these are just some of the stars of the field. Each of these devices played an important role in furthering humanity’s understanding of electrostatics, and to a degree, physics in general.

Today, these machines continue to serve as educational tools and historical curiosities, offering a glimpse into the early days of electrical science—and they still spark fascination on the regular, quite literally. Static electricity may be an everyday phenomenon, but the machines that harness its power are still captivating today. Just go to any local science museum for the proof!


An Ode to the SAO

There are a lot of fantastic things about Hackaday Supercon, but for me personally, the highlight is always seeing the dizzying array of electronic bits and bobs that folks bring with them. If you’ve never had the chance to join us in Pasadena, it’s a bit like a hardware show-and-tell, where half the people you meet are eager to pull some homemade gadget out of their bag for an impromptu demonstration. But what’s really cool is that they’ve often made enough of said device that they can hand them out to anyone who’s interested. Put simply, it’s very easy to leave Supercon with a whole lot more stuff than when you came in with.

Most people would look at this as a benefit of attending, which of course it is. But in a way, the experience bummed me out for the first couple of years. Sure, I got to take home a literal sack of incredible hardware created by members of our community, and I’ve cherished each piece. But I never had anything to give them in return, and that didn’t quite sit right with me.

So last year I decided to be a bit more proactive and make my own Simple Add-On (SAO) in time for Supercon 2023. With a stack of these in my bag, I’d have a personalized piece of hardware to hand out that attendees could plug right into their badge and enjoy. From previous years I also knew there was something of an underground SAO market at Supercon, and that I’d find plenty of people who would be happy to swap one for their own add-ons for mine.

To say that designing, building, and distributing my first SAO was a rewarding experience would be something of an understatement. It made such an impression on me that it ended up helping to guide our brainstorming sessions for what would become the 2024 Supercon badge and the ongoing SAO Contest. Put simply, making an SAO and swapping it with other attendees adds an exciting new element to a hacker con, and you should absolutely do it.

So while you’ve still got time to get PCBs ordered, let’s take a look at some of the unique aspects of creating your own Simple Add-On.

Low Barrier to Entry

To start with, let’s cover what’s probably the biggest benefit of making an SAO versus pretty much any other kind of electronic device: essentially all the hard work has been done for you, so you’re free to explore and get creative.

Consider the SAO standard, such as it is. You know there’s going to be 3.3 volts, you know physically how your device will interface with the host badge, and should you decide to utilize it, there’s an incredibly common and well-supported protocol (I2C) in place for communication with other devices.

There’s even a pair of GPIO pins thrown in for good measure, which more nuanced versions of the SAO spec explain can be used as the clock and data pins for addressable LEDs. In either event, they provide an even easier way to get your SAO talking to whatever it’s plugged into than I2C if that’s what you’re after.

Not having to worry about power is a huge weight off your shoulders. Voltage regulation — whether it’s boosting the output from a battery, or knocking down a higher voltage to something that won’t fry your components — can be tricky, and has been known to trip up even experienced hardware hackers. There’s admittedly some ambiguity about how much current an SAO can draw, but unless you’re looking to push the envelope, it’s unlikely anything that fits in such a small footprint could pull enough juice to actually become a problem.

Minimal Investment

Another thing to consider is the cost. While getting PCBs made today is cheaper than ever, the cost still goes up with surface area. Especially for new players, the cost of ordering larger boards can trigger some anxiety. Luckily, the traditional SAO is so small that having 20, 30, or even 50 of them made won’t hit you too hard in the wallet. Just as an example, having 30 copies of the PCB for my first SAO fabricated overseas cost me around $12 (shipping is the expensive part).

In fact, an SAO is usually small enough that a quick-turn prototype run with one of the domestic board houses might be within your budget. I’ve been playing around with a new SAO design, and both DigiKey and OSH Park quoted me around $40 to have a handful of boards produced and at my doorstep within 5 to 7 days.

Now assembly of your SAOs, should you outsource that, can still be expensive. Even though they’re small, it’s all going to come down to what kind of parts you’re using in the design. I was recently talking to Al Williams around the Hackaday Virtual Water Cooler, and he mentioned the cost to have just a handful of his SAO made was in the three figures. Then you look at the parts he used in the design, and it was clear this was never going to be a cheap build.

But even if you’ve got deep enough pockets to pay for it, I’d personally recommend against professional assembly in most cases. Which leads nicely into my next point…

A Taste of Mass Production

Being hobbyists, the reality is that most of us never get the opportunity to build more than a few copies of the same thing. For a personal project, there’s rarely the need to build more than one — and even if you count the early prototypes or failed attempts, it’s unlikely you’d hit the double digits.

But for an SAO, the more the merrier. If you’re planning on swapping with others or giving them away, you’ll obviously want quite a few of them. There’s no “right” number here, but for an event the size of Supercon, having 50 copies of your SAO on-hand would be reasonable. As mentioned earlier, I went with 30 (in part due to the per-unit cost) and in the end felt I should have bumped it up a bit more.

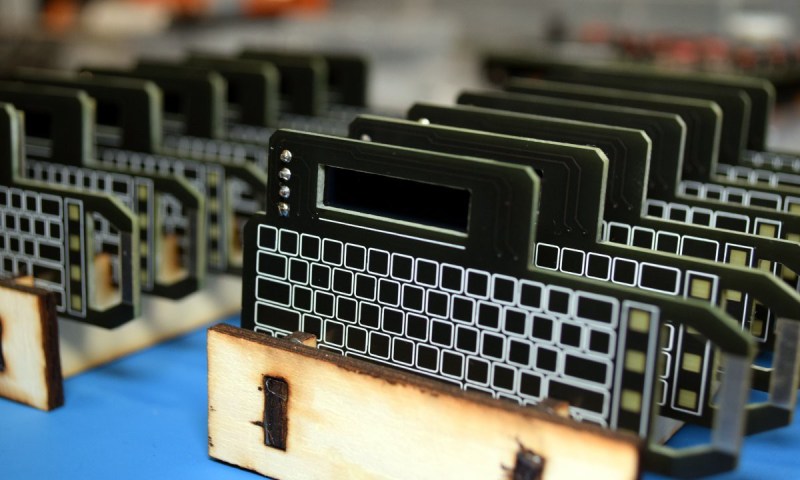
But even at 30, it was far and away the largest run of any single thing I’d ever done. After assembling the third or fourth one, I started to pick up on tricks that would speed up the subsequent builds. Where applicable, hand-soldering quickly gave way to reflowing. After some initial struggling, I realized taking the time to make a jig to hold the more fiddly bits would end up saving me time in the long run. Once ten or so were in various states of completion, it became clear I needed some way to safely hold them while in production, so I ended up cutting a couple board holders out of wood on the laser cutter.

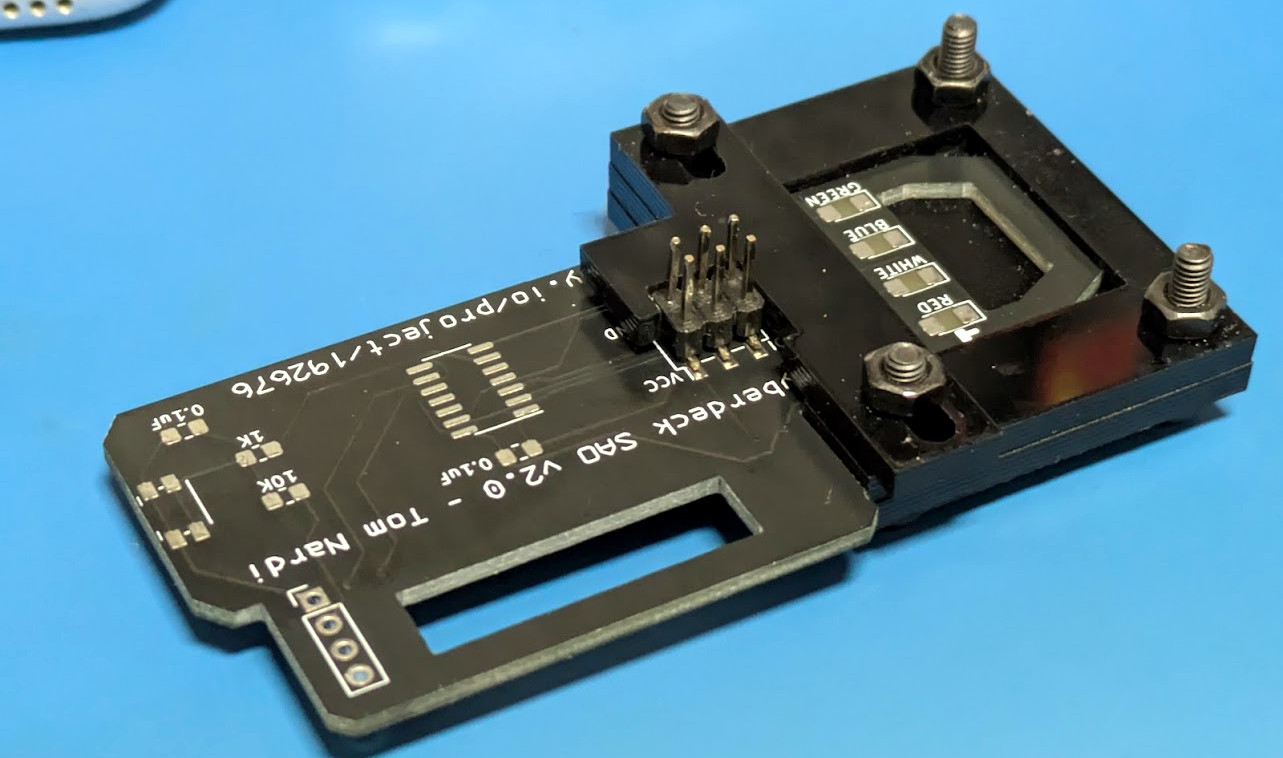
A custom jig helped make sure each surface-mount header was properly aligned while soldering.

Looking back, this part of the process was perhaps what I enjoyed the most. As you might expect, I’ve been involved with  badge production at significant scales in the past. If you have a Supercon badge from the last several years, there’s an excellent chance I personally handled it in some way before you received it. But this was an opportunity to do everything myself, to solve problems and learn some valuable lessons.

Finding a New Community

Finally, the most unique part of making your own SAO is that it’s a ticket to a whole new subculture of hardware hacking.

The SAO Wall is calling, will you answer?

There are some incredibly talented people making badges and add-ons for the various hacker cons throughout the year, and there’s nothing they like better than swapping their wares and comparing notes. These folks are often pushing the very limits on what the individual hacker and maker is capable of, and can be a wealth of valuable information on every aspect of custom hardware design and production.

When you put your creation up on the SAO Wall at Supercon, or exchange SAOs with somebody, you’re officially part of the club, and entitled to all the honors and benefits occurring thereto. Don’t be surprised if you soon find yourself on a private channel in an invite-only chat server, pitching ideas for what your next project might be.

With a little over a month to go before the 2024 Hackaday Supercon kicks off in Pasadena, and a couple weeks before the deadline on submissions for the Supercon Add-On Contest, there’s still time to throw your six-pin hat into the ring. We can’t wait to see what you come up with.

Tech in Plain Sight: Zipper Bags

You probably think of them as “Ziploc” bags, but, technically, the generic term is zipper bag. Everything from electronic components to coffee beans arrive in them. But they weren’t always everywhere, and it took a while for them to find their niche.

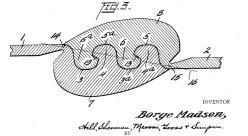
Image from an early Madsen patent

A Dane named Borge Madsen was actually trying to create a new kind of zipper for clothes in the 1950s and had several patents on the technology. The Madsen zipper consisted of two interlocking pieces of plastic and a tab to press them together. Unfortunately, the didn’t work very well for clothing.

A Romanian immigrant named Max Ausnit bought the rights to the patent and formed Flexigrip Inc. He used the zippers on flat vinyl pencil cases and similar items. However, these still had the little plastic tab that operated like a zipper pull. While you occasionally see these in certain applications, they aren’t what you think of when you think of zipper bags.

Zipping

Ausnit’s son, Steven, figured out how to remove the tab. That made the bags more robust, a little handier to use, and it also rendered them less expensive to produce. Even so, cost was a barrier because the way they were made was to heat seal the zipper portion to the bags.

That changed in the 1960s when the Ausnits learned of a Japanese company, Seisan Nippon Sha, that had a process to integrate the bags and zippers in one step which slashed the production cost in half. Flexigrip acquired the rights in the United States and created a new company, Minigrip, to promote this type of bag.

Enter Dow

In 1964, Dow Chemical wanted to acquire the rights to the Minigrip bags to sell in supermarkets using Down’s polyethylene bags. And with this marriage, the Ziploc bag as we know it was born.

Dow continued driving down the cost, tasking R. Douglas Behr to improve how the Ziploc production line worked. Eventually, the bags were flying off the line at 150 feet per minute.

You can find plenty of videos of machines that “make” zipper bags on YouTube (like the one below). Many of them are surprisingly light on detail, and it isn’t clear now how many of them are molding zippers and how many are sealing premade zippers to bags or using rolls of bags with zippers in them already. However, the video below shows making “zip lines” from pellets and then creating bags from film. This creates giant rolls of zipper bag stock which are then cut into individual bags.

Slow Start

At first, consumers weren’t sure what to do with the zipper bags. Supposedly, a record company was set to put records in the bags but when an executive handed one to his assistant, the assistant ripped the bag open without using the zipper.

Regardless, consumers finally figured it out. Now, the zipper bag is a staple in electronics, food storage, and many other areas, too.

More Than Meets the Eye

Even the most ordinary things have details you don’t think about, but someone does. For example, zip bags can have one, two, or three zippers. Some have color indicators that show the seal. Some have strips that conceal the zipper so you can tell if the bag was opened.

There are special zippers for liquids and different ones that resist getting powder stuck in the seal. Some zip bags still have pulls, and some of those pulls are child-proof, requiring the user to pinch the tab to slide it. You can even get zipper bags that don’t use locking zippers but hook-and-loop closures.

Even though zipper bags don’t seem very glamorous, you can learn a lot from the Ausnits. Improve your product in ways that make people want to use it. Also, improve your product in ways that lower costs. We’d guess that when Ausnit bought the zipper patents, he’d never imagine how the market would grow.

You can see a talk from Steve Ausnit at Marquette University in the video below. If you’ve ever had the urge to be an entrepreneur, you can learn a lot from his talk.

Hack On Self: Collecting Data

A month ago, I’ve talked about using computers to hack on our day-to-day existence, specifically, augmenting my sense of time (or rather, lack thereof). Collecting data has been super helpful – and it’s best to automate it as much as possible. Furthermore, an augment can’t be annoying beyond the level you expect, and making it context-sensitive is important – the augment needs to understand whether it’s the right time to activate.

I want to talk about context sensitivity – it’s one of the aspects that brings us closest to the sci-fi future; currently, in some good ways and many bad ways. Your device needs to know what’s happening around it, which means that you need to give it data beyond what the augment itself is able to collect. Let me show you how you can extract fun insights from collecting data, with an example of a data source you can easily tap while on your computer, talk about implications of data collections, and why you should do it despite everything.

Started At The Workplace, Now We’re Here

Around 2018-2019, I was doing a fair bit of gig work – electronics, programming, electronics and programming, sometimes even programming and electronics. Of course, for some, I billed per hour, and I was asked to provide estimates. How many hours does it take for me to perform task X?

I decided to collect data on what I do on my computer – to make sure I can bill people as fairly as possible, and also to try and improve my estimate-making skills. Fortunately, I do a lot of my work on a laptop – surely I could monitor it very easily? Indeed, and unlike Microsoft Recall, neither LLMs nor people were harmed during this quest. What could be a proxy for “what I’m currently doing”? For a start, currently focused window names.

All these alt-tabs, it feels like a miracle I manage to write articles sometimes

Thankfully, my laptop runs Linux, a hacker-friendly OS. I quickly wrote a Python script that polls the currently focused window, writing every change into a logfile, each day a new file. A fair bit of disk activity, but nothing that my SSDs can’t handle. Initially, I just let the script run 24/7, writing its silly little logs every time I Alt-Tabbed or opened a new window, checking them manually when I needed to give a client a retrospective estimate.

I Alt-Tab a lot more than I expected, while somehow staying on the task course and making progress. Also, as soon as I started trying to sort log entries into types of activity, I was quickly reminded that categorizing data is a whole project in itself – it’s no wonder big companies outsource it to the Global South for pennies. In the end, I can’t tell you a lot about data processing here, but only because I ended up not bothering with it much, thinking that I would do it One Day – and I likely will mention it later on.

Collect Data, And Usecases Will Come

Instead, over time, I came up with other uses for this data. As it ran in an always-open commandline window, I could always scroll up and see the timestamps. Of course, this meant I could keep tabs on things like my gaming habits – at least, after the fact. I fall asleep with my laptop by my side, and usually my laptop is one of the first things I check when I wake up. Quickly, I learned to scroll through the data to figure out when I went to sleep, when I woke up, and check how long I slept.

seriously, check out D-Feet – turns out there’s so, so much you can find on DBus!

I also started tacking features on the side. One thing I added was monitoring media file playback, logging it alongside window title changes. Linux systems expose this information over Dbus, and there’s a ton of other useful stuff there too! And Dbus is way easier to work with than I’ve heard, especially when you use a GUI explorer like D-Feet to help you learn the ropes.

The original idea was figuring out how much time I was spending actively watching YouTube videos, as opposed to watching them passively in the background, and trying to notice trends. Another idea was to keep an independent YouTube watch history, since the YouTube-integrated one is notoriously unreliable. I never actually did either of these, but the data is there whenever I feel the need to do so.

Of course, having the main loop modifiable meant that I could add some hardcoded on-window-switch actions, too. For instance, at some point I was participating in a Discord community and I had trouble remembering a particular community rule. No big deal – I programmed the script to show me a notification whenever I switched into that server, reminding me of the rule.

whenever I wish, I have two years’ worth of data to learn from!

There is no shortage of information you can extract even from this simple data source. How much time do I spend talking to friends, and at which points in the day; how does that relate to my level of well-being? When I spend all-nighters on a project, how does the work graph look? Am I crashing by getting distracted into something unrelated, not asleep, but too sleepy to get up and get myself to bed? Can I estimate my focus levels at any point simply by measuring my Alt-Tab-bing frequency, then perhaps, measure my typing speed alongside and plot them together on a graph?

Window title switches turned out to be a decent proxy for “what I’m currently doing with my computer”. Plus, it gives me a wonderful hook, of the “if I do X, I need to remember to do Y” variety – there can never be enough of those! Moreover, it provides me with sizeable amounts of data about myself, data that I now store. Some of you will be iffy about collecting such data – there are some good reasons for it.

Taking Back Power

We emit information just like we emit heat. As long as we are alive, there’s always something being digitized; even your shed in the woods is being observed by a spy satellite. The Internet revolution has made information emissivity increase exponentially, a widespread phenomenon it now uses to grow itself, since now your data pays for online articles, songs, and YouTube videos. Now there are entire databanks containing various small parts of your personality, way more than you could ever have been theoretically comfortable with, enough to track your moves before you’re aware you’re making them.

:¬)

Cloning is not yet here, but Internet already contains your clone – it can sure answer your security questions to your bank, with a fair bit of your voice to impersonate you while doing so, and not to mention all the little tidbits used to sway your purchase power and voting preferences alike. When it comes to protections, all we have is pretenses like “privacy policies” and “data anonymization”. EU is trying to move in the right direction through directives like GDPR, with Snowden discoveries having left a deep mark, but it’s barely enough and not a consistent trend.

Just like with heat signatures, not taking care of your information signature gives you zero advantages and a formidable threat profile, but if you are tapped into it, you can protect people – or preserve dictatorships. Now, if anyone deserves to have power over yourself, it’s you, as opposed to an algorithm currently tracking your toilet paper purchases, which might be used tomorrow to catch weed smokers when it notices an increase in late night snack runs. It’s already likely to be used to ramp up prices during an emergency, or just because of increased demand – that’s where all these e-ink pricetags come into play!

Isn’t It Ridiculous?

Your data will be collected by others no matter your preference, and it will not be shared with you, so you have to collect it yourself. Once you have it, you can use your data to understand yourself better, become stronger by compensating for your weaknesses, help you build healthier relationships with others, living a more fulfilling and fun life overall. Collecting data also means knowing what others might collect and the power it provides, and tyis can help you fight and offset the damage you are bound to suffer because of datamining. Why are we not doing more of this, again?

We’ve got a lot to catch up to. Our conversations can get recorded with the ever-present networked microphones and then datamined, but you don’t get a transcript of that one phonecall where you made a doctor’s appointment and forgot to note the appointment time. Your store knows how often you buy toilet paper, what’s with these loyalty cards we use to get discounts while linking our purchases to our identities, but they are not kind enough to send you a notification saying it might be time to restock. Ever looked back on a roadtrip you did and wished you had a GPS track saved? Your telco operators know your location well enough, now even better with 5G towers, but you won’t get a log. Oh, also, your data can benefit us all, in a non-creepy way.

Unlike police departments, scientists are bound by ethics codes and can’t just buy data without the data owner’s consent – but science and scientific research is where our data could seriously shine. In fact, scientific research thrives when we can provide it with data we collected – just look at Apple Health. In particular, social sciences could really use a boost in available data, as reproducibility crises have no end in sight – research does turn out to skew a certain way when your survey respondents are other social science students.

Grab the power that you’re owed, collect your own data, store it safely, and see where it gets you – you will find good uses for it, whether it’s self-improvement, scientific research, or just building a motorized rolling chair that brings you to your bed as it notices you become too tired after hacking all night throughout. Speaking of which, my clock tells me it’s 5 AM.

Works, Helps, Grows

The code is on GitHub, for whatever purposes. This kind of program is a useful data source, and you could add it into other things you might want to build. This year, I slapped some websocket server code over the window monitoring code – now, other programs on my computer can connect to the websocket server, listen to messages, making decisions based on my currently open windows and currently playing media. If you want to start tracking your computer activity right now, there are some promising programs you should consider – ActivityWatch looks really nice in particular.

I have plans for computer activity tracking beyond today – from tracking typing on the keyboard, to condensing this data into ongoing activity summaries. When storing data you collect, make sure you include a version number from the start and increment it on every data format change. You will improve upon your data formats and you will want to parse them all, and you’ll be thankful for having a version number to refer to.

The GitHub-published portion is currently being used for a bigger project, where the window monitoring code plays a crucial part. Specifically, I wanted to write a companion program that would help me stay on track when working on specific projects on my laptop. In a week’s time, I will show you that program, talk about how I’ve come to create it and how it hooks into my brain, how much it helps me in the end, share the code, and give you yet another heap of cool things I’ve learned.

What other kinds of data could one collect?

Review: iFixit’s FixHub May Be The Last Soldering Iron You Ever Buy

Like many people who solder regularly, I decided years ago to upgrade from a basic iron and invest in a soldering station. My RadioShack digital station has served me well for the better part of 20 years. It heats up fast, tips are readily available, and it’s a breeze to dial in whatever temperature I need. It’s older than both of my children, has moved with me to three different homes, and has outlived two cars and one marriage (so far, anyway).

When I got this, Hackaday still used B&W pictures.

As such, when the new breed of “smart” USB-C soldering irons started hitting the scene, I didn’t find them terribly compelling. Oh sure, I bought a Pinecil. But that’s because I’m an unrepentant open source zealot and love the idea that there’s a soldering iron running a community developed firmware. In practice though, I only used the thing a few times, and even then it was because I needed something portable. Using it at home on the workbench? It just never felt up to the task of daily use.

So when iFixit got in contact a couple weeks back and said they had a prototype USB-C soldering iron they wanted me to take a look at, I was skeptical to say the least. But then I started reading over the documentation they sent over, and couldn’t deny that they had some interesting ideas. For one, it was something of a hybrid iron. It was portable when you needed it to be, yet offered the flexibility and power of a station when you were at the bench.

Even better, they were planning on putting their money where their mouth is. The hardware was designed with repairability in mind at every step. Not only was it modular and easy to open up, but the company would be providing full schematics, teardown guides, and spare parts.

Alright, fine. Now you’ve got my attention.

Best of Both Worlds

Before we get too much farther, I should clarify that the FixHub is technically two separate devices. Officially iFixit calls the combo a “Portable Soldering System” in their documentation, which is made up of the Smart Soldering Iron and the Portable Power Station. While they are designed to work best when combined, both are fully capable of working independently of each other.

Smart Soldering Iron

The star of the show is, of course, the Smart Soldering Iron. It’s a 100 watt iron that comes up to operating temperature in under five seconds and can work with any suitably beefy USB-C Power Delivery source. The size and general proportions of the iron are very close to the Pinecil V2, though the grip is larger and considerably more comfortable to hold. The biggest difference between the two however is the absence of a display or configuration buttons. According to iFixit, most users don’t change their settings enough to justify putting the interface on the iron itself. That doesn’t mean you can’t tweak the iron’s settings when used in this stand-alone configuration, but we’ll get back to that in a minute.

The only control on the iron is a slide switch on the tail end that cuts power to the heating element. I like this arrangement a lot more than the software solution used on irons like the Pinecil. The click of the switch just feels more reliable than having to hold down a button and hoping the iron’s firmware understands that I want to turn the thing off and not adjust some setting. Of course, this is still a “smart” iron, so naturally there’s also support for accelerometer based idle and sleep modes that you can enable.

While there’s no display, the illuminated ring behind the grip does provide a visual indicator of what the iron is doing: solid blue means it has power but the heating element is off, a pulsing blue indicates the iron is heating, and orange means it has reached the desired temperature. If you flick the heater switch off, the ring pulses purple until it cools back off and returns to blue. It’s a simple and effective system, but the visual distinction between the blue and purple isn’t great. Would love to see the ability to customize these colors in a future firmware update.

The iron has a couple of clever portability features for those who often find themselves hacking on the go. The magnetic cap can be placed over the tip even when it’s hot, which means you don’t need to wait for the iron to cool down before you pack it away in your bag. The included USB-C cable also comes with a locking collar that mates with the groves in the tail of the iron — this keeps the cable from pulling out if you’ve got yourself contorted into some weird angle, but doesn’t prevent you from using your own cable should you want.

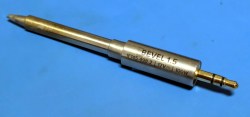
As for the tip, it can be easily removed without tools and uses a 3.5 mm TRS plug like the Miniware TS80, although I don’t have a TS80 handy to test if the tips are actually compatible. For their part, iFixit says they plan on offering an array of styles and sizes of tips in addition to the 1.5 mm bevel that the Smart Soldering Iron ships with.

Portable Power Station

While it’s not required to use the Smart Soldering Iron, for the best experience, you’ll want to spring for the Portable Power Station. It’s essentially a 5,200 mAh battery bank capable of powering devices at 100 W, with a single USB-C port on the back for charging and two on the front for whatever devices you want to plug into it.

The trick is, once the Station detects you’ve plugged a Smart Soldering Iron into it, you’re given the ability to configure it via the OLED screen and rotary encoder on the front of the device. There’s even support for connecting a pair of Smart Soldering Irons to the Station, each with its own independent configuration. Though in that case, both would have to share the total 100 W output.

Assuming a single Smart Soldering Iron, iFixit says you should expect to get up to eight hours of runtime from the Portable Power Station. Of course there are a lot of variables involved, so your mileage may vary. If you’re spending most of your time at the bench, you can keep the rear USB-C port connected to a Power Delivery charger and use it more or less like a traditional station.

The Internet of Irons

Plugging the Smart Soldering Iron into the Power Station is the most obvious way of tweaking its various settings, but as I mentioned earlier, it’s not the only way.

Maybe you don’t want to buy the Station, or you left it at home. In either event, you can simply plug the iron into your computer and configure it via WebSerial.

You’ll need a browser based on Chrome to pull this trick off, as Mozilla has decided (at least, for now) to not include the capability in Firefox. In testing, it worked perfectly on both my Linux desktop and Chromebook.

Unfortunately, plugging the iron into your phone won’t work, as the mobile version of Chrome does not currently support WebSerial. But given the vertical layout of the interface and the big touch-friendly buttons, I can only assume that iFixit is either banking on this changing soon or has a workaround in mind. Being able to plug the iron into your phone for a quick settings tweak would be incredibly handy, so hopefully it will happen one way or another.

The WebSerial interface not only gives you access to all the same settings as plugging the iron into the Power Station does, but it also serves as the mechanism for updating the firmware on the iron.

Incidentally, the Power Station has it’s own nearly identical WebSerial interface. Primarily this would be used for upgrading the firmware, but it’s not hard to imagine that some users would prefer being able to change their settings on the big screen rather than having to squint at an OLED not much larger than their thumbnail.

Solder At Your Command

But wait! I hear those gears turning in your head. If the Smart Soldering Iron into the Power Station both feature WebSerial interfaces that let you play around with their settings, does that mean they might also offer a traditional serial interface for you to poke around in?

Hell yeah they do!

There was no mention of this terminal interface in any of the documentation I received from iFixit, but thanks to the built-in help function and tab completion, I was able to make my way around the various tools and functions. I never knew how badly I yearned to adjust the temperature on my soldering station from the command line before this moment. There’s clearly a lot of potential here, and I’m really looking forward to seeing what the community can come up given this level of control.

A Look Under the Hood

iFixit offered to give me a peek at the in-development repair guides for the Smart Soldering Iron and the Power Station, but I passed. For one thing, there’s no doubt in my mind that the finished product is going to be phenomenally detailed. Just look at any of their in-house guides, and you’ll know what to expect. But more to the point, I wanted to see how hard it would be to take the two devices apart without any guidance.

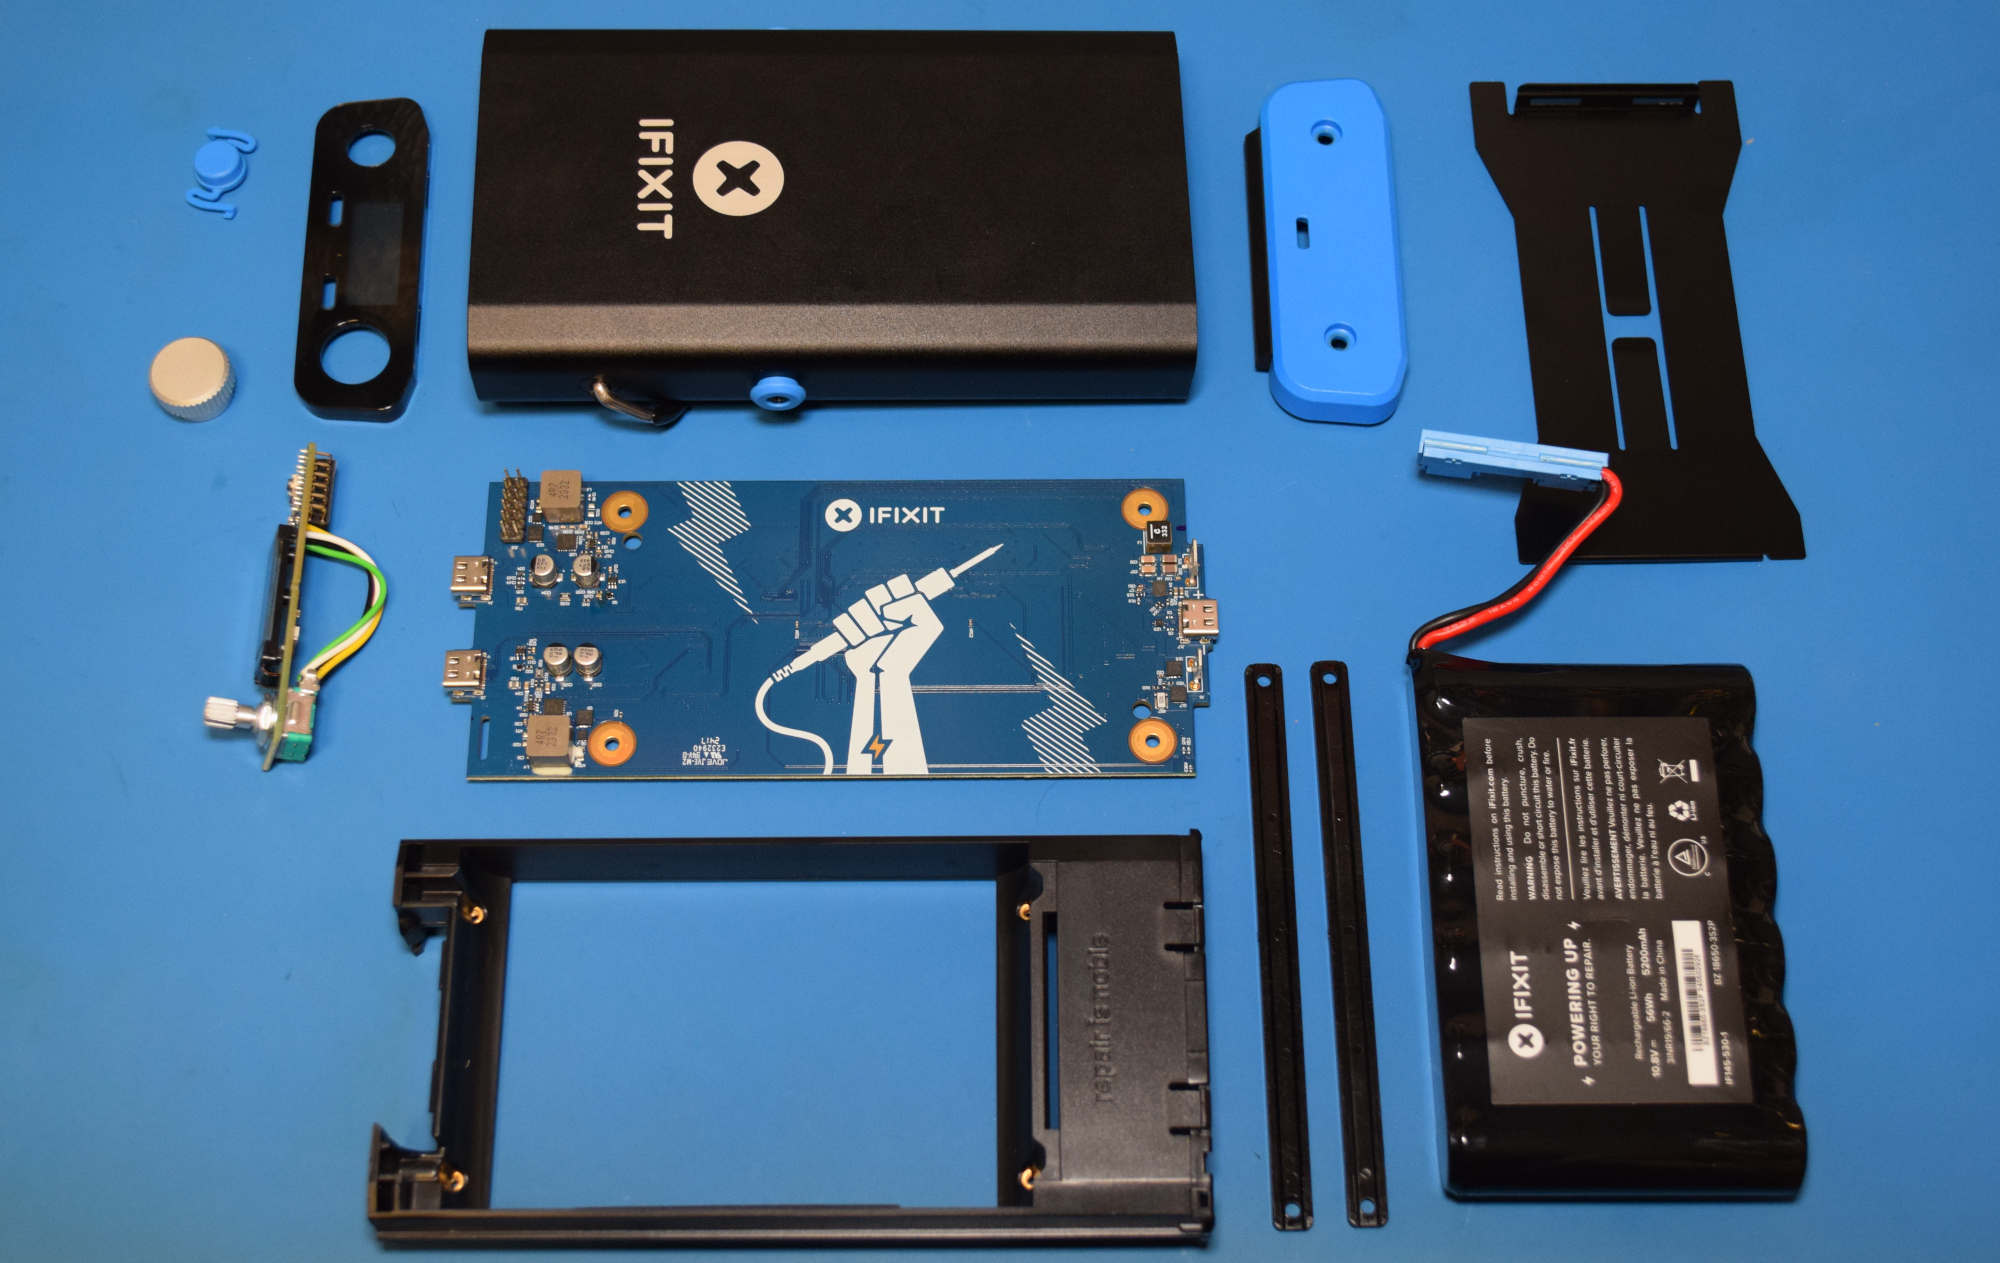
I’m happy to report that the iron and its base station are some of the most easily dissembled devices I’ve ever come across. No glue, weird tape, or hidden fasteners. No little plastic tabs that break if you look at them the wrong way. Just two pieces of hardware that were designed and assembled in a logical enough way that you only need to look at them to understand how it all goes together.

Of course, this should come as no surprise. Imagine the mud that would have been slung had iFixit had dropped the ball here. You can’t very well campaign for repairability if you don’t hold your own products to the same standards you do for everyone else. Presumably they designed the Smart Soldering Iron and the Power Station to hit a perfect ten by their published standards, and from what I’ve seen, they nailed it.

I also got a look at the schematics, exploded diagrams, and parts list for both products. Like the repair guides, these won’t be made public until the hardware ships in October. But don’t worry, this isn’t some crowdsource bait-and-switch. They’ve got the goods, and it’s all very impressive.

Now to be clear, we’re not talking open source hardware here. Don’t expect to pull Gerbers from a GitHub repo so you can crank out your own Power Station. But the documentation they’re providing is remarkable for a consumer device. The schematics especially — they’re filled with all sorts of notes in the margins from the engineers which were fascinating to go through.

Investing in the Future

If I’ve not made it abundantly clear so far, iFixit really blew me away with the Portable Soldering System. I knew they would put a solid effort into the product from their reputation alone, but even still, I wasn’t expecting the hardware and software to be this polished. iFixit didn’t just raise the bar, they sent it into orbit.

But all this comes at a price. Literally. The Smart Soldering Iron alone will set you back $79.95, and if you want to get the Power Station along with it, the combo comes in at $249.95. You could get a nice soldering station from Weller or Hakko for half the price. Then again, it’s hard to compare what iFixit is offering here to anything else on the market.

In the end, this is one of those times when you’ve got to decide what’s really important to you. If you just want a quality soldering station, there are cheaper options that will meet all of your needs and then some. But if you want to support a company that’s working to change the status quo, sometimes you’ve got to reach a little deeper into those pockets.

A Look At The Small Web, Part 1

In the early 1990s I was privileged enough to be immersed in the world of technology during the exciting period that gave birth to the World Wide Web, and I can honestly say I managed to completely miss those first stirrings of the information revolution in favour of CD-ROMs, a piece of technology which definitely didn’t have a future. I’ve written in the past about that experience and what it taught me about confusing the medium with the message, but today I’m returning to that period in search of something else. How can we regain some of the things that made that early Web good?

We All Know What’s Wrong With The Web…

It’s likely most Hackaday readers could recite a list of problems with the web as it exists here in 2024. Cory Doctrow coined a word for it, enshitification, referring to the shift of web users from being the consumers of online services to the product of those services, squeezed by a few Internet monopolies. A few massive corporations control so much of our online experience from the server to the browser, to the extent that for so many people there is very little the touch outside those confines.

A screenshot of the first ever web page
The first ever web page is maintained as a historical exhibit by CERN.

Contrasting the enshitified web of 2024 with the early web, it’s not difficult to see how some of the promise was lost. Perhaps not the web of Tim Berners-Lee and his NeXT cube, but the one of a few years later, when Netscape was the new kid on the block to pair with your Trumpet Winsock. CD-ROMs were about to crash and burn, and I was learning how to create simple HTML pages.

The promise then was of a decentralised information network in which we would all have our own websites, or homepages as the language of the time put it, on our own servers. Microsoft even gave their users the tools to do this with Windows, in that the least technical of users could put a Frontpage Express web site on their Personal Web Server instance. This promise seems fanciful to modern ears, as fanciful perhaps as keeping the overall size of each individual page under 50k, but at the time it seemed possible.

With such promise then, just how did we end up here? I’m sure many of you will chip in in the comments with your own takes, but of course, setting up and maintaining a web server is either hard, or costly. Anyone foolish enough to point their Windows Personal Web Server directly at the Internet would find their machine compromised by script kiddies, and having your own “proper” hosting took money and expertise. Free stuff always wins online, so in those early days it was the likes of Geocities or Angelfire which drew the non-technical crowds. It’s hardly surprising that this trend continued into the early days of social media, starting the inevitable slide into today’s scene described above.

…So Here’s How To Fix It

If there’s a ray of hope in this wilderness then, it comes in the shape of the Small Web. This is a movement in reaction to a Facebook or Google internet, an attempt to return to that mid-1990s dream of a web of lightweight self-hosted sites. It’s a term which encompases both lightweight use of traditional web tehnologies and some new ones designed more specifically to deliver lightweight services, and it’s fair to say that while it’s not going to displace those corporations any time soon it does hold the interesting prospect of providing an alternative. From a Hackaday perspective we see Small Web technologies as ideal for serving and consuming through microcontroller-based devices, for instance, such as event badges. Why shouldn’t a hacker camp badge have a Gemini client which picks up the camp schedule, for example? Because the Small Web is something of a broad term, this is the first part of a short series providing an introduction to the topic. We’ve set out here what it is and where it comes from, so it’s now time to take a look at some of those 1990s beginnings in the form of Gopher, before looking at what some might call its spiritual successors today.

A screenshot of a browser with a very plain text page.
An ancient Firefox version shows us a Gopher site. Ph0t0phobic, MPL 1.1.

It’s odd to return to Gopher after three decades, as it’s one of those protocols which was for most of us immediately lost as the Web gained traction. Particulrly as at the time I associated Gopher with CLI base clients and the Web with the then-new NCSA Mosaic, I’d retained that view somehow. It’s interesting then to come back and look at how the first generation of web browsers rendered Gopher sites, and see that they did a reasonable job of making them look a lot like the more texty web sites of the day. In another universe perhaps Gopher would have evolved further to something more like the web, but instead it remains an ossifed glimpse of 1992 even if there are still a surprising number of active Gopher servers still to be found. There’s a re-imagined version of the Veronica search engine, and some fun can be had browsing this backwater.

With the benefit of a few decades of the Web it’s immediately clear that while Gopher is very fast indeed in the days of 64-bit desktops and gigabit fibre, the limitations of what it can do are rather obvious. We’re used to consuming information as pages instead of as files, and it just doesn’t meet those expectations. Happily  though Gopher never made those modifications, there’s something like what it might have become in Gemini. This is a lightweight protocol like Gopher, but with a page format that allows hyperlinking. Intentionally it’s not simply trying to re-implement the web and HTML, instead it’s trying to preserve the simplicity while giving users the hyperlinking that makes the web so useful.

A Kennedy search engine Gemini search page for "Hackaday".
It feels a lot like the early 1990s Web, doesn’t it.

The great thing about Gemini is that it’s easy to try. The Gemini protocol website has a list of known clients, but if even that’s too much, find a Gemini to HTTP proxy (I’m not linking to one, to avoid swamping someone’s low traffic web server). I was soon up and running, and exploring the world of Gemini sites. Hackaday don’t have a presence there… yet.

We’ve become so used to web pages taking a visible time to load, that the lightning-fast response of Gemini is a bit of a shock at first. It’s normal for a web page to contain many megabytes of images, Javascript, CSS, and other resources, so what is in effect the Web stripped down to only the information  is  unexpected. The pages are only a few K in size and load in effect, instantaneously. This may not be how the Web should be, but it’s certainly how fast and efficient hypertext information should be.

This has been part 1 of a series on the Small Web, in looking at the history and the Gemini protocol from a user perspective we know we’ve only scratched the surface of the topic. Next time we’ll be looking at how to create a Gemini site of your own, through learning it ourselves.

Reinforcing Plastic Polymers With Cellulose and Other Natural Fibers

While plastics are very useful on their own, they can be much stronger when reinforced and mixed with a range of fibers. Not surprisingly, this includes the thermoplastic polymers which are commonly used with FDM 3D printing, such as polylactic acid (PLA) and polyamide (PA, also known as nylon). Although the most well-known fibers used for this purpose are probably glass fiber (GF) and carbon fiber (CF), these come with a range of issues, including their high abrasiveness when printing and potential carcinogenic properties in the case of carbon fiber.

So what other reinforcing fiber options are there? As it turns out, cellulose is one of these, along with basalt. The former has received a lot of attention currently, as the addition of cellulose and similar elements to thermopolymers such as PLA can create so-called biocomposites that create plastics without the brittleness of PLA, while also being made fully out of plant-based materials.

Regardless of the chosen composite, the goal is to enhance the properties of the base polymer matrix with the reinforcement material. Is cellulose the best material here?

Cellulose Nanofibers

Plastic objects created by fused deposition modeling (FDM) 3D printing are quite different from their injection-molding counterparts. In the case of FDM objects, the relatively poor layer adhesion and presence of voids means that 3D-printed PLA parts only have a fraction of the strength of the molded part, while also affecting the way that any fiber reinforcement can be integrated into the plastic. This latter aspect can also be observed with the commonly sold CF-containing FDM filaments, where small fragments of CF are used rather than long strands.

According to a study by Tushar Ambone et al. (2020) as published (PDF) in Polymer Engineering and Science, FDM-printed PLA has a 49% lower tensile strength and 41% lower modulus compared to compression molded PLA samples. The addition of a small amount of sisal-based cellulose nanofiber (CNF) at 1% by weight to the PLA subsequently improved these parameters by 84% and 63% respectively, with X-ray microtomography showing a reduction in voids compared to the plain PLA. Here the addition of CNF appears to significantly improve the crystallization of the PLA with corresponding improvement in its properties.

Fibers Everywhere

Incidentally a related study by Chuanchom Aumnate et al. (2021) as published in Cellulose used locally (India) sourced kenaf cellulose fibers to reinforce PLA, coming to similar results. This meshes well with the findings by  Usha Kiran Sanivada et al. (2020) as published in Polymers, who mixed flax and jute fibers into PLA. Although since they used fairly long fibers in compression and injection molded samples a direct comparison with the FDM results in the Aumnate et al. study is somewhat complicated.

Meanwhile the use of basalt fibers (BF) is already quite well-established alongside glass fibers (GF) in insulation, where it replaced asbestos due to the latter’s rather unpleasant reputation. BF has some advantages over GF in composite materials, as per e.g. Li Yan et al. (2020) including better chemical stability and lower moisture absorption rates. As basalt is primarily composed of silicate, this does raise the specter of it being another potential cause of silicosis and related health risks.

With the primary health risk of mineral fibers like asbestos coming from the jagged, respirable fragments that these can create when damaged in some way, this is probably a very pertinent issue to consider before putting certain fibers quite literally everywhere.

A 2018 review by Seung-Hyun Park in Saf Health Work titled “Types and Health Hazards of Fibrous Materials Used as Asbestos Substitutes” provides a good overview of the relative risks of a range of asbestos-replacements, including BF (mineral wool) and cellulose. Here mineral wool fibers got rated as IARC Group 3 (insufficient evidence of carcinogenicity) except for the more biopersistent types (Group 2B, possibly carcinogenic), while cellulose is considered to be completely safe.

Finally, related to cellulose, there is also ongoing research on using lignin (present in plants next to cellulose as cell reinforcement) to improve the properties of PLA in combination with cellulose. An example is found in a 2021 study by Diana Gregor-Svetec et al. as published in Polymers. PLA composites created with lignin and surface-modified nanofibrillated (nanofiber) cellulose (NFC). A 2023 study by Sofia P. Makri et al. (also in Polymers) examined methods to improve the dispersion of the lignin nanoparticles. The benefit of lignin in a PLA/NFC composite appears to be in UV stabilization most of all, which should make objects FDM printed using this material last significantly longer when placed outside.

End Of Life

Another major question with plastic polymers is what happens with them once they inevitably end up discarded in the environment. There should be little doubt about what happens with cellulose and lignin in this case, as every day many tons of cellulose and lignin are happily devoured by countless microorganisms around the globe. This means that the only consideration for cellulose-reinforced plastics in an end-of-life scenario is that of the biodegradability of PLA and other base polymers one might use for the polymer composite.

Today, many PLA products end up discarded in landfills or polluting the environment, where PLA’s biodegradability is consistently shown to be poor, similar to other plastics, as it requires an industrial composting process involving microbial and hydrolytic treatments. Although incinerating PLA is not a terrible option due to its chemical composition, it is perhaps an ironic thought that the PLA in cellulose-reinforced PLA might actually be the most durable component in such a composite.

That said, if PLA is properly recycled or composted, it seems to pose few issues compared to other plastics, and any cellulose components would likely not interfere with the process, unlike CF-reinforced PLA, where incinerating it is probably the easiest option.

Do you print with hybrid or fiber-mixed plastics yet?

Australia Didn’t Invent WiFi, Despite What You’ve Heard

Wireless networking is all-pervasive in our modern lives. Wi-Fi technology lives in our smartphones, our laptops, and even our watches. Internet is available to be plucked out of the air in virtually every home across the country. Wi-Fi has been one of the grand computing revolutions of the past few decades.

It might surprise you to know that Australia proudly claims the invention of Wi-Fi as its own. It had good reason to, as well— given the money that would surely be due to the creators of the technology. However, dig deeper, and you’ll find things are altogether more complex.

Big Ideas

The official Wi-Fi logo.

It all began at the Commonwealth Scientific and Industrial Research Organization, or CSIRO. The government agency has a wide-ranging brief to pursue research goals across many areas. In the 1990s, this extended to research into various radio technologies, including wireless networking.

The CSIRO is very proud of what it achieved, crediting itself with “Bringing WiFi to the world.” It’s a common piece of trivia thrown around the pub as a bit of national pride—it was scientists Down Under that managed to cook up one of the biggest technologies of recent times!

This might sound a little confusing to you if you’ve looked into the history of Wi-Fi at all. Wasn’t it the IEEE that established the working group for 802.11? And wasn’t it that standard that was released to the public in 1997? Indeed, it was!

The fact is that many groups were working on wireless networking technology in the 1980s and 1990s. Notably, the CSIRO was among them, but it wasn’t the first by any means—nor was it involved with the group behind 802.11. That group formed in 1990, while the precursor to 802.11 was actually developed by NCR Corporation/AT&T in a lab in the Netherlands in 1991. The first standard of what would later become Wi-Fi—802.11-1997—was established by the IEEE based on a proposal by Lucent and NTT, with a bitrate of just 2 MBit/s and operating at 2.4GHz. This standard operated based on frequency-hopping or direct-sequence spread spectrum technology.  This later developed into the popular 802.11b standard in 1999, which upped the speed to 11 Mbit/s. 802.11a came later, switching to 5GHz and using a modulation scheme based around orthogonal frequency division multiplexing (OFDM).

A diagram from the CSIRO patent for wireless LAN technology, dated 1993.

Given we apparently know who invented Wi-Fi, why are Australians allegedly taking credit? Well, it all comes down to patents. A team at the CSIRO had long been developing wireless networking technologies on its own.  In fact, the group filed a patent on 19 November 1993 entitled “Invention: A Wireless Lan.” The crux of the patent was the idea of using multicarrier modulation to get around a frustrating problem—that of multipath interference in indoor environments. This was followed up with a later US patent in 1996 following along the same lines.

The patents were filed because the CSIRO team reckoned they’d cracked wireless networking at rates of many megabits per second. But the details differ quite significantly from the modern networking technologies we use today. Read the patents, and you’ll see repeated references to “operating at frequencies in excess of 10 GHz.” Indeed, the diagrams in the patent documents refer to transmissions in the 60 to 61 GHz range. That’s rather different from the mainstream Wi-Fi standards established by the IEEE. The CSIRO tried over the years to find commercial partners to work with to establish its technology, however, little came of it barring a short-lived start-up called Radiata that was swallowed up by Cisco, never to be seen again.

Steve Jobs shocked the crowd with a demonstration of the first mainstream laptop with wireless networking in 1999. Funnily enough, the CSIRO name didn’t come up.

Based on the fact that the CSIRO wasn’t in the 802.11 working group, and that its patents don’t correspond to the frequencies or specific technologies used in Wi-Fi, you might assume that the CSIRO wouldn’t have any right to claim the invention of Wi-Fi. And yet, the agency’s website could very much give you that impression! So what’s going on?

The CSIRO had been working on wireless LAN technology at the same time as everyone else. It had, by and large, failed to directly commercialize anything it had developed. However, the agency still had its patents. Thus, in the 2000s, it contested that it effectively held the rights to the techniques developed for effective wireless networking, and that those techniques were used in Wi-Fi standards. After writing to multiple companies demanding payment, it came up short. The CSIRO started taking wireless networking companies to court, charging that various companies had violated its patents and demanding heavy royalties, up to $4 per device in some cases. It contested that its scientists had come up with a unique combination of OFDM multiplexing, forward error correction, and interleaving that was key to making wireless networking practical.

An excerpt from the CSIRO’s Australian patent filing in 1993. The agency’s 1996 US patent covers much of the same ground.

A first test case against a Japanese company called Buffalo Technology went the CSIRO’s way. A follow-up case in 2009 aimed at a group of 14 companies. After four days of testimony, the case would have gone down to a jury decision, many members of which would not have been particularly well educated on the finer points of radio communications. The matter was instead settled for $205 million in the CSIRO’s favor. 2012 saw the Australian group go again, taking on a group of nine companies including T-Mobile, AT&T, Lenovo, and Broadcom. This case ended in a further $229 million settlement paid to the CSIRO.

We know little about what went on in these cases, nor the negotiations involved. Transcripts from the short-lived 2009 case had defence lawyers pointing out that the modulation techniques used in the Wi-Fi standards had been around for decades prior to the CSIRO’s later wireless LAN patent.  Meanwhile, the CSIRO stuck to its guns, claiming that it was the combination of techniques that made wireless LAN possible, and that it deserved fair recompense for the use of its patented techniques.

Was this valid? Well, to a degree, that’s how patents work. If you patent an idea, and it’s deemed unique and special, you can generally demand a payment others that like to use it. For better or worse, the CSIRO was granted a US patent for its combination of techniques to do wireless networking. Other companies may have come to similar conclusions on their own, but that didn’t get a patent for it and that left them open to very expensive litigation from the CSIRO.

However, there’s a big caveat here. None of this means that the CSIRO invented Wi-Fi. These days, the agency’s website is careful with the wording, noting that it “invented Wireless LAN.”

The CSIRO has published several comics about the history of Wi-Fi, which might confuse some as to the agency’s role in the standard. This paragraph is a more reserved explanation, though it accuses other companies of having “less success”—a bold statement given that 802.11 was commercially successful, and the CSIRO’s 60 GHz ideas weren’t. Credit: CSIRO website via screenshot

It’s certainly valid to say that the CSIRO’s scientists did invent a wireless networking technique. The problem is that in the mass media, this has commonly been transliterated to say that the agency invented Wi-Fi, which it obviously did not. Of course, this misconception doesn’t hurt the agency’s public profile one bit.

Ultimately, the CSIRO did file some patents. It did come up with a wireless networking technique in the 1990s. But did it invent Wi-Fi? Certainly not. And many will contest that the agency’s patent should not have earned it any money from equipment built to standards it had no role in developing. Still, the myth with persist for some time to come. At least until someone writes a New York Times bestseller on the true and exact history of the real Wi-Fi standards. Can’t wait.

❌