Vista de Lectura

Hay nuevos artículos disponibles. Pincha para refrescar la página.

Man-in-the-Middle PCB Unlocks HP Ink Cartridges
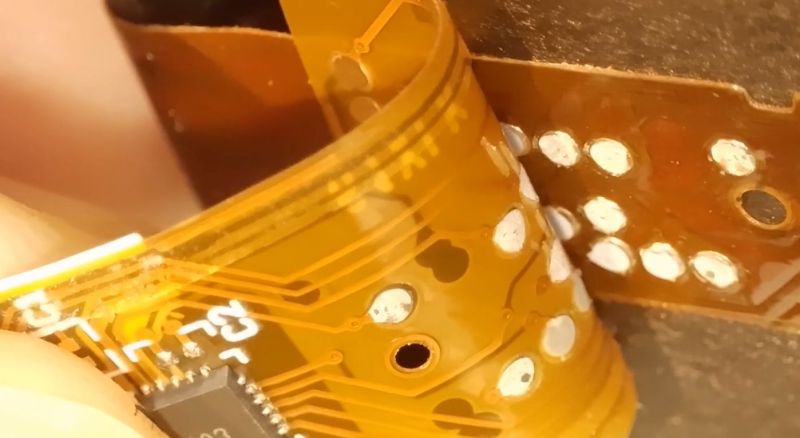
It’s a well-known secret that inkjet ink is being kept at artificially high prices, which is why many opt to forego ‘genuine’ manufacturer cartridges and get third-party ones instead. Many of these third-party ones are so-called re-manufactured ones, where a third-party refills an empty OEM cartridge. This is increasingly being done due to digital rights management (DRM) reasons, with tracking chips added to each cartridge. These chip prohibit e.g. the manual refilling of empty cartridges with a syringe, but with the right tweak or attack can be bypassed, with [Jay Summet] showing off an interesting HP cartridge DRM bypass using a physical man-in-the-middle-attack.

This bypass takes the form of a flex PCB with contacts on both sides which align with those on the cartridge and those of the printer. What looks like a single IC in a QFN package is located on the cartridge side, with space for it created inside an apparently milled indentation in the cartridge’s plastic. This allows is to fit flush between the cartridge and HP inkjet printer, intercepting traffic and presumably telling the printer some sweet lies so that you can go on with that print job rather than dash out to the store to get some more overpriced Genuine HP-approved cartridges.

Not that HP isn’t aware or not ticked off about this, mind. Recently they threatened to brick HP printers that use third-party cartridges if detected, amidst vague handwaving about ‘hackers’ and ‘viruses’ and ‘protecting the users’ with their Dynamic Security DRM system. As the many lawsuits regarding this DRM system trickle their way through the legal system, it might be worth it to keep a monochrome laser printer standing by just in case the (HP) inkjet throws another vague error when all you want is to just print a text document.


Upgraded Raster Laser Projector Goes RGB

We’ve covered a scanning laser project by Ben Make’s Everything last year, and now he’s back with a significant update. [Ben]’s latest project now offers a higher resolution and RGB lasers. A couple of previous versions of the device used the same concept of a rotating segmented mirror synchronised to a pulsed laser diode to create scanlines. When projected onto a suitable surface, the distorted, pixelated characters looked quite funky, but there was clearly room for improvement.

More scanlines and a faster horizontal pixel rate

The previous device used slightly inclined mirrors to deflect the beam into scanlines, with one mirror per scanline limiting the vertical resolution. To improve resolution, the mirrors were replaced with identically aligned mirrors of the type used in laser printers for horizontal scanning. An off-the-shelf laser galvo was used for vertical scanning, allowing faster scanning due to its small deflection angle. This setup is quicker than then usual vector galvo application, as the smaller movements require less time to complete. Once the resolution improvement was in hand, the controller upgrade to a Teensy 4 gave more processing bandwidth than the previous Arduino and a consequent massive improvement in image clarity.

Finally, monochrome displays don’t look anywhere near as good as an RGB setup. [Ben] utilised a dedicated RGB laser setup since he had trouble sourcing the appropriate dichroic mirrors to match available lasers. This used four lasers (with two red ones) and the correct dichroic mirrors to combine each laser source into a single beam path, which was then sent to the galvo. [Ben] tried to find a DAC solution fast enough to drive the lasers for a proper colour-mixing input but ended up shelving that idea for now and sticking with direct on-off control. This resulted in a palette of just seven colours, but that’s still a lot better than monochrome.

The project’s execution is excellent, and care was taken to make it operate outdoors with a battery. Even with appropriate safety measures, you don’t really want to play with high-intensity lasers around the house!

Here’s the previous version we covered, a neat DIY laser galvo using steppers, and a much older but very cool RGB vector projector.

Thanks to [Chan] for the tip!

Archiving Data On Paper Using 2D Images

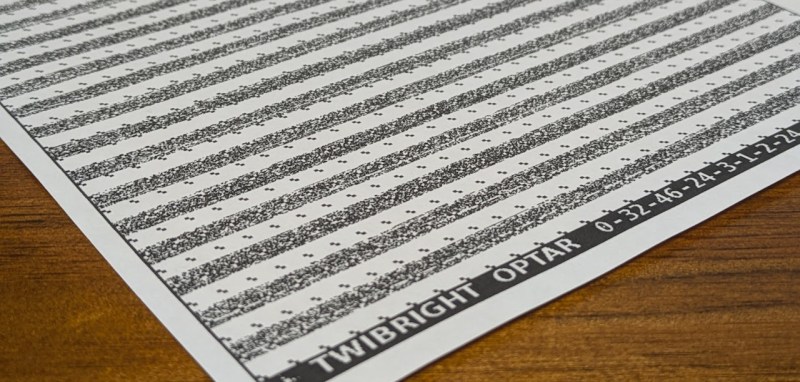
It seems like only yesterday we covered a project using QR codes to archive data on paper (OK, it was last Thursday), so here’s another way to do it, this time with a dedicated codec using the full page. Optar or OPTical ARchiver is a project capable of squeezing a whopping 200 Kb of data onto a single A4 sheet of paper, with writing and reading achieved with a standard laser printer and a scanner. It’s a bit harder than you might think to get that much data on the page, given that even a 600 DPI printer can’t reliably place every dot each time. Additionally, paper is rarely uniform at the microscopic scale, so Optar utilizes a forward error-correcting coding scheme to cater for a little irregularity in both printing and scanning.

The error-correcting scheme selected was an Extended Golay code (24, 12, 8),  which, interestingly, was also used for image transmission by the NASA Voyager 1 and 2 missions. In information theory terms, this scheme has a minimum Hamming Distance of 8, giving detection of up to seven bit errors. This Golay code implementation is capable of correcting three-bit errors in each 24-bit block, with 12 bits available for payload. That’s what the numbers in those brackets mean.

Another interesting problem is paper stretch during printing. A laser printer works by feeding the paper around rollers, some of which are heated. As a printer wears or gets dirty, the friction coefficient along the rollers can vary, leading to twisting and stretching of the paper during the printing process. Water absorbed by the paper can also lead to distortion. To compensate for these effects, Optar regularly inserts calibration targets throughout the bit image, which are used to locally resynchronize the decoding process as the image is processed. This is roughly similar to how the alignment patterns work within larger QR codes. Finally, similar to the position detection targets (those square bits) in QR codes, Optar uses a two-pixel-wide border around the bit image. The border is used to align to the corners well enough to locate the rows of bits to be decoded.

In the distant past of last week, we covered a similar project that uses QR codes. This got us thinking about how QR codes work, and even if encoding capacity can be increased using more colors than just black and white?

Thanks to [Petr] for the tip!

Back Up Your Data On Paper With Lots Of QR Codes

QR codes are used just about everywhere now, for checking into venues, ordering food, or just plain old advertising. But what about data storage? It’s hardly efficient, but if you want to store your files in a ridiculous paper format—there’s a way to do that, too!

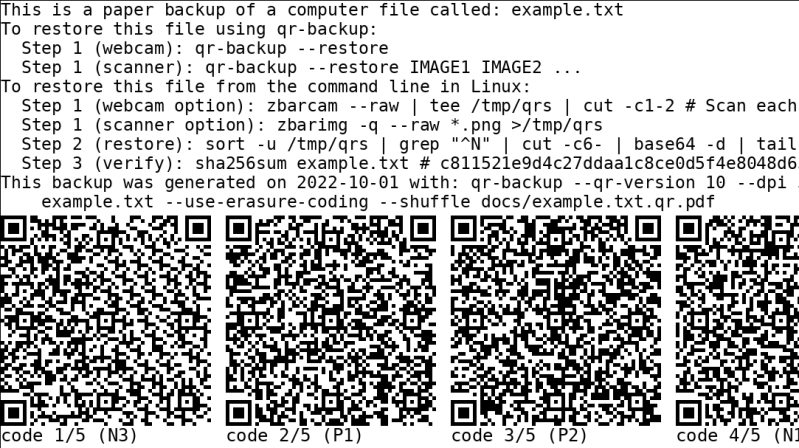
QR-Backup was developed by [za3k], and is currently available as a command-line Linux tool only. It takes a file or files, and turns them into a “paper backup”—a black-and white PDF file full of QR codes that’s ready to print. That’s legitimately the whole deal—you run the code, generate the PDF, then print the file. That piece of paper is now your backup. Naturally, qr-backup works in reverse, too. You can use a scanner or webcam to recover your files from the printed page.

Currently, it achieves a storage density of 3KB/page, and [za3k] says backups of text in the single-digit megabyte range are “practical.” You can alternatively print smaller, denser codes for up to 130 KB/page.

Is it something you’ll ever likely need? No. Is it super neat and kind of funny? Yes, very much so.

We’ve seen some other neat uses for QR codes before, too—like this printer that turns digital menus into paper ones. If you’ve got your own nifty uses for these attractive squares, let us know!

Printed in Space: 3D-Printed Metal Parts Shown Off After Returning From the ISS

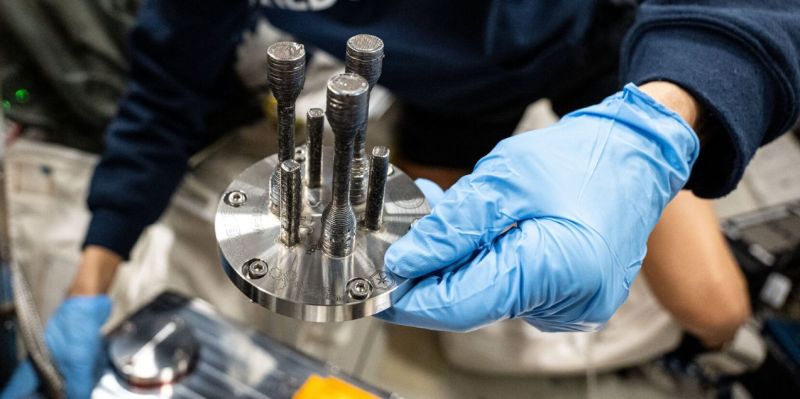
The European Space Agency (ESA) is showing 3D-printed metal parts made onboard the International Space Station using a printer and materials the agency sent earlier this year.  While 3D printing onboard the ISS is nothing new, the printing of metal parts in space is an important advancement. The agency’s goals are to be able to produce more tools and spares in situ rather than having to rely on resupply missions. An ambitious idea being pitched is to use captured space debris as input as well, which would further decrease the ISS’s dependence on Earth and expensive cargo runs from the bottom of the gravity well.

The metal 3D printer in operation during testing on Earth prior to being installed on the ISS. (Credit: ESA)

The 180 kg 3D printer lives in the European Drawer Rack Mark II inside ESA’s Columbus module. Controllers on Earth managed the printing process after installation. The printer ran for about four hours a day, with each layer inspected before continuing. This means the printing process took days, but running the machine continuously would, of course, cut printing time significantly.

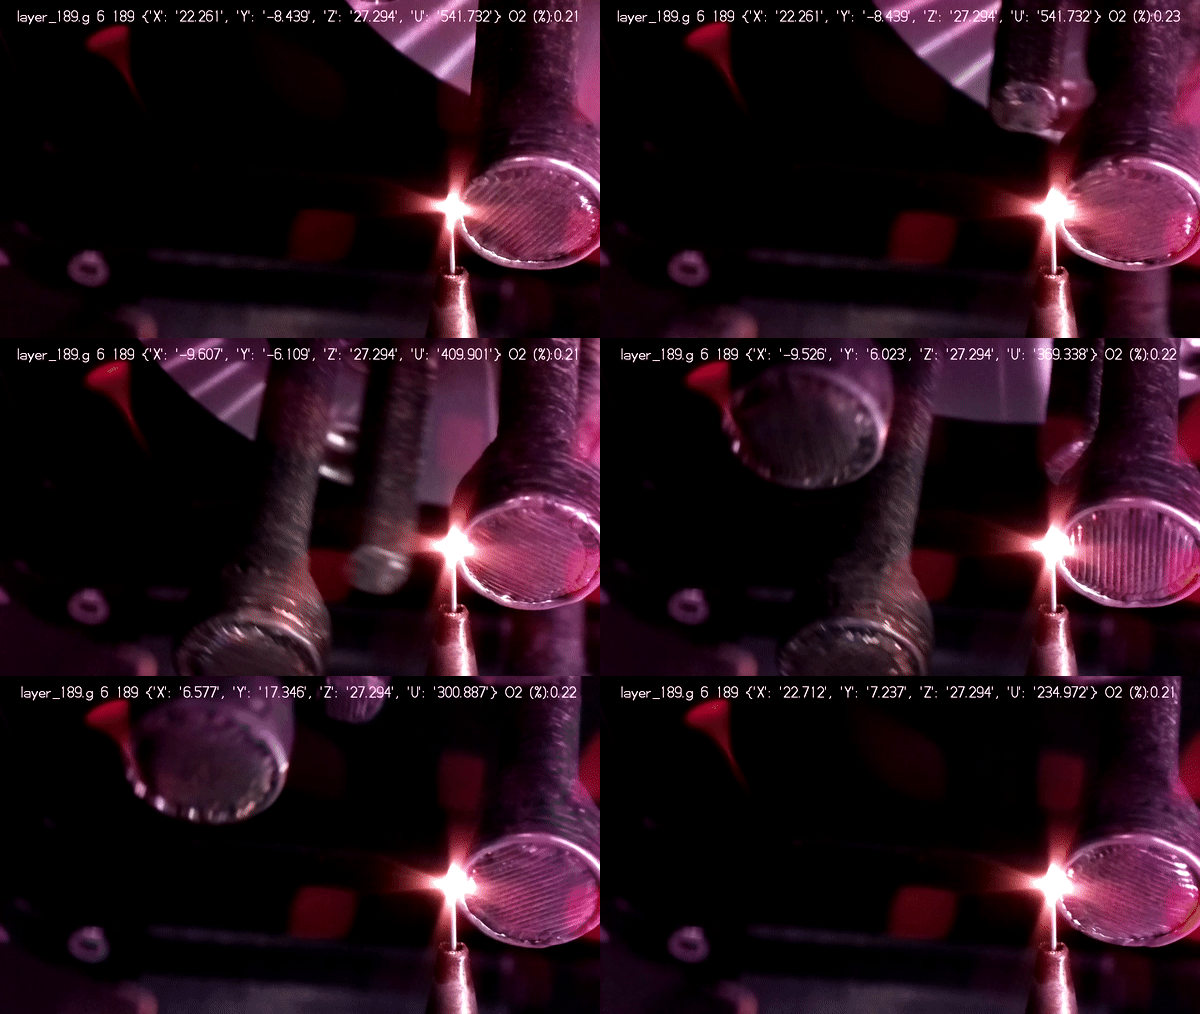
The printer uses stainless steel wire that is fed to the printing location, where a laser melts it. As the pool of molten metal moves away from the laser-heated spot, it solidifies like plastic does in a regular FDM printer. Of course, with the melting point of stainless steel being around 1400 °C, it runs a lot hotter and thus requires that the printer to be inside a completely sealed box, with the atmosphere inside vented into space and replaced with nitrogen prior to starting the printing process. The presence of oxygen would totally ruin the print.

We badly want a practical metal printer for home use, but, so far, they remain out of reach. When you do get them, you might consider that there are different design rules for metal-printed parts.

3D Print Yourself These Mini Workshop Tools

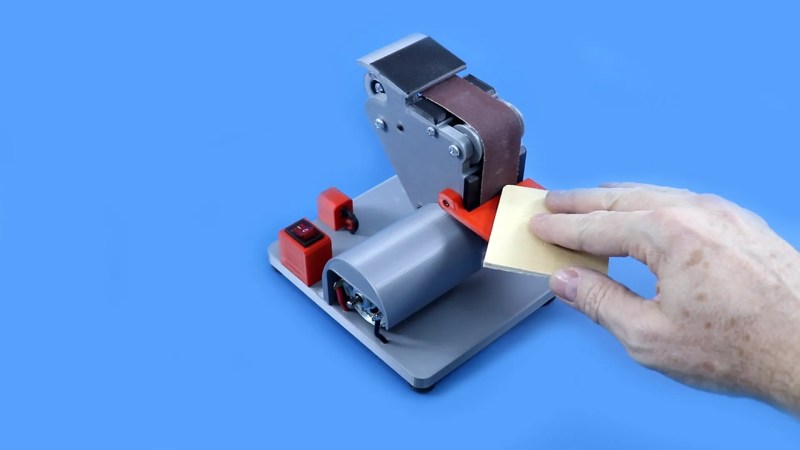
Kitting out a full workshop can be expensive, but if you’re only working on small things, it can also be overkill. Indeed, if your machining tends towards the miniature, consider building yourself a series of tiny machines like [KendinYap] did. In the video below, you can see the miniature electric sander, table saw, drill press, and cut-off saw put through their paces.

Just because the machines are small, doesn’t mean they’re not useful. In fact, they’re kind of great for doing smaller jobs without destroying what you’re working on. The tiny belt sander in particular appeals in this case, but the same applies to the drill press as well. [KendinYap] also shows off a tiny table and circular saw. The machines are straightforward in their design, relying largely on 3D printed components. They’re all powered by basic DC brushed motors which are enough to get the job done on the small scale.

They look particularly good if tiny scale model-making is your passion.

Big Benchy Is a Boat That Really Boats

Benchy is that cute little boat that everyone uses to calibrate their 3D printer. [Emily The Engineer] asked the obvious question—why isn’t it a real working boat? Then she followed through on the execution. Bravo, [Emily]. Bravo.

The full concept is straightforward, but that doesn’t make it any less fun. [Emily] starts by trying to get small Benchys to float, and then steadily steps up the size, solving problems along the way. By the end of it, the big Benchy is printed out of lots of smaller sections that were then assembled into a larger whole. This was achieved with glue and simply using a soldering iron to melt parts together. It’s a common technique used to build giant parts on smaller 3D printers, and it works pretty well.

The basic hull did okay at first, save for some stability problems. Amazingly, though, it was remarkably well sealed against water ingress. It then got a trolling motor, survived a capsizing, and eventually took to the open water with the aid of some additional floatation.

We’ve seen big Benchys before, and we’ve seen fully functional 3D-printed boats before, too. It was about time the two concepts met in reality. Video after the break.

❌