Vista de Lectura

Hay nuevos artículos disponibles. Pincha para refrescar la página.

Embedded Python: MicroPython Is Amazing

In case you haven’t heard, about a month ago MicroPython has celebrated its 11th birthday. I was lucky that I was able to start hacking with it soon after pyboards have shipped – the first tech talk I remember giving was about MicroPython, and that talk was how I got into the hackerspace I subsequently spent years in. Since then, MicroPython been a staple in my projects, workshops, and hacking forays.

If you’re friends with Python or you’re willing to learn, you might just enjoy it a lot too. What’s more, MicroPython is an invaluable addition to a hacker’s toolkit, and I’d like to show you why.

Hacking At Keypress Speed

Got a MicroPython-capable chip? Chances are, MicroPython will serve you well in a number of ways that you wouldn’t expect. Here’s a shining example of what you can do. Flash MicroPython onto your board – I’ll use a RP2040 board like a Pi Pico. For a Pico, connect an I2C device to your board with SDA on pin 0 and SCL on pin 1, open a serial terminal of your choice and type this in:

>>> from machine import I2C, Pin
>>> i2c = I2C(0, sda=Pin(0), scl=Pin(1))
>>> i2c.scan()

This interactivity is known as REPL – Read, Evaluate, Print, Loop. The REPL alone makes MicroPython amazing for board bringup, building devices quickly, reverse-engineering, debugging device library problems and code, prototyping code snippets, writing test code and a good few other things. You can explore your MCU and its peripherals at lightning speed, from inside the MCU.

When I get a new I2C device to play with, the first thing I tend to do is wiring it up to a MicroPython-powered board, and poking at its registers. It’s as simple as this:

>>> for i in range(16):
>>>     # read out registers 0-15
>>>     # print "address value" for each
>>>     print(hex(i), i2c.readfrom_mem(0x22, i))
>>> # write something to a second (0x01) register
>>> i2c.writeto_mem(0x22, 0x01, bytes([0x01]) )

That i2c.scan() line alone replaces an I2C scanner program you’d otherwise have to upload into your MCU of choice, and you can run it within three to five seconds. Got Micropython running? Use serial terminal, Ctrl+C, and that will drop you into a REPL, just type i2c.scan() and press Enter. What’s more, you can inspect your code’s variables from the REPL, and if you structure your code well, even restart your code from where it left off! This is simply amazing for debugging code crashes, rare problems, and bugs like “it stops running after 20 days of uptime”. In many important ways, this removes the need for a debugger – you can now use your MCU to debug your code from the inside.

Oh, again, that i2c.scan()? You can quickly modify it if you need to add features on the fly. Want addresses printed in hex? (hex(addr) for addr in i2c.scan()). Want to scan your bus while you’re poking your cabling looking for a faulty wire? Put the scan into a while True: and Ctrl+C when you’re done. When using a typical compiled language, this sort of tinkering requires an edit-compile-flash-connect-repeat cycle, taking about a dozen seconds each time you make a tiny change. MicroPython lets you hack at the speed of your keyboard typing. Confused the pins? Press the `up` button, edit the line and run the i2c = line anew.

To be clear, all of code is running on your microcontroller, you just type it into your chip’s RAM and it is executed by your MCU. Here’s how you check GPIOs on your Pi Pico, in case you’re worried that some of them have burnt out:

>>> from machine import Pin
>>> from time import sleep
>>> pin_nums = range(30) # 0 to 29
>>> # all pins by default - remove the ones connected to something else if needed
>>> pins = [Pin(num, Pin.OUT) for num in pin_nums]
>>> 
>>> while True:
>>>   # turn all pins on
>>>   for i in range(len(pins)):
>>>     pins[i].value(True)
>>>   sleep(1)
>>>   # turn all pins off
>>>   for i in range(len(pins)):
>>>     pins[i].value(False)
>>>   sleep(1)
>>>   # probe each pin with your multimeter and check that each pin changes its state

There’s many things that make MicroPython a killer interpreter for your MCU. It’s not just the hardware abstraction layer (HAL), but it’s also the HAL because moving your code from board to board is generally as simple as changing pin definitions. But it’s all the other libraries that you get for free that make Python awesome on a microcontroller.

Batteries Included

It really is about the batteries – all the libraries that the stock interpreter brings you, and many more that you can download. Only an import away are time, socket, json, requests, select, re and many more, and overwhelmingly, they work the same as CPython. You can do the same r = requests.get("https://retro.hackaday.com"); print(r.text)[:1024] as you would do on desktop Python, as long as you got a network connection going on. There will be a few changes – for instance, time.time() is an integer, not a float, so if you need to keep track of time very granularly, there are different functions you can use.

Say, you want to parse JSON from a web endpoint. If you’re doing that in an Arduino environment, chances are, you will be limited in what you can do, and you will get triangle bracket errors if you mis-use the JSON library constructs because somehow the library uses templates; runtime error messages are up to you to implement. If you parse JSON on MicroPython and you expect a dict but get a list in runtime, it prints a readable error message. If you run out of memory, you get a very readable MemoryError printed out, you can expect it and protect yourself from it, even fix things from REPL and re-run the code if needed.

The user-supplied code is pretty good, too. If you want PIO or USB-HID on the RP2040, or ESP-CPU-specific functions on the ESP family, they are exposed in handy libraries. If you want a library to drive a display, it likely already has been implemented by someone and put on GitHub. And, if that doesn’t exist, you port one from Arduino and publish it; chances are, it will be shorter and easier to read. Of course, MicroPython has problems. In fact, I’ve encountered a good few problems myself, and I would be amiss not mentioning them.

Mind The Scope

In my experience, the single biggest problem with MicroPython is that writing out `MicroPython` requires more of my attention span than I can afford. I personally shorten it to uPy or just upy, informally. Another problem is that the new, modernized MicroPython logo has no sources or high-res images available, so I can’t print my own stickers of it, and MicroPython didn’t visit FOSDEM this year, so I couldn’t replenish my sticker stock.

On a more serious note, MicroPython as a language has a wide scope of where you can use it; sometimes, it won’t work for you. An ATMega328P can’t handle it – but an ESP8266 or ESP32 will easily, without a worry in the world, and you get WiFi for free. If you want to exactly control what your hardware does, counting clock cycles or hitting performance issues, MicroPython might not work for you – unless you write some Viper code.

If you want to have an extremely-low-power MCU that runs off something like energy harvesting, MicroPython might not work – probably. If you need your code run instantly once your MCU gets power, mind the interpreter takes a small bit of time to initialize – about one second, in my experience. If you want to do HDMI output on a RP2040, perhaps stick to C – though you can still do PIO code, there are some nice libraries for it.

Some amount of clock cycles will be spent on niceties that Python brings. Need more performance? There are things you can do. For instance, if you have a color display connected over SPI and you want to reduce frame rendering time, you might want to drop down to C, but you don’t have to ditch MicroPython – just put more of your intensive code into C-written device drivers or modules you compile, and, prototype it in MicroPython before you write it.

As Seen On Hackaday
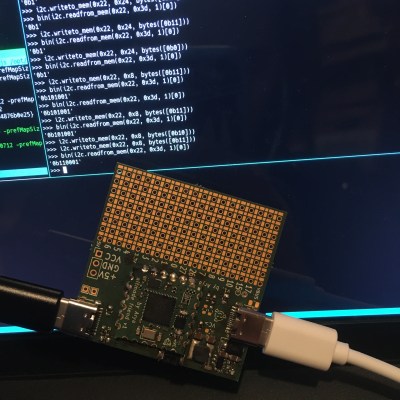
If you’ve followed the USB-C PD talking series, you must’ve seen that the code was written in MicroPython, and I’ve added features like PD sniffing, DisplayPort handling and PSU mode as if effortlessly; it was just that easy to add them and more. I started with the REPL, a FUSB302 connected to a RP2040, poking at registers and reading the datasheet, and while I needed outside help, the REPL work was so so much fun!

There’s something immensely satisfying about poking at a piece of technology interactively and trying to squeeze features out of it, much more if it ends up working, which it didn’t, but it did many other times! I’ve been hacking on that PD stack, and now I’m slowly reformatting it from a bundle of functions into object-based code – Python makes that a breeze.

Remember the Sony Vaio board? Its EC (embedded controller) is a RP2040, always powered on as long as batteries are inserted, and it’s going to be running MicroPython. The EC tasks include power management, being a HID over I2C peripheral, button and LED control, and possibly forwarding keyboard and trackpoint events to save a USB port from the second RP2040, which will run QMK and server as a keyboard controller. MicroPython allows me to make the firmware quickly, adorn it with a dozen features while I do it, and keep the codebase expandable on a whim. The firmware implementation will be a fun journey, and I hope I can tell about it at some point.

Have you used MicroPython in your projects? What did it bring to your party?

Hackaday Links: May 5, 2024

Hackaday Links Column Banner

It may be hard to believe, but BASIC turned 60 this week. Opinions about the computer language vary, of course, but one thing everyone can agree on is that Professors Kemeny and Kurtz really stretched things with the acronym: “Beginner’s All-Purpose Symbolic Instruction Code” is pretty tortured, after all. BASIC seems to be the one language it’s universally cool to hate, at least in its current incarnations like Visual Basic and VBA. But back in 1964, the idea that you could plunk someone down in front of a terminal, or more likely a teletype, and have them bang out a working “Hello, world!” program with just a few minutes of instruction was pretty revolutionary. Yeah, line numbers and GOTO statements encouraged spaghetti code and engrained bad programming habits, but at least it got people coding. And perhaps most importantly, it served as a “gateway drug” into the culture for a lot of us. Many of us would have chosen other paths in life had it not been for those dopamine hits provided by getting that first BASIC program working. So happy birthday BASIC!

Speaking of gateways, we’ve been eagerly following the “65 in 24” project, an homage to the “65 in 1” kits sold by Radio Shack back in the day. These were the hardware equivalent of as BASIC to a lot of us, and just as formative. Tom Thoen has been lovingly recreating the breadboard kit, rendering it in PCBs rather than cardboard and making some updates in terms of components choices, but staying as true to the original as possible. One thing that the original had was the “lab manual,” a book containing all 65 circuits with schematics and build instructions, plus crude but charming cartoons to illustrate the principles of the circuit design. Tom obviously needs to replicate that to make the project complete, and while schematics are a breeze in the age of EDA, the cartoons are another matter. He’s making progress on that front, though, with the help of an art student who is really nailing the assignment. Watch out, Joe Kim!

Last week we mentioned HOPE XV is coming in July. This week, a partial list of talks was released, and there’s already a lot of interesting stuff scheduled. Supercon keynote alums Mitch Altman and Cory Doctorow are both scheduled to appear, along with a ton of others. Check out the list, get your proposals in, or just get your tickets.

If an entire forest is composed of a single tree, does it make a sound? Yes it does, and it’s kind of weird. The tree is called Pando, which is also weird, and it’s the largest living individual organism by biomass on Earth. The quaking aspen has 47,000 stems covering 100 acres (40 hectares) of Utah, and though it does a pretty good job of looking like a forest, the stems are genetically identical so it counts as a single organism. Quaking aspens are known to be a noisy tree, with leaves that rattle together in the slightest breeze. That pleasant sound isn’t just for us to enjoy, however, as sound artist Jeff Rice discovered by sticking a hydrophone down into one of Pando’s many hollow stems. The sound of the leaves banging together apparently gets transmitted down the stems and into the interconnected root system. At least that’s the thought; more rigorous experiments would be needed to confirm that the sound isn’t being mechanically coupled through the soil.

And finally, we’re in no position to cast stones at anyone for keeping a lot of browser tabs open, but keeping almost 7,500 Firefox tabs going seems a bit extreme. And yet a software engineer going by the handle Hazel just can’t bring herself to close any tabs, resulting in an epic restore session when her browser finally gave up the ghost. Panic set in at first when Firefox refused to reload all the tabs, accumulated over the last two years, but eventually the browser figured it all out and Hazel was back in business. Interestingly, Firefox doesn’t really use up too much memory to keep al those tabs open — only 70 MB. Compare that to Chrome, which needs 2 GB to keep a measly 10 tabs open.

Programming Ada: First Steps on the Desktop

Who doesn’t want to use a programming language that is designed to be reliable, straightforward to learn and also happens to be certified for everything from avionics to rockets and ICBMs? Despite Ada’s strong roots and impressive legacy, it has the reputation among the average hobbyist of being ‘complicated’ and ‘obscure’, yet this couldn’t be further from the truth, as previously explained. In fact, anyone who has some or even no programming experience can learn Ada, as the very premise of Ada is that it removes complexity and ambiguity from programming.

In this first part of a series, we will be looking at getting up and running with a basic desktop development environment on Windows and Linux, and run through some Ada code that gets one familiarized with the syntax and basic principles of the Ada syntax. As for the used Ada version, we will be targeting Ada 2012, as the newer Ada 2022 standard was only just approved in 2023 and doesn’t change anything significant for our purposes.

Toolchain Things

The go-to Ada toolchain for those who aren’t into shelling out big amounts of money for proprietary, certified and very expensive Ada toolchains is GNAT, which at one point in time stood for the GNU NYU Ada Translator. This was the result of the United States Air Force awarding the New York University (NYU) a contract in 1992 for a free Ada compiler. The result of this was the GNAT toolchain, which per the stipulations in the contract would be licensed under the GNU GPL and its copyright assigned to the Free Software Foundation. The commercially supported (by AdaCore) version of GNAT is called GNAT Pro.

Obtaining a copy of GNAT is very easy if you’re on a common Linux distro, with the package gnat for Debian-based distros and gcc-ada if you’re Arch-based. For Windows you can either download the AdaCore GNAT Community Edition, or if you use MSYS2, you can use its package manager to install the mingw-w64-ucrt-x86_64-gcc-ada package for e.g. the new ucrt64 environment. My personal preference on Windows is the MSYS2 method, as this also provides a Unix-style shell and tools, making cross-platform development that much easier. This is also the environment that will be assumed throughout the article.

Hello Ada

The most important part of any application is its entry point, as this determines where the execution starts. Most languages have some kind of fixed name for this, such as main, but in Ada you are free to name the entry point whatever you want, e.g.:

with Ada.Text_IO;
procedure Greet is
begin
    -- Print "Hello, World!" to the screen
    Ada.Text_IO.Put_Line ("Hello, World!");
end Greet;

Here the entry point is the Greet procedure, because it’s the only procedure or function in the code. The difference between a procedure and a function is that only the latter returns a value, while the former returns nothing (similar to void in C and C++). Comments start with two dashes, and packages are imported using the with statement. In this case we want the Ada.Text_IO package, as it contains the standard output routines like Put_Line. Note that since Ada is case-insensitive, we can type all of those names in lower-case as well.

Also noticeable might be the avoidance of any symbols where an English word can be used, such as the use of is, begin and end rather than curly brackets. When closing a block with end, this is post-fixed with the name of the function or procedure, or the control structure that’s being closed (e.g. an if/else block or loop). This will be expanded upon later in the series. Finally, much like in C and C++ lines end with a semicolon.

For a reference of the syntax and much more, AdaCore has an online reference as well as a number of freely downloadable books, which include a comparison with Java and C++. The Ada Language Reference Manual (LRM) is also freely available.

Compile And Run

To compile the simple sample code above, we need to get it into a source file, which we’ll call greet.adb. The standard extensions with the GNAT toolchain are .adb for the implementation (body) and .ads for the specification (somewhat like a C++ header file). It’s good practice to use the same file name as the main package or entry point name (unit name) for the file name. It will work if not matched, but you will get a warning depending on the toolchain configuration.

Unlike in C and C++, Ada code isn’t just compiled and linked, but also has an intermediate binding step, because the toolchain fully determines the packages, dependencies, and other elements within the project before assembling the compiled code into a binary.

An important factor here is also that Ada does not work with a preprocessor, and specification files aren’t copied into the file which references them with a with statement, but only takes note of the dependency during compilation. A nice benefit of this is that include guards are not necessary, and headaches with linking such as link order of objects and libraries are virtually eliminated. This does however come at the cost of dealing with the binder.

Although GNAT comes with individual tools for each of these steps, the gnatmake tool allows the developer to handle all of these steps in one go. Although some prefer to use the AdaCore-developed gprbuild, we will not be using this as it adds complexity that is rarely helpful. To use gnatmate to compile the example code, we use a Makefile which produces the following output:

mkdir -p bin
mkdir -p obj
gnatmake -o bin/hello_world greet.adb -D obj/
gcc -c -o obj\greet.o greet.adb
gnatbind -aOobj -x obj\greet.ali
gnatlink obj\greet.ali -o bin/hello_world.exe

Although we just called gnatmake, the compilation, binding and linking steps were all executed subsequently, resulting in our extremely sophisticated Hello World application.

For reference, the Makefile used with the example is the following:

GNATMAKE = gnatmake
MAKEDIR = mkdir -p
RM = rm -f

BIN_OUTPUT := hello_world
ADAFLAGS := -D obj/

SOURCES := greet.adb

all: makedir build

build:
	$(GNATMAKE) -o bin/$(BIN_OUTPUT) $(SOURCES) $(ADAFLAGS)
	
makedir:
	$(MAKEDIR) bin
	$(MAKEDIR) obj

clean:
	rm -rf obj/
	rm -rf bin/
	
.PHONY: test src

Next Steps

Great, so now you have a working development environment for Ada with which you can build and run any code that you write. Naturally, the topic of code editors and IDEs is one can of flamewar that I won’t be cracking open here. As mentioned in my 2019 article, you can use AdaCore’s GNAT Programming Studio (GPS) for an integrated development environment experience, if that is your jam.

My own development environment is a loose constellation of Notepad++ on Windows, and Vim on Windows and elsewhere, with Bash and similar shells the environment for running the Ada toolchain in. If there is enough interest I’d be more than happy to take a look at other development environments as well in upcoming articles, so feel free to sound off in the comments.

For the next article I’ll be taking a more in-depth look at what it takes to write an Ada application that actually does something useful, using the preparatory steps of this article.

❌