Vista de Lectura

Hay nuevos artículos disponibles. Pincha para refrescar la página.

Mining and Refining: Lead, Silver, and Zinc

If you are in need of a lesson on just how much things have changed in the last 60 years, an anecdote from my childhood might suffice. My grandfather was a junk man, augmenting the income from his regular job by collecting scrap metal and selling it to metal recyclers. He knew the current scrap value of every common metal, and his garage and yard were stuffed with barrels of steel shavings, old brake drums and rotors, and miles of copper wire.

But his most valuable scrap was lead, specifically the weights used to balance car wheels, which he’d buy as waste from tire shops. The weights had spring steel clips that had to be removed before the scrap dealers would take them, which my grandfather did by melting them in a big cauldron over a propane burner in the garage. I clearly remember hanging out with him during his “melts,” fascinated by the flames and simmering pools of molten lead, completely unconcerned by the potential danger of the situation.

Fast forward a few too many decades and in an ironic twist I find myself living very close to the place where all that lead probably came from, a place that was also blissfully unconcerned by the toxic consequences of pulling this valuable industrial metal from tunnels burrowed deep into the Bitterroot Mountains. It didn’t help that the lead-bearing ores also happened to be especially rich in other metals including zinc and copper. But the real prize was silver, present in such abundance that the most productive silver mine in the world was once located in a place that is known as “Silver Valley” to this day. Together, these three metals made fortunes for North Idaho, with unfortunate side effects from the mining and refining processes used to win them from the mountains.

All Together Now

Thanks to the relative abundance of their ores and their physical and chemical properties, lead, silver, and zinc have been known and worked since prehistoric times. Lead, in fact, may have been the first metal our ancestors learned to smelt. It’s primarily the low melting points of these metals that made this possible; lead, for instance, melts at only 327°C, well within the range of a simple wood fire. It’s also soft and ductile, making it easy enough to work with simple tools that lead beads and wires dating back over 9,000 years have been found.

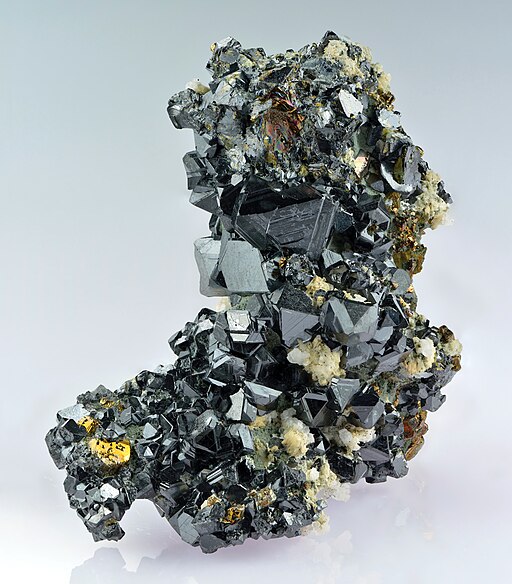
Unlike many industrial metals, minerals containing lead, silver, and zinc generally aren’t oxides of the metals. Rather, these three metals are far more likely to combine with sulfur, so their ores are mostly sulfide minerals. For lead, the primary ore is galena or lead (II) sulfide (PbS). Galena is a naturally occurring semiconductor, crystals of which lent their name to the early “crystal radios” which used a lump of galena probed with a fine cat’s whisker as a rectifier or detector for AM radio signals.

Geologically, galena is found in veins within various metamorphic rocks, and in association with a wide variety of sulfide minerals. Exactly what minerals those are depends greatly on the conditions under which the rock formed. Galena crystallized out of low-temperature geological processes is likely to be found in limestone deposits alongside other sulfide minerals such as sphalerite, or zincblende, an ore of zinc. When galena forms under higher temperatures, such as those associated with geothermal processes, it’s more likely to be associated with iron sulfides like pyrite, or Fool’s Gold. Hydrothermal galenas are also more likely to have silver dissolved into the mineral, classifying them as argentiferous ores. In some cases, such as the mines of the Silver Valley, the silver is at high enough concentrations that the lead is considered the byproduct rather than the primary product, despite galena not being a primary ore of silver.

Like a Lead Bubble

How galena is extracted and refined depends on where the deposits are found. In some places, galena deposits are close enough to the surface that open-cast mining techniques can be used. In the Silver Valley, though, and in other locations in North America with commercially significant galena deposits, galena deposits follow deep fissures left by geothermal processes, making deep tunnel mining more likely to be used. The scale of some of the mines in the Silver Valley is hard to grasp. The galena deposits that led to the Bunker Hill stake in the 1880s were found at an elevation of 3,600′ (1,100 meters) above sea level; the shafts and workings of the Bunker Hill Mine are now 1,600′ (488 meters) below sea level, requiring miners to take an elevator ride one mile straight down to get to work.

Ore veins are followed into the rock using a series of tunnels or stopes that branch out from vertical shafts. Stopes are cut with the time-honored combination of drilling and blasting, freeing up hundreds of tons of ore with each blasting operation. Loose ore is gathered with a slusher, a bucket attached to a dragline that pulls ore back up the stope, or using mining loaders, low-slung payloaders specialized for operation in tight spaces.

Ore plus soap equals metal bubbles. Froth flotation of copper sulfide is similar to the process for extracting zinc sulfide. Source: Geomartin, CC BY-SA 4.0

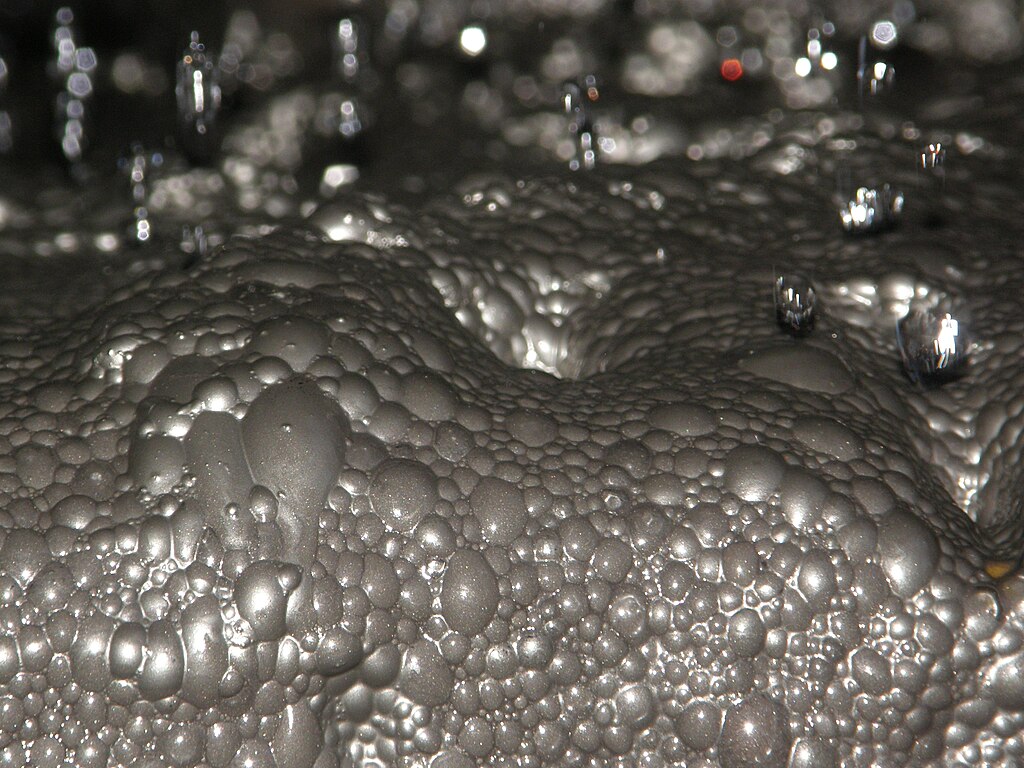
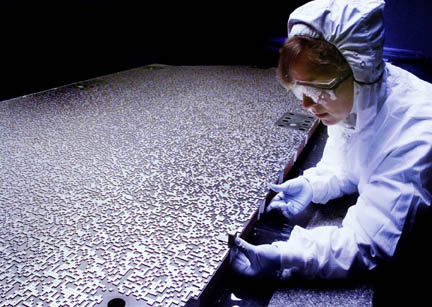
Silver Valley galena typically assays at about 10% lead, making it a fairly rich ore. It’s still not rich enough, though, and needs to be concentrated before smelting. Most mines do the initial concentration on site, starting with the usual crushing, classifying, washing, and grinding steps. Ball mills are used to reduce the ore to a fine powder, mixed with water and surfactants to form a slurry, and pumped into a broad, shallow tank. Air pumped into the bottom of the tanks creates bubbles in the slurry that carry the fine lead particles up to the surface while letting the waste rock particles, or gangue, sink to the bottom. It seems counterintuitive to separate lead by floating it, but froth flotation is quite common in metal refining; we’ve seen it used to concentrate everything from lightweight graphite to ultradense uranium. It’s also important to note that this is not yet elemental lead, but rather still the lead sulfide that made up the bulk of the galena ore.

Once the froth is skimmed off and dried, it’s about 80% pure lead sulfide and ready for smelting. The Bunker Hill Mine used to have the largest lead smelter in the world, but that closed in 1982 after decades of operation that left an environmental and public health catastrophe in its wake. Now, concentrate is mainly sent to smelters located overseas for final processing, which begins with roasting the lead sulfide in a blast of hot air. This converts the lead sulfide to lead oxide and gaseous sulfur dioxide as a waste product:

2 PbS + 3 O{_2} \rightarrow2 PbO + 2 SO{_2}

After roasting, the lead oxide undergoes a reduction reaction to free up the elemental lead by adding everything to a blast furnace fueled with coke:

2 PbO + C \rightarrow2 Pb + CO{_2}

Any remaining impurities float to the top of the batch while the molten lead is tapped off from the bottom of the furnace.

Zinc!

A significant amount of zinc is also located in the ore veins of the Silver Valey, enough to become a major contributor to the district’s riches. The mineral sphalerite is the main zinc ore found in this region; like galena, it’s a sulfide mineral, but it’s a mixture of zinc sulfide and iron sulfide instead of the more-or-less pure lead oxide in galena. Sphalerite also tends to be relatively rich in industrially important contaminants like cadmium, gallium, germanium, and indium.

Most sphalerite ore isn’t this pretty. Source: Ivar Leidus, CC BY-SA 4.0.

Extraction of sphalerite occurs alongside galena extraction and uses mostly the same mining processes. Concentration also uses the froth flotation method used to isolate lead sulfide, albeit with different surfactants specific for zinc sulfide. Concentration yields a material with about 50% zinc by weight, with iron, sulfur, silicates, and trace metals making up the rest.

Purification of zinc from the concentrate is via a roasting process similar to that used for lead, and results in zinc oxide and more sulfur dioxide:

2 ZnS + 3 O{_2}\rightarrow2 ZnO + 2SO{_2}

Originally, the Bunker Hill smelter just vented the sulfur dioxide out into the atmosphere, resulting in massive environmental damage in the Silver Valley. My neighbor relates his arrival in Idaho in 1970, crossing over the Lookout Pass from Montana on the then brand-new Interstate 90. Descending into the Silver Valley was like “a scene from Dante’s Inferno,” with thick smoke billowing from the smelter’s towering smokestacks trapped in the valley by a persistent inversion. The pine trees on the hillsides had all been stripped of needles by the sulfuric acid created when the sulfur dioxide mixed with moisture in the stale air. Eventually, the company realized that sulfur was too valuable to waste and started capturing it, and even built a fertilizer plant to put it to use. But the damage was done, and it took decades for the area to bounce back.

Recovering metallic zinc from zinc oxide is performed by reduction, again in a coke-fired blast furnace which collects the zinc vapors and condenses them to the liquid phase, which is tapped off into molds to create ingots. An alternative is electrowinning, where zinc oxide is converted to zinc sulfate using sulfuric acid, often made from the sulfur recovered from roasting. The zinc sulfate solution is then electrolyzed, and metallic zinc is recovered from the cathodes, melted, further purified if necessary, and cast into ingots.

Silver from Lead

If the original ore was argentiferous, as most of the Silver Valley’s galena is, now’s the time to recover the silver through the Parke’s process, a solvent extraction technique. In this case, the solvent is the molten lead, in which silver is quite soluble. The dissolved silver is precipitated by adding molten zinc, which has the useful property of reacting with silver while being immiscible with lead. Zinc also has a higher melting point than lead, meaning that as the temperature of the mixture drops, the zinc solidifies, carrying along any silver it combined with while in the molten state. The zinc-silver particles float to the top of the desilvered lead where they can be skimmed off. The zinc, which has a lower boiling point than silver, is driven off by vaporization, leaving behind relatively pure silver.

To further purify the recovered silver, cupellation is often employed. Cupellation is a pyrometallurgical process used since antiquity to purify noble metals by exploiting the different melting points and chemical properties of metals. In this case, silver contaminated with zinc is heated to the point where the zinc oxidizes in a shallow, porous vessel called a cupel. Cupels were traditionally made from bone ash or other materials rich in calcium carbonate, which gradually absorbs the zinc oxide, leaving behind a button of purified silver. Cupellation can also be used to purify silver directly from argentiferous galena ore, by differentially absorbing lead oxide from the molten solution, with the obvious disadvantage of wasting the lead:

Ag + 2 Pb + O{_2}\rightarrow 2PbO + Ag

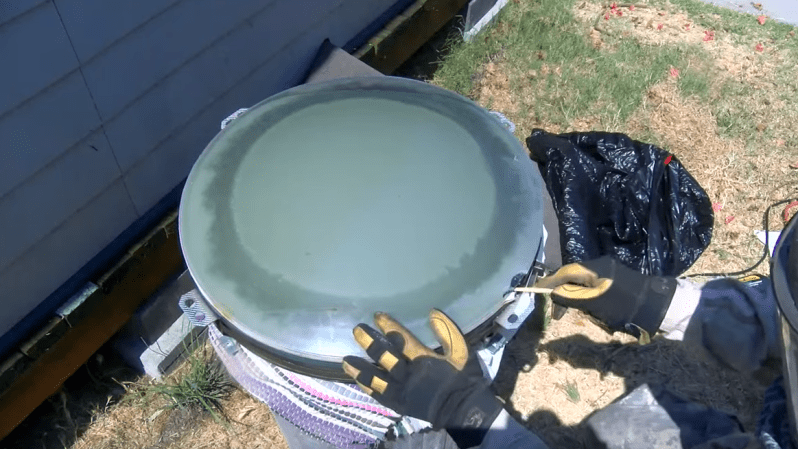
Cupellation can also be used to recover small amounts of silver directly from refined lead, such as that in wheel weights:

If my grandfather had only known.

Hackaday Links: September 29, 2024

Hackaday Links Column Banner

There was movement in the “AM Radio in Every Vehicle Act” last week, with the bill advancing out of the US House of Representatives Energy and Commerce Committee and heading to a full floor vote. For those not playing along at home, auto manufacturers have been making moves toward deleting AM radios from cars because they’re too sensitive to all the RF interference generated by modern vehicles. The trouble with that is that the government has spent a lot of effort on making AM broadcasters the centerpiece of a robust and survivable emergency communications system that reaches 90% of the US population.

The bill would require cars and trucks manufactured or sold in the US to be equipped to receive AM broadcasts without further fees or subscriptions, and seems to enjoy bipartisan support in both the House and the Senate. Critics of the bill will likely point out that while the AM broadcast system is a fantastic resource for emergency communications, if nobody is listening to it when an event happens, what’s the point? That’s fair, but short-sighted; emergency communications isn’t just about warning people that something is going to happen, but coordinating the response after the fact. We imagine Hurricane Helene’s path of devastation from Florida to Pennsylvania this week and the subsequent emergency response might bring that fact into focus a bit.

The US Geological Survey and NASA bid goodbye to Landsat 7 this week, 25 years into its five-year mission to watch the planet. Launched in 1999, the satellite’s imaging instruments were witness to many Earth changes, both natural and man-made. Its before-and-after images, like this look at New Orleans around the time of Hurricane Katrina, are especially striking. Despite suffering instrumentation problems within a few years of launch that degraded image quality on some of its sensors, Landsat 7 sent a wealth of geophysical data down to Earth, enough that it has over 210,000 citations in the scientific literature. The aging satellite was moved to a lower orbit in 2021 to make way for its newer cousins, Landsat 8 and 9, which put its polar sun-synchronous orbit out of sync with mission requirements. Despite this, it kept on grabbing images right up until May 28, 2024, when it grabbed a picture of Las Vegas that shows the dramatic increase in the size of the metro area over the last 25 years, along with the stunning decrease of Lake Mead.

How much do you enjoy captchas? If you’re anything like us, you’ve learned to loathe their intentionally fuzzy photos where you have to find traffic lights, stairs, motorcycles, or cars to prove you’re human. Well, surprise — just because you can (eventually) solve a captcha doesn’t make you a human. It turns out that AI can do it too. A security research group at ETH Zurich managed to modify YOLO to solve Google’s reCAPTCHAv2, saying it wasn’t even particularly hard to get it to pass the test 100% of the time within two tries. Think about that the next time you’re wondering if that tiny sliver of the rider’s helmet that intrudes just a tiny bit into one frame counts as a square containing a motorcycle.

We’re not much into cryptocurrency around here, but we do love vaults and over-the-top physical security, and that makes this article on a Swiss Bitcoin vault worth looking at. If you’re perplexed with the need for a physical vault to keep your virtual currency safe, we get it. But with people investing huge amounts of effort in excavating landfills for accidentally disposed hard drives containing Bitcoin wallets worth millions, it starts to make sense. The vault in this story is impressively well-protected, living deep within the granite of a Swiss mountain and protected from every conceivable threat. Ah, but it’s the inconceivable threats that get you, isn’t it? And when you put a lot of valuable things together in one place, well — let’s just say we’re eagerly awaiting the “based on a true story” heist film.

And finally, YouTube seems to be the go-to resource for how-to videos, and we’ve all likely gotten quick tutorials on everything from fixing a toilet to writing a will. So why not a tutorial on changing a fuel filter on an Airbus A320? Sure, you might not need to do one, and we’re pretty sure you’ll be arrested for even trying without the proper certifications, but it’s cool to see it down. All things considered, it doesn’t look all that hard, what with all the ease-of-maintenance features built into the Pratt and Whitney PW1100G engine. As we’ve spent many hours on a creeper in the driveway doing repairs that would better be done on the lift we can’t afford, we found the fact that the mechanic has to lie on his back on the tarmac to service a multimillion-dollar aircraft pleasingly ironic.

Curing CRT Cataracts Freshens Up Retro Roundy TVs

It’s been a long time since the family TV has had a CRT in it, and even longer since that it was using what was basically an overgrown oscilloscope tube. But “roundies” were once a thing, and even back in the early 80s you’d still find them in living rooms on TV repair calls, usually sporting a characteristic and unsightly bullseye discoloration.

Fast-forward a few decades, and roundy TVs have become collectible enough that curing their CRT cataracts is necessary for restorationists like [shango066], a skill he demonstrates in the video below. The defect comes from the composite construction of CRTs — a safety feature added by television manufacturers wisely concerned with the safety aspects of putting a particle accelerator with the twin hazards of high vacuum and high voltage in the family home. The phosphor-covered face of the tube was covered by a secondary glass cover, often tinted and frosted to improve the admittedly marginal viewing experience. This cover was often glued in place with an epoxy resin that eventually oxidized from the edges in, making the bullseye pattern.

The remedy for this problem? According to [shango066], it’s heat, and plenty of it. After liberating the tube from the remarkably clean TV chassis, he took advantage of a warm summer’s day and got the tube face cooking under a black plastic wrap. Once things were warmed up, more heat was added to really soften the glue; you can easily see the softening progress across the face of the tube in the video below. Once softened, gentle prying with wooden chopsticks completes the job of freeing the safety lens, also in remarkably good shape.

With the adhesive peeled off in an oddly satisfying manner, all that’s left is a thorough cleaning and gluing the lens back on with a little silicone sealant around the edges. We’d love to see the restored TV in operation, but that’s left to a promised future video. In the meantime, please enjoy a look at the retro necessities TV owners depended on in the good old days, which really weren’t all that good when you get down to it.

Dog Poop Drone Cleans Up the Yard So You Don’t Have To

Sometimes you instantly know who’s behind a project from the subject matter alone. So when we saw this “aerial dog poop removal system” show up in the tips line, we knew it had to be the work of [Caleb Olson].

If you’re unfamiliar with [Caleb]’s oeuvre, let us refresh your memory. [Caleb] has been on a bit of a dog poop journey, starting with a machine-learning system that analyzed security camera footage to detect when the adorable [Twinkie] dropped a deuce in the yard. Not content with just knowing when a poop event has occurred, he automated the task of locating the packages with a poop-pointing robot laser. Removal of the poop remained a manual task, one which [Caleb] was keen to outsource, hence the current work.

The video below, from a lightning talk at a conference, is pretty much all we have to go on, and the quality is a bit potato-esque. And while [Caleb]’s PoopCopter is clearly still a prototype, it’s easy to get the gist. Combining data from the previous poop-adjacent efforts, [Caleb] has built a quadcopter that can (or will, someday) be guided to the approximate location of the offending package, home in on it using a downward-looking camera, and autonomously whisk it away.

The retrieval mechanism is the high point for us; rather than a complicated, servo-laden “sky scoop” or something similar, the drone has a bell-shaped container on its belly with a series of geared leaves on the open end. The leaves are open when the drone descends onto the payload, and then close as the drone does a quick rotation around the yaw axis. And, as [Caleb] gleefully notes, the leaves can also open in midair with a high-torque yaw move in the opposite direction; the potential for neighborly hijinx is staggering.

All jokes and puns aside, this looks fantastic, and we can’t wait for more information and a better video. And lest you think [Caleb] only works on “Number Two” problems, never fear — he’s also put considerable work into automating his offspring and taking the awkwardness out of social interactions.

Broadcast TV Simulator Keeps the Nostalgia Flowing

Watch out, Gen X-ers — there’s a nostalgia overload heading your way, courtesy of this over-the-air TV simulator. And it has us feeling a little Saturday morning cartoon-ish, or maybe even a bit Afterschool Special.

[Shane C Mason]’s “FieldStation42” build centers around a period-correct color TV, and rightly so — a modern TV would be jarring here, and replacing the CRT in this irreplaceable TV would be unthinkable. Programming comes via painstakingly collected sitcoms, dramas, news broadcasts, and specials, all digitized and stored on disk and organized by the original networks the programs came from. Python running on a Raspberry Pi does the heavy lifting here, developing a schedule of programs for the week that makes sense for the time of day — morning news and talk, afternoon soaps, the usual family hour and prime time offerings, and finally [Carson] rounding out the day, because that’s all we had for late night.

As for switching between stations, rather than risk damaging the old TV, [Shane] really upped his nostalgia game and found an old antenna rotator control box. These were used to steer the directional antenna toward different transmitters back in the day, especially in fringe areas like the one he grew up in. He added a set of contacts to the knob and a Pi Pico, which talks to the main Pi and controls which “channel” is being viewed. He also added an effect of fading and noise in the video and audio between channels, simulating the antenna moving. The video below shows it in action.

For those who missed the Golden Age of TV, relax; as [Shane] correctly surmises after going through this whole project, Golden Ages only exist in your mind. Things were certainly different with 70s mass media, a fact which this build captures neatly, but that doesn’t mean they were better. Other than Saturday mornings, of course — those were objectively better in every way.

Cyberpack Puts All the Radios Right on Your Back

A disclaimer: Not a single cable tie was harmed in the making of this backpack cyberdeck, and considering that we lost count of the number of USB cables [Bag-Builds] used to connect everything in it, that’s a minor miracle.

The onboard hardware is substantial, starting with a Lattepanda Sigma SBC, a small WiFi travel router, a Samsung SSD, a pair of seven-port USB hubs, and a quartet of Anker USB battery banks. The software defined radio (SDR) gear includes a HackRF One, an Airspy Mini, a USRP B205mini, and a Nooelec NESDR with an active antenna. There are also three USB WiFi adapters, an AX210 WiFi/Bluetooth combo adapter, a uBlox GPS receiver, and a GPS-disciplined oscillator, both with QFH antennas. There’s also a CatSniffer multi-protocol IoT dongle and a Flipper Zero for good measure, and probably a bunch of other stuff we missed. Phew!

As for mounting all this stuff, [Bag-Builds] went the distance with a nicely designed internal frame system. Much of it is 3D printed, but the basic frame and a few rails are made from aluminum. The real hack here, though, is getting the proper USB cables for each connection. The cable lengths are just right so that nothing needs to get bundled up and cable-tied. The correct selection of adapters is a thing of beauty, too, with very little interference between the cables despite some pretty tightly packed gear.

What exactly you’d do with this cyberpack, other than stay the hell away from airports, police stations, and government buildings, isn’t exactly clear. But it sure seems like you’ve got plenty of options. And yes, we’re aware that this is a commercial product for which no build files are provided, but if you’re sufficiently inspired, we’re sure you could roll your own.

Thanks to [KC] for the tip on this one.

Hackaday Links: September 22, 2024

Hackaday Links Column Banner

Thanks a lot, Elon. Or maybe not, depending on how this report that China used Starlink signals to detect low-observable targets pans out. There aren’t a lot of details, and we couldn’t find anything approximating a primary source, but it seems like the idea is based on forward scatter, which is when waves striking an object are deflected only a little bit. The test setup for this experiment was a ground-based receiver listening to the downlink signal from a Starlink satellite while a DJI Phantom 4 Pro drone was flown into the signal path. The drone was chosen because nobody had a spare F-22 or F-35 lying around, and its radar cross-section is about that of one of these stealth fighters. They claim that this passive detection method was able to make out details about the drone, but as with most reporting these days, this needs to be taken with an ample pinch of salt. Still, it’s an interesting development that may change things up in the stealth superiority field.

Another week, another example of how the fine print on the EULA is never your friend. This time around it’s the popular Wyze security cameras, where there’s an unconfirmed report that a recent firmware update nerfed the “Recording Cooldown” setting menu, making the option to have no cooldown period between recording a paid feature. As we understand it, Wyze cameras previously had a cooldown feature, intended to keep the camera from overheating or killing the battery if the motion sensor detects a lot of continual movement. But it looks like earlier firmware revs allowed users to bypass the default five-minute period between recordings, a reasonable choice for anyone using these as security cameras. Now, bypassing the cooldown seems to require a paid subscription. We have to stress that we don’t know anything beyond this one unconfirmed report, but this enshittification is certainly something we’ve seen before, so it at least rings true, and it seems like another solid example of the fact that with cheap IoT appliances, you never truly own your stuff.

We hate to be the bearers of bad news — well, that might be a stretch given the two articles above — but this is really the kind of news we hate to hear. The Eugene Makerspace in Eugene, Oregon, suffered a major fire in their community shop on September 15. Judging by the pictures, the place was pretty thoroughly destroyed, and the fact that it was an early morning fire probably contributed to the lack of injuries. Their GoFundMe campaign is doing pretty well, but they could certainly use some help getting back on their feet. If you’re in a position to contribute, we’re sure they’d appreciate it.

When it comes to OpenAI’s newest AI model, you’d better watch what you think — or rather, you’d better not think too much about how the model thinks. Trying to get inside the model’s “head” is apparently against the terms of service, with users getting nastygrams from OpenAI warning them to step off. The “Strawberry” AI model has a feature that lets users have a glimpse into the “chain of thought” used to answer a question or complete a task, which on the face of it seems to be exactly what they don’t want users to do. But the chain of thought is only a hand-waving summary of the raw thought process, filtered through a separate AI model. This is what OpenAI doesn’t want people probing, and any attempts at engineering tricky prompts to reveal the raw chain of thought will potentially get you banned.

And finally, although motorsports aren’t really our thing, we have to admit a certain sense of awe at this video that exposes some of the extreme engineering that goes into top fuel drag racing. Specifically, this video concentrates on drag racing, where nitromethane-fueled engines-on-wheels scream down a quarter-mile track in less than four seconds. Everything about this sport is extreme, especially the engines, which run themselves almost to death for the few seconds they are under full power. The video is packed full of tidbits that boggle the mind, such as these engines burning out their sparkplugs about halfway through the course, with the engine continuing to run in diesel mode thanks to the high compression and temperatures. Drivers experience a brain-squishing 8 g of acceleration during a run, which consumes over 30 gallons of fuel and exerts so much force on the engine that the connecting rods get compressed. The supercharger alone takes 800 horsepower to run, and yet the engine still produces enough power that the car is going 60 miles per hour before it covers its own length. Oh, and that ridiculous exhaust plume? That’s raw fuel that is purposely left unburned until it escapes the exhaust tips, which are angled to provide additional down-force to make sure as much torque as possible gets from the tires to the track. Enjoy!

Steel Reinforcement Toughens Cracked Vintage Knobs

Nothing can ruin a restoration project faster than broken knobs. Sure, that old “boat anchor” ham rig will work just fine with some modern knobs, but few and far between are the vintage electronics buffs that will settle for such aesthetic affrontery. But with new old stock knobs commanding dear prices, what’s the budget-conscious restorationist to do? Why, fix the cracked knobs yourself, of course.

At least that’s what [Level UP EE Lab] tried with his vintage Heahkit DX60 ham transmitter, with pretty impressive results. The knobs on this early-60s radio had all cracked thanks to years of over-tightening the set screws. To strengthen the knobs, he found some shaft collars with a 1/4″ inside diameter and an appropriate set screw. The backside of the knob was milled out to make room for the insert, which was then glued firmly in place with everyone’s go-to adhesive, JB Weld. [Level UP] chose the “Plastibonder” product, which turns out not to be an epoxy but rather a two-part urethane resin, which despite some initial difficulties flowed nicely around the shaft collar and filled the milled-out space inside the knob. The resin also flowed into the channels milled into the outside diameter of the shaft collars, which are intended to grip the hardened resin better and prevent future knob spinning.

It’s a pretty straightforward repair if a bit fussy, but the result is knobs that perfectly match the radio and still have the patina of 60-plus years of use. We’ll keep this technique in mind for our next restoration, or even just an everyday repair. Of course, for less demanding applications, there are always 3D printed knobs.

Laser Fault Injection, Now With Optional Decapping

Whether the goal is reverse engineering, black hat exploitation, or just simple curiosity, getting inside the packages that protect integrated circuits has long been the Holy Grail of hacking. It isn’t easy, though; those inscrutable black epoxy blobs don’t give up their secrets easily, with most decapping methods being some combination of toxic and dangerous. Isn’t there something better than acid baths and spinning bits of tungsten carbide?

[Janne] over at Fraktal thinks so, and the answer he came up with is laser decapping. Specifically, this is an extension of the laser fault injection setup we recently covered, which uses a galvanometer-scanned IR laser to induce glitches in decapped microcontrollers to get past whatever security may be baked into the silicon. The current article continues that work and begins with a long and thorough review of various IC packaging technologies, including the important anatomical differences. There’s also a great review of the pros and cons of many decapping methods, covering everything from the chemical decomposition of epoxy resins to thermal methods. That’s followed by specific instructions on using the LFI rig to gradually ablate the epoxy and expose the die, which is then ready to reveal its secrets.

The benefit of leveraging the LFI rig for decapping is obvious — it’s an all-in-one tool for gaining access and executing fault injection. The usual caveats apply, of course, especially concerning safety; you’ll obviously want to avoid breathing the vaporized epoxy and remember that lasers and retinas don’t mix. But with due diligence, having a single low-cost tool to explore the innards of chips seems like a big win to us.

Mothbox Watches Bugs, So You — Or Your Grad Students — Don’t Have To

To the extent that one has strong feelings about insects, they tend toward the extremes of a spectrum that runs from a complete fascination with their diversity and the specializations they’ve evolved to exploit unique and ultra-narrow ecological niches, and “Eww, ick! Kill it!” It’s pretty clear that [Dr. Andy Quitmeyer] and his team tend toward the former, and while they love their bugs, spending all night watching them is a tough enough gig that they came up with Mothbox, the automated insect monitor.

Insect censuses are valuable tools for assessing the state of an ecosystem, especially insects’ vast numbers, short lifespan, and proximity to the base of the food chain. Mothbox is designed to be deployed in insect-rich environments and automatically recognize and tally the moths it sees. It uses an Arducam and Raspberry Pi for image capture, plus an array of UV and visible LEDs, all in a weatherproof enclosure. The moths are attracted to the light and fly between the camera and a plain white background, where an image is captured. YOLO v8 locates all the moths in the image, crops them out, and sends them to BioCLIP, a vision model for organismal biology that appears similar to something we’ve seen before. The model automatically sorts the moths by taxonomic features and keeps a running tally of which species it sees.

Mothbox is open source and the site has a ton of build information if you’re keen to start bug hunting, plus plenty of pictures of actual deployments, which should serve as nightmare fuel to the insectophobes out there.

Catching The BOAT: Gamma-Ray Bursts and The Brightest of All Time

Down here at the bottom of our ocean of air, it’s easy to get complacent about the hazards our universe presents. We feel safe from the dangers of the vacuum of space, where radiation sizzles and rocks whizz around. In the same way that a catfish doesn’t much care what’s going on above the surface of his pond, so too are we content that our atmosphere will deflect, absorb, or incinerate just about anything that space throws our way.

Or will it? We all know that there are things out there in the solar system that are more than capable of wiping us out, and every day holds a non-zero chance that we’ll take the same ride the dinosaurs took 65 million years ago. But if that’s not enough to get you going, now we have to worry about gamma-ray bursts, searing blasts of energy crossing half the universe to arrive here and dump unimaginable amounts of energy on us, enough to not only be measurable by sensitive instruments in space but also to effect systems here on the ground, and in some cases, to physically alter our atmosphere.

Gamma-ray bursts are equal parts fascinating physics and terrifying science fiction. Here’s a look at the science behind them and the engineering that goes into detecting and studying them.

Collapsars and Neutron Stars

Although we now know that gamma-ray bursts are relatively common, it wasn’t all that long ago that we were ignorant of their existence, thanks in part to our thick, protective atmosphere. The discovery of GRBs had to wait for the Space Race to couple with Cold War paranoia, which resulted in Project Vela, a series of early US Air Force satellites designed in part to watch for Soviet compliance with the Partial Test Ban Treaty, which forbade everything except underground nuclear tests. In 1967, gamma ray detectors on satellites Vela 3 and Vela 4 saw a flash of gamma radiation that didn’t match the signature of any known nuclear weapon. Analysis of the data from these and subsequent flashes revealed that they came from space, and the race to understand these energetic cosmic outbursts was on.

Trust, but verify. Vela 4, designed to monitor Soviet nuclear testing, was among the first satellites to detect cosmic gamma-ray bursts. Source: ENERGY.GOV, Public domain, via Wikimedia Commons

Gamma-ray bursts are the most energetic phenomena known, with energies that are almost unfathomable. Their extreme brightness, primarily as gamma rays but across the spectrum and including visible light, makes them some of the most distant objects ever observed. To put their energetic nature into perspective, a GRB in 2008, dubbed GRB 080319B, was bright enough in the visible part of the spectrum to just be visible to the naked eye even though it was 7.5 billion light years away. That’s more than halfway across the observable universe, 3,000 times farther away than the Andromeda galaxy, normally the farthest naked-eye visible object.

For all their energy, GRBs tend to be very short-lived. GRBs break down into two rough groups. Short GRBs last for less than about two seconds, with everything else falling into the long GRB category. About 70% of GRBs we see fall into the long category, but that might be due to the fact that the short bursts are harder to see. It could also be that the events that precipitate the long variety, hypernovae, or the collapse of extremely massive stars and the subsequent formation of rapidly spinning black holes, greatly outnumber the progenitor event for the short category of GRBs, which is the merging of binary neutron stars locked in a terminal death spiral.

The trouble is, the math doesn’t work out; neither of these mind-bogglingly energetic events could create a burst of gamma rays bright enough to be observed across half the universe. The light from such a collapse would spread out evenly in all directions, and the tyranny of the inverse square law would attenuate the signal into the background long before it reached us. Unless, of course, the gamma rays were somehow collimated. The current thinking is that a disk of rapidly spinning material called an accretion disk develops outside the hypernova or the neutron star merger. The magnetic field of this matter is tortured and twisted by its rapid rotation, with magnetic lines of flux getting tangled and torn until they break. This releases all the energy of the hypernova or neutron star merger in the form of gamma rays in two tightly focused jets aligned with the pole of rotation of the accretion disk. And if one of those two jets happens to be pointed our way, we’ll see the resulting GRB.

Crystals and Shadows

But how exactly do we detect gamma-ray bursts? The first trick is to get to space, or at least above the bulk of the atmosphere. Our atmosphere does a fantastic job shielding us from all forms of cosmic radiation, which is why the field of gamma-ray astronomy in general and the discovery of GRBs in particular had to wait until the 1960s. A substantial number of GRBs have been detected by gamma-ray detectors carried aloft on high-altitude balloons, especially in the early days, but most dedicated GRB observatories are now satellite-borne

Gamma-ray detection technology has advanced considerably since the days of Vela, but a lot of the tried and true technology is still used today. Scintillation detectors, for example, use crystals that release photons of visible light when gamma rays of a specific energy pass through them. The photons can then be amplified by photomultiplier tubes, resulting in a pulse of current proportional to the energy of the incident gamma ray. This is the technology used by the Gamma-ray Burst Monitor (GBM) aboard the Fermi Gamma-Ray Space Telescope, a satellite that was launched in 2008. Sensors with the GBT are mounted around the main chassis of Fermi, giving it a complete very of the sky. It consists of twelve sodium iodide detectors, each of which is directly coupled to a 12.7-cm diameter photomultiplier tube. Two additional sensors are made from cylindrical bismuth germanate scintillators, each of which is sandwiched between two photomultipliers. Together, the fourteen sensors cover from 8 keV to 30 MeV,  and used in concert they can tell where in the sky a gamma-ray burst has occurred.

The coded aperture for Swift’s BAT. Each tiny lead square casts a unique shadow pattern on the array of cadmiun-zinc-telluride (CZT) ionization sensors, allowing an algorithm to work out the characteristics of the gamma rays falling on it. Source: NASA.

Ionization methods are also used as gamma-ray detectors. The Niel Gehrels Swift Observatory, a dedicated GRB hunting satellite that was launched in 2004, has an instrument known as the Burst Alert Telescope, or BAT. This instrument has a very large field of view and is intended to monitor a huge swath of sky. It uses 32,768 cadmium-zinc-telluride (CZT) detector elements, each 4 x 4 x 2 mm, to directly detect the passage of gamma rays. CZT is a direct-bandgap semiconductor in which electron-hole pairs are formed across an electric field when hit by ionizing radiation, producing a current pulse. The CZT array sits behind a fan-shaped coded aperture, which has thousands of thin lead tiles arranged in an array that looks a little like a QR code. Gamma rays hit the coded aperture first, casting a pattern on the CZT array below. The pattern is used to reconstruct the original properties of the radiation beam mathematically, since conventional mirrors and lenses don’t work with gamma radiation. The BAT is used to rapidly detect the location of a GRB and to determine if it’s something worth looking at. If it is, it rapidly slews the spacecraft to look at the burst with its other instruments and instantly informs other gamma observatories about the source so they can take a look too.

The B.O.A.T.

On October 9, 2022, both Swift and Fermi, along with dozens of other spacecraft and even some ground observatories, would get to witness a cataclysmically powerful gamma-ray burst. Bloodlessly named GRB 221009A but later dubbed “The BOAT,” for “brightest of all time,” the initial GRB lasted for an incredible ten minutes with a signal that remained detectable for hours. Coming from the direction of the constellation Sagittarius from a distance of 2.4 billion light years, the burst was powerful enough to saturate Fermi’s sensors and was ten times more powerful than any signal yet received by Swift.

The BOAT. A ten-hour time-lapse of data from the Fermi Large Area Telescope during GRB 221009A on October 8, 2022. Source: NASA/DOE/Fermi LAT Collaboration, Public domain

Almost everything about the BOAT is fascinating, and the superlatives are too many to list. The gamma-ray burst was so powerful that it showed up in the scientific data of spacecraft that aren’t even equipped with gamma-ray detectors, including orbiters at Mars and Voyager 1. Ground-based observatories noted the burst, too, with observatories in Russia and China noting very high-energy photons in the range of tens to hundreds of TeV arriving at their detectors.

The total energy released by GRB 221009A is hard to gauge with precision, mainly because it swamped the very instruments designed to measure it. Estimates range from 1048 to 1050 joules, either of which dwarfs the total output of the Sun over its entire 10 billion-year lifespan. So much energy was thrown in our direction in such a short timespan that even our own atmosphere was impacted. Lightning detectors in India and Germany were triggered by the burst, and the ionosphere suddenly started behaving as if a small solar flare had just occurred. Most surprising was that the ionospheric effects showed up on the daylight side of the Earth, swamping the usual dampening effect of the Sun.

When the dust had settled from the initial detection of GRB 221009A, the question remained: What happened to cause such an outburst? To answer that, the James Webb Space Telescope was tasked with peering into space, off in the direction of Sagittarius, where it found pretty much what was expected — the remains of a massive supernova. In fact, the supernova that spawned this GRB doesn’t appear to have been particularly special when compared to other supernovae from similarly massive stars, which leaves the question of how the BOAT got to be so powerful.

Does any of this mean that a gamma-ray burst is going to ablate our atmosphere and wipe us out next week? Probably not, and given that this recent outburst was estimated to be a one-in-10,000-year event, we’re probably good for a while. It seems likely that there’s plenty that we don’t yet understand about GRBs, and that the data from GRB 221009A will be pored over for decades to come. It could be that we just got lucky this time, both in that we were in the right place at the right time to see the BOAT, and that it didn’t incinerate us in the process. But given that on average we see one GRB per day somewhere in the sky, chances are good that we’ll have plenty of opportunities to study these remarkable events.

Ferrites Versus Ethernet in the Ham Shack

For as useful as computers are in the modern ham shack, they also tend to be a strong source of unwanted radio frequency interference. Common wisdom says applying a few ferrite beads to things like Ethernet cables will help, but does that really work?

It surely appears to, for the most part at least, according to experiments done by [Ham Radio DX]. With a particular interest in lowering the noise floor for operations in the 2-meter band, his test setup consisted of a NanoVNA and a simple chunk of wire standing in for the twisted-pair conductors inside an Ethernet cable. The NanoVNA was set to sweep across the entire HF band and up into the VHF; various styles of ferrite were then added to the conductor and the frequency response observed. Simply clamping a single ferrite on the wire helped a little, with marginal improvement seen by adding one or two more ferrites. A much more dramatic improvement was seen by looping the conductor back through the ferrite for an additional turn, with diminishing returns at higher frequencies as more turns were added. The best performance seemed to come from two ferrites with two turns each, which gave 17 dB of suppression across the tested bandwidth.

The question then becomes: How do the ferrites affect Ethernet performance? [Ham Radio DX] tested that too, and it looks like good news there. Using a 30-meter-long Cat 5 cable and testing file transfer speed with iPerf, he found no measurable effect on throughput no matter what ferrites he added to the cable. In fact, some ferrites actually seemed to boost the file transfer speed slightly.

Ferrite beads for RFI suppression are nothing new, of course, but it’s nice to see a real-world test that tells you both how and where to apply them. The fact that you won’t be borking your connection is nice to know, too. Then again, maybe it’s not your Ethernet that’s causing the problem, in which case maybe you’ll need a little help from a thunderstorm to track down the issue.

Microwave Forge Casts the Sinking-est Benchy Ever

As a test artifact, 3DBenchy does a pretty good job of making sure your 3D printer is up to scratch. As an exemplar of naval architecture, though — well, let’s just say that if it weren’t for the trapped air in the infilled areas, most Benchy prints wouldn’t float at all. About the only way to make Benchy less seaworthy would be to make it out of cast iron. Challenge accepted.

We’ve grown accustomed to seeing [Denny] over at “Shake the Future” on YouTube using his microwave-powered kilns to cast all sorts of metal, but this time he puts his skill and experience to melting iron. For those not in the know, he uses standard consumer-grade microwave ovens to heat kilns made from ceramic fiber and lots of Kapton tape, which hold silicon carbide crucibles that get really, really hot under the RF onslaught. It works surprisingly well, especially considering he does it all on an apartment balcony.

For this casting job, he printed a Benchy model from PLA and made a casting mold from finely ground silicon carbide blasting medium mixed with a little sodium silicate, or water glass. His raw material was a busted-up barbell weight, which melted remarkably well in the kiln. The first pour appeared to go well, but the metal didn’t quite make it all the way to the tip of Benchy’s funnel. Round two was a little more exciting, with a cracked crucible and spilled molten metal. The third time was a charm, though, with a nice pour and complete mold filling thanks to the vibrations of a reciprocating saw.

After a little fettling and a saltwater bath to achieve the appropriate patina, [Denny] built a neat little Benchy tableau using microwave-melted blue glass as a stand-in for water. It highlights the versatility of his method, which really seems like a game-changer for anyone who wants to get into home forging without the overhead of a proper propane or oil-fired furnace.

Hackaday Links: September 15, 2024

Hackaday Links Column Banner

A quick look around at any coffee shop, city sidewalk, or sadly, even at a traffic light will tell you that people are on their phones a lot. But exactly how much is that? For Americans in 2023, it was a mind-boggling 100 trillion megabytes, according to the wireless industry lobbying association CTIA. The group doesn’t discuss their methodology in the press release, so it’s a little hard to make judgments on that number’s veracity, or the other numbers they bandy about, such as the 80% increase in data usage since 2021, or the fact that 40% of data is now going over 5G connections. Some of the numbers are more than a little questionable, too, such as the claim that 330 million Americans (out of a current estimate of 345.8 million people) are covered by one or more 5G networks. Even if you figure that most 5G installations are in densely populated urban areas, 95% coverage seems implausible given that in 2020, 57.5 million people lived in rural areas of the USA. Regardless of the details, it remains that our networks are positively humming with data, and keeping things running is no mean feat.

If you’ve ever wondered what one does with a degree in wildlife biology, look no further than a study that looks into “avian-caused ignitions” of wildfires. The study was led by Taylor Barnes, a wildlife biologist and GIS specialist who works for a civil engineering firm, and concludes that some utility poles are 5 to 8 times more likely to spark a wildfire than the average pole due to “thermal events” following electrocution of a bird, squirrel, bear, or idiot. Unfortunately, the paper is paywalled, so there’s no information on methodology, but we’re guessing a grad student or intern spent a summer collecting animal carcasses from beneath power poles. It’s actually very valuable work since it informs decisions on where to direct wildlife mitigation efforts that potentially reduce the number of service outages and wildfires, but it’s still kinda funny.

From the “How to get rid of a lot of money in a hurry” files comes a story of a bad GPU made into an incredibly unattractive purse. About the only thing good about the offering, which consists of a GeForce GT 730 video card stuffed into a clear plastic box with a gold(ish) chain attached, is the price of $1,024. The completely un-dodgy GPUStore Shopify site also lists a purse fashioned from an NVIDIA H100 Tensor Core GPU for a cool $65,536. At least somebody knows about base two.

And finally, if you’ve struggled with the question of what humanoid robots bring to the table, chances are pretty good that adding the ability to fly with four jet engines isn’t going to make things much clearer. But for some reason, a group from the Italian Institute of Technology is working on the problem of “aerial humanoid robotics” with a cherub-faced bot dubbed iRonCub. The diminutive robot is only about 70 kilograms, which includes the four jet engines generating a total of 1,000 newtons of thrust. Applications for the flying baby robot are mostly left to the imagination, although there is a vague reference to “search and rescue” applications; we’re not sure about you, but if we’re lost in the woods and half-crazed from hunger and exposure, a baby descending from the sky on a 600° plume of exhaust might not be the most comforting sight.

An Earth-Bound Homage to a Martian Biochemistry Experiment

With all the recent attention on Mars and the search for evidence of ancient life there, it’s easy to forget that not only has the Red Planet been under the figurative microscope since the early days of the Space Race, but we went to tremendous effort to send a pair of miniaturized biochemical laboratories there back in 1976. While the results were equivocal, it was still an amazing piece of engineering and spacefaring, one that [Marb] has recreated with this Earth-based version of the famed Viking “Labeled Release” experiment.

The Labeled Release experimental design was based on the fact that many metabolic processes result in the evolution of carbon dioxide gas, which should be detectable by inoculating a soil sample with a nutrient broth laced with radioactive carbon-14. For this homage to the LR experiment, [Marb] eschewed the radioactive tracer, instead looking for a relative increase in the much lower CO2 concentration here on Earth. The test chamber is an electrical enclosure with a gasketed lid that holds a petri dish and a simple CO2 sensor module. Glands in the lid allow an analog for Martian regolith — red terrarium sand — and a nutrient broth to be added to the petri dish. Once the chamber was sterilized, or at least sanitized, [Marb] established a baseline CO2 level with a homebrew data logger and added his sample. Adding the nutrient broth — a solution of trypsinized milk protein, yeast extract, sugar, and salt — gives the bacteria in the “regolith” all the food they need, which increases the CO2 level in the chamber.

More after the break…

[Marb]’s results are not surprising by any means, but that’s hardly the point. This is just a demonstration of the concept of the LR experiment, one that underscores the difficulties of doing biochemistry on another planet and the engineering it took to make it happen. Compared to some of the instruments rolling around Mars today, the Viking experiments seem downright primitive, and the fact that they delivered even the questionable data they did is pretty impressive.

Soldering, Up Close and Personal

A word of warning before watching this very cool video on soldering: it may make you greatly desire what appears to be a very, very expensive microscope. You’ve been warned.

Granted, most people don’t really need to get this up close and personal with their soldering, but as [Robert Feranec] points out, a close look at what’s going on when the solder melts and the flux flows can be a real eye-opener. The video starts with what might be the most esoteric soldering situation — a ball-grid array (BGA) chip. It also happens to be one of the hardest techniques to assess visually, both during reflow and afterward to check the quality of your work. While the microscope [Robert] uses, a Keyence VHX-7000 series digital scope, allows the objective to swivel around and over the subject in multiple axes and keep track of where it is while doing it, it falls short of being the X-ray vision you’d need to see much beyond the outermost rows of balls. But, being able to look in at an angle is a huge benefit, one that allows us a glimpse of the reflow process.

More after the break

[Robert] also takes a look at other SMD packages, such as a TSSOP chip and a QFN package, as well as some through-hole terminals. He also forces a few errors, like misaligning leads or using way too much solder, just to show how fault-tolerant SMD soldering can be. The real eye-opener here was the excess tinning on the central pad of the QFN, which clearly caused problems by preventing capillary action from pulling the outer contacts down onto the pads. We’ve had that same problem ourselves, and seeing this makes us want to give that repair another go.

Kudos to [Roboert] for sharing these delicious views of what’s really going on when the solder starts to flow.

2024 Tiny Games Contest: A Flappy Seagull Game With Sound in Only 500 Bytes

It was probably a reasonable assumption that the “Tiny” in our recently concluded Tiny Games Contest mostly referred to the physical footprint of the game. And indeed, that’s the way most of the entries broke, which resulted in some pretty amazing efforts. [Anders Nielsen], however, took the challenge another way and managed to stuff a seagull-centric side-scroller into just 500 bytes of code.

That’s not to say that the size of [Anders]’s game is physically huge either. Flappy Larus, as he calls his game, runs on his popular 65uino platform, a 6502 microcontroller in the familiar Arduino Uno form factor. So it’s pretty small to begin with, and doesn’t even need any additional components other than the tiny OLED screen which has become more or less standard for the 65uino at this point. The only real add-on is a piezo speaker module, which when hooked up to the I2C data line happens to make reasonable approximations of a squawking seagull, all without adding a single byte of code. Check out a little game play in the video below.

Flappy Larus may be pretty simplistic, but as we recall, the game it’s based on was similarly minimalist and still managed to get people hooked. The 2024 Tiny Games contest is closed now, but if you’ve got an idea for a tiny game, we’d still love to feature it. Hit the tip line and we’ll take a look!

2024 Tiny Games Challenge

A Look Inside a DIY Rocket Motor

[Joe Barnard] made a solid propellant rocket motor, and as one does in such situations, he put it through its paces on the test stand. The video below is not about the test, nor is it about the motor’s construction. Rather, it’s a deconstruction of the remains of the motor in order to better understand its design, and it’s pretty interesting stuff.

Somewhere along the way, [Joe], aka “BPS.Space” on YouTube, transitioned from enthusiastic model rocketeer to full-fledged missile-man, and in the process stepped up his motor game considerably. The motor that goes under the knife — or rather, the bandsaw — in this video is his “Simplex V2,” a completely DIY build of [Joe]’s design. For scale, the casing is made from a 6″ (15 cm) diameter piece of aluminum tubing over a meter in length, with a machined aluminum forward closure and a composite nozzle assembly. This is a pretty serious piece of engineering.

The closure and the nozzle are the focus of the video, which makes sense since that’s where most of the action takes place. To understand what happened during the test, [Joe] lopped them off and cut them roughly in half longitudinally. The nozzle throat, which was machined from a slug of graphite, fared remarkably well during the test, accumulating only a little slag from the propellant, a combination of powdered aluminum, ammonium perchlorate, and HTBP resin. The lower part of the nozzle, made from phenolic-impregnated linen, did pretty well too, building up a pyrolyzed layer that acted much like a space capsule’s ablative heat shield would. The forward closure, whose sole job is to contain the inferno and direct the exhaust anywhere but up, took more of a beating but stood up to the challenge. Especially interesting was the state of the O-rings and the way that the igniter interfaced with the closure.

Post mortems like these are valuable teaching tools, and while it must be heartbreaking to destroy something you put so much work into, you can’t improve what you can’t measure. Hats off to [Joe] for the peek inside his world.

Slim Tactile Switches Save Classic TI Calculator with a Bad Keypad

For vintage calculator fans, nothing strikes more fear than knowing that someday their precious and irreplaceable daily driver will become a museum piece to be looked at and admired — but never touched again. More often than not, the failure mode will be the keypad.

In an effort to recover from the inevitable, at least for 70s vintage TI calculators, [George] has come up with these nice replacement keypad PCBs. The original membrane switches on these calculators have a limited life, but luckily there are ultra-slim SMD tactile switches these days make a dandy substitute. [George] specifies a 0.8 mm thick switch that when mounted on a 1.6 mm thick PCB comes in just a hair over the original keypad’s 2.2 mm thickness. He has layouts for a TI-45, which should also fit a TI-30, and one for the larger keypads on TI-58s and TI-59s.

While these particular calculators might not in your collection, [George]’s goal is to create an open source collection of replacement keypads for all the vintage calculators sitting in desk drawers out there. And not just keypads, but battery packs, too.

❌