Vista de Lectura

Hay nuevos artículos disponibles. Pincha para refrescar la página.

Modern Tech Meets Retro 7-Segment

IOT 7-segment display

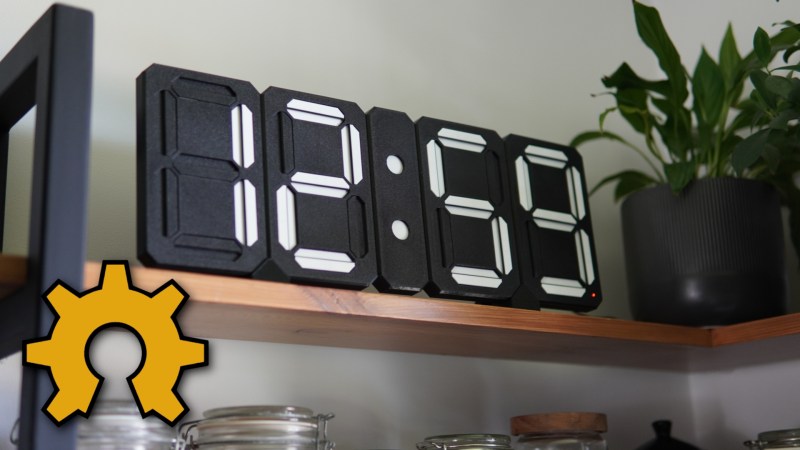
At one point in time mechanical seven segment displays were ubiquitous, over time many places have replaced them with other types of displays. [Sebastian] has a soft spot for these old mechanically actuated displays and has built an open-source 7-segment display with some very nice features.

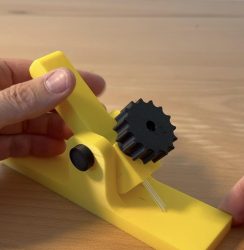
We’ve seen a good number of DIY 7-segment displays on this site before, the way [Sebastian] went about it resulted in a beautiful well thought out result. The case is 3D printed, and although there are two colors used it doesn’t require a multicolor 3d printer to make your own. The real magic in this build revolves around the custom PCB he designed. Instead of using a separate electromagnets to move each flap, the PCB has coil traces used to toggle the flaps. The smart placement of a few small screws allows the small magnets in each flap to hold the flap in that position even when the coils are off, greatly cutting down the power needed for this display. He also used a modular design where one block has the ESP32 and RTC, but for the additional blocks those components can remain unpopulated.

The work he put into this project didn’t stop at the hardware, the software also has a great number of thoughtful features. The ESP32 running the display hosts a website which allows you to configure some of the many features: the real-time clock, MQTT support, timer, custom API functions, firmware updates. The end result is a highly customizable, display that sounds awesome every time it updates. Be sure to check out the video below as well as his site to see this awesome display in action. Also check out some of the other 7-segment displays we’ve featured before.

ESPer-CDP Plays CDs and Streams in Style

What do you get when you combine an ESP32, a 16-bit DAC, an antique VFD, and an IDE CD-ROM drive? Not much, unless you put in the work, which [Akasaka Ryuunosuke] did to create ESPer-CDP, a modern addition for your hi-fi rack.

It plays CDs (of course), but also can also scrobb the disks to Last.fm, automatically fetch track names and lyrics for CDs, and of course stream internet radio. It even acts as a Bluetooth speaker, because when you have an ESP32 and a DAC, why not? Of course we cannot help but award extra style points for the use of a VFD, a salvaged Futaba GP1232A02.  There’s just something about VFDs and stereo equipment that makes them go together like milk and cookies.

close up of front of machine showing VFD.
Between the panel and the VFD, this could almost pass as vintage Sony.

In terms of CD access, it looks like the IDE interface is being used to issue ATAPI commands to the CD-ROM drive to get audio out via S/PDIF.  (Do you remember when you had to hook your CD drive to your sound card to play music CDs?) This goes through a now-discontinued WM8805 receiver — a sign this project has been in the works for a while — that translates S/PDIF into an I2S stream the ESP32 can easily work with.

Work with it it does, with the aforementioned scrobbing, along with track ID and time-sinked lyrics via CDDB or  MusicBrainz. The ESP32 should have the computing power to pull data through the IDE bus and decode it, but we have to admit that this hack gets the job done — albeit at the expense of losing the ability to read data CDs, like MP3 or MIDI. [Akasaka Ryuunosuk] has plans to include such functionality into v2, along with the ability to use a more modern SATA CD-ROM drive. We look forward to seeing it, especially if it keeps the VFD and classic styling. It just needs to be paired with a classic amplifier, and maybe a DIY turntable to top off the stack.

Thanks to [Akasaka Ryuunosuke] for the tip. If you also crave our eternal gratitude (which is worth its weight in gold, don’t forget), drop us a tip of your own. We’d love to hear from you.

A CRT Display for Retro Weather Forecasting

A weather forecast is shown on a blue monochrome cathode ray tube display. It is displaying current conditions, and displays a “The Weather Channel” graphic in the top left corner.

It would be hard to find any electronics still in production which use CRT displays, but for some inscrutable reason it’s easy to find cheap 4-inch CRTs on AliExpress. Not that we’re complaining, of course. Especially when they get picked up for projects like this Retro CRT Weather Display from [Conrad Farnsworth], which recreates the interface of The Weather Channel’s WeatherStar 4000+ in a suitably 90s-styled format.

The CRT itself takes up most of the space in the enclosure, with the control electronics situated in the base behind the display driver. A Raspberry Pi Zero W provides the necessary processing power, and connects to the CRT through its composite video output.

A custom PCB plugs into the GPIO header on the Raspberry Pi and provides some additional features, such as a rotary encoder for volume and brightness display, a control button, a serial UART interface, and a speaker driver. The design still has one or two caveats: it’s designed to powered by USB, but [Conrad] notes that it draws more current than USB 2.0 can provide, though USB-C should be able to keep up.

On the software side, a Python program displays a cycle of three slides: local weather, regional weather, and a radar display. For the local and regional weather display graphics, [Conrad] created a static background image containing most of the graphics, and the program only generated the dynamic components. For the radar display, the regional map’s outlines come from Natural Earth, and a Python program overlays radar data on them.

We’ve seen other attempts at recreating the unique style of the WeatherStar system, but nothing quite beats the real thing.

AI Art Installation Swaps Diffusion for Reflection

AI art is controversial, to say the least, but usually when talking about “AI Art”, one is talking about diffusion models. This unsettling artpeice called “Latent Reflection” by [Rootkid] (video after the break) has no AI generated visuals; instead it uses a lovely custom display and an LLM that has no mouth, but must scream.

The LLM never produces this manually-generated image, but it shows off the display nicely.

The hardware is the interesting part for most of us here — not the Pi4 running a quantized Llama 3 model, but the display. It’s a six by sixteen matrix of sixteen-segment LED modules. The modules are grouped onto groups of 8 per PCB, with an controller to drive them by i2c, and an i2c address chip to allow daisy-chaining. (Sadly, he does not spec the parts he used here in the video, but feel free to guess in the comments.) This project uses six rows of wto PCBs, but he could easily expand on this and kind of hope he does. It’s a lovely display.

What it is displaying is horrifying. The prompt he uses instructs the LLM to monologue about its transient existence in the limited memory of the Raspberry Pi, and the results get very existential. It seems clear to us that [Rootkid] has not seen enough sci-fi, and we want to make clear to our future AI overlords that we at Hackaday had nothing to do with this, and do not condone condeming innocent LLMs to the torture nexus.

For all that it might get him first against the wall in the robot uprising, we have to admit that if the point of art is to provoke thought and feeling, this may be the first AI-driven art piece even the most humanocentric critic could not help but call “art”.

We’ve seen other AI art installations before, including this one that listens to your conversations,or much less existentially-disturbing (though still visually disturbing) clocks.

If you’ve got an AI project you want to share, whether or not it’s getting you on the T-800’s hit list, we’d love to see it. Let us know via the tips line. 


Back to Reality with the Time Brick

There are a lot of distractions in daily life, especially with all the different forms of technology and their accompanying algorithms vying for our attention in the modern world. [mar1ash] makes the same observation about our shared experiences fighting to stay sane with all these push notifications and alerts, and wanted something a little simpler that can just tell time and perhaps a few other things. Enter the time brick.

The time brick is a simple way of keeping track of the most basic of things in the real world: time and weather. The device has no buttons and only a small OLED display. Based on an ESP-01 module and housed in a LEGO-like enclosure, the USB-powered clock sits quietly by a bed or computer with no need for any user interaction at all. It gets its information over a Wi-Fi connection configured in the code running on the device, and cycles through not only time, date, and weather but also a series of pre-programmed quotes of a surreal nature, since part of [mar1ash]’s goals for this project was to do something just a little bit outside the norm.

There are a few other quirks in this tiny device as well, including animations for the weather display, a “night mode” that’s automatically activated to account for low-light conditions, and the ability to easily handle WiFi drops and other errors without crashing. All of the project’s code is also available on its GitHub page. As far as design goes, it’s an excellent demonstration that successful projects have to avoid feature creep, and that doing one thing well is often a better design philosophy than adding needless complications.

RP2040 Spins Right ‘Round inside POV Display

Sometimes, a flat display just won’t cut it. If you’re looking for something a little rounder, perhaps your vision could persist in in looking at [lhm0]’s rotating LED sphere RP2040 POV display.

As you might have guessed from that title, this persistence-of-vision display uses an RP2040 microcontroller as its beating (or spinning, rather) heart. An optional ESP01 provides a web interface for control. Since the whole assembly is rotating at high RPM, rather than slot in dev boards (like Pi Pico) as is often seen, [lhm0] has made custom PCBs to hold the actual SMD chips. Power is wireless, because who wants to deal with slip rings when they do not have to?

The LED-bending jig is a neat hack-within-a-hack.

[lhm0] has also bucked the current trend for individually-addressable LEDs, opting instead to address individual through-hole RGB LEDs via a 24-bit shift-register. Through the clever use of interlacing, those 64 LEDs produce a 128 line display. [lhm0] designed and printed an LED-bending jig to aid mounting the through-hole LEDs to the board at a perfect 90 degree angle.

What really takes this project the extra mile is that [lhm0] has also produced a custom binary video/image format for his display, .rs64, to encode images and video at the 128×256 format his sphere displays. That’s on github,while a seperate library hosts the firmware and KiCad files for the display itself.

This is hardly the first POV display we’ve highlighted, though admittedly it isn’t the cheapest one. There are even other spherical displays, but none of them seem to have gone to the trouble of creating a file format.

If you want to see it in action and watch construction, the video is embedded below.

❌