Vista de Lectura

Hay nuevos artículos disponibles. Pincha para refrescar la página.

A Second OctoPrint Plugin Has been Falsifying Stats
The ongoing story of bogus analytical data being submitted to the public OctoPrint usage statistics has taken a surprising turn with the news that a second plugin was being artificially pushed up the charts. At least this time, the developer of the plugin has admitted to doing the deed personally.

Just to recap, last week OctoPrint creator [Gina Häußge] found that somebody had been generating fictitious OctoPrint usage stats since 2022 in an effort to make the OctoEverywhere plugin appear to be more popular than it actually was. It was a clever attempt, and if it wasn’t for the fact that the fake data was reporting itself to be from a significantly out of date build of OctoPrint, there’s no telling how long it would have continued. When the developers of the plugin were confronted, they claimed it was an overzealous user operating under their own initiative, and denied any knowledge that the stats were being manipulated in their favor.

Presumably it was around this time that Obico creator [Kenneth Jiang] started sweating bullets. It turns out he’d been doing the same thing, for just about as long. When [Gina] contacted him about the suspicious data she was seeing regarding his plugin, he owned up to falsifying the data and published what strikes us as a fairly contrite apology on the Obico blog. While this doesn’t absolve him of making a very poor decision, we respect that he didn’t try to shift the blame elsewhere.

That said, there’s at least one part of his version of events that doesn’t quite pass the sniff test for us. According to [Kenneth], he first wrote the script that generated the fake data back in 2022 because he suspected (correctly, it turns out) that the developers of OctoEverywhere were doing something similar. But after that, he says he didn’t realize the script was still running until [Gina] confronted him about it.

Now admittedly, we’re not professional programmers here at Hackaday. But we’ve written enough code to be suspicious when somebody claims a script they whipped up on a lark was able to run unattended for two years and never once crashed or otherwise bailed out. We won’t even begin to speculate where said script could have been running since 2022 without anyone noticing…

But we won’t dwell on the minutiae here. [Gina] has once again purged the garbage data from the OctoPrint stats, and hopefully things are finally starting to reflect reality. We know she was already angry about the earlier attempts to manipulate the stats, so she’s got to be seething right about now. But as we said before, these unfortunate incidents are ultimately just bumps in the road. We don’t need any stat tracker to know that the community as a whole greatly appreciates the incredible work she’s put into OctoPrint.
A Trip Down Electronic Toy Memory Lane

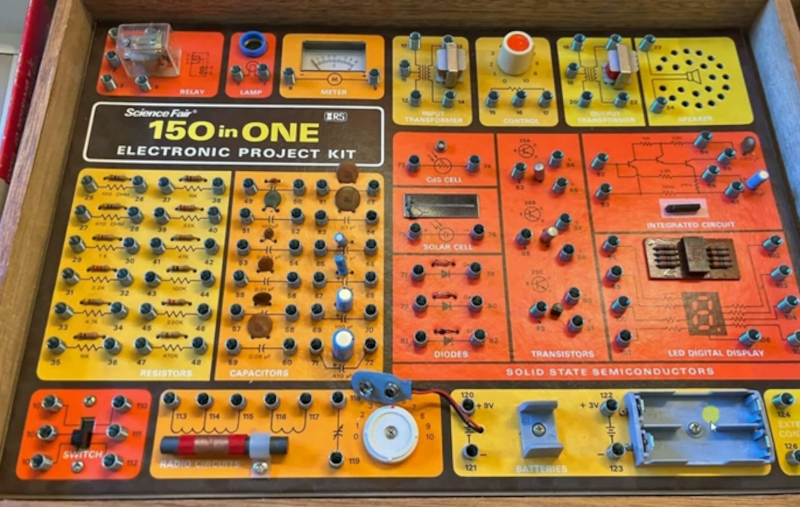
Like many of us, [MIKROWAVE1] had a lot of electronic toys growing up. In a video you can watch below, he asks the question: “Did electronic toys influence your path?” Certainly, for us, the answer was yes.

The CB “base station” looked familiar although ours was marked “General Electric.” Some of us certainly had things similar to the 150-in-one kit and versions of the REMCO broadcast system. There were many versions of crystal radio kits, although a kit for that always seemed a little like cheating.

Shortwave radios were fun in those days, too. We miss the days when you could find interesting stations on shortwave. We were also happy to see the P-box kits. If you weren’t interested in radio, there were also digital logic kits including a “computer” that was really a giant multi-pole switch that could create logic gates.

It made us wonder what toys are launching the next generation of engineers. We are not convinced that video games, Tik Tok, and ChatGPT are going to serve the same purpose these toys did for many of us. What do you think? What were your favorite toys and what do think will serve that purpose for the next generation?

VHF/UHF Antennas, the Bad, the Ugly, and the Even Worse

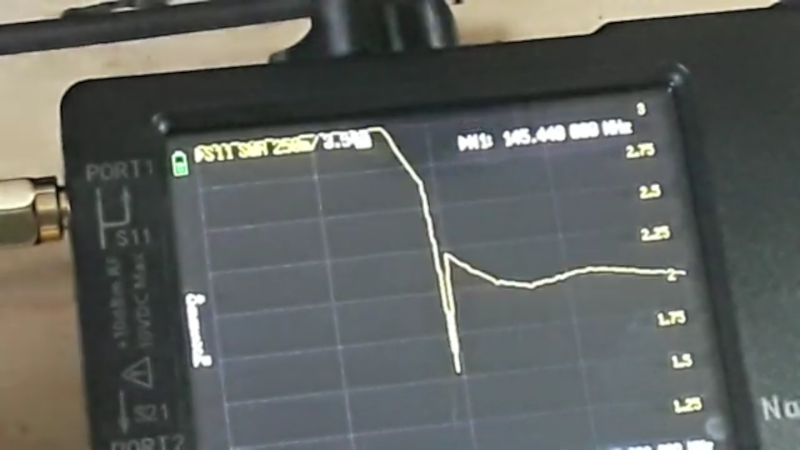
When you buy a cheap ham radio handy-talkie, you usually get a little “rubber ducky” antenna with it. You can also buy many replacement ones that are at least longer. But how good are they? [Learnelectronics] wanted to know, too, so he broke out his NanoVNA and found out that they were all bad, although some were worse than others. You can see the results in the — sometimes fuzzy — video below.

Of course, bad is in the eye of the beholder and you probably suspected that most of them weren’t super great, but they do seem especially bad. So much so, that, at first, he suspected he was doing something wrong. The SWR was high all across the bands the antennas targeted.

It won’t come as a surprise to find that making an antenna work at 2 meters and 70 centimeters probably isn’t that easy. In addition, it is hard to imagine the little stubby antenna the size of your thumb could work well no matter what. Still, you’d think at least the longer antennas would be a little better.

Hams have had SWR meters for years, of course. But it sure is handy to be able to connect an antenna and see its performance over a wide band of frequencies. Some of the antennas weren’t bad on the UHF band. That makes sense because the antenna is physically larger but at VHF the size didn’t seem a big difference.

He even showed up a little real-world testing and, as you might predict, the test results did not lie. However, only the smallest antenna was totally unable to hit the local repeater.

Of course, you can always make your own antenna. It doesn’t have to take much.

Responsive LCD Backlights With A Little Lateral Thinking

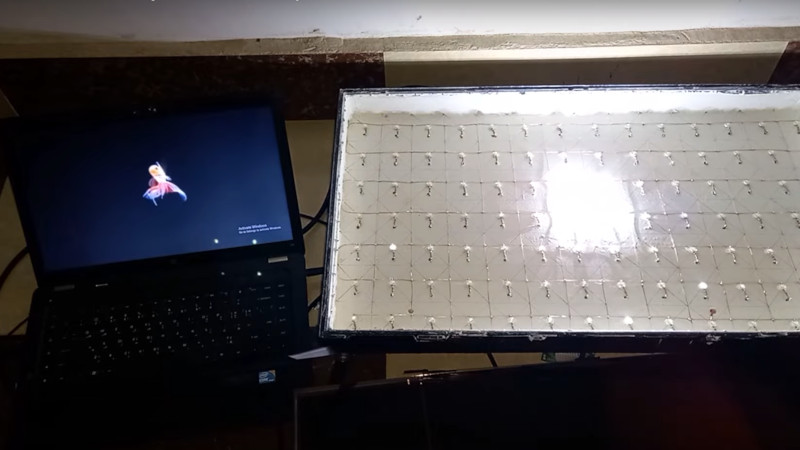
LCD televisions are a technological miracle, but if they have an annoying side it’s that some of them are a bit lacklustre when it comes to displaying black. [Mousa] has a solution, involving a small LCD and a bit of lateral thinking.

These screens work by the LCD panel being placed in front of a bright backlight, and only letting light through at bright parts of the picture. Since LCD isn’t a perfect attenuator, some of the light can make its way through, resulting in those less than perfect blacks. More recent screens replace the bright white backlight with an array of LEDs that light up with the image, but the electronics to make that happen are not exactly trivial.

The solution? Find a small LCD panel and feed it from the same HDMI source as a big panel. Then place an array of LDRs on the front of the small LCD, driving an array of white LEDs through transistor drivers to make a new responsive backlight. We’re not sure we’d go to all this trouble, but it certainly looks quite cool as you can see below the break.

This may be the first responsive backlight we’ve brought you, but more than one Ambilight clone has graced these pages.

FLOSS Weekly Episode 790: Better Bash Scripting with Amber

This week Jonathan Bennett and Dan Lynch chat with Paweł Karaś about Amber, a modern scripting language that compiles into a Bash script. Want to write scripts with built-in error handling, or prefer strongly typed languages? Amber may be for you!

https://github.com/Ph0enixKM/Amber
https://amber-lang.com/
https://docs.amber-lang.com/

Did you know you can watch the live recording of the show Right on our YouTube Channel? Have someone you’d like use to interview? Let us know, or contact the guest and have them contact us! Take a look at the schedule here.

Direct Download in DRM-free MP3.

If you’d rather read along, here’s the transcript for this week’s episode.

Places to follow the FLOSS Weekly Podcast:

The ErgO Ring Makes Computer Interactions Comfortable

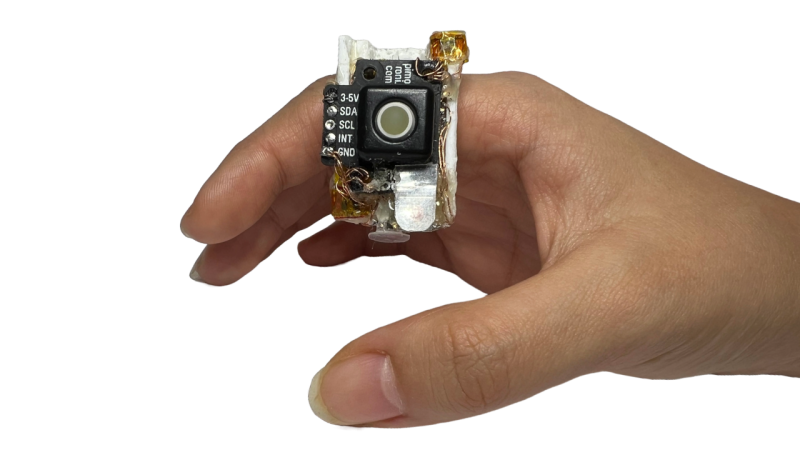
The ring shown on someone's index finger

[Sophia Dai] brings us a project you will definitely like if you’re tired of traditional peripherals like a typical keyboard and mouse combo. This is ErgO, a smart ring you can build out of a few commonly available breakouts, and it keeps a large number of features within a finger’s reach. The project has got an IMU, a Pimoroni trackball, and a good few buttons to perform actions or switch modes, and it’s powered by a tiny Bluetooth-enabled devboard so it can seamlessly perform HID device duty.

While the hardware itself appears to be in a relatively early state, there’s no shortage of features, and the whole experience looks quite polished. Want to lay back in your chair yet keep scrolling the web, clicking through links as you go? This ring lets you do that, no need to hold your mouse anymore, and you can even use it while exercising. Want to do some quick text editing on the fly? That’s also available; the ErgO is designed to be used for day to day tasks, and the UX is thought out well. Want to use it with more than just your computer? There is a device switching feature. The build instructions are quite respectable, too – you can absolutely build one like this yourself, just get a few breakouts, a small battery, some 3D printed parts, and find an evening to solder them all together. All code is on GitHub, just like you would expect from a hack well done.

Looking for a different sort of ring? We’ve recently featured a hackable cheap smart ring usable for fitness tracking – this one is a product that’s still being reverse-engineered, but it’s alright if you’re okay with only having an accelerometer and a few optical sensors.

Lasers Al Fresco: Fun with Open-Cavity Lasers

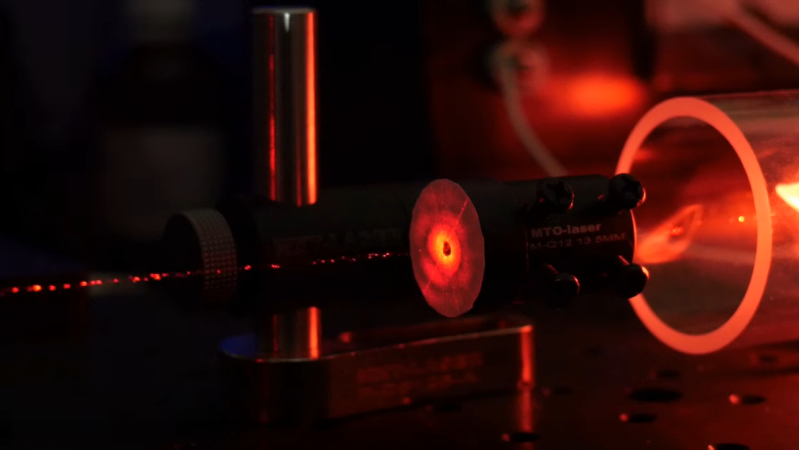
Helium-neon lasers may be little more than glorified neon signs, but there’s just something about that glowing glass tube that makes the whole process of stimulated emission easier to understand. But to make things even clearer, you might want to take a step inside the laser with something like [Les Wright]’s open-cavity He-Ne laser.

In most gas lasers, the stimulated emission action takes place within a closed optical cavity, typically formed by a glass tube whose ends are sealed with mirrors, one of which is partially silvered. The gas in the tube is stimulated, by an electrical discharge in the case of a helium-neon laser, and the stimulated photons bounce back and forth between the mirrors until some finally blast out through the partial mirror to form a coherent, monochromatic laser beam. By contrast, an open-cavity laser has a gas-discharge tube sealed with the fully silvered mirror on one end and a Brewster window on the other, which is a very flat piece of glass set at a steep angle to the long axis of the tube and transparent to p-polarized light. A second mirror is positioned opposite the Brewster window and aligned to create a resonant optical cavity external to the tube.

To switch mirrors easily, [Les] crafted a rotating turret mount for six different mirrors. The turret fits in a standard optical bench mirror mount, which lets him precisely align the mirror in two dimensions. He also built a quick alignment jig, as well as a safety enclosure to protect the delicate laser tube. The tube is connected to a high-voltage supply and after a little tweaking the open cavity starts to lase. [Les] could extend the cavity to almost half a meter, although even a waft of smoke was enough obstruction to kill the lasing at that length.

If this open-cavity laser arrangement seems familiar, it might be because [Les] previously looked at an old-school particle counter with such a laser at its heart.

Everyone Needs a 1950s Signal Generator in their Life

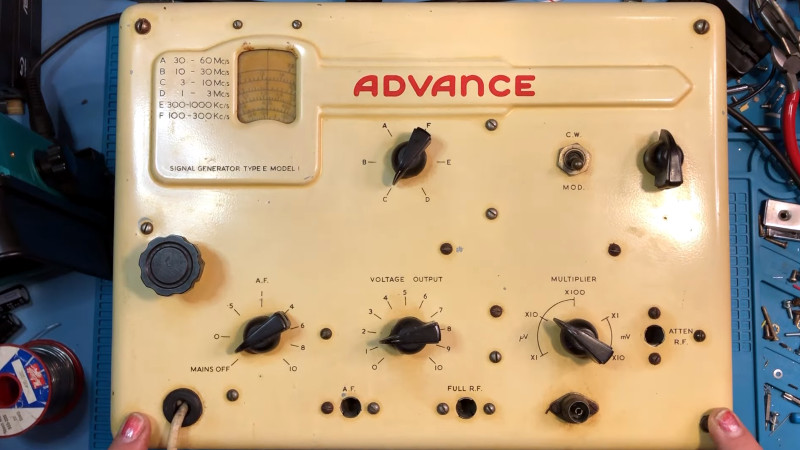
At Hackaday, we comb the world of tech in search of good things to bring you. Today’s search brought up something very familiar, [Jazzy Jane] has an Advance E1 tube signal generator, the same model as the unit on the shelf above where this is being written. It’s new to her, so she’s giving it a teardown and fixing any safety issues before powering it on.

For a 70+ year old unit, the quality of these instruments was such that they remain useful and reliable to this day. Unsurprisingly a few things need looking at, such as an aged mains lead and a pair of filter caps in the power supply which haven’t aged well. These parts failed on the E1 here too, and while she’s taking the time to order appropriate replacements we have to admit to being cheapskates and robbing parts with an appropriate working voltage for ours from a nearby PC power supply.

Where this one becomes rather interesting is in an extra switch and socket. It’s a wafer switch with a load of capacitors, and the best guess is it provides some adjustability for the inbuilt audio oscillator which had a fixed frequency on stock models. This is part one of a series though, so we’re looking forward to finding out its purpose in the next installment. Take a look at the video below the break, and if that’s not enough, we seem to have had more than one piece of vintage British test equipment here of late.

Google Drive Now Bootable

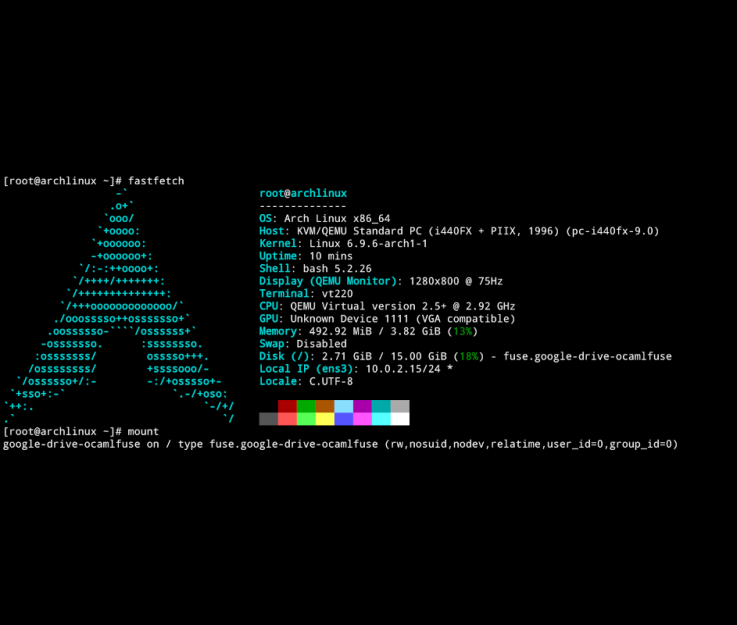
USB drives are incredibly useful, both storing files for transport between different computers and for creating bootable drives that let us use or install other operating systems on our computers. While online file storage systems like Dropbox and Google Drive have taken over a large percentage of the former task from USB drives, they have not been able to act as bootable media, ensuring that each of us have a few jump drives lying around. That might not be the case anymore, though, as this guide is the first we know of to be able to use Google Drive to boot to a Linux system.

Unlike the tried-and-true jump drive methods, however, this process is not straightforward at all. It relies on two keys, the first of which is FUSE which allows a filesystem to be created in userspace. The second is exploiting a step in boot process of Linux systems where the kernel unpacks a temporary filesystem, called initramfs, in order to load the real filesystem. Normally a user doesn’t interact much with this step, but that doesn’t mean it’s impossible. A tool called dracut allows using an existing Linux installation to build a custom initramfs and in this case, the custom initramfs is built to include the proper support for both networking and FUSE.

The proof of concept in this demonstration originally ran in a container, using an existing project called google-drive-ocamlfuse to interact with Google Drive itself. From there, after sorting out some issues with root access, networking, malfunctioning symlinks, and various timeouts on the (perhaps predictably) slow system, the whole contraption was moved over to a laptop so it could be tested on real hardware. Everything runs, and although the original creator of this behemoth admits it is a bit “silly” they note that there may be some real-world use cases for something like this. We still won’t expect everyone to throw out their jump drives anytime soon, though. If you’re not feeling like your Linux skills are up to the challenge of something like this, we’d recommend you start with our own [Al Williams]’s Linux Fu series.

Instant Filament Drying Satisfies an Immediate Need

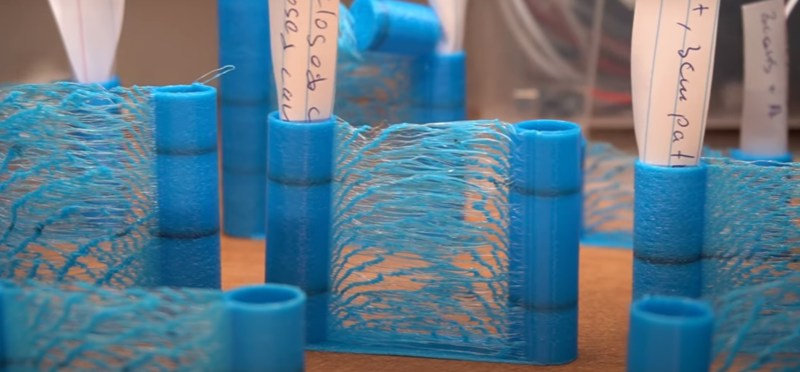
Most 3D printer filament soaks up water from the air, and when it does, the water passing through the extruder nozzle can expand, bubble, and pop, causing all kinds of mayhem and unwanted effects in the print. This is why reels come vacuum sealed. Some people 3D print so much that they consume a full roll before it can soak up water and start to display these effects. Others live in dry climates and don’t have to worry about humidity. But the rest of us require a solution. To date, that solution has been filament dryers, which are heated elements in a small reel-sized box, or for the adventurous an oven put at a very specific temperature until the reel melts and coats the inside of the oven. The downside to this method is that it’s a broad stroke that takes many hours to accomplish, and it’s inefficient because one may not use the whole roll before it gets soaked again.

In much the same way that instant water heaters exist to eliminate the need for a water heater, [3DPI67] has a solution to this problem, and it involves passing the filament through a small chamber with a heating element and fan circulating air. The length of the chamber is important, as is the printing speed, since the filament needs to have enough time in the improvised sauna to sweat out all its water weight. The temperature of the chamber can’t get above the glass transition temperature of the filament, either, which is another limiting factor for the dryer. [3DPI67] wrote up a small article on his improvised instant filament heater in addition to the video.

So far, only TPU has been tested with this method, but it looks promising. Some have suggested a larger chamber with loops of filament so that more can be exposed for longer. There’s lots of room for innovation, and it seems some math might be in order to determine the limits and optimizations of this method, but we’re excited to see the results.

Putting Some Numbers on Your NEMAs

It’s official: [Engineer Bo] wins the internet with a video titled “Finding NEMA 17,” wherein he builds a dynamometer to find the best stepper motor in the popular NEMA 17 frame size.

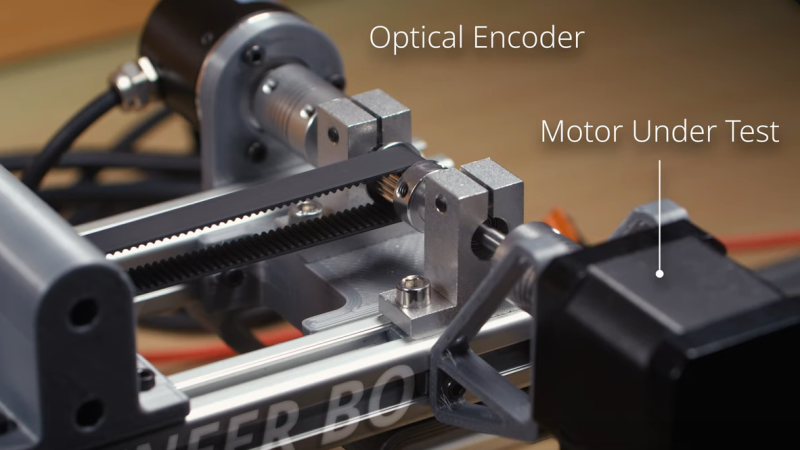
Like a lot of subjective questions, the only correct answer to which stepper is best is, “It depends,” and [Bo] certainly has that in mind while gathering the data needed to construct torque-speed curves for five samples of NEMA 17 motors using his homebrew dyno. The dyno itself is pretty cool, with a bicycle disc brake to provide drag, a load cell to measure braking force, and an optical encoder to measure the rotation of the motor under test. The selected motors represent a cross-section of what’s commonly available today, some of which appear in big-name 3D printers and other common applications.

[Bo] tested each motor with two different drivers: the TMC2209 silent driver to start with, and because he released the Magic Smoke from those, the higher current TB6600 module. The difference between the two drivers was striking, with lower torque and top speeds for the same settings on each motor using the TB6600, as well as more variability in the data. Motors did better across the board with the TBC6600 at 24 volts, showing improved torque at higher speeds, and slightly higher top speeds. He also tested the effect of microstepping on torque using the TBC6600 and found that using full steps resulted in higher torque across a greater speed range.

At the end of the day, it seems as if these tests say more about the driver than they do about any of the motors tested. Perhaps the lesson here is to match the motor to the driver in light of what the application will be. Regardless, it’s a nice piece of work, and we really appreciate the dyno design to boot — reminds us of a scaled-down version of the one [Jeremey Fielding] demonstrated a few years back.

Keebin’ with Kristina: the One with the Tasty Snacks Board

Illustrated Kristina with an IBM Model M keyboard floating between her hands.

A pocket cyberdeck-looking thing with a screen and a thumb keyboard.
Image by [MakerM0] via Hackaday.IO
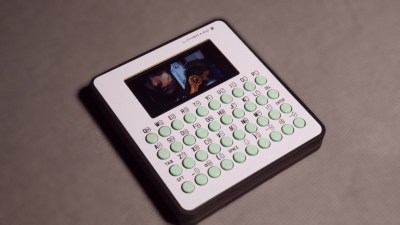
[MakerM0]’s LangCard is an entry into our 2024 Business Card Challenge that just so happens to fit the Keebin’ bill as well.

You might label this a pocket cyberdeck, and that’s just fine with me. The idea here is to have a full-keyboard development board for learning programming languages like CircuitPython, MicroPython, C++, and so on, wherever [MakerM0] happens to be at a given moment.

Open up the LangCard and you’ll find an RP2040 and a slim LiPo battery. I’m not sure what display that is, but there are probably a few that would work just fine were you to make one of these fun learning devices for yourself.

Calling All Tiny Keyboard Makers!

A very small keyboard with some coins and a 3D-printed piggy bank for size comparison.
Image by [sporewoh] via KBD
It seems that [sporewoh], who has been featured here before for building magnificent tiny keyboards, is holding a tiny keyboard design contest, which is being sponsored by PCBWay.

All the rules and such are available over on GitHub. Basically, you need to create a new design, publish the open-source design somewhere along with the source files, and, ideally, build a functional prototype. Entries are made official by sharing in the appropriate channel of [sporewoh]’s Discord.

Entries will be scored on novelty and innovation, size/portability, viability, reproducibility, and presentation. Submissions aren’t due until September 10th, so you have a bit of time to really think about what you’re going to do. The prizes include PCBWay credits as well as kits designed by [sporewoh]. How small can you go and still be able to type at least 20 WPM? That’s a requirement, by the way.

The Centerfold: It’s a Tasty Snacks Board

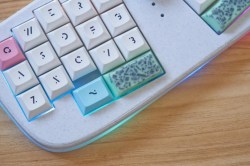
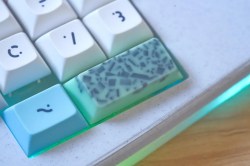
Le Chiffre 3D-printed small keyboard with mint chocolate chip space bars and a Ring Pop knob. Up close on the spacebar of a Le Chiffre 3D-printed small keyboard with mint chocolate chip space bars and a Ring Pop knob. Way up close on the spacebar of a Le Chiffre 3D-printed small keyboard with mint chocolate chip space bars and a Ring Pop knob. Up close on the Ring Pop knob of a Le Chiffre 3D-printed small keyboard with mint chocolate chip space bars and a Ring Pop knob. Ring Pop knob on a Le Chiffre 3D-printed small keyboard with mint chocolate chip space bars.

That’s right; we’ve got a gallery this time. I simply couldn’t decide which picture best conveyed the deliciousness of this thing. I mean, the first shot is a good thought, but you really don’t get right away that it’s a Ring Pop knob, and that’s vitally important information.

Anyway, this is a Le Chiffre that has been quite smoothly 3D-printed in marble filament. [CattiDaddi] says they got that by using a matte print bed. I wish I knew what keycaps those are, because that is a sneaky typeface they have going.

Do you rock a sweet set of peripherals on a screamin’ desk pad? Send me a picture along with your handle and all the gory details, and you could be featured here!

Historical Clackers: the Forgotten History of Chinese Keyboards

Four images showing the detail and output of the Chinese IPX keyboard.
The IPX keyboard. Image via IEEE Spectrum

Here is quite an interesting bit of history as it relates to China’s ability to survive the ravages of time, which pivots on their use of character-based script.

The story begins with a talk that took place decades ago, and follows the path of one audience member who came to change the course of Chinese keyboard history — a Taiwanese cadet named Chan-hui Yeh.

After graduating with a B.S. in electrical engineering, Yeh went on to earn an M.S. in nuclear engineering and a Ph.D. in electrical engineering. He then joined IBM, although it wasn’t to revolutionize Chinese text technologies; he was helping to develop computational simulations for large-scale manufacturing plants. But the talk stuck with him.

Yeh eventually quit his job and developed the IPX keyboard, which had 160 main keys with 15 characters each. A daughter keyboard was used to choose the character on a given key, and there were nearly 120 levels of “Shift” to change all the 160 keys’ character assignments.

See that picture with the spiral-bound book? The 160 keys are underneath the book, and the user presses the pages to access the pressure pads beneath. The booklets had up to eight pages, each with 2,400 characters. The total number of potential symbols was just under 20,000.

The IPX keyboard is just the first of three interesting inputs described within this history. You owe it to yourself to devote time to reading this one.

Thanks to [juju] for sending this in!

ICYMI: One-Handed Keyboard Does It Without Chording

A pair of hands using a one-handed keyboard and a trackball mouse.
Image by [Dylan Turner] via Hackaday.IO
Usually when we talk about operating an entire keyboard with one hand and leaving the other free for mousing or holding a beer, chording — pressing multiple keys at once like on a piano — is very much on the table. Keyboards like the Infogrip BAT come to mind.

But that isn’t always the case. Take for example the one-handed PCD Maltron, which I think must have inspired [Dylan Turner]’s one-handed keyboard.

[Dylan]’s design puts 75 keys in close reach of one hand’s worth of fingers, and doesn’t let the thumb off easy like on a standard keyboard. All the Function keys are  there, and the arrow keys are in a familiar layout. There is even an Insert/Delete cluster. Everything is up on GitHub if you want to make your own.


Got a hot tip that has like, anything to do with keyboards? Help me out by sending in a link or two. Don’t want all the Hackaday scribes to see it? Feel free to email me directly.

Fork! Ladybird Browser and SerenityOS To Go Separate Ways

In the monthly Ladybird Browser update video which we’ve placed below, SerenityOS founder [Andreas Kling] announced an interesting development. The browser has been forked from the OS that has been its progenitor, and both projects will now proceed separately. This frees the browser from the SerenityOS insistence on avoiding external libraries, and allows it to take advantage of stable, fast, and mature open source alternatives. This is already paying dividends in compatibility and speed, and is likely to lead further towards a usable everyday browser as time goes by.

As the world of fully-featured web browser engines has contracted from a number of different projects to little more than Google’s Blink and Mozilla’s Gecko, Ladybird has found itself in an unexpected position. It is vital that the browser market retains some competition and does not become a Google monoculture, so while it might not seem so at first glance, the news of Ladybird going alone has the potential to be one of the most far-reaching open source stories of the year.

If you’d like to try Ladybird you’ll have to get your hands slightly dirty and build it yourself, but we’d expect ready-built versions to appear in due course. We took a look at an earlier version of Ladybird last year, as well as SerenityOS itself.

Meccano-based Hellschreiber Machine

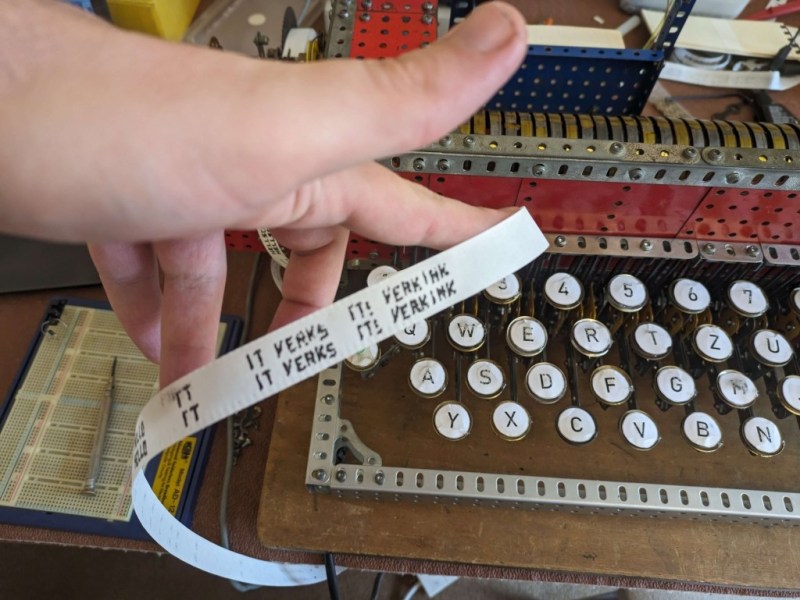
[ZXGuesser] has pulled off a true feat of Meccano engineering: building a Meccano Hellschreiber machine. The design is a close replica of the original Siemens Feld-Hell machine as documented here. What is Hellschreiber, you might ask? It’s a very neat method of sending written messages over the air by synchronizing a printing wheel on the receiving end with pulses generated on the transmitter. By quickly moving the print wheel up and down, arbitrary figures can be printed out. If you want to learn more about Hellschreiber, check out this excellent Hackaday post from almost a decade ago!

The Mastodon thread linked above goes into more detail about the difficulty in building this behemoth — and the slight regret of sticking with the authentic QWERTZ keyboard layout! In order to use the Hellschreiber mode, you have to keep up a steady rhythm of typing at about 2.5 characters per second, otherwise, the receiving end will see randomly spaced gaps between each letter. So while having to type at a steady speed [ZXGuesser] also had to work with a slightly different keyboard layout. Despite this difficulty, some very good quality output was generated!

Incredibly, the output looks just like the output from the original, century-old design. We think this is an absolutely incredible accomplishment, and we hope [ZXGuesser] doesn’t follow through on disassembling this amazing replica — or if they do, we hope it’s documented well enough for others to try their hand at it!

Thanks [BB] for the tip!

So Much Going On In So Few Components: Dissecting A Microwave Radar Module

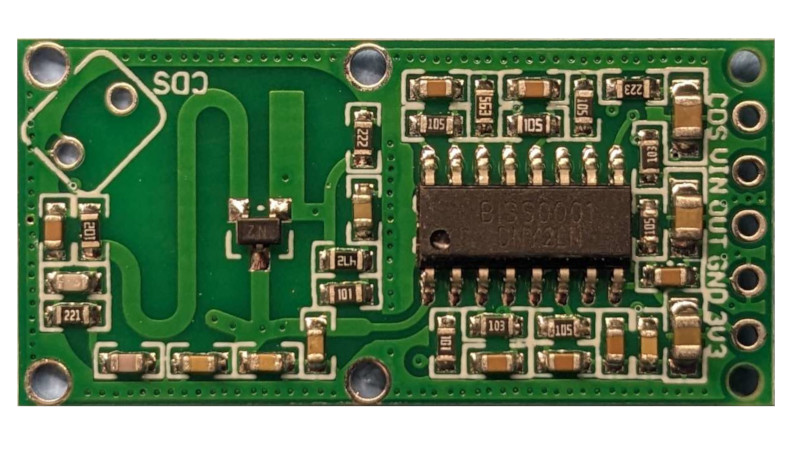
In the days before integrated circuits became ubiquitous, providing advanced functionality in a single package, designers became adept at extracting the maximum use from discrete components. They’d use clever circuits in which a transistor or other active part would fulfill multiple roles at once, and often such circuits would need more than a little know-how to get working. It’s not often in 2024 that we encounter this style of circuit, but here’s [Maurycy] with a cheap microwave radar module doing just that.

On the board is an RF portion with a single transistor, some striplines, and an SOIC chip. Oddly this last part turns out to be an infra-red proximity sensor chip, so what’s going on? Careful analysis of the RF circuit reveals something clever. As expected, it’s a 3.18 GHz oscillator, but how is it functioning as both transmitter and receiver? The answer comes in the form of a resistor and capacitor in the emitter circuit, which causes the transistor to also oscillate at about 20 kHz. The result is that at different times in the 20 kHz period, the transistor is either off, fully oscillating at 3.18GHz and transmitting, or briefly in the not-quite-oscillating state between the two during which it functions as a super-regenerative receiver. This is enough for one device to effectively transmit and receive at the same time with the minimum of parts, there’s no need for a mixer diode as you might expect if it were it a direct conversion receiver. Perhaps in RF terms, it’s not particularly pretty, but we have to admit to being impressed by its simplicity. He goes on to perform a few experiments with the board as a transmitter or as a more conventional radar.

This isn’t the first such radar module we’ve looked at, here’s one designed from scratch. And we love regens, since they are so simple to build.

A DIY Proximity Sensor, Using Just Scrap Parts and Software

[mircemk] shows how to create a simple non-contact proximity sensor using little more than an Arduino Nano board, and a convenient software library intended to measure the value of capacitors.

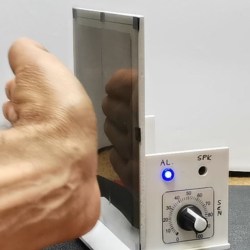
The prototype has a threshold set via potentiometer for convenience.

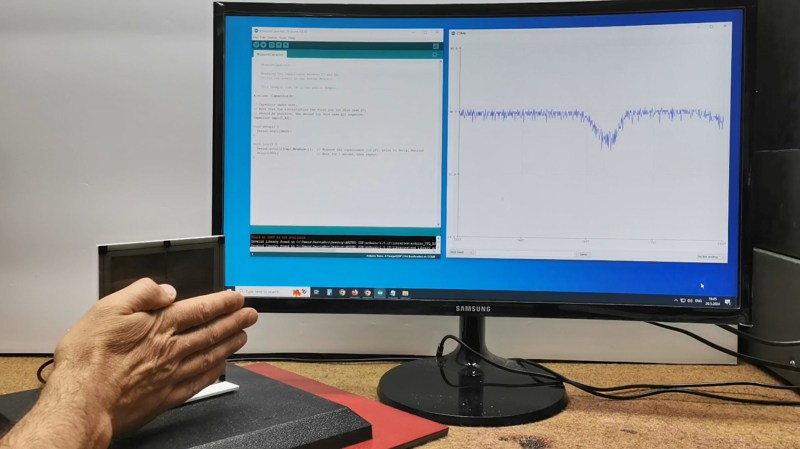
The basic idea is that it’s possible to measure a capacitor’s capacitance using two microcontroller pins and the right software, so by using a few materials to create an open-style capacitor, one can monitor it for changes and detect when anything approaches enough to alter its values past a given threshold, creating a proximity sensor.

The sensor shown here is essentially two plates mounted side-by-side, attached to an Arduino Nano using the Capacitor library which uses just two pins, one digital and one analog.

As configured, [mircemk]’s sensor measures roughly thirty picofarads, and that value decreases when approached by something with a dielectric constant that is different enough from the air surrounding the sensor. The sensor ignores wood and plastic, but an approaching hand is easily detected. The sensor also detects liquid water with similar ease, either in the form of pooled liquid, or filled bottles.

We’ve also seen a spring elegantly used as a hidden touch sensor that works through an enclosure’s wall by using similar principles, so the next time you need a proximity or touch-sensitive sensor in a project, reaching for the junk box might get you where you need to go. Watch [mircemk]’s sensor in action in the video, just below the page break.

Split A USB-C PD Port Into Three Port-ions

The splitter with a 3D-printed case and three yellow cables coming out of it, powering two phones and one powerbank at the same time

There’s no shortage of USB-C chargers in all sorts of configurations, but sometimes, you simply need a few more charging ports on the go, and you got a single one. Well then, check out [bluepylons]’s USB-C splitter, which takes a single USB-C 5V/3A port and splits it into three 5V/1A plugs, wonderful for charging a good few devices on the go!

This adapter does things right – it actually checks that 3A is provided, with just a comparator, and uses that to switch power to the three outputs, correctly signalling to the consumer devices that they may consume about 1A from the plugs. This hack’s documentation is super considerate – you get detailed instructions on how to reproduce it, every nuance you might want to keep in mind, and even different case options depending on whether you want to pot the case or instead use a thermal pad for a specific component which might have to dissipate some heat during operation!

This hack has been documented with notable care for whoever might want to walk the journey of building one for themselves, so if you ever need a splitter, this one is a wonderful weekend project you are sure to complete. Wonder what kind of project would be a polar opposite, but in all the best ways? Why, this 2kW USB-PD PSU, most certainly.

An IBM M2 Keyboard Lives Again

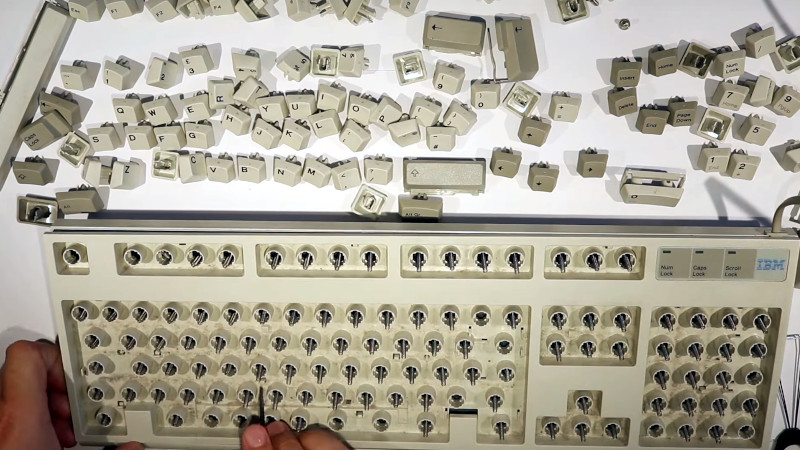
There’s a mystique in old keyboard circles around the IBM Model M, the granddaddy of PC keyboards with those famous buckling spring key switches. The original Model M was a substantial affair with a sheet metal backplane that would probably serve well as a weapon in a zombie apocalypse and still allow writing a Hackaday piece afterward, but later on in the life of these ‘boards there was also a lighter version. The M2 as these models are dubbed has a few known problems, and [Anders Nielsen] scored one online that turned out to have dodgy capacitors. His video, below the break, takes us through the disassembly of his M2 and provides a relaxing tour of these not-quite-so-famous peripherals.

As you’d expect, three-decade-old plastic isn’t always in the best shape, so disassembly and unlatching all those little tabs has to be performed with care. The keys come off and the springs are on show, but we get a nasty shock when they all fall out of place as the top is removed. It appears the rookie mistake is to not turn the ‘board upside down before parting it. Replacing the caps is an easy process after all that, and we get a little dive into the 6805 processors used in model Ms.

If you have a model M of any description then you’re probably at home with the clack-clack-clack sound they make, but have you ever looked at its ancestor, the model F?

Almost Google Glass in 1993

You might think Google Glass was an innovative idea, but [Allison Marsh] points out that artist [Lisa Krohn] imagined the Cyberdesk in 1993. Despite having desk in the name, the imagined prototype was really a wearable computer. Of course, in 1993, the technology wasn’t there to actually build it, but it does look like [Krohn] predicted headgear that would augment your experience.

Unlike Google Glass, the Cyberdesk was worn like a necklace. There are five disk-like parts that form a four-key keyboard and something akin to a trackpad. There were two models built, but since they were nonfunctional, they could have any imagined feature you might like. For example, the system was supposed to draw power from the sun and your body, something practical devices today don’t really do, either.

She also imagined a wrist-mounted computer with satellite navigation, a phone, and more. Then again, so did [Chester Gould] when he created Dick Tracy. The post also talks about a more modern reimagining of the Cyberdesk last year.

While this wasn’t a practical device, it is a great example of how people imagine the future. Sometimes, they miss the mark, but even then, speculative art and fiction can serve as goals for scientists and engineers who build the actual devices of the future.

We usually think about machines augmenting our intelligence and senses, but maybe we should consider more physical augmentation. We do appreciate seeing designs that are both artistic and functional.

❌