Vista de Lectura

Hay nuevos artículos disponibles. Pincha para refrescar la página.

Machining Copper from Algaecide

We love it when we find someone on the Internet who has the exact same problem we do and then solves it. [Hyperspace Pirate] starts a recent video by saying, “Oh no! I need to get rid of the algae in my pond, but I bought too much algaecide. If only there were a way to turn all this excess into CNC machined parts.” OK, we’ll admit that we don’t actually have this problem, but maybe you do?

Algaecide is typically made with copper sulfate. There are several ways to extract the copper, and while it is a little more expensive than buying copper, it is cost-competitive. Electrolysis works, but it takes a lot of power and time. Instead, he puts a more reactive metal in the liquid to generate a different sulfate, and the copper should precipitate out.

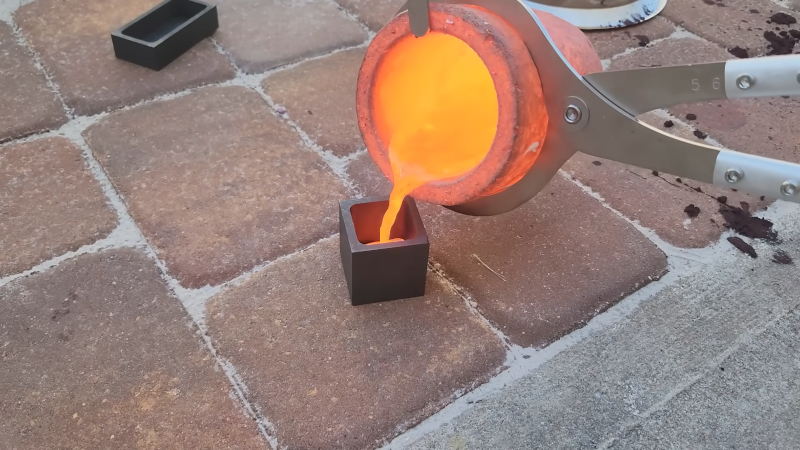
As you might expect, the details are the problem here. He first tried scrap steel. It worked, but it took a long time. He switched to aluminum, which was faster but required some salt to strip off the oxide. Once he had 1 kg of copper, it was time to heat it up.

Melting it was another set of issues and solutions. He eventually gets a reasonable cube of copper. Then it was off to the CNC mill, which had its own set of issues. But in the end, it looked OK. Some chemical aging made it look interesting.

Honestly, maybe just buy copper, but it sure was interesting and educational watching it all work. As a bonus, he took the copper dust from machining and converted it back into copper sulfate, completing the circle.

Usually, our chemical interest in copper is making it go away. Or plating it onto something.

Magnesium and Copper Makes an Emergency Flashlight

Many of us store a flashlight around the house for use in emergency situations. Usually, regular alkaline batteries are fine for this task, as they’ll last a good few years, and you remember to swap them out from time to time. Alternatively, you can make one that lasts virtually indefinitely in storage, and uses some simple chemistry, as [JGJMatt] demonstrates.

The flashlight uses 3D printing to create a custom battery using magnesium and copper as the anode and cathode respectively. Copper tape is wound around a rectangular part to create several cathode plates, while magnesium ribbon is affixed to create the anodes. Cotton wool is then stuffed into the 3D-printed battery housing to serve as a storage medium for the electrolyte—in this case, plain tap water.

The custom battery is paired with a simple LED flashlight circuit in its own 3D-printed housing. The idea is that when a blackout strikes, you can assemble the LED flashlight with your custom battery, and then soak it in water. This will activate the battery, producing around 4.5 V and 20 mA to light the LED.

It’s by no means going to be a bright flashlight, and realistically, it’s probably less reliable than just keeping a a regular battery-powered example around. Particularly given the possibility of your homebrew battery corroding over the years unless it’s kept meticulously dry. But that’s not to say that water-activated batteries don’t have their applications, and anyway it’s a fun project that shows how simple batteries really are at their basic level. Consider it as a useful teaching project if you have children interested in science and electricity!

DIY Spacer Increases FDM Flow Rate for Faster, Better Printing

The host of problems to deal with when you’re feeling the need for FDM speed are many and varied, but high on the list is figuring out how to melt filament fast enough to accommodate high flow rates. Plus, the filament must be melted completely; a melty outside and a crunchy inside might be good for snacks, but not for 3D printing. Luckily, budget-minded hobbyists can build a drop-in booster to increase volumetric flow using only basic tools and materials.

[aamott]’s booster, which started life as a copper screw, is designed to replace the standard spacer in an extruder, with a bore that narrows as the filament gets closer to the nozzle to ensure that the core of the filament melts completely. Rather than a lathe, [aamott]’s main tool is a drill press, which he used to drill a 0.7 mm bore through the screw using a PCB drill bit. The hole was reamed out with a 10° CNC engraving bit, generating the required taper. After cutting off the head of the screw and cleaning up the faces, he cut radial slots into the body of the booster by threading the blade of a jeweler’s saw into the bore. The result was a bore wide enough to accept the filament on one end, narrowing to a (roughly) cross-shaped profile at the other.

Stacked up with a couple of knock-off Bondtech CHT nozzles, the effect of the booster was impressive — a 50% increase in flow rate. It’s not bad for a prototype made with simple tools, and it looks a little easier to build than [Stefan]’s take on the same idea.

❌