Review: iFixit’s FixHub May Be The Last Soldering Iron You Ever Buy
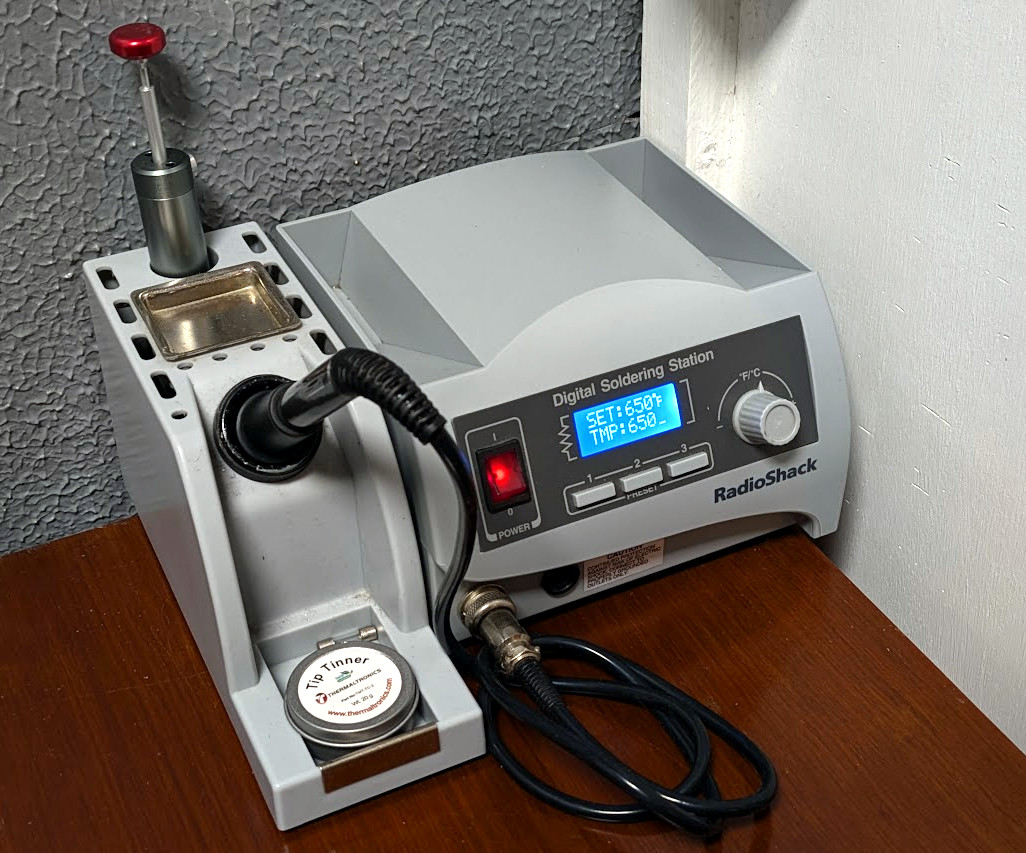
Like many people who solder regularly, I decided years ago to upgrade from a basic iron and invest in a soldering station. My RadioShack digital station has served me well for the better part of 20 years. It heats up fast, tips are readily available, and it’s a breeze to dial in whatever temperature I need. It’s older than both of my children, has moved with me to three different homes, and has outlived two cars and one marriage (so far, anyway).
As such, when the new breed of “smart” USB-C soldering irons started hitting the scene, I didn’t find them terribly compelling. Oh sure, I bought a Pinecil. But that’s because I’m an unrepentant open source zealot and love the idea that there’s a soldering iron running a community developed firmware. In practice though, I only used the thing a few times, and even then it was because I needed something portable. Using it at home on the workbench? It just never felt up to the task of daily use.
So when iFixit got in contact a couple weeks back and said they had a prototype USB-C soldering iron they wanted me to take a look at, I was skeptical to say the least. But then I started reading over the documentation they sent over, and couldn’t deny that they had some interesting ideas. For one, it was something of a hybrid iron. It was portable when you needed it to be, yet offered the flexibility and power of a station when you were at the bench.
Even better, they were planning on putting their money where their mouth is. The hardware was designed with repairability in mind at every step. Not only was it modular and easy to open up, but the company would be providing full schematics, teardown guides, and spare parts.
Alright, fine. Now you’ve got my attention.
Best of Both Worlds
Before we get too much farther, I should clarify that the FixHub is technically two separate devices. Officially iFixit calls the combo a “Portable Soldering System” in their documentation, which is made up of the Smart Soldering Iron and the Portable Power Station. While they are designed to work best when combined, both are fully capable of working independently of each other.
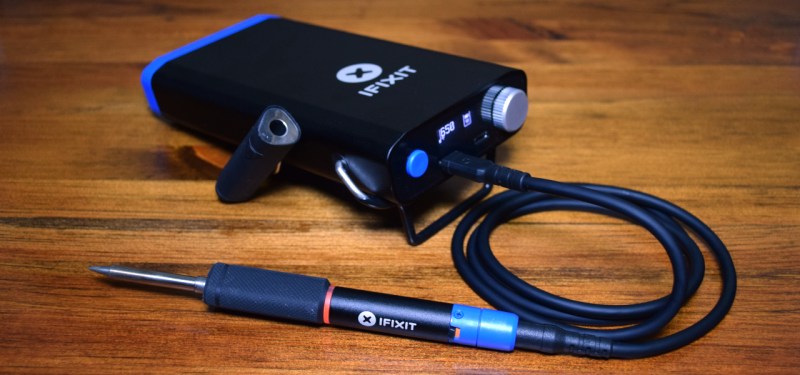
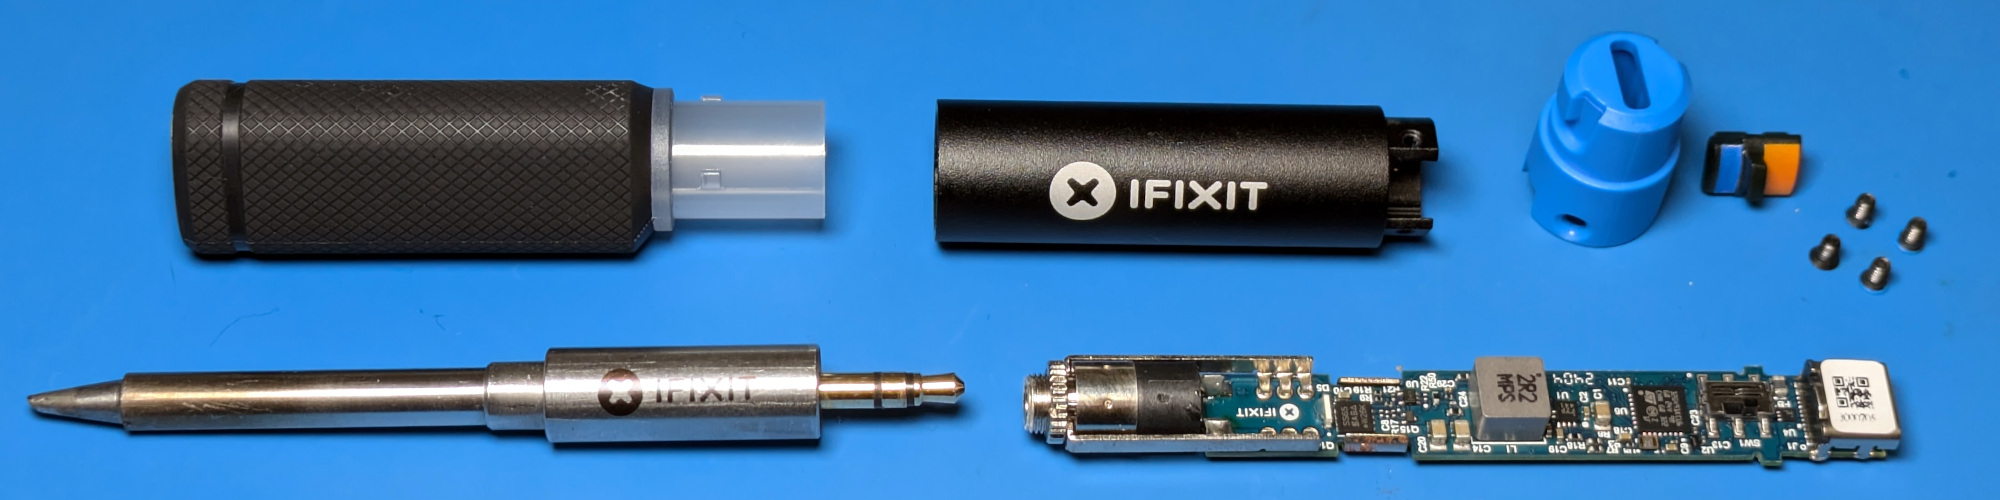
Smart Soldering Iron
The star of the show is, of course, the Smart Soldering Iron. It’s a 100 watt iron that comes up to operating temperature in under five seconds and can work with any suitably beefy USB-C Power Delivery source. The size and general proportions of the iron are very close to the Pinecil V2, though the grip is larger and considerably more comfortable to hold. The biggest difference between the two however is the absence of a display or configuration buttons. According to iFixit, most users don’t change their settings enough to justify putting the interface on the iron itself. That doesn’t mean you can’t tweak the iron’s settings when used in this stand-alone configuration, but we’ll get back to that in a minute.
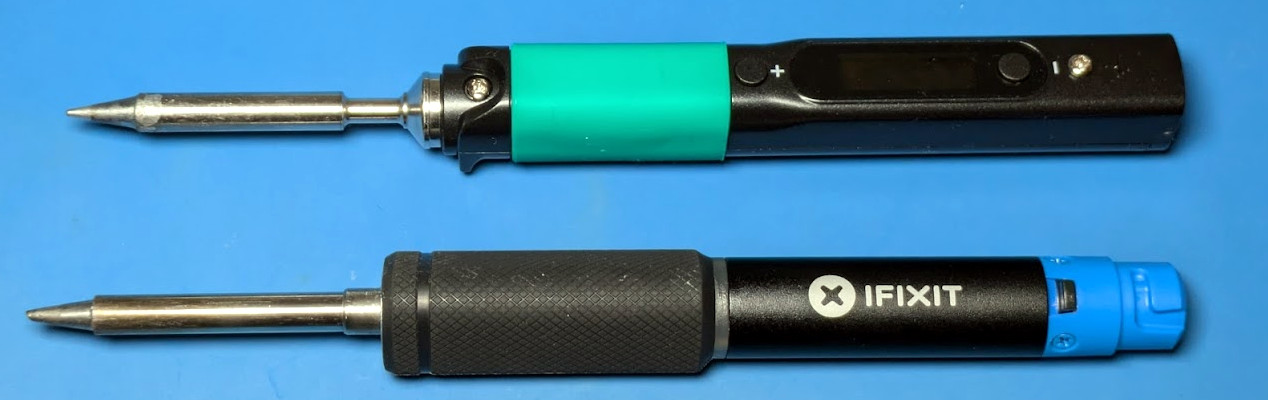
The only control on the iron is a slide switch on the tail end that cuts power to the heating element. I like this arrangement a lot more than the software solution used on irons like the Pinecil. The click of the switch just feels more reliable than having to hold down a button and hoping the iron’s firmware understands that I want to turn the thing off and not adjust some setting. Of course, this is still a “smart” iron, so naturally there’s also support for accelerometer based idle and sleep modes that you can enable.
While there’s no display, the illuminated ring behind the grip does provide a visual indicator of what the iron is doing: solid blue means it has power but the heating element is off, a pulsing blue indicates the iron is heating, and orange means it has reached the desired temperature. If you flick the heater switch off, the ring pulses purple until it cools back off and returns to blue. It’s a simple and effective system, but the visual distinction between the blue and purple isn’t great. Would love to see the ability to customize these colors in a future firmware update.
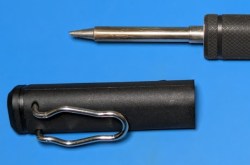
The iron has a couple of clever portability features for those who often find themselves hacking on the go. The magnetic cap can be placed over the tip even when it’s hot, which means you don’t need to wait for the iron to cool down before you pack it away in your bag. The included USB-C cable also comes with a locking collar that mates with the groves in the tail of the iron — this keeps the cable from pulling out if you’ve got yourself contorted into some weird angle, but doesn’t prevent you from using your own cable should you want.
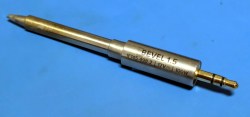
As for the tip, it can be easily removed without tools and uses a 3.5 mm TRS plug like the Miniware TS80, although I don’t have a TS80 handy to test if the tips are actually compatible. For their part, iFixit says they plan on offering an array of styles and sizes of tips in addition to the 1.5 mm bevel that the Smart Soldering Iron ships with.
Portable Power Station
While it’s not required to use the Smart Soldering Iron, for the best experience, you’ll want to spring for the Portable Power Station. It’s essentially a 5,200 mAh battery bank capable of powering devices at 100 W, with a single USB-C port on the back for charging and two on the front for whatever devices you want to plug into it.
The trick is, once the Station detects you’ve plugged a Smart Soldering Iron into it, you’re given the ability to configure it via the OLED screen and rotary encoder on the front of the device. There’s even support for connecting a pair of Smart Soldering Irons to the Station, each with its own independent configuration. Though in that case, both would have to share the total 100 W output.
Assuming a single Smart Soldering Iron, iFixit says you should expect to get up to eight hours of runtime from the Portable Power Station. Of course there are a lot of variables involved, so your mileage may vary. If you’re spending most of your time at the bench, you can keep the rear USB-C port connected to a Power Delivery charger and use it more or less like a traditional station.
The Internet of Irons
Plugging the Smart Soldering Iron into the Power Station is the most obvious way of tweaking its various settings, but as I mentioned earlier, it’s not the only way.
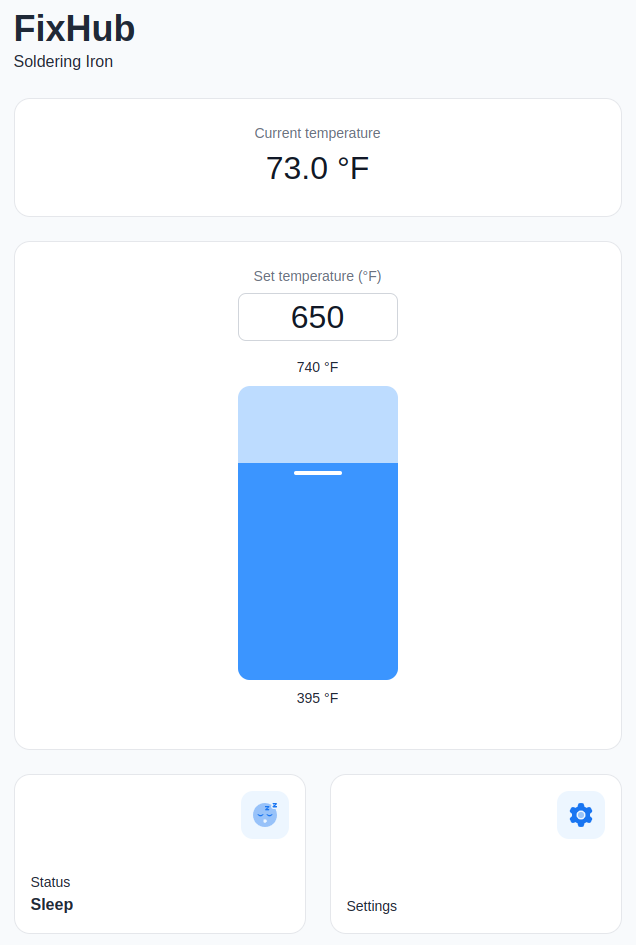
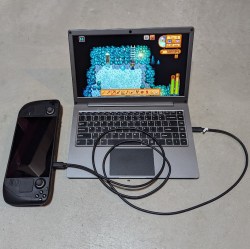
Maybe you don’t want to buy the Station, or you left it at home. In either event, you can simply plug the iron into your computer and configure it via WebSerial.
You’ll need a browser based on Chrome to pull this trick off, as Mozilla has decided (at least, for now) to not include the capability in Firefox. In testing, it worked perfectly on both my Linux desktop and Chromebook.
Unfortunately, plugging the iron into your phone won’t work, as the mobile version of Chrome does not currently support WebSerial. But given the vertical layout of the interface and the big touch-friendly buttons, I can only assume that iFixit is either banking on this changing soon or has a workaround in mind. Being able to plug the iron into your phone for a quick settings tweak would be incredibly handy, so hopefully it will happen one way or another.
The WebSerial interface not only gives you access to all the same settings as plugging the iron into the Power Station does, but it also serves as the mechanism for updating the firmware on the iron.
Incidentally, the Power Station has it’s own nearly identical WebSerial interface. Primarily this would be used for upgrading the firmware, but it’s not hard to imagine that some users would prefer being able to change their settings on the big screen rather than having to squint at an OLED not much larger than their thumbnail.
Solder At Your Command
But wait! I hear those gears turning in your head. If the Smart Soldering Iron into the Power Station both feature WebSerial interfaces that let you play around with their settings, does that mean they might also offer a traditional serial interface for you to poke around in?
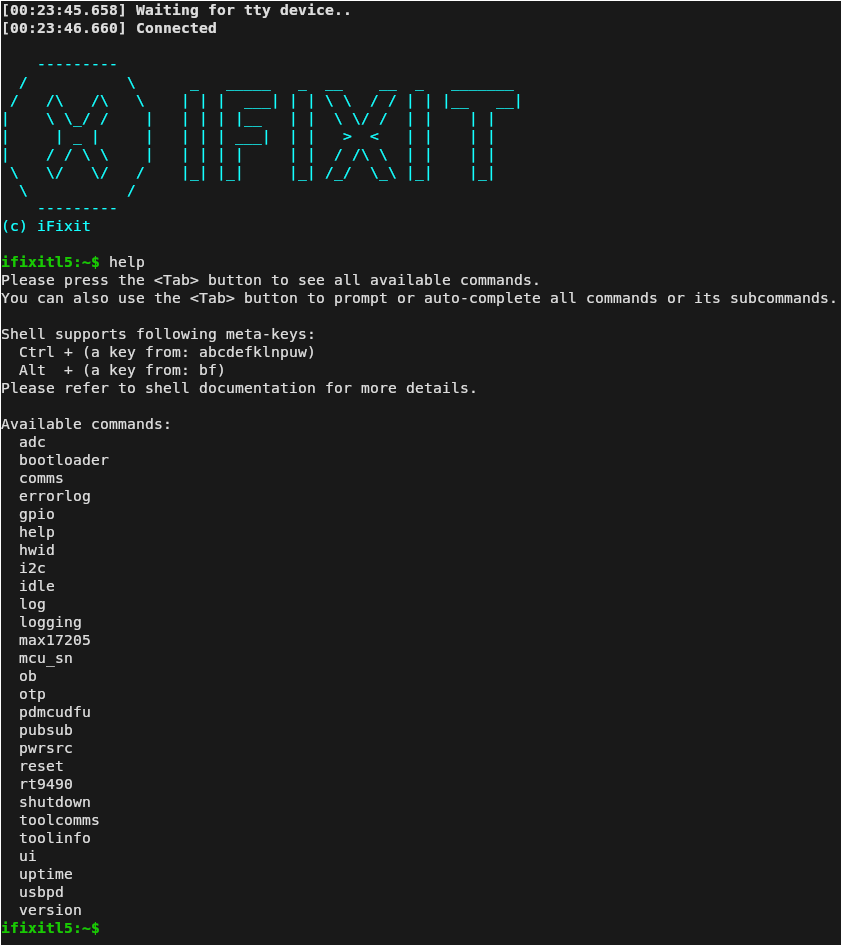
Hell yeah they do!
There was no mention of this terminal interface in any of the documentation I received from iFixit, but thanks to the built-in help function and tab completion, I was able to make my way around the various tools and functions. I never knew how badly I yearned to adjust the temperature on my soldering station from the command line before this moment. There’s clearly a lot of potential here, and I’m really looking forward to seeing what the community can come up given this level of control.
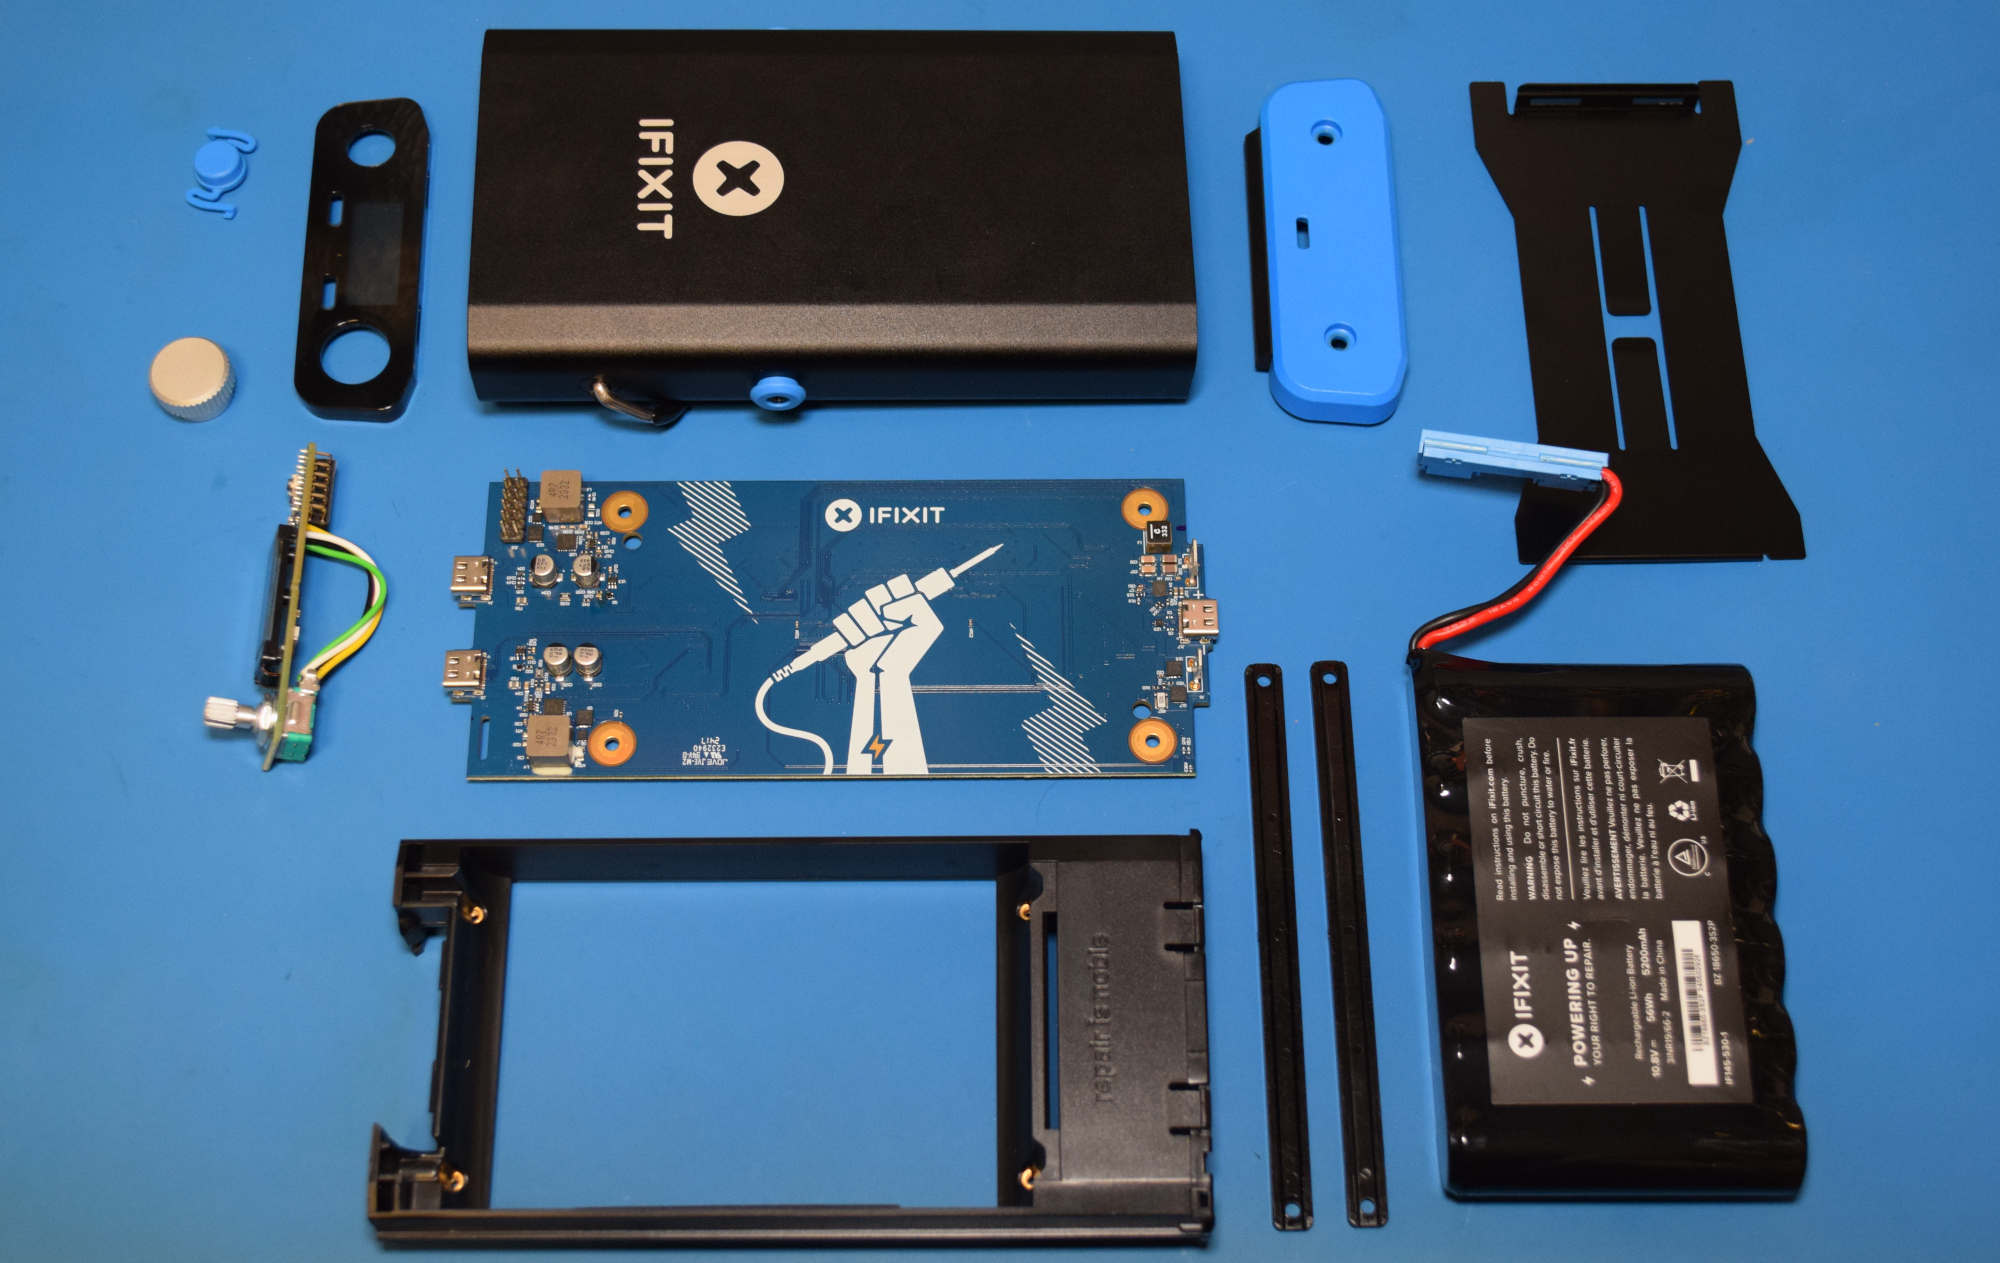
A Look Under the Hood
iFixit offered to give me a peek at the in-development repair guides for the Smart Soldering Iron and the Power Station, but I passed. For one thing, there’s no doubt in my mind that the finished product is going to be phenomenally detailed. Just look at any of their in-house guides, and you’ll know what to expect. But more to the point, I wanted to see how hard it would be to take the two devices apart without any guidance.
I’m happy to report that the iron and its base station are some of the most easily dissembled devices I’ve ever come across. No glue, weird tape, or hidden fasteners. No little plastic tabs that break if you look at them the wrong way. Just two pieces of hardware that were designed and assembled in a logical enough way that you only need to look at them to understand how it all goes together.
Of course, this should come as no surprise. Imagine the mud that would have been slung had iFixit had dropped the ball here. You can’t very well campaign for repairability if you don’t hold your own products to the same standards you do for everyone else. Presumably they designed the Smart Soldering Iron and the Power Station to hit a perfect ten by their published standards, and from what I’ve seen, they nailed it.
I also got a look at the schematics, exploded diagrams, and parts list for both products. Like the repair guides, these won’t be made public until the hardware ships in October. But don’t worry, this isn’t some crowdsource bait-and-switch. They’ve got the goods, and it’s all very impressive.
Now to be clear, we’re not talking open source hardware here. Don’t expect to pull Gerbers from a GitHub repo so you can crank out your own Power Station. But the documentation they’re providing is remarkable for a consumer device. The schematics especially — they’re filled with all sorts of notes in the margins from the engineers which were fascinating to go through.
Investing in the Future
If I’ve not made it abundantly clear so far, iFixit really blew me away with the Portable Soldering System. I knew they would put a solid effort into the product from their reputation alone, but even still, I wasn’t expecting the hardware and software to be this polished. iFixit didn’t just raise the bar, they sent it into orbit.
But all this comes at a price. Literally. The Smart Soldering Iron alone will set you back $79.95, and if you want to get the Power Station along with it, the combo comes in at $249.95. You could get a nice soldering station from Weller or Hakko for half the price. Then again, it’s hard to compare what iFixit is offering here to anything else on the market.
In the end, this is one of those times when you’ve got to decide what’s really important to you. If you just want a quality soldering station, there are cheaper options that will meet all of your needs and then some. But if you want to support a company that’s working to change the status quo, sometimes you’ve got to reach a little deeper into those pockets.