Vista de Lectura

Hay nuevos artículos disponibles. Pincha para refrescar la página.

Ethernet From First Principles
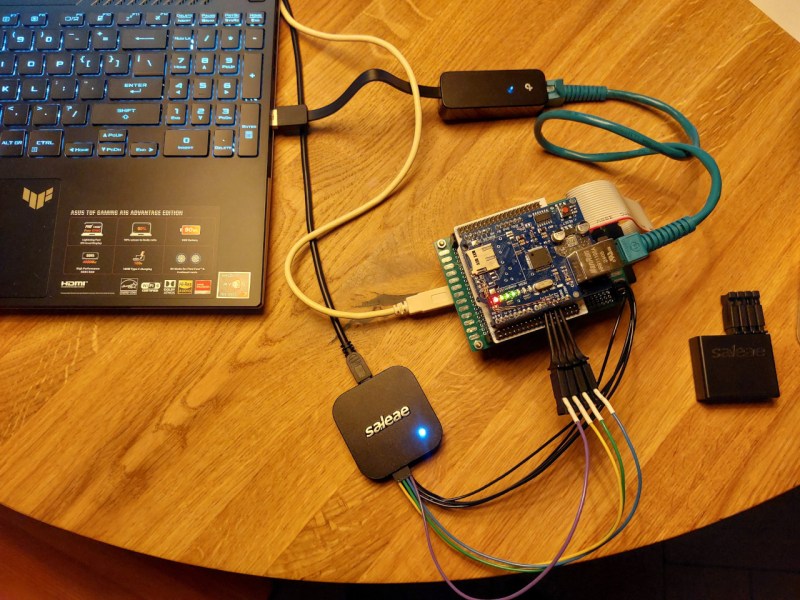
For someone programming in a high-level language like Python, or even for people who interact primarily with their operating system and the software running on it, it can seem like the computer hardware is largely divorced from the work. Yes, the computer has to be physically present to do something like write a Hackaday article, but most of us will not understand the Assembly language, machine code, or transistor layout well enough to build up to what makes a browser run. [Francis Stokes] is a different breed, though, continually probing these mysterious low-level regions of our computerized world where he was recently able to send an Ethernet packet from scratch.

[Francis] is using an STM32F401 development board for his networking experiments, but even with this powerful microcontroller, Ethernet is much more resource-hungry than we might imagine given its ubiquity in the computing world. Most will turn to a dedicated hardware ASIC to get the Ethernet signals out on the wires rather than bit-banging the protocol, so [Francis] armed himself with a W5100 chip to handle this complex task. Since the W5100 was on a board meant for an Arduino, there were a few kinks to work out, including soldering some wires to the chip, and then there were a few more issues with the signaling, including a bug in the code, which was writing too many times to the same memory, causing the received packet to be enormous while also completely full of garbage.

In the end, [Francis] was able to remove all of the bugs from his code, reliably send an Ethernet packet from his development board, and decode it on a computer. This is an excellent deep dive into the world of signalling and networking from the bottom up. He’s done plenty of these types of investigations before as well, including developing his own AES cryptography from scratch.

We’ve looked deeply into Ethernet, too. You can even make it work on an FPGA.

Building a Discrete 14-Bit String DAC

The discrete 14-bit DAC under test. (Credit: Sine Lab, YouTube)

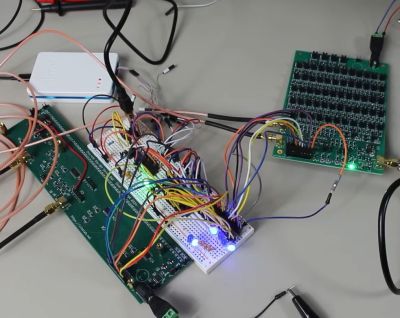
How easy is it to build your own Digital to Analog Converter (DAC)? Although you can readily purchase a wide variety of DACs these days, building your own can be very instructive, as the [Sine Lab] on YouTube explores in a recent video with the construction of a discrete 14-bit DAC. First there are the different architectures you can pick for a DAC, which range from R-2R (resistor ladder) to delta-sigma versions, each having its own level of complexity and providing different response times, accuracy and other characteristics.

The architecture that the [Sine Lab] picked was a String DAC with interpolator. The String type DAC has the advantage of having inherently monotonic output voltage and better switching-induced glitch performance than the R-2R DAC. At its core it still uses resistors and switches (transistors), with the latter summing up the input digital value. This makes adding more bits to the DAC as easy as adding more of these same resistors and switches, the only question is how many. In the case of a String DAC that’d be 2N, which implies that you want to use multiple strings, as in the above graphic.

Scaling this up to 16-bit would thus entail 65,536 resistors/switches in the naive approach, or with 2 8-bit strings 513 switches, 512 resistors and 2 buffers. In the actual design in the video both MOSFETs and 74HCT4051 multiplexers were used, which also necessitated creating two buses per string to help with the input decoding. This is the part where things get serious in the video, but the reasoning for each change and addition is explained clearly as the full 6-bit DAC with interpolator is being designed and built.

One big issue with discrete DACs comes when you have to find matching MOSFETs and similar, which is where LSI DACs are generally significantly more precise. Even so, this discrete design came pretty close to a commercial offering, which is pretty impressive.

3D Printed Hardware Sorter Keeps It Simple

If you’re like us, you’ve got at least one bin dedicated to keeping the random hardware you just can’t bear to part with. In our case it’s mostly populated with the nuts and bolts left over after finishing up a car repair, but however it gets filled, it’s a mess. The degree to which you can tolerate this mess will vary, but for [EmGi], even a moderately untidy pile of bolts was enough to spur this entirely 3D-printed mechanical bolt sorter.

The elements of this machine bear a strong resemblance to a lot of the sorting mechanisms we’ve seen used on automated manufacturing and assembly lines. The process starts with a hopper full of M3 cap head bolts of varying lengths, which are collated by a pair of elevating platforms. These line up the bolts and lift them onto a slotted feed ramp, which lets them dangle by their heads and pushes them into a fixture that moves them through a 90° arc and presents them to a long sorting ramp. The ramp has a series of increasingly longer slots; bolts roll right over the slots until they find the right slot, where they fall into a bin below. Nuts can also feed through the process and get sorted into their own bin.

What we like about [EmGi]’s design is its simplicity. There are no motors, bearings, springs, or other hardware — except for the hardware you’re sorting, of course. The entire machine is manually powered, so you can just grab a handful of hardware and start sorting. True, it can only sort M3 cap head bolts, but we suspect the design could be modified easily for other sizes and styles of fasteners. Check it out in action in the video below.

Just because it’s simple doesn’t mean we don’t like more complicated hardware sorters, like the ones [Christopher Helmke] builds.

Thanks to [john] for the tip.

Custom Fan Controller For Otherwise Fanless PCs

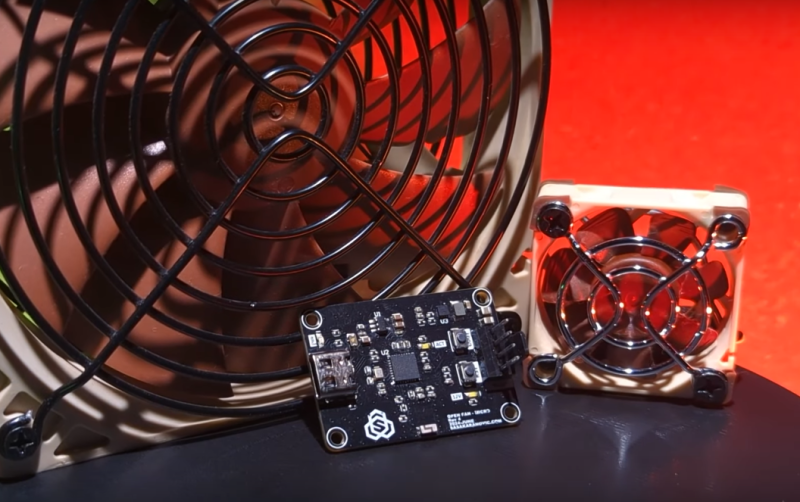
Most of us using desktop computers, and plenty of us on laptops, have some sort of fan or pump installed in our computer to remove heat and keep our machines running at the most optimum temperature. That’s generally a good thing for performance, but comes with a noise pollution cost. It’s possible to build fanless computers, though, which are passively cooled by using larger heat sinks with greater thermal mass, or by building more efficient computers, or both. But sometimes even fanless designs can benefit from some forced air, so [Sasa] built this system for cooling fanless systems with fans.

The main advantage of a system like this is that the fans on an otherwise fanless system remain off when not absolutely necessary, keeping ambient noise levels to a minimum. [Sasa] does have a few computers with fans, and this system helps there as well. Each fan module is WiFi-enabled, allowing for control of each fan on the system to be set up and controlled from a web page. It also can control 5V and 12V fans automatically with no user input, and can run from any USB power source, so it’s not necessary to find a USB-PD-compatible source just to run a small fan.

Like his previous project, this version is built to easily integrate with scripting and other third-party software, making it fairly straightforward to configure in a home automation setup or with any other system that is monitoring a temperature. It doesn’t have to be limited to a computer, either; [Sasa] runs one inside a server cabinet that monitors the ambient temperature in the cabinet, but it could be put to use anywhere else a fan is needed. Perhaps even a hydroponic setup.

A Modern PC With a Retro OS

Despite the rise of ARM processors in more and more computers from embedded systems to daily driver PCs, the x86 architecture maintains a stronghold in the computing space that won’t be going away anytime soon. One of the main drivers of this is its beachhead in industrial systems; the x86 architecture is backwards-compatible farther back than many of us have been alive and in situations where machines need to run for years with minimum downtime it’s good to know you can grab any x86 system off the shelf and it’ll largely work. This is also true for gaming, so if you’re like [Yeo Kheng Meng] and want to run games like DOOM natively on modern hardware it’s certainly possible, although there are a few catches.

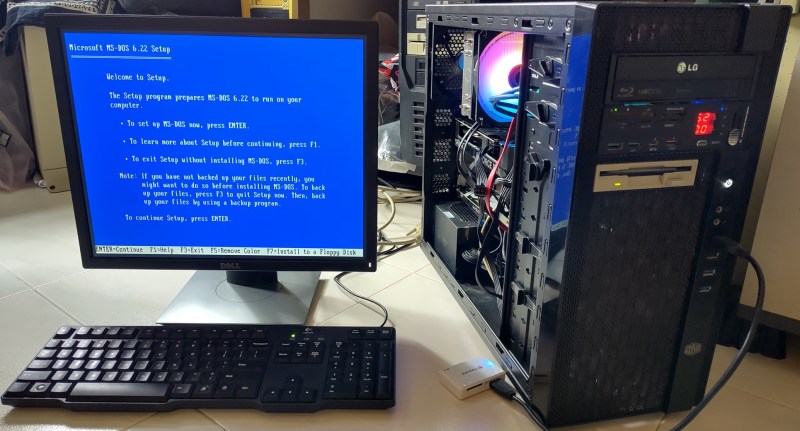
This build goes into the design of a modern AMD Ryzen 5 desktop computer, with all of the components selected specifically for their use running software more than three decades old now. [Yeo Kheng Meng] is targeting DOS 6.22 as his operating system of choice, meaning that modern EFI motherboards won’t necessarily work. He’s turned to business class products as a solution for many of these issues, as motherboards targeting business and industrial customers often contain more support for antiquated hardware like PS/2 and parallel ports while still having modern amenities like DDR5 memory slots. PS/2 ports additionally are an indicator that the motherboard will supports older non-EFI boot modes (BIOS) and can potentially run DOS natively. Everything here can also run modern operating systems, since he isn’t building this system only to run DOS and retro games.

Beyond the motherboard choice, he’s also using a Soundblaster card for audio which is a design choice generally relegated to history, but still used in modern gaming by a dedicated group. There’s also a floppy drive running via a USB header adapter cable. Of course, there are a few problems running DOS and other era-appropriate software natively on such incomprehensibly fast hardware (by early 90s standards). Some video games were hard coded to the processor clock of the x86 process of the era, so increasing the clock speed orders of magnitude results in several playability issues. In emulators it’s easier to provide an artificially slow clock speed, but on real hardware this isn’t always possible. But [Yeo Kheng Meng] has done a lot to get this modern computer running older software like this. Another take we’ve seen for retro gaming on original hardware is this system which uses a brand-new 486 processor meant for use in industrial settings as well.

Rewind Pendant

The Rewind Pendant is an upcoming wearable device that gives you a personalized AI assistant that can understand everything you say and hear. It automatically transcribes, encrypts, and stores conversations and ambient sounds locally on your phone. Key features include automatic to-do list generation from verbal commitments, capturing ideas or memories throughout your day, insights […]

Source

rabbit r1

The Rabbit R1 is a compact AI-powered device that aims to make it easier to interact with the technology you use every day. Equipped with a touchscreen, camera, microphone, and integrated AI assistant, it allows you to perform tasks and access services just by speaking to it. It’s designed to be a voice-first alternative to […]

Source

❌