Vista de Lectura

Hay nuevos artículos disponibles. Pincha para refrescar la página.

A Handheld Gaming PC With Steam Deck Vibes

Since its inception, the Steam Deck has been a bit of a game changer in the PC gaming world. The goal of the handheld console was to make PC gaming as easy and straightforward as a walled-garden proprietary console like a Switch or Playstation but still allow for the more open gaming experience of a PC. At its core, though, it’s essentially a standard PC with the parts reorganized into handheld form, and there’s no reason any other small-form-factor PC can’t be made into a similar system. [CNCDan] has the skills and tools needed to do this and shows us how it’s done.

The build is based around a NUC, a small form factor computer that typically uses the same low-power mobile processors and graphics cards found in laptops but without the built-in battery or screen. This one has an AMD Ryzen 7 processor with Radeon graphics, making it reasonably high-performing for its size. After measuring out the dimensions of the small computer and preparing for other components like the battery, joysticks, buttons, and even a trackpad, it was time to create the case. Instead of turning to a 3D printer, this one is instead milled on a CNC machine. Something tells us that [CNCDan] prefers subtractive manufacturing in general.

With all the parts assembled in the case, the build turns into a faithful Steam Deck replica with a few bonuses, like an exposed Ethernet port and the knowledge that everything can easily be fixed since it was built from the ground up in the first place. The other great thing about builds like these is they don’t need an obscure NUC for the hardware; you can always grab your old Framework mainboard for handheld gaming instead. Reminded us of the NucDeck.
Ethernet From First Principles

For someone programming in a high-level language like Python, or even for people who interact primarily with their operating system and the software running on it, it can seem like the computer hardware is largely divorced from the work. Yes, the computer has to be physically present to do something like write a Hackaday article, but most of us will not understand the Assembly language, machine code, or transistor layout well enough to build up to what makes a browser run. [Francis Stokes] is a different breed, though, continually probing these mysterious low-level regions of our computerized world where he was recently able to send an Ethernet packet from scratch.

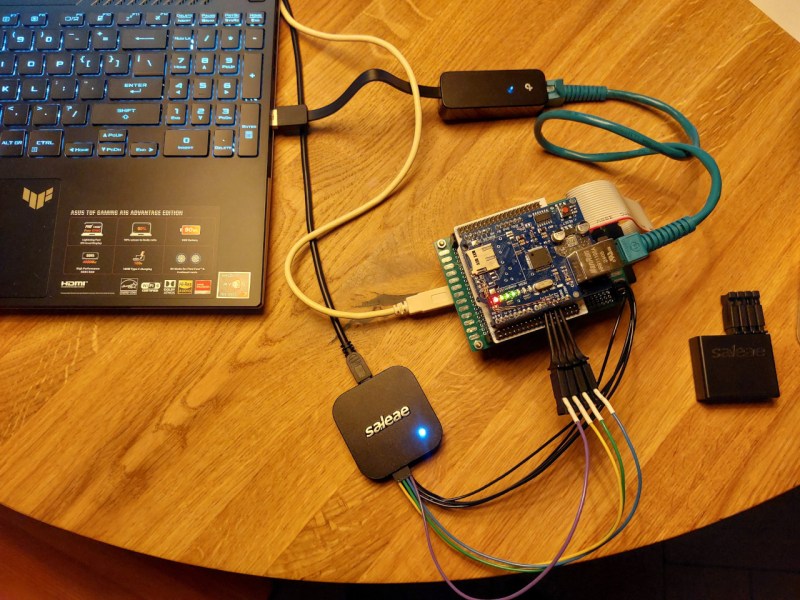
[Francis] is using an STM32F401 development board for his networking experiments, but even with this powerful microcontroller, Ethernet is much more resource-hungry than we might imagine given its ubiquity in the computing world. Most will turn to a dedicated hardware ASIC to get the Ethernet signals out on the wires rather than bit-banging the protocol, so [Francis] armed himself with a W5100 chip to handle this complex task. Since the W5100 was on a board meant for an Arduino, there were a few kinks to work out, including soldering some wires to the chip, and then there were a few more issues with the signaling, including a bug in the code, which was writing too many times to the same memory, causing the received packet to be enormous while also completely full of garbage.

In the end, [Francis] was able to remove all of the bugs from his code, reliably send an Ethernet packet from his development board, and decode it on a computer. This is an excellent deep dive into the world of signalling and networking from the bottom up. He’s done plenty of these types of investigations before as well, including developing his own AES cryptography from scratch.

We’ve looked deeply into Ethernet, too. You can even make it work on an FPGA.

A Tiny Chemistry Lab

While advances in modern technology have allowed average people access to tremendous computing power as well as novel tools like 3D printers and laser cutters for a bare minimum cost, around here we tend to overlook some of the areas that have taken advantage of these trends as well. Specifically in the area of chemistry, the accessibility of these things have opened up a wide range of possibilities for those immersed in this world, and [Marb’s Lab] shows us how to build a glucose-detection lab in an incredibly small form factor.

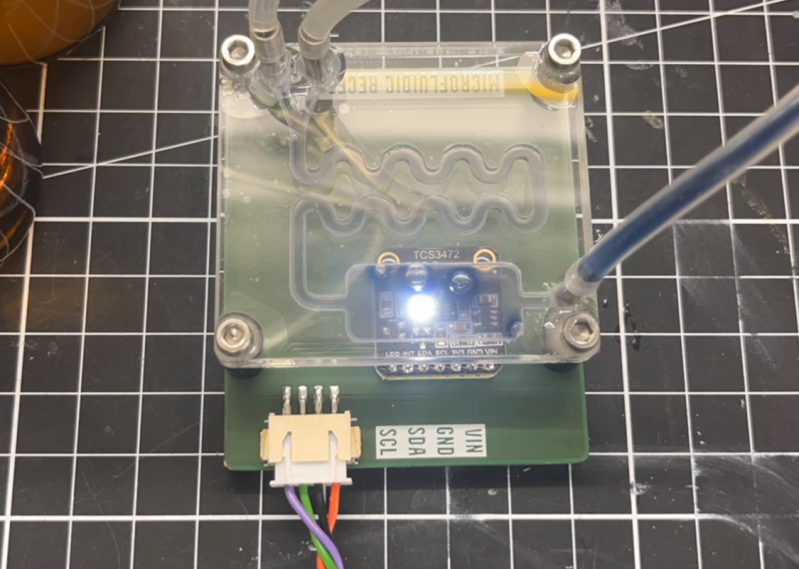
The key to the build is a set of three laser-cut acrylic sheets, which when sandwiched together provide a path for the fluid to flow as well as a chamber that will be monitored by electronic optical sensors. The fluid is pumped through the circuit by a custom-built syringe pump driven by a linear actuator, and when the chamber is filled the reaction can begin. In this case, if the fluid contains glucose it will turn blue, which is detected by the microcontroller’s sensors. The color value is then displayed on a small screen mounted to the PCB, allowing the experimenter to take quick readings.

Chemistry labs like this aren’t limited to one specific reaction, though. The acrylic plates are straightforward to laser cut, so other forms can be made quickly. [Marb’s Lab] also made the syringe pump a standalone system, so it can be quickly moved or duplicated for use in other experiments as well. If you want to take your chemistry lab to the extreme, you can even build your own mass spectrometer.

Using AI To Help With Assembly

Although generative AI and large language models have been pushed as direct replacements for certain kinds of workers, plenty of businesses actually doing this have found that using this new technology can cause more problems than it solves when it is given free reign over tasks. While this might not be true indefinitely, the real use case for these tools right now is as a kind of assistant to certain kinds of work. For this they can be incredibly powerful as [Ricardo] demonstrates here, using Amazon Q to help with game development on the Commodore 64.

The first step here was to generate code that would show a sprite moving across the screen. The AI first generated code in all caps, as was the style at the time of the C64, but in [Ricardo]’s development environment this caused some major problems, so the code was converted to lowercase. A more impressive conversion was done in the next steps, as the program needed to take advantage of the optimizations found in the Assembly language. With the code converted to 6502 Assembly that can run on the virtual Commodore, [Ricardo] was eventually able to show four sprites moving across the screen after several iterations with the AI, as well as change the style of the sprites to arbitrary designs.

Although the post is a bit over-optimistic on Amazon Q as a tool specifically for developers, it might have some benefits over other generative AIs especially if it’s capable at the chore of programming in Assembly language. We’d love to hear anyone with real-world experience with this and whether it is truly worth the extra cost over something like Copilot or GPT 4. For any of these generative AI models, though, it’s probably worth trying them out while they’re in their early stages. Keep in mind that there’s a lot more than programming that can be done with some of them as well.

Disposable Vape Batteries Power eBike

There are a lot of things that get landfilled that have some marginal value, but generally if there’s not a huge amount of money to be made recycling things they won’t get recycled. It might not be surprising to most that this is true of almost all plastic, a substantial portion of glass, and even a lot of paper and metals, but what might come as a shock is that plenty of rechargeable lithium batteries are included in this list as well. It’s cheaper to build lithium batteries into one-time-use items like disposable vape pens and just throw them out after one (or less than one) charge cycle, but if you have some spare time these batteries are plenty useful.

[Chris Doel] found over a hundred disposable vape pens after a local music festival and collected them all to build into a battery powerful enough for an ebike. Granted, this involves a lot of work disassembling each vape which is full of some fairly toxic compounds and which also generally tend to have some sensitive electronics, but once each pen was disassembled the real work of building a battery gets going. He starts with testing each cell and charging them to the same voltage, grouping cells with similar internal resistances. From there he assembles them into a 48V pack with a battery management system and custom 3D printed cell holders to accommodate the wide range of cell sizes. A 3D printed enclosure with charge/discharge ports, a power switch, and a status display round out the build.

With the battery bank completed he straps it to his existing ebike and hits the trails, easily traveling 20 miles with barely any pedal input. These cells are only rated for 300 charge-discharge cycles which is on par for plenty of similar 18650 cells, making this an impressive build for essentially free materials minus the costs of filament, a few parts, and the sweat equity that went into sourcing the cells. If you want to take an ebike to the next level of low-cost, we’d recommend pairing this battery with the drivetrain from the Spin Cycle.\

Thanks to [Anton] for the tip!

https://www.youtube.com/watch?v=VcVp9T8f_W4

The Most Inexpensive Apple Computer Possible

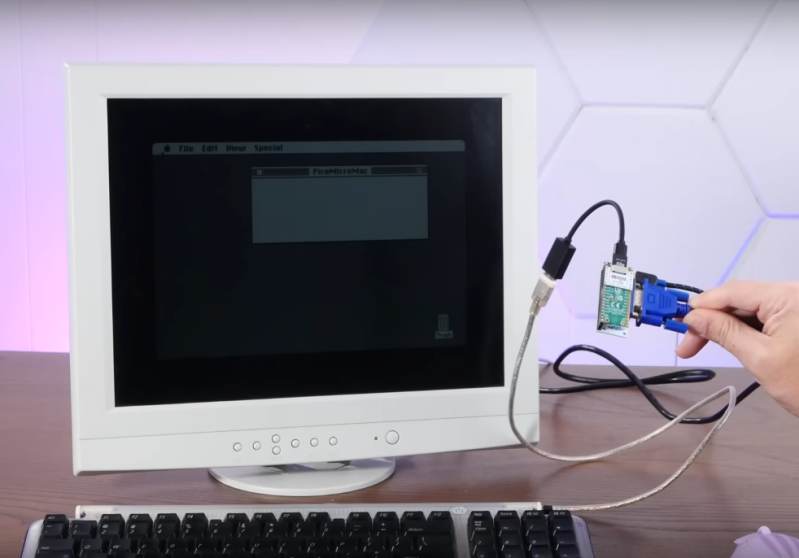
If Apple has a reputation for anything other than decent hardware and excellent industrial design, it’s for selling its products at extremely inflated prices. But there are some alternatives if you want the Apple experience on the cheap. Buying their hardware a few years out of date of course is one way to avoid the bulk of the depreciation, but at the extreme end is this working Mac clone that cost just $14.

This build relies on the fact that modern microcontrollers absolutely blow away the computing power available to the average consumer in the 1980s. To emulate the Macintosh 128K, this build uses nothing more powerful than a Raspberry Pi Pico. There’s a little bit more to it than that, though, since this build also replicates the feel of the screen of the era as well. Using a “hat” for the Pi Pico from [Ron’s Computer Videos] lets the Pico’s remaining system resources send the video signal from the emulated Mac out over VGA, meaning that monitors from the late 80s and on can be used with ease. There’s an option for micro SD card storage as well, allowing the retro Mac to have an incredible amount of storage compared to the original.

The emulation of the 80s-era Mac is available on a separate GitHub page for anyone wanting to take a look at that. A VGA monitor is not strictly required, but we do feel that displaying retro computer graphics on 4K OLEDs leaves a little something out of the experience of older machines like this, even if they are emulated. Although this Macintosh replica with a modern e-ink display does an excellent job of recreating the original monochrome displays of early Macs as well.

Open-Source Robot Transforms

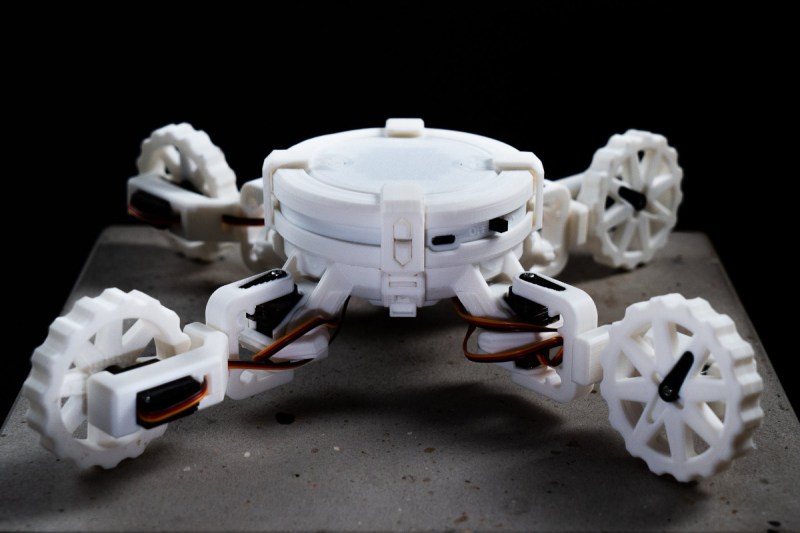
Besides Pokémon, there might have been no greater media franchise for a child of the 90s than the Transformers, mysterious robots fighting an intergalactic war but which can inexplicably change into various Earth-based object, like trucks and airplanes. It led to a number of toys which can also change shapes from fighting robots into various ordinary objects as well. And, perhaps in a way of life imitating art, plenty of real-life robots have features one might think were inspired by this franchise like this transforming quadruped robot.

Called the CYOBot, the robot has four articulating arms with a wheel at the end of each. The arms can be placed in a wide array of positions for different operating characteristics, allowing the robot to move in an incredibly diverse way. It’s based on a previous version called the CYOCrawler, using similar articulating arms but with no wheels. The build centers around an ESP32-S3 microcontroller, giving it plenty of compute power for things like machine learning, as well as wireless capabilities for control or access to more computing power.

Both robots are open source and modular as well, allowing a range of people to use and add on to the platform. Another perk here is that most parts are common or 3d printed, making it a fairly low barrier to entry for a platform with so many different configurations and options for expansion and development. If you prefer robots without wheels, though, we’d always recommend looking at Strandbeests for inspiration.

Few Things Are Cheaper than This Antenna

As far as hobbies go, ham radio tends to be on the more expensive side. A dual-band mobile radio can easily run $600, and a high-end HF base station with the capability of more than 100 watts will easily be in the thousands of dollars. But, like most things, there’s an aspect to the hobby that can be incredibly inexpensive and accessible to newcomers. Crystal radios, for example, can be built largely from stuff most of us would have in our parts drawers, CW QRP radios don’t need much more than that, and sometimes even the highest-performing antennas are little more than two lengths of wire.

For this specific antenna, [W3CT] is putting together an inverted-V which is a type of dipole antenna. Rather than each of the dipole’s legs being straight, the center is suspended at some point relatively high above ground with the two ends closer to the earth. Dipoles, including inverted-Vs, are resonant antennas, meaning that they don’t need any tuning between them and the radio so the only thing needed to match the antenna to the feed line is a coax-to-banana adapter. From there it’s as simple as attaching the two measured lengths of wire for the target band and hoisting the center of the antenna up somehow. In [W3CT]’s case he’s using a mast which would break the $8 budget, but a tree or building will do just as well.

The video on the construction of this antenna goes into great detail, so if you haven’t built a dipole yet or you’re just getting started on your ham radio journey, it’s a great place to get started. From there we’d recommend checking out an off-center-fed dipole which lets a dipole operate efficiently on multiple bands instead of just one, and for more general ham radio advice without breaking the bank we’d always recommend the $50 Ham series.

Pi Pico Lays Down the Groove

From the 60s to perhaps the mid-00s, the path to musical stardom was essentially straight with very few forks. As a teenager you’d round up a drummer and a few guitar players and start jamming out of a garage, hoping to build to bigger and bigger venues. Few people made it for plenty of reasons, not least of which was because putting together a band like this is expensive. It wasn’t until capable electronic devices became mainstream and accepted in popular culture in the last decade or two that a few different paths for success finally opened up, and this groovebox shows just how much music can be created this way with a few straightforward electronic tools.

The groovebox is based on a Raspberry Pi Pico 2 and includes enough storage for 16 tracks with a sequencer for each track, along with a set of 16 scenes. Audio plays through PCM5102A DAC module, with a 160×128 TFT display and a touch-sensitive pad for user inputs. It’s not just a device for looping stored audio, though. There’s also a drum machine built in which can record and loop beats with varying sounds and pitches, as well as a sample slicer and a pattern generator and also as the ability to copy and paste clips.

There are a few limitations to using a device this small though. Because of memory size it outputs a 22 kHz mono signal, and its on-board storage is not particularly large either, but it does have an SD card slot for expansion. But it’s hard to beat the bang-for-the-buck qualities of a device like this, regardless, not to mention the portability. Especially when compared with the cost of multiple guitars, a drum set and a bunch of other analog equipment, it’s easy to see how musicians wielding these instruments have risen in popularity recently. This 12-button MIDI instrument could expand one’s digital musical capabilities even further.

Custom Fan Controller For Otherwise Fanless PCs

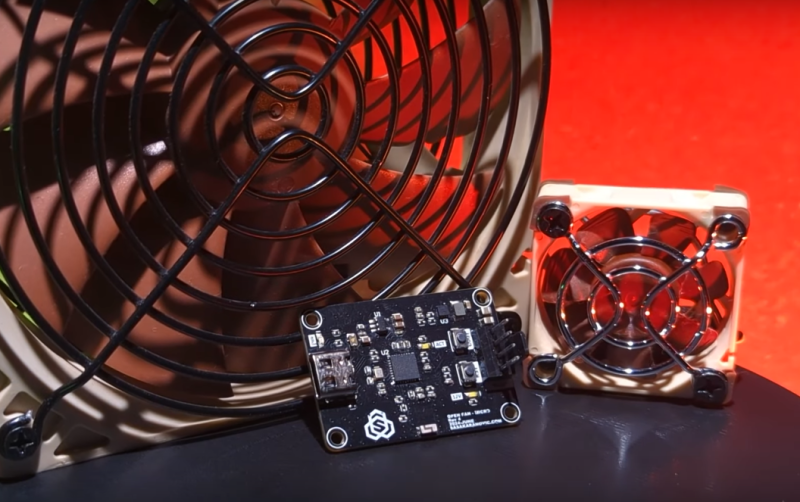
Most of us using desktop computers, and plenty of us on laptops, have some sort of fan or pump installed in our computer to remove heat and keep our machines running at the most optimum temperature. That’s generally a good thing for performance, but comes with a noise pollution cost. It’s possible to build fanless computers, though, which are passively cooled by using larger heat sinks with greater thermal mass, or by building more efficient computers, or both. But sometimes even fanless designs can benefit from some forced air, so [Sasa] built this system for cooling fanless systems with fans.

The main advantage of a system like this is that the fans on an otherwise fanless system remain off when not absolutely necessary, keeping ambient noise levels to a minimum. [Sasa] does have a few computers with fans, and this system helps there as well. Each fan module is WiFi-enabled, allowing for control of each fan on the system to be set up and controlled from a web page. It also can control 5V and 12V fans automatically with no user input, and can run from any USB power source, so it’s not necessary to find a USB-PD-compatible source just to run a small fan.

Like his previous project, this version is built to easily integrate with scripting and other third-party software, making it fairly straightforward to configure in a home automation setup or with any other system that is monitoring a temperature. It doesn’t have to be limited to a computer, either; [Sasa] runs one inside a server cabinet that monitors the ambient temperature in the cabinet, but it could be put to use anywhere else a fan is needed. Perhaps even a hydroponic setup.

Custom Drone Software Searches, Rescues

When a new technology first arrives in people’s hands, it often takes a bit of time before the full capabilities of that technology are realized. In much the same way that many early Internet users simply used it to replace snail mail, or early smartphones were used as more convenient methods for messaging and calling than their flip-phone cousins, autonomous drones also took a little bit of time before their capabilities became fully realized. While some initially used them as a drop-in replacement for things like aerial photography, a group of mountain rescue volunteers in the United Kingdom realized that they could be put to work in more efficient ways suited to their unique abilities and have been behind a bit of a revolution in the search-and-rescue community.

The first search-and-rescue groups using drones to help in their efforts generally used them to search in the same way a helicopter would have been used in the past, only with less expense. But the effort involved is still the same; a human still needed to do the searching themselves. The group in the UK devised an improved system to take the human effort out of the equation by sending a drone to fly autonomously over piece of mountainous terrain and take images of the ground in such a way that any one thing would be present in many individual images. From there, the drone would fly back to its base station where an operator could download the images and run them through a computer program which would analyse the images and look for outliers in the colors of the individual pixels. Generally, humans tend to stand out against their backgrounds in ways that computers are good at spotting while humans themselves might not notice at all, and in the group’s first efforts to locate a missing person they were able to locate them almost immediately using this technology.

Although the system is built on a mapping system somewhat unique to the UK, the group has not attempted to commercialize the system. MR Maps, the software underpinning this new feature, has been free to use for anyone who wants to use it. And for those just starting out in this field, it’s also worth pointing out that location services offered by modern technologies in rugged terrain like this can often be misleading, and won’t be as straightforward of a solution to the problem as one might think.

A Modern PC With a Retro OS

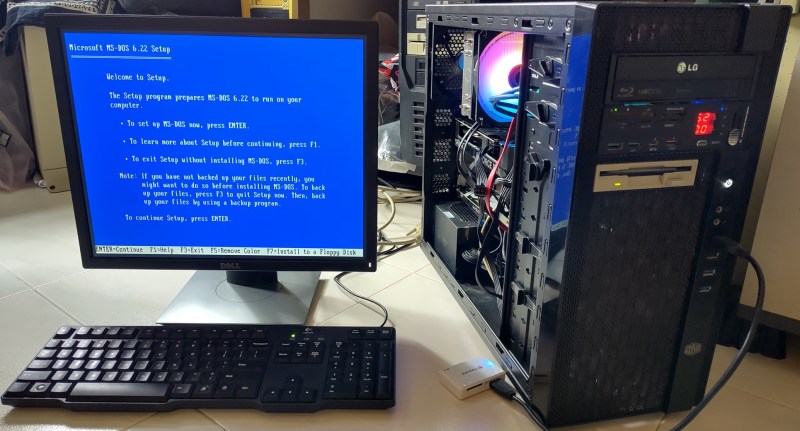
Despite the rise of ARM processors in more and more computers from embedded systems to daily driver PCs, the x86 architecture maintains a stronghold in the computing space that won’t be going away anytime soon. One of the main drivers of this is its beachhead in industrial systems; the x86 architecture is backwards-compatible farther back than many of us have been alive and in situations where machines need to run for years with minimum downtime it’s good to know you can grab any x86 system off the shelf and it’ll largely work. This is also true for gaming, so if you’re like [Yeo Kheng Meng] and want to run games like DOOM natively on modern hardware it’s certainly possible, although there are a few catches.

This build goes into the design of a modern AMD Ryzen 5 desktop computer, with all of the components selected specifically for their use running software more than three decades old now. [Yeo Kheng Meng] is targeting DOS 6.22 as his operating system of choice, meaning that modern EFI motherboards won’t necessarily work. He’s turned to business class products as a solution for many of these issues, as motherboards targeting business and industrial customers often contain more support for antiquated hardware like PS/2 and parallel ports while still having modern amenities like DDR5 memory slots. PS/2 ports additionally are an indicator that the motherboard will supports older non-EFI boot modes (BIOS) and can potentially run DOS natively. Everything here can also run modern operating systems, since he isn’t building this system only to run DOS and retro games.

Beyond the motherboard choice, he’s also using a Soundblaster card for audio which is a design choice generally relegated to history, but still used in modern gaming by a dedicated group. There’s also a floppy drive running via a USB header adapter cable. Of course, there are a few problems running DOS and other era-appropriate software natively on such incomprehensibly fast hardware (by early 90s standards). Some video games were hard coded to the processor clock of the x86 process of the era, so increasing the clock speed orders of magnitude results in several playability issues. In emulators it’s easier to provide an artificially slow clock speed, but on real hardware this isn’t always possible. But [Yeo Kheng Meng] has done a lot to get this modern computer running older software like this. Another take we’ve seen for retro gaming on original hardware is this system which uses a brand-new 486 processor meant for use in industrial settings as well.

Libre Space Foundation Aims to Improve Satellite Tech

There’s no shortage of movies, TV shows, and books that show a dystopian future with corporations run amok in outer space with little or no effective oversight. Dune, The Expanse, and The Dispossessed spring to mind as predicting different aspects of this idea, but there are plenty of other warnings throughout sci-fi depicting this potential future. One possible way of preventing this outcome is by ensuring that space is as open-sourced as possible and one group, the Libre Space Foundation (LSF), is working towards this end. Their latest is a project with Ondsel to develop and model a satellite deploying mechanism using almost entirely open source software.

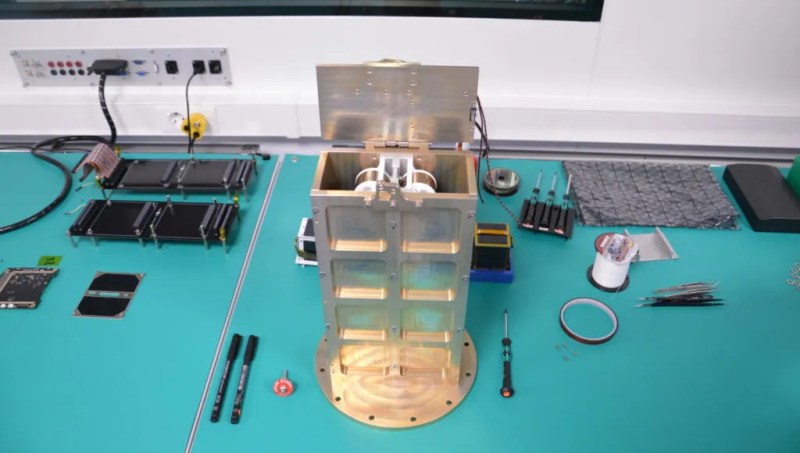
The LSF had already designed the PICOBUS satellite launcher system that flew to space in 2022 and deployed a number of CubeSats, but the group needed more information about how the system would perform. They turned to Ondsel to help develop a multi-body dynamics (MBD) solver, managing simulations with mass-spring-damper models. The satellite launcher includes a large constant-force spring that pushes the CubeSats out of the device once the door is opened, and the model can now simulate their paths in space without gravity. The team will launch their next set of satellites sometime next year on an RFA-ONE rocket.

The LSF maintains a huge database of their open source space projects, including this one, on their GitLab page. Although it might seem like small potatoes now, the adoption of open source software and hardware by space-fairing entities can help further the democratization of low Earth orbit.

Thanks to [johnad] for the tip!

Pac-Man Ghost Helps With Air Quality Sensing

In the past, building construction methods generally didn’t worry much about air quality. There were enough gaps around windows, doors, siding, and flooring that a house could naturally “breathe” and do a decent enough job of making sure the occupants didn’t suffocate. Modern buildings, on the other hand, are extremely concerned with efficiency and go to great lengths to ensure that no air leaks in or out. This can be a problem for occupants though and generally requires some sort of mechanical ventilation, but to be on the safe side and keep an eye on it a CO2 sensor like this unique Pac-Man-inspired monitor can be helpful.

Although there are some ways to approximate indoor air quality with inexpensive sensors, [Tobias] decided on a dedicated CO2 sensor for accuracy and effectiveness, despite its relatively large cost of around $30. An ESP32 handles the data from the sensor and then outputs the results to an array of LEDs hidden inside a ghost modeled after the ones from the classic arcade game Pac-Man. There are 17 WS2812B LEDs in total installed on a custom PCB, with everything held together in the custom 3D printed ghost-shaped case. The LEDs change from green to red as the air quality gets worse, although a few preserve the ghost’s white eyes even as the colors change.

For anyone looking to recreate this project and keep an eye on their own air quality, [Tobias] has made everything from the code, the PCB, and the 3D printer files open source, and has used accessible hardware in the build as well. Although the CO2 sensors can indeed be pricey, there are a few less expensive ways of keeping an eye on indoor air quality. Some of these methods attempt to approximate CO2 levels indirectly, but current consensus is that there’s no real substitute for taking this measurement directly if that’s the metric targeted for your own air quality.

The Design Process For A Tiny Robot Brain

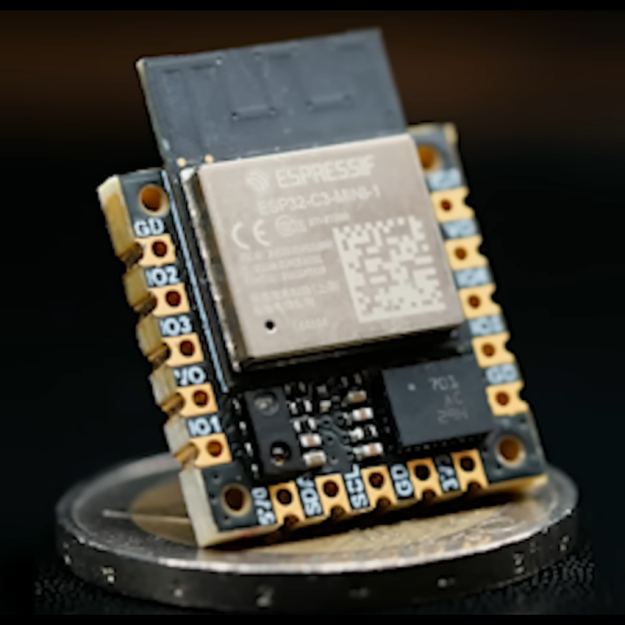
As things get smaller, we can fit more processing power into devices like robots to allow them to do more things or interact with their environment in new ways. If not, we can at least build them for less cost. But the design process can get exponentially more complicated when miniaturizing things. [Carl] wanted to build the smallest 9-axis robotic microcontroller with as many features as possible, and went through a number of design iterations to finally get to this extremely small robotics platform.

Although there are smaller wireless-enabled microcontrollers, [Carl] based this project around the popular ESP32 platform to allow it to be usable by a wider range of people. With that module taking up most of the top side of the PCB, he turned to the bottom to add the rest of the components for the platform. The first thing to add was a power management circuit, and after one iteration he settled on a circuit which can provide the board power from a battery or a USB cable, while also managing the battery’s charge. As for sensors, it has a light sensor and an optional 9-axis motion sensor, allowing for gesture sensing, proximity detection, and motion tracking.

Of course there were some compromises in this design to minimize the footprint, like placing the antenna near the USB-C charger and sacrificing some processing power compared to other development boards like the STM-32. But for the size and cost of components it’s hard to get so many features in such a small package. [Carl] is using it to build some pretty tiny robots so it suits his needs perfectly. In fact, it’s hard to find anything smaller that isn’t a bristlebot.

❌