Vista de Lectura

Hay nuevos artículos disponibles. Pincha para refrescar la página.

Supercon 2024 SAO Petal KiCad Redrawing Project
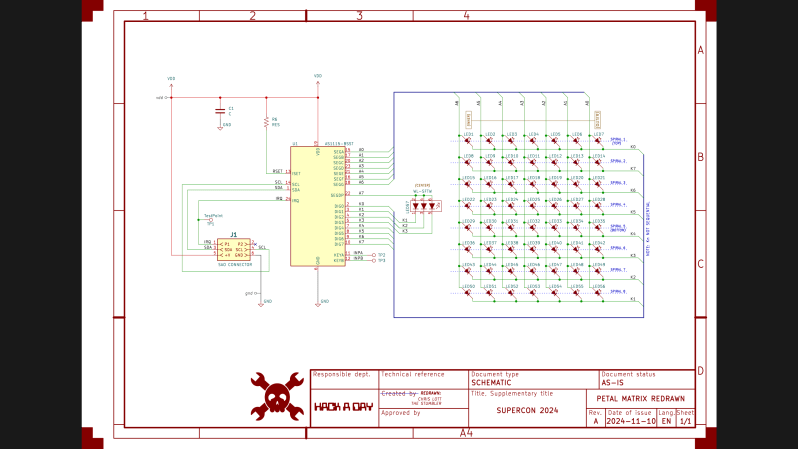
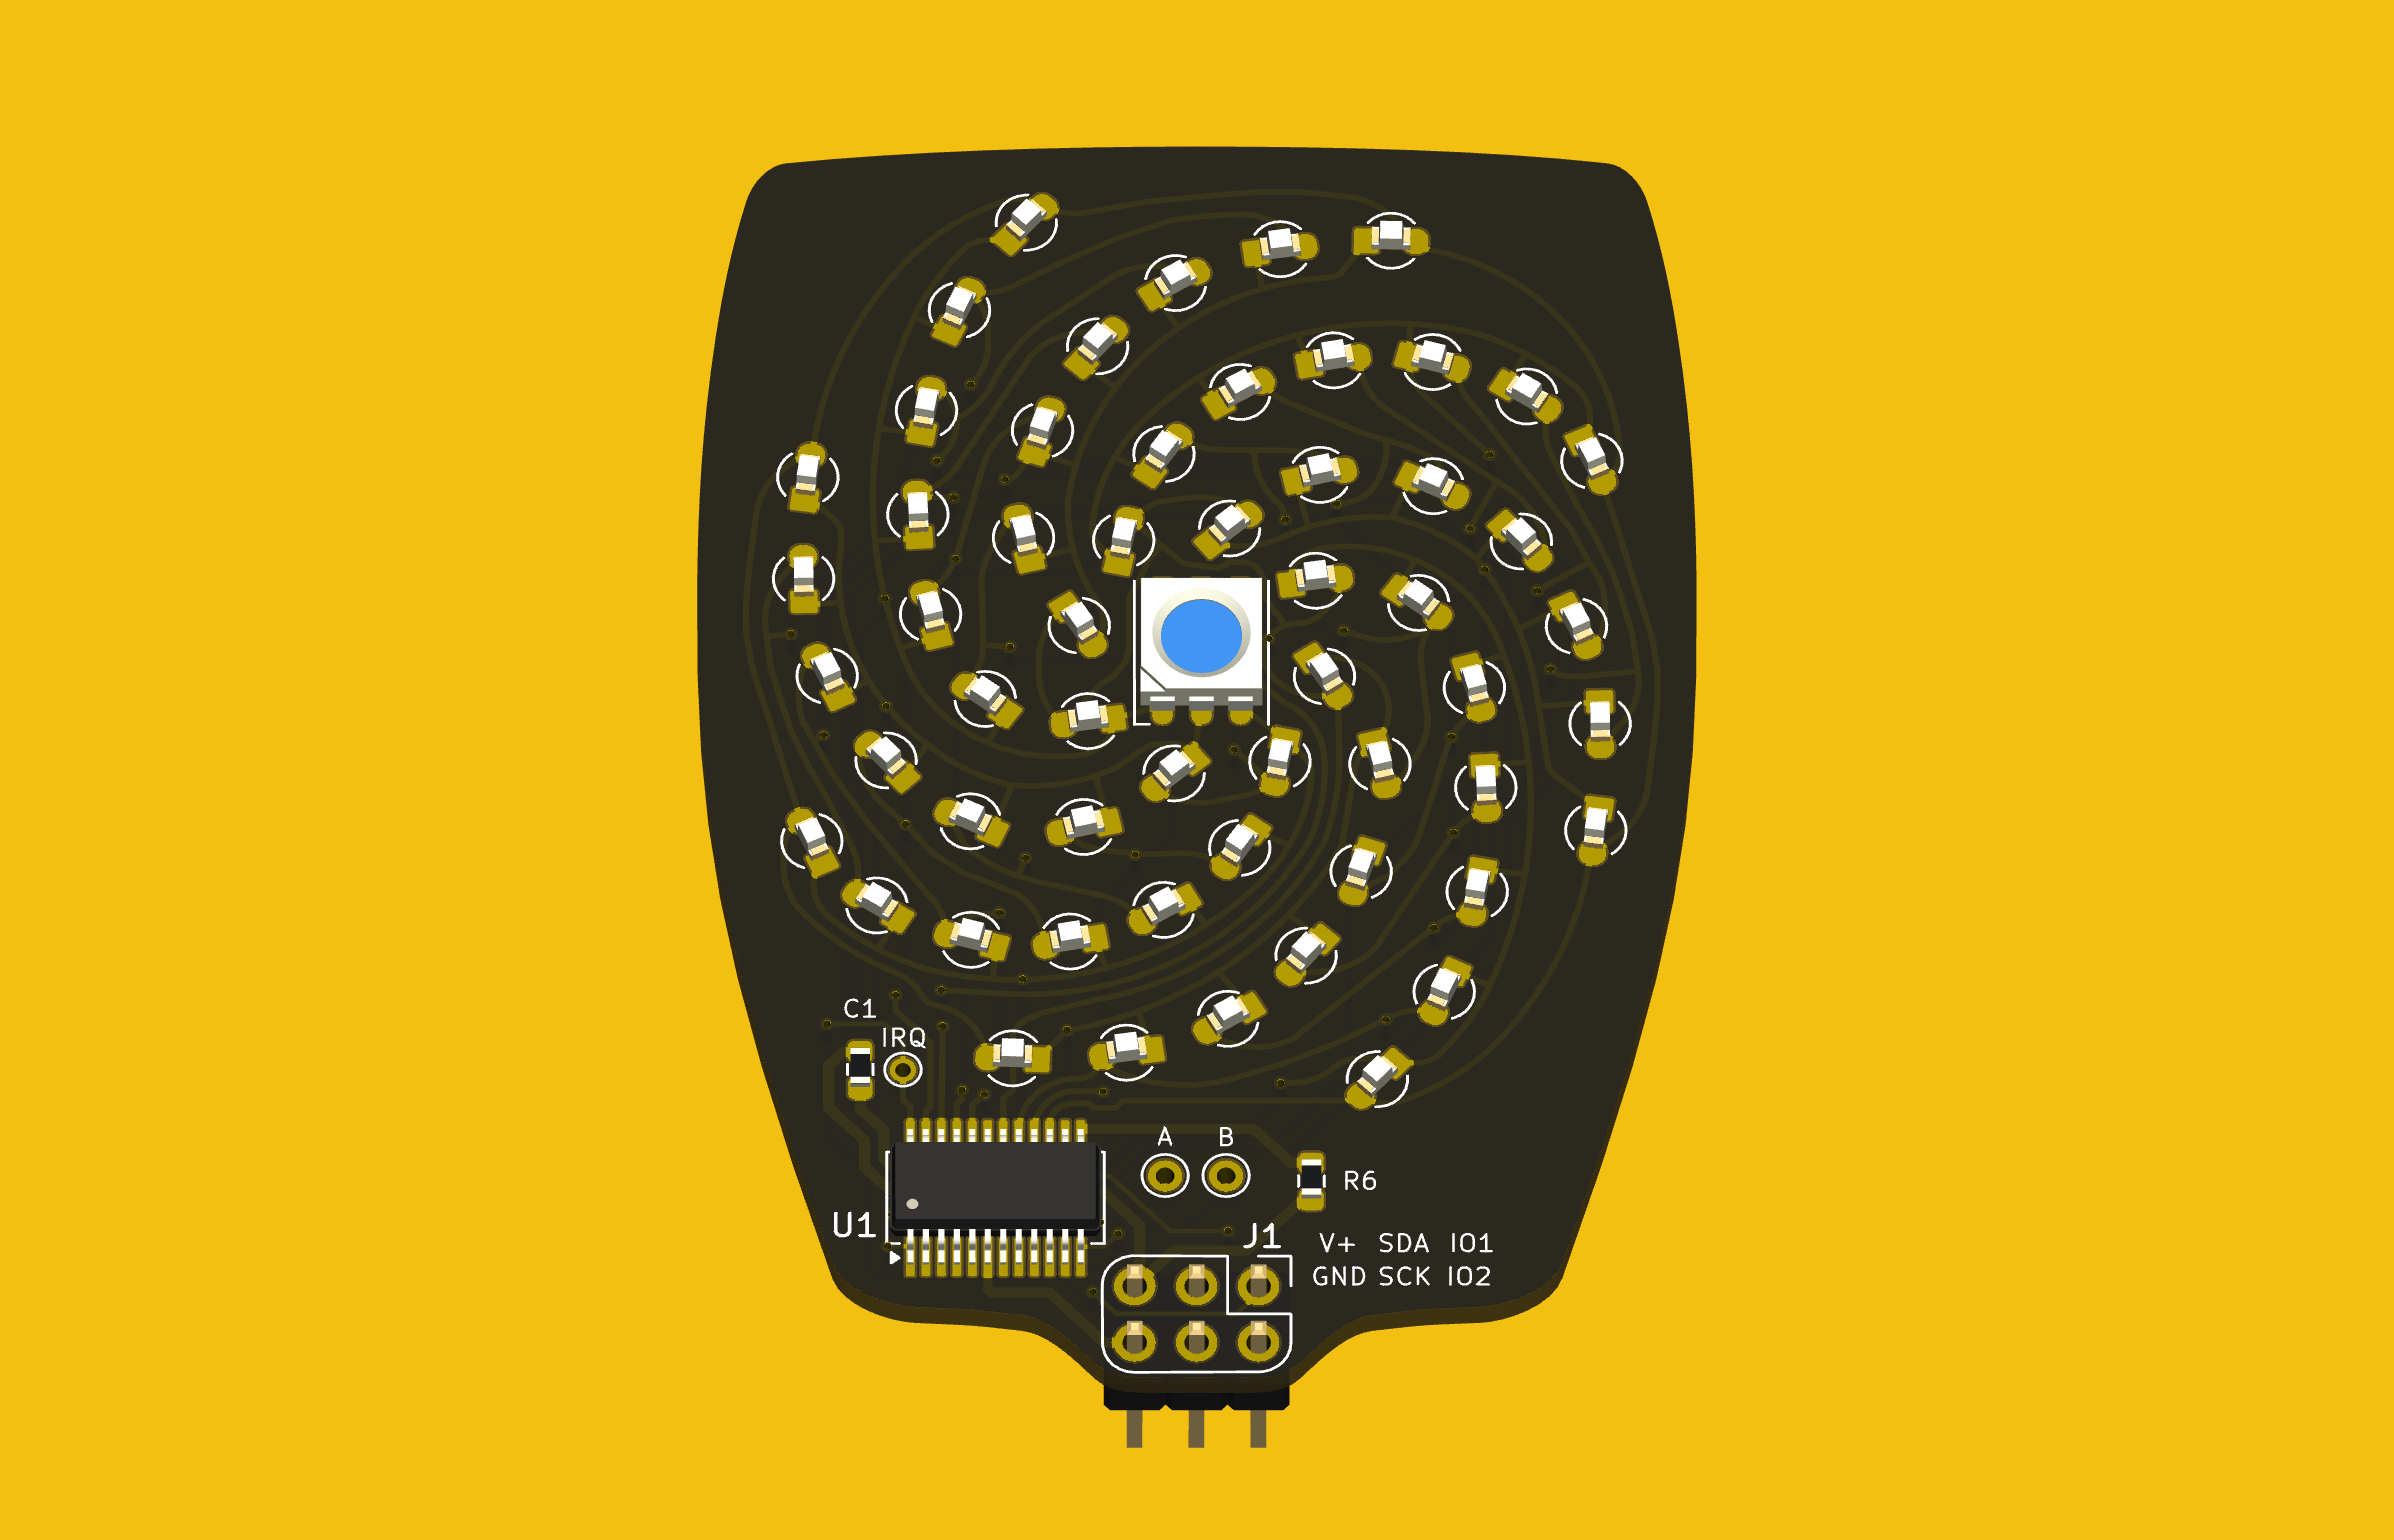
Last week I completed the SAO flower badge redrawing task, making a complete KiCad project. Most of the SAO petals are already released as KiCad projects, except for the Petal Matrix. The design features 56 LEDs arranged in eight spiral arms radiating from the center. What it does not feature are straight lines, right angles, nor parts placed on a regular grid.

Importing into KiCad
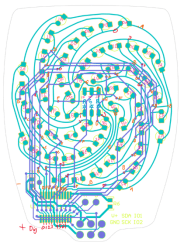
Circuit Notes for LEDs, Thanks to [spereinabox]
I followed the same procedures as the main flower badge with no major hiccups. This design didn’t have any released schematics, but backing out the circuits was straightforward. It also helped that user [sphereinabox] over on the Hackaday Discord server had rung out the LED matrix connections and gave me his notes.

Grep Those Positons

I first wanted to only read the data from the LEDs for analysis, and I didn’t need the full Kicad + Python scripting for that. Using grep on the PCB file, you get a text file that can be easily parsed to get the numbers. I confirmed that the LED placements were truly as irregular as they looked.

My biggest worry was how obtain and re-apply the positions and angles of the LEDs, given the irregular layout of the spiral arms. Just like the random angles of six SAO connector on the badge board, [Voja] doesn’t disappoint on this board, either. I fired up Python and used Matplotlib to get a visual perspective of the randomness of the placements, as one does. Due to the overall shape of the arms, there is a general trend to the numbers. But no obvious equation is discernable.
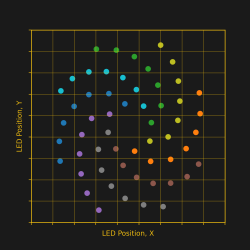
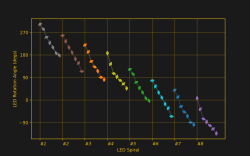
It was obvious that I needed a script of some sort to locate 56 new KiCad LED footprints onto the board. (Spoiler: I was wrong.) Theoretically I could have processed the PCB text file with bash or Python, creating a modified file. Since I only needed to change a few numbers, this wasn’t completely out of the question. But that is inelegant. It was time to get familiar with the KiCad + Python scripting capabilities. I dug in with gusto, but came away baffled.

KiCad’s Python Console to the Rescue — NOT

This being a one-time task for one specific PCB, writing a KiCad plugin didn’t seem appropriate. Instead, hacking around in the KiCad Python console looked like the way to go. But I didn’t work well for quick experimenting. You open the KiCad PCB console within the PCB editor. But when the console boots up, it doesn’t know anything about the currently loaded PCB. You need to import the Kicad Python interface library, and then open the PCB file. Also, the current state of the Python REPL and the command history are not maintained between restarts of KiCad. I don’t see any advantages of using the built-in Python console over just running a script in your usual Python environment.

Clearly there is a use case for this console. By all appearances, a lot of effort has gone into building up this capability. It appears to be full of features that must be valuable to some users and/or developers. Perhaps I should have stuck with it longer and figured it out.

KiCad Python Script Outside KiCad

This seemed like the perfect solution. The buzz in the community is that modern KiCad versions interface very well with Python. I’ve also been impressed with the improved KiCad project documentation on recent years. “This is going to be easy”, I thought.

First thing to note, the KiCad v8 interface library works only with Python 3.9. I run pyenv on my computers and already have 3.9 installed — check. However, you cannot just do a pip install kicad-something-or-other... to get the KiCad python interface library. These libraries come bundled within the KiCad distribution. Furthermore, they only work with a custom built version of Python 3.9 that is also included in the bundle. While I haven’t encountered this situation before, I figured out you can make pyenv point to a Python that has been installed outside of pyenv. But before I got that working, I made another discovery.

The Python API is not “officially” supported. KiCad has announced that the current Simplified Wrapper and Interface Generator-based Python interface bindings are slated to be deprecated. They are to be replaced by Inter-Process Communication-based bindings in Feb 2026. This tidbit of news coincided with learning of a similar 3rd party library.

Introducing KiUtils

Many people were asking questions about including external pip-installed modules from within the KiCad Python console. This confounded my search results, until I hit upon someone using the KiUtils package to solve the same problem I was having. Armed with this tool, I was up and running in no time. To be fair, I susepct KiUtils may also break when KiCad switched from SWIG to IPC interface, but KiUtils was so much easier to get up and running, I stuck with it.

I wrote a Python script to extract all the information I needed for the LEDs. The next step was to apply those values to the 56 new KiCad LED footprints to place each one in the correct position and orientation. As I searched for an example of writing a PCB file from KiUtils, I saw issue #113, “Broken as of KiCAD 8?”, on the KiUtils GitHub repository. Looks like KiUtils is already broken for v8 files. While I was able to read data from my v8 PCB file, it is reported that KiCad v8 cannot read files written by KiUtils.

Scripting Not Needed — DOH

At a dead end, I was about to hand place all the LEDs manually when I realized I could do it from inside KiCad. My excursions into KiCad and Python scripting were all for naught. The LED footprints had been imported from Altium Circuit Maker as one single footprint per LED (as opposed to some parts which convert as one footprint per pad). This single realization made the problem trivial. I just needed to update footprints from the library. While this did require a few attempts to get the cathode and anodes sorted out, it was basically solved with a single mouse click.

Those Freehand Traces

The imported traces on this PCB were harder to cleanup than those on the badge board. There were a lot of disconinuities in track segments. These artifacts would work fine if you made a real PCB, but because some segment endpoints don’t precisely line up, KiCad doesn’t know they belong to the same net. Here is how these were fixed:

  • Curved segments endpoints can’t be dragged like a straight line segment can. Solutions:
    • If the next track is a straight line, drag the line to connect to the curved segment.
    • If the next track is also a curve, manually route a very short track between the two endpoints.
  • If you route a track broadside into a curved track, it will usually not connect as far as KiCad is concerned. The solution is to break the curved track at the desired intersection, and those endpoints will accept a connection.
  • Some end segments were not connected to a pad. These were fixed by either dragging or routing a short trace.

Applying these rules over and over again, I finaly cleared all the discontinuities. Frustratingly, the algorithm to do this task already exists in a KiCad function: Tools -> Cleanup Graphics... -> Fix Discontinuities in Board Outline, and an accompanying tolerance field specified as a length in millimeters. But this operation, as noted in the its name, is restricted to lines on the Edge.Cuts layer.

PCB vs Picture
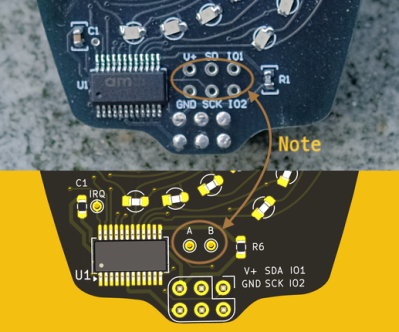
Detail of Test Pad Differences

When I was all done, I noticed a detail in the photo of the Petal Matrix PCB assembly from the Hackaday reveal article. That board (sitting on a rock) has six debugging / expansion test points connected to the six pins of the SAO connector. But in the Altium Circuit Maker PCB design, there are only two pads, A and B. These connect to the two auxiliary input pins of the AS1115 chip. I don’t know which is correct. (Editor’s note: they were just there for debugging.) If you use this project to build one of these boards, edit it according to your needs.

Conclusion

The SAO Petal Matrix redrawn KiCad project can be found over at this GitHub repository. It isn’t easy to work backwards using KiCad from the PCB to the schematic. I certainly wouldn’t want to reverse engineer a 9U VME board this way. But for many smaller projects, it isn’t an unreasonable task, either. You can also use much simpler tools to get the job done. Earlier this year over on Hackaday.io, user [Skyhawkson] did a gread job backing out schematics from an Apollo-era PCB with Microsoft Paint 3D — a tool released in 2017 and just discontinued last week.
2023 Hackaday Supercon: One Year of Progress for Project Boondock Echo

Do you remember the fourth-place winner in the 2022 Hackaday Prize? If it’s slipped your mind, that’s okay—it was Boondock Echo. It was a radio project that aimed to make it easy to record and playback conversations from two-way radio communications. The project was entered via Hackaday.io, the judges dug it, and it was one of the top projects of that year’s competition.

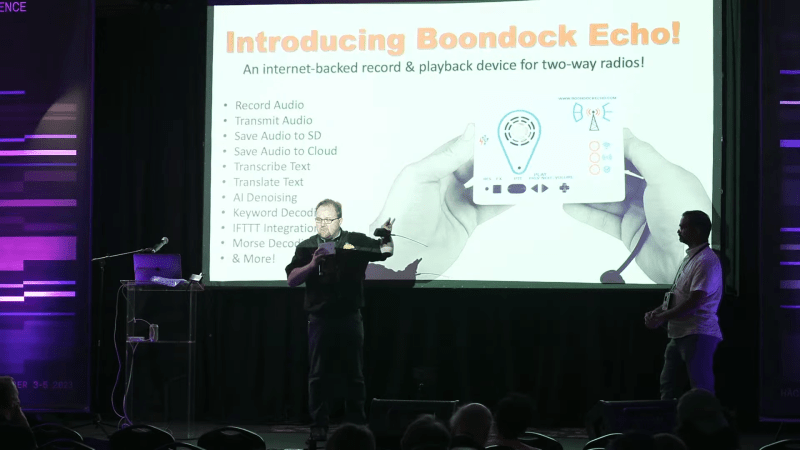
The project was the brainchild of Mark Hughes and Kaushlesh Chandel. At the 2023 Hackaday Supercon, Mark and Kaushlesh (KC) came back to tell us all about the project, and how far it had come one year after its success in the 2022 Hackaday Prize.

Breaker, Breaker

The talk begins with a simple video explainer of the Boondock Echo project. Basically, it points out the simple problem with two-way radio communications. If you’re not sitting in front of the receiver at the right time, you’re going to miss the message someone’s trying to send you. Unlike cellular communications, Skype calls, or email, there’s no log of missed calls or messages waiting for you. If you weren’t listening, you’re out of luck.

The device works with conventional amateur radios and can capture messages, store them in the cloud, and even react to them.

Mark was inspired to create a device to solve these problems by his father’s experience as an emergency responder with FEMA. Often, his father would tell stories about problems with radios and missed transmissions, and Mark had always wondered if something could be done.

Boondock Echo is the device that hopes to change all that. It’s a device designed for recording and playback of two-way radio communications. The hardware is based around the ESP32, which is able to capture analog audio from a radio, digitize it, and submit it to the Boondock Echo online service. This also enables more advanced features—the system can transcribe audio to text, and even do keyword monitoring on the results and email you any important relevant messages.

The Boondock Echo service can be set up to react to keywords and provide notifications in turn.

Rather amazingly, Hackaday actually helped spawn this project. Mark had an idea of what Boondock Echo should do, but he didn’t feel like he had the full set of technical skills to implement it. Then, Mark met KC via a Hackaday Hackchat, and the two started a partnership to develop the project further. Eventually, they won fourth place in the 2022 Hackaday Prize, which netted them a tasty $10,000 which they could use to develop the project further. They then brought in Mark’s friend Jesse on the hardware side, and things really got rolling.

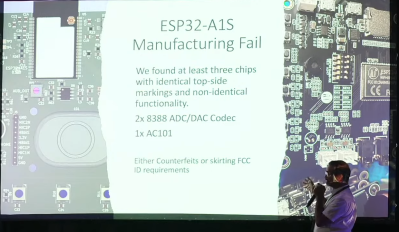
The hope was to start producing and delivering Boondock Echo devices. Of course, nobody is immune to production hell, and it was no different for this team. KC dives into the story of how the device relied on the ESP32-A1S module. When they went to make more, this turned out to be problematic. They found some of the purchased modules worked and some didn’t. Stripping the RF shields off the pre-baked modules, they found that while they all included audio codec chips marked “8388,” some modules had a different layout and functioned differently. And these were parts with FCC IDs, identical part numbers, and everything! This turned into a huge mess that derailed the project for some time. The project had to be retooled to work with the ESP32-based AI Thinker Audio Kit, to which they added a custom “sidekick” board to handle interfacing with the desired radio hardware.

Dodgy parts caused a great deal of trouble for the team.

Mark notes that there were some organizational lessons learned through this difficult journey. He talks about the value of planning and budgets when it comes to any attempt to escape the “Valley of Death” as a nascent startup. Mark also explains how Boondock Echo came to seek investors to grow further when he realized they didn’t have the resources to make it on their own.

“You don’t go out asking for $10,000 from family and friends, you go out and you ask for a heck of a lot more than that from professional investors,” explains Mark. “It’s a lot easier to come up with $100,000 than $10,000, because the venture capitalists don’t play in the $10,000 price range.” Of course, he notes that this comes with a tradeoff—investors want a stake in the company in exchange for cold, hard cash. Moving to this mode of operation involved creating a company and then dividing up shares for all the relevant stakeholders—a unique challenge of its own. Mark and KC explain how they handled the growing pains and grew their team from there.

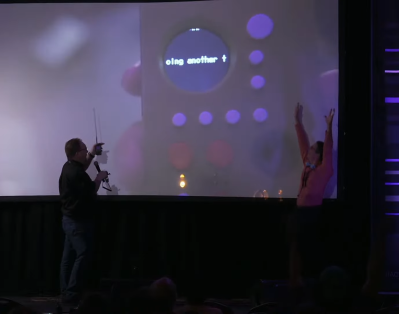
The successful live demo was a moment of some joy. It used a modified Supercon badge to display transcription of an audio message captured by a Boondock Echo device.

The rest of the talk covers the product itself, and we get a demo of what it can do. KC and Mark show us how the Boondock Echo units capture audio, record it, and submit it to the cloud. From there, we get to see how things like AI transcription, keyword triggers, and notifications work, and there’s even a fun live demo. Beyond that, Mark explains how you can order the hardware via CrowdSupply, and sign up with the Boondock Echo cloud service.

It’s not just neat to see a cool project, it’s neat to see something like this grow from an idea into a fully-fledged business. Even better, it grew out of the Hackaday community itself, and has flourished from there. It’s a wonderful testament to what hackers can achieve with a good idea and the will to pursue it.


A CO2 Traffic Light On An SAO

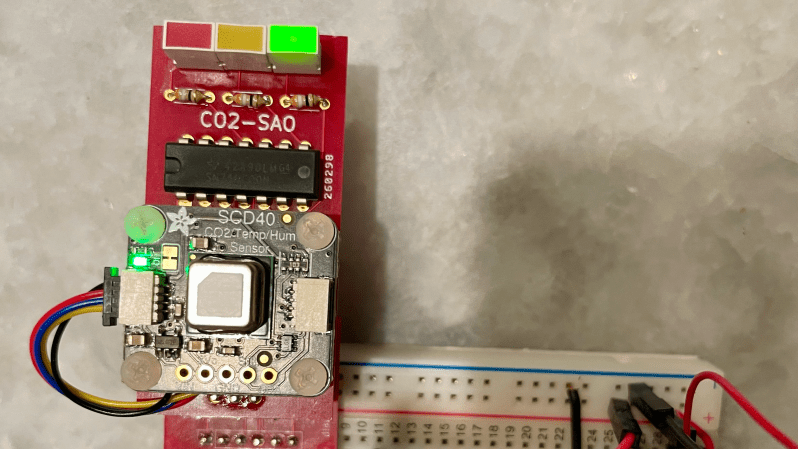
[David Bryant] clearly has an awareness of the impact of an excess concentration of CO2 in the local environment and has designed an SAO board to add a CO2 traffic light indicator to one of the spare slots on the official Hackaday Supercon 2024 badge.

The part used is the Sensirion SCD40 ‘true’ CO2 sensor, sitting atop an Adafruit rider board. [David] got a leg up on development by creating a simple SAO breakout board, which could have either the male and female connectors fitted, as required. Next, he successfully guessed that the badge would be based around the RP2040 running MicroPython and hooked up an Adafruit Feather RP2040 board to get started on some software to drive the thing. This made hooking up to the official badge an easy job. Since the SAO has only two GPIOs, [David] needed to decode these to drive the three LEDs. There are a few ways to avoid this, but he wanted to relive his earlier EE college years and do it the direct way using a pair of 74HC00 quad NAND gate chips.

We’ve seen a few CO2 monitors over the years. This sleek little unit is based around the Seeeduino XIAO module and uses an LED ring as an indicator. Proper CO2 monitors can be a little pricey, and there are fakes out there. Finally, CO2 is not the only household pollutant; check out this project.

Supercon 2024: Badge Add-On Winners

This year we challenged the Hackaday community to develop Shitty Simple Supercon Add-Ons (SAO) that did more than just blink a few LEDs. The SAO standard includes I2C data and a pair of GPIO pins, but historically, they’ve very rarely been used. We knew the talented folks in this community would be able to raise the bar, but as they have a tendency to do, they’ve exceeded all of our expectations.

As we announced live during the closing ceremony at the 2024 Hackaday Supercon, the following four SAOs will be put into production and distributed to all the attendees at Hackaday Europe in Spring of 2025.

Best Overall: SAO Multimeter

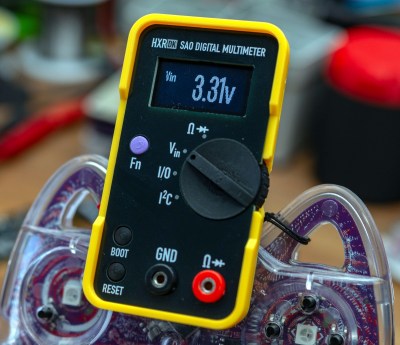
For the “Best Overall” category, we only intended to compare it with the other entries in the contest. But in the end, we think there’s a strong case to be made that [Thomas Flummer] has created the greatest SAO of all time. So far, anyway.

This add-on is a fully functional digital multimeter, with functions for measuring voltage, resistance, and continuity. The design is a pure work of art, with its structure combining stacked PCBs and 3D printed parts. There’s even tiny banana plugs to connect up properly scaled probes. Incredible.

In the documentation [Thomas] mentions there are additional functions he didn’t have time to include in the firmware, such as modes to analyze the I2C and GPIO signals being received. Now that it’s been selected for production, we’re hoping he’ll have the time to get the code finished up before its European debut.

Fun: Etch sAo Sketch

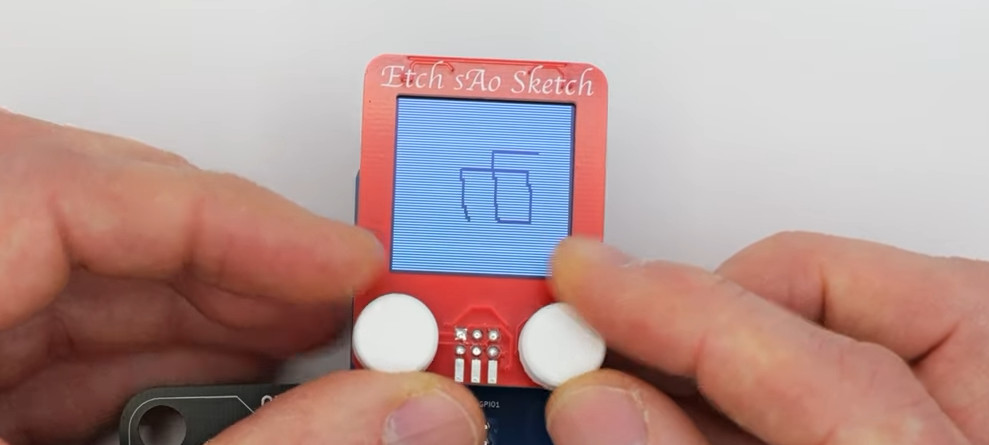
This SAO recreates the iconic art toy in a (hopefully) non-trademarked way, with a 1.5″ inch 128 x 128 grayscale OLED display and a pair of trimpots capped with 3D printed knobs. Drawing is fun enough, but the nostalgia really kicks in when you give it a good shake — the onboard LIS3DH 3-axis accelerometer picks up the motion and wipes the display just like the real thing.

Created by [Andy Geppert], this SAO isn’t just a pretty face. Flipping it over shows an exceptionally clever technique for connecting the display board to the main PCB. Tiny metal balls (or “alignment spheres” if you want to get fancy) mate up with the mounting holes on the OLED board and center it, and a touch of solder locks it all in place.

Fine Art: Bendy SAO

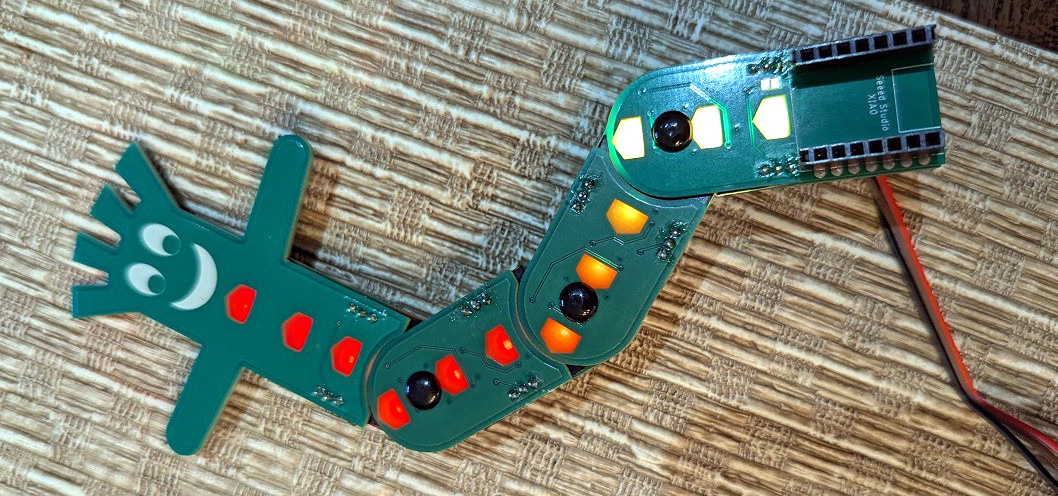
While this wacky, waving, inflatable, arm-flailing SAO might look like the sort of thing that would be outside of a used car dealership, but creator [debraansell] managed to shrink it down so the point that it’s reasonable to plug into your badge. More or less.

There are several fascinating tricks at work here, from lighting the PCB from the back using side-firing LEDs to the integrated slip rings. If this one didn’t look so good, it would have been a strong contender for the “Least Manufacturable” Honorable Mention.

Functional: Vectrex SAO

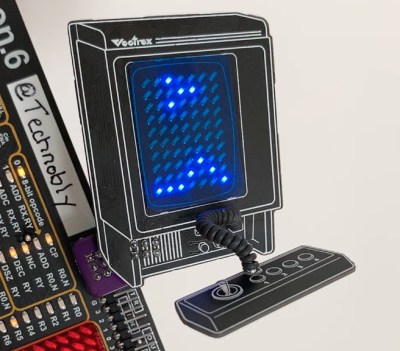
Creating a replica of the Vectrex at SAO scale would have been an impressive enough accomplishment, but [Brett Walach] took this one all the way and made it playable.

The display is a 7 x 10 Charlieplexed LED matrix, while the “joystick” is implemented with a 1-button capacitive touch sensor. A PIC16F886 microcontroller runs the simplified version of Scramble, and there’s even a speaker for era-appropriate audio.

But that’s not all! This SAO was also designed to be hacked — so not only is all the hardware and software open source, but there’re various jumpers to fiddle with various settings and an I2C control protocol that lets you command the action from the badge.

Honorable Mentions

As usual, this contest had several Honorable Mentions categories — while we would have loved to put all of these SAOs into production, there’s only so much we can do before now and Spring.

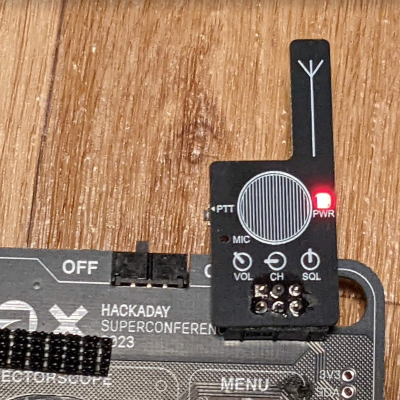
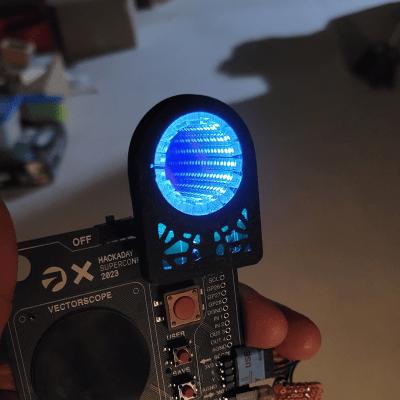
[Jeremy Geppert]’s SAO LoRa Walkie Talkie was a judge favorite, for its simple good looks and the extra functionality that it brings to the table. [Scorch Works]’s SAO Infinity Mirror was absolutely beautiful to see in person, and makes a fantastic display when many of them get together. And [MakeItHackin]’s Skull of Fate SAO not only looked super when its eyes scan the room, but it could read your future as well!

Best Communication:

Using I2C to get SAOs to talk to the badge (or each other) was a big part of this contest, but we were also on the lookout for entries which helped facilitate badge-to-badge communications.

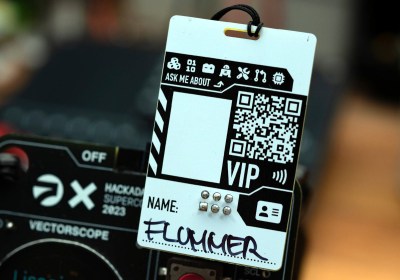
The Badge Tag NFC SAO from [Thomas Flummer] is a perfect example of both — it uses the NXP NTAG I2C Plus to provide 2K of read-write storage that can be accessed either internally through the I2C bus by the badge, or externally by an NFC device such as a smartphone. Modeled after a traditional conference name tag, this SAO was designed to make it easier for sharing your contact info with others during a busy con.

Infrared Communication SAO by [Alec Probst] brings infrared communications to the party, while looking like a classic TV remote. Though the original idea was to get this working in conjunction with the badge to act as a sort of TV-B-Gone, it ended up being used as part of a laser tag game during Supercon.

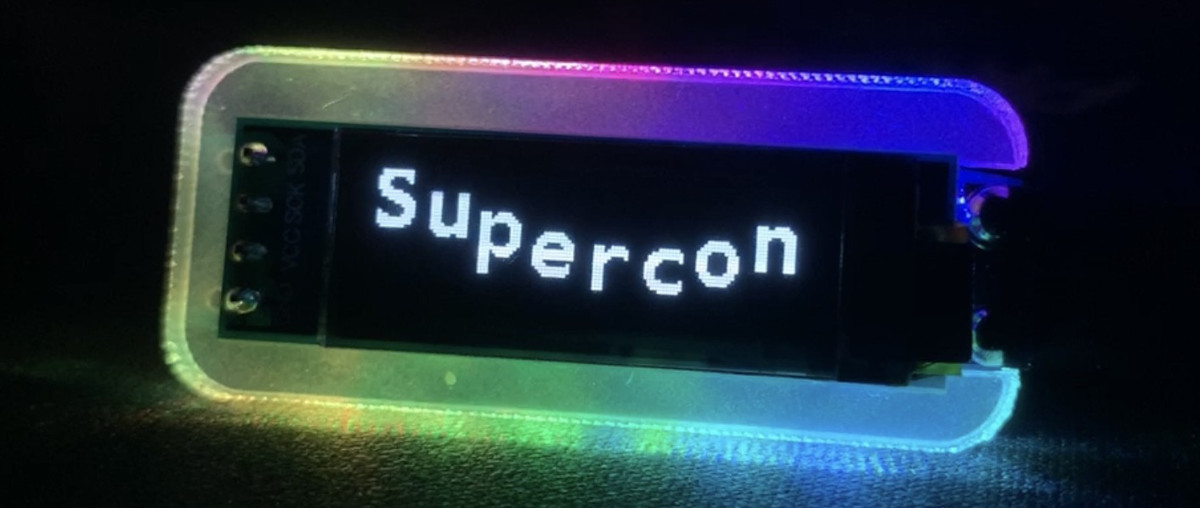
The GAT Nametag SC8 from [true] tackles communication on a more human level by providing a digital name tag for your badge. This compact board’s secret trick is the ability to make sure your name is legible no matter what its orientation thanks to a LIS2DW12 accelerometer that can detect the SAO’s orientation relative to the ground. RGB LEDs catch the viewer’s eye, but it’s the incredible firmware with seemingly endless options for text styling and tweaks that really set this build apart.

Light Show:

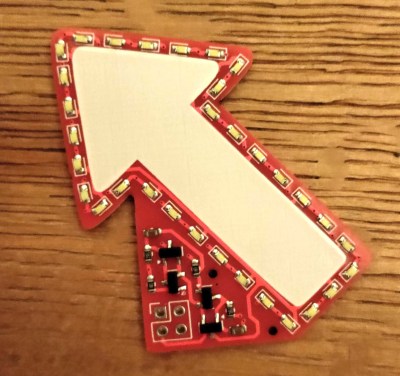
There’s little question that Featuring You! from [Nanik Adnani] is a perfect entry for this category. Nominally, it’s a little arrow you can write your name on and use a name tag. But power it up and you can dazzle anyone standing too close with its array of marching white LEDs. In a particularly nice touch, the circuit is implemented with only discreet components — no microcontroller.

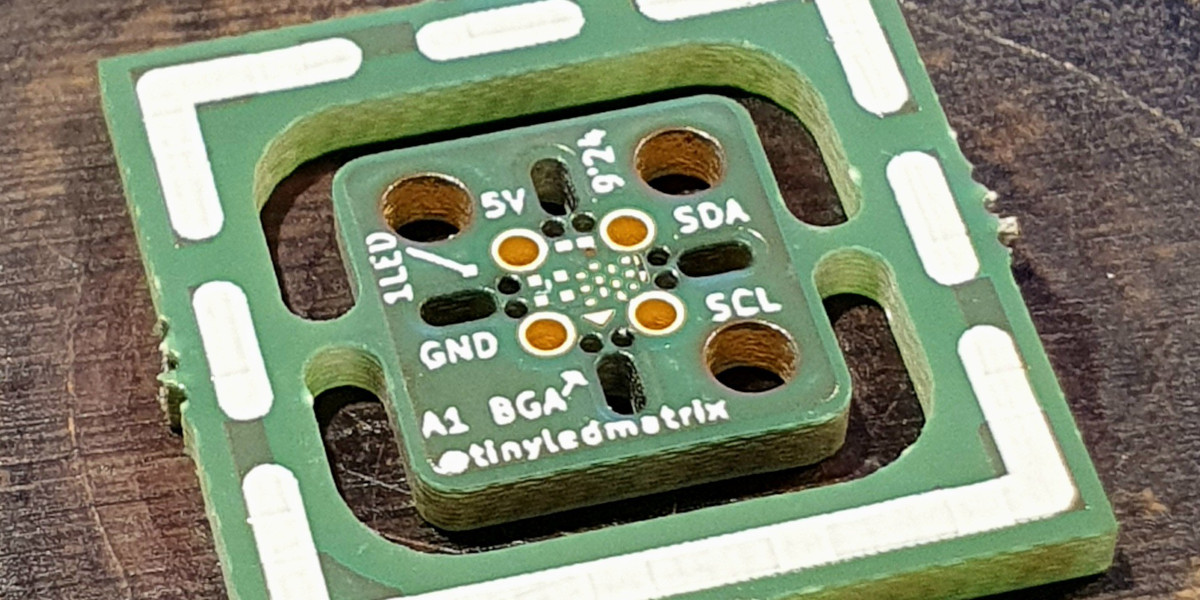
The reDOT_RGB from [Alex] is a tiny 5×7 RGB LED matrix with a minuscule ATtiny816 MCU around the back to control the show. At just 8 x 11 mm, it’s hard to overstate just how tiny this SAO is.

While on the subject of tiny boards, the
Persistence of Vision POV Display is another entry not much larger than the SAO connector itself. Using a row of five tiny white LEDs and a ADXL345 accelerometer, [Michael Yim] is able to write text in mid-air thanks to the gullibility of the human eye.

Least Manufacturable:

Simple Add-Ons are essentially an art form, so it’s not surprising to find that they don’t often lend themselves to mass production. Several of the entries this yeah would be a real challenge to make in large numbers, but the one that really keeps us up at night is the ultra tiny smart SAO from [Alex].

This board is designed to fit inside the space between four header pins. Thanks, but no thanks.

Raising the Bar

Our hope this year was to elevate the Simple Add-On from a decorative piece of flair to something functional, and potentially, even useful. The results were incredible, and while we can only pick four winners this time around, every entry helped push the state-of-the-art forward in its own way. It’s hard to imagine how the SAO envelope can be pushed any further, but we can’t wait to find out.

2024 Hackaday Supercon SAO Contest

Supercon 2024: Streaming Live

The 2024 Hackaday Supercon is on in Pasadena, but if you couldn’t make it to sunny California this year, don’t worry. We’ve got a live streams of the main stage talks, and all of the second track talks are being recorded and will be put up on the YouTube channel after the con.

If you’re watching from home and want to join the conversation, today might be a good time to join the official Hackaday Discord server.

NOTE: Stream will resume Sunday morning.

2024 Supercon: Last Minute Announcements

If you’re hear a rushing noise, don’t be alarmed — that’s just the rapidly approaching 2024 Hackaday Supercon. As hard as it is to believe, a whole year has gone by, and we’re now just a few days away from kicking off our annual hardware hacking extravaganza in Pasadena. Tickets just sold out over the weekend — thank you procrastinators!

For those of you who have tickets to join us this weekend, we’ve got a few last minute announcements and bits of information we wanted to get out to you. As a reminder, you can find the full schedule for all three days on the official Supercon site.

New Events Added!

For those who’ve attended a Supercon before, you know we like to cram as much content as we can into the weekend. But there’s always room for more, and this year we’ve managed to squeeze in a couple extra activities that we’re very excited about.

Halloween Hacker Happy Hour

It just so happens that Halloween is the night before Supercon officially kicks off, and that seemed like too good of an opportunity to pass up. So we’ll be throwing a pre-event party at the nearby KingsRow Gastropub where costumes and all manner of blinking LEDs are very much encouraged. Officially we’ll be hanging out from 7:00 to 10:00 PM, but don’t be surprised if you find yourself still talking to Hackaday folks at last call.

You don’t need tickets for this event, but we’d like to have a rough head count, so if you could RSVP through Eventbrite we’d appreciate it.

Tina’s Junk Challenge

Tina’s been piling up her treasures for weeks

We’ve always wanted to introduce some kind of swap meet aspect to Supercon, but the logistics have always been a challenge. This year though, we’re finally going to get the chance to test out the idea. Former DesignLab Resident Tina Belmont is in the process of moving out of the country and needs to find a new home for her electronic bric-a-brac.

Everything is free, so attendees are encouraged to take anything they think they can make use of. Naturally, an influx of interesting hardware could provide for some very unique badge hacking possibilities. If we can get enough people to graft these second-hand components onto their badges, we just might be able to turn it into a proper category come Sunday night.

A table where folks can offload their electronic bits and bobs has worked well at other hacker cons, so we’re eager to see how it goes at Supercon. If this is something you’d like to see more of, or would potentially like to participate in next year, let us know.

Krux’s Side Quests

Let’s be honest, most of us are already taking our marching orders from the computer in one way or another. So why not turn it into a fun interactive game?

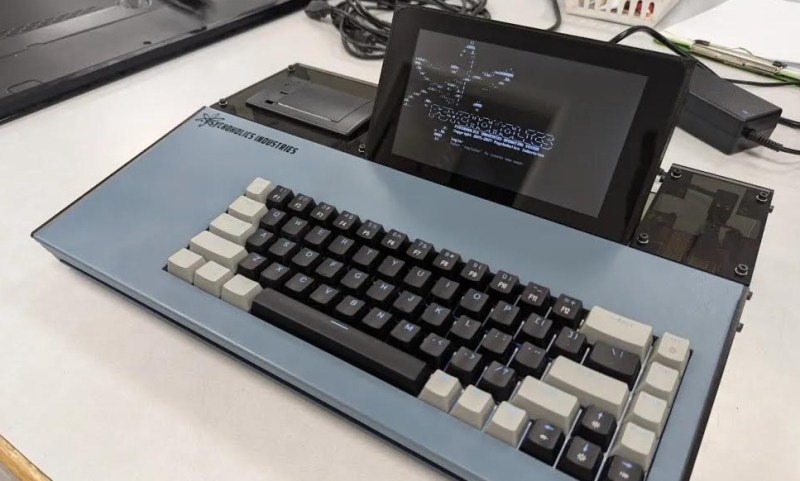
The idea is simple: use the mysterious retrocomputer oracle, and it gives you a quest. Maybe you’ll have to find a hidden item, or solve a riddle. Krux has a run a variation of this game at Toor Con in the past, but the challenges spit out by the computer this time will be tailored to Supercon.

Windows Through Wires Exhibition

You may recall that we asked the Hackaday community if they had any unusual display technology they’d like to show off during Supercon as part of an exhibit.

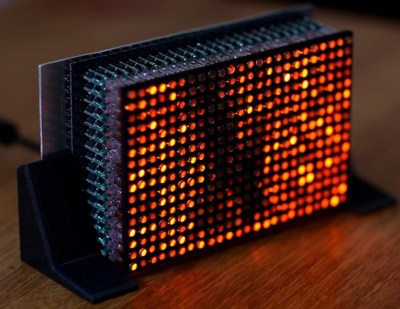
Well, as you might have imagined, the response was incredible. From gorgeous vintage pieces to completely custom hardware, there’s going to be a wide array of fascinating hardware for attendees to study up-close.

While getting a chance to see various display technologies throughout the years would have our attention as it is, what’s really exciting is that many of the custom-built devices in the exhibit are either projects hosted on Hackaday.io or ones that we’ve covered at some point on the front page.

Considering how gorgeous some of them have looked in photographs, we’re eager to drool over them in the real world — and we bet you are to.

Workshop Technical Difficulties

Hopefully we’ve provided enough good news that we can slip in a bit of the bad. Unfortunately, we’ve had to cancel the “Hands on with an Electron Microscope” workshop that was to be hosted by Adam McCombs and Isabel Burgos. Everyone with tickets will of course be getting a refund, and you should be receiving an email to that effect shortly if you haven’t already.

While we’re just as disappointed by this news as you are, it’s one of those situations where there simply weren’t any good solutions. Long story short, the scanning electron microscope that was small enough to bring to Supercon is down, and there’s just not enough time to get it up and running at this point. An attempt was made to find another small-ish electron microscope on short notice but…well, that’s just as tricky to pull off as it sounds.

Send Us Your Lightning Talks!

To end this update on a high note, we want to remind everyone that this year we’ll once again be going Lighting Talks on Sunday morning. If you’ve never given a talk before, the shorter seven minute format is perfect for getting your feet wet. Or maybe you’ve got something you want to talk about that doesn’t take a whole hour to explain. Either way, the Lightning Talks are a great way to share what your passionate about with the Supercon audience.

If you’d like to give a Lightning Talk, simply fill out this form. You can upload slides if you’ve got them, but they aren’t strictly necessary.

An SAO for Hams

Generally speaking, the Hackaday Supercon badge will always have a place for SAO (rebranded as “Supercon add-ons”), and that makes sense. We did originate them, after all. This year, though, we’ve gone all in on SAO, and, in particular, we’ve asked to see more SAOs with communication capabilities. The standard has always had an I2C bus, but few people use them. I decided I wanted to set an example and cook up a badge for Supercon. Was it hard? Yes and no. I’ll share with you a little about the board’s genesis and the issues I found. At the end, I’ll make you a special offer, if you are going to Supercon.

The Idea

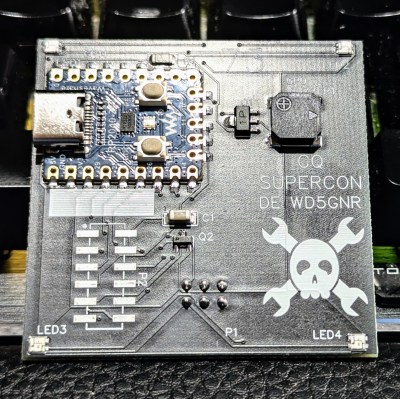
The front of the SAOGNR — the SAO connector is, of course, on the back

I’ve been a ham radio operator for a very long time. In fact, July was my 47th anniversary in the radio hobby. Well, that’s not true. It was my 47th year with a license. I had been listening to shortwave long before then. So, I wanted to do something with Morse code. You don’t have to know Morse code to get a license these days, but a lot of hams enjoy it.

I set out to do a simple board that would play some Morse code messages. But that’s just another blinking light LED with a buzzer on it, too. So, naturally, I decided it would also provide Morse code output for the I2C host. That is, the SAO could be used to convert ASCII to Morse code. Sounds simple, right? Sure.

Getting Started

I wanted to use a Raspberry Pi Pico but didn’t want to violate the SAO size requirements. Luckily, there’s an RP2040-Zero module that is quite tiny and looks more or less like a normal Pico. The two big differences are plusses: they have a reset button, and instead of a normal LED, they have a WS2812b-style LED.

Using that let me not worry about a lot of overhead on the board. Sure, it costs a few bucks more, so if you were mass-producing something, that’s not so good. But for this, it was perfect. I only had to add a speaker with a little transistor driver, which is probably unnecessary, four more WS2812B LEDs, and the SAO connector.

I was going to add a button, but I remembered from last year there is a way to use the BOOTSEL button on the module as a normal button, so I decided to cut a corner there. I could have shrunk the board, but I wanted some area for a protyping area and some cool silk screen, since I’m not artistic enough to come up with a nice outline for the board, so I kept the board full-size which is a lot of space.

The only strange thing is that the RP2040-Zero has parts on both sides, so it needs a cutout in the board. No problem. KiCAD didn’t have a good footprint for it that I could find, so I switched over to EasyEDA. They have handy integration with the parts you can get, too, so it is easy to price your board and even buy them already put together if you like.

While I waited for the boards, I decided to grab a similar Pico board and prototype the software. However, in the middle of this, I got a disturbing e-mail.

The Boards are Wrong?

The Chinese board house sent me a note: they were not sure the LEDs were connected properly. I checked, and I double-checked. They looked OK to me. I bravely asked them to build the boards as specified and went back to prototyping.

I’m not always a fan of Python, but we have a history of doing badges in Python so people can easily hack them. So I decided to stick to MicroPython. Getting the code and other features to work was a piece of cake. There is something surreal about using regular expressions to filter comments out of a file on a little microprocessor.

I2C Woe

Once I had the main features working, I set out to do the I2C when I realized an unpleasant fact. The Micropython library has I2C classes so you can host an I2C device. It does not have code that lets you be an I2C device yourself. CircuitPython apparently supports this, but I was in no mood to move the code over. Had I realized it going in, I might have made a different choice.

Luckily, an online forum had some code that directly manipulated the chip’s I2C registers and I was able to adapt that. If you are thinking of building an SAO with I2C capabilities, this is something to check before you go too far.

I stuck with the simple protocol that just lets me receive I2C commands because that’s all I needed, but there were examples of going further. For my project, I created the I2CTarget class. You tell the constructor which I2C bus you want to use, what pins you want to map to, and the I2C address you want to use. There are defaults for all of that.

Once it is running, you can check to see if data is available (call any()) and then read that data (get()). Don’t forget that reading data will block, so if you don’t want to block, check to see if anything is available first. The I2C hardware on the chip has a small FIFO, so that’s fine for this project.

I did create a subclass that allows an I2C object to act like a menu in the code. The menu object normally gets input from the user, but using this little trick lets the I2C commands fake user input.

The Boards Arrive

The board came in, as boards tend to do. I changed a few I/O pins in my code and… big sigh of relief, the LEDs were fine. A few tweaks on the code and the SAO was complete.

I left you all the files and documentation over on Hackaday.io. Maybe I went a little overboard with the documentation. You can decide. The source code is on GitHub, but you’ll find the link on the IO page.

Special Offer

Do you want one? Well, all the design files are there. Fire up your favorite way to etch boards or order them from your favorite board house. It wouldn’t be that hard to point-to-point wire one or put one on a breadboard except for the SAO connector, of course.

However, I have a deal for you. I have a limited number of these and will have them at Supercon. Find me — I’m easy to find since I mostly hang out at the soldering challenge table — and show me some code you propose to run that either uses the SAO or runs on the SAO. If I have any left, I’ll give you one, but when I’m out, I’m out. So, to be on the safe side, maybe make your own and bring it anyway.

❌