Vista de Lectura

Hay nuevos artículos disponibles. Pincha para refrescar la página.

Combining Gyro Stabilisation With Weight Shift Balancing
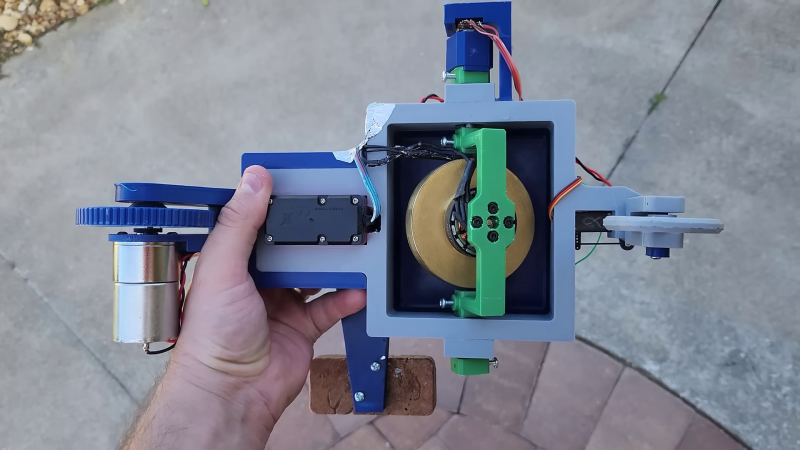
Gyroscopes are perfect to damper short impulses of external forces but will eventually succumb if a constant force, like gravity, is applied. Once the axis of rotation of the mass aligns with the axis of the external torque, it goes into the gimbal lock and loses the ability to compensate for the roll on that axis. [Hyperspace Pirate] tackled this challenge on a gyroscopically stabilized RC bike by shifting a weight around to help keep the bike upright.

[Hyperspace Pirate] had previously stabilized a little monorail train with a pair of control moment gyroscopes. They work by actively adjusting the tilt of gyroscopes with a servo to apply a stabilizing torque. On this bike, he decided to use the gyro as a passive roll damper, allowing it to rotate freely on the pitch axis. The bike will still fall over but at a much slower rate, and it buys time for a mass on the end of the servo-actuated arm to shift to the side. This provides a corrective torque and prevents gimbal lock.

[Hyperspace Pirate] does an excellent job of explaining the math and control theory behind the system. He implemented a PD-controller (PID without the integral) on an Arduino, which receives the roll angle (proportional) from the accelerometer on an MPU6050 MEMS sensor and the roll rate (Derivative) from a potentiometer that measures the gyro’s tilt angle. He could have just used the gyroscope output from the MPU6050, but we applaud him for using the actual gyro as a sensor.

Like [Hyperspace Pirate]’s other projects, aesthetics were not a consideration. Instead, he wants to experiment with the idea and learn a few things in the process, which we can support.
Small Steam Generator Creates Educational Experience

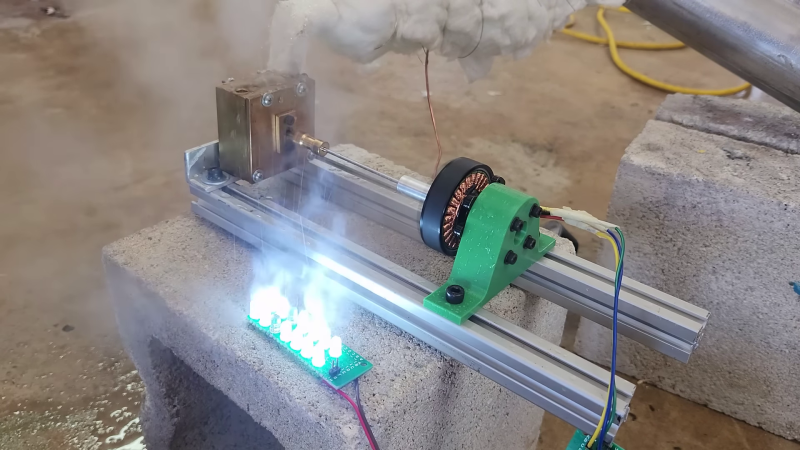
Steam turbines have helped drive a large chunk of our technological development over the last century or so, and they’ll always make for interesting DIY. [Hyperspace Pirate] built a small turbine and boiler in his garage, turning fire into flowing electrons, and learning a bunch in the process.

[Hyperspace Pirate] based the turbine design on 3D printed Pelton-style turbines he had previously experimented with, but milled it from brass using a CNC router. A couple of holes had to be drilled in the side of the rotor to balance it. The shaft drives a brushless DC motor to convert the energy from the expanding steam into electricity.

To avoid the long heat times required for a conventional boiler, [Hyperspace Pirate] decided to use a flash boiler. This involves heating up high-pressure water in a thin coil of copper tube, causing the water to boil as it flows down the tube. To produce the high-pressure water feed the propane tank for the burner was also hooked up to the water tank to pressurize it, removing the need for a separate pump or compressed air source. This setup allows the turbine to start producing power within twelve seconds of lighting the burner — significantly faster than a conventional boiler.

Throughout the entire video [Hyperspace Pirate] shows his calculation for the design and tests, making for a very informative demonstration. By hooking up a variable load and Arduino to the rectified output of the motor, he was able to measure the output power and efficiency. It came out to less than 1% efficiency for turning propane into electricity, not accounting for the heat loss of the boiler. The wide gaps between the turbine and housing, as well as the lack of a converging/diverging nozzle on the input of the turbine are likely big contributing factors to the low efficiency.

Like many of his other projects, the goal was the challenge of the project, not practicality or efficiency. From a gyro-stabilized monorail, to copper ingots from algaecide and and a DIY cryocooler, he has sure done some interesting ones.

Keeping Tabs on an Undergraduate Projects Lab’s Door Status

Over at the University of Wisconsin’s Undergraduate Projects Lab (UPL) there’s been a way to check whether this room is open for general use by CS undergraduates and others practically for most of the decades that it has existed. Most recently [Andrew Moses] gave improving on the then latest, machine vision-based iteration a shot. Starting off with a historical retrospective, the 1990s version saw a $15 camera combined with a Mac IIcx running a video grabber, an FTP server and an HP workstation that’d try to fetch the latest FTP image.

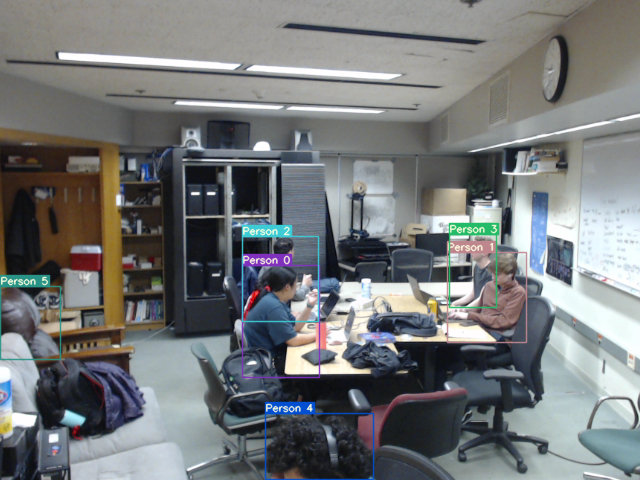
As the accuracy of this system means the difference between standing all forlorn in front of a closed UPL door and happily waddling into the room to work on some projects, it’s obvious that any new system had to be as robust as possible. The machine vision based version that got installed previously seemed fancy: it used a Logitech C920 webcam, a YOLOv7 MV model to count humanoids and a tie into Discord to report the results. The problem here was that this would sometimes count items like chairs as people, and there was the slight issue that people in the room didn’t equate an open door, as the room may be used for a meeting.

Thus the solution was changed to keeping track of whether the door was open, using a sensor on the two doors into the room. Sadly, the captive-portal-and-login-based WiFi made the straightforward approach with a reed sensor, a magnet and an ESP32 too much of a liability. Instead the sensor would have to communicate with a device in the room that’d be easier to be updated, ergo a Zigbee-using door sensor, Raspberry Pi with Zigbee dongle and Home Assistant (HA) was used.

One last wrinkle was the need to use a Cloudflare-based tunnel add-on to expose the HA API from the outside, but now at long last the UPL door status can be checked with absolute certainty that it is correct. Probably.

Featured image: The machine vision-based room occupancy system at UoW’s UPL. (Credit: UPL, University of Wisconsin)

❌