Vista de Lectura

Hay nuevos artículos disponibles. Pincha para refrescar la página.

Close Shave for an Old Oscilloscope Saved with a Sticky Note
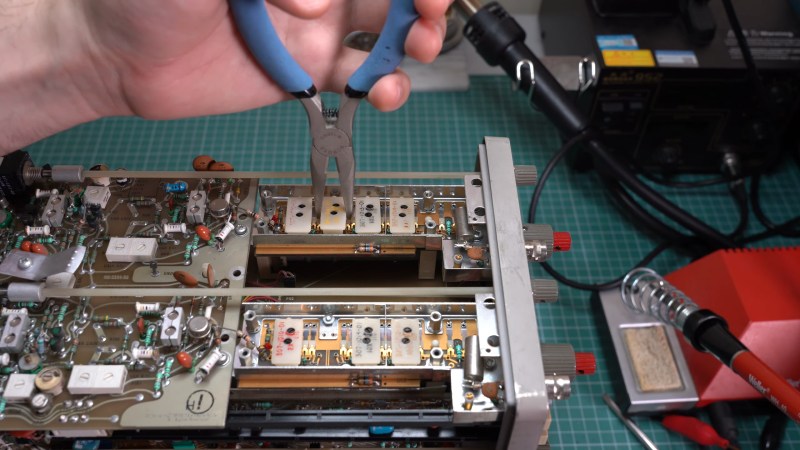
When you tear into an old piece of test equipment, you’re probably going to come up against some surprises. That’s especially true of high-precision gear like oscilloscopes from the time before ASICs and ADCs, which had to accomplish so much with discrete components and a lot of engineering ingenuity.

Unfortunately, though, those clever hacks that made everything work sometimes come back to bite you, as [Void Electronics] learned while bringing this classic Tektronix 466 scope back to life. A previous video revealed that the “Works fine, powers up” eBay listing for this scope wasn’t entirely accurate, as it was DOA. That ended up being a bad op-amp in the power supply, which was easily fixed. Once powered up, though, another, more insidious problem cropped up with the vertical attenuator, which failed with any setting divisible by two.

With this curious symptom in mind, [Void] got to work on the scope. Old analog Tek scopes like this use a bank of attenuator modules switched in and out of the signal path by a complex mechanical system of cams. It seemed like one of the modules, specifically the 4x attenuator, was the culprit. [Void] did the obvious first test and compared the module against the known good 4x module in the other channel of the dual-channel scope, but surprisingly, the module worked fine. That meant the problem had to be on the PCB that the module lives on. Close examination with the help of some magnification revealed the culprit — tin whiskers had formed, stretching out from a pad to chassis ground. The tiny metal threads were shorting the signal to ground whenever the 4x module was switched into the signal path. The solution? A quick flick with a sticky note to remove the whiskers!

This was a great fix and a fantastic lesson in looking past the obvious and being observant. It puts us in the mood for breaking out our old Tek scope and seeing what wonders — and challenges — it holds.
Z80 Testing the 80s Way

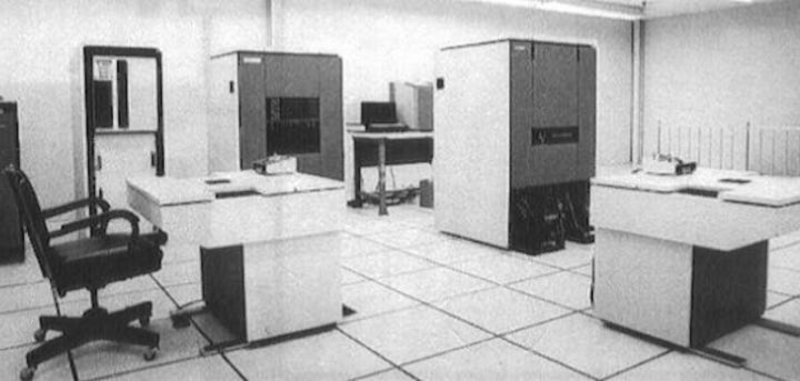
According to [MTSI], if you used a Z80 chip back in the 1980s, it almost certainly passed through the sole Fairchild Sentry 610 system that gave it the seal of approval.

The Sentry was big iron for its day. The CPU was a 24-bit device and ran at a blistering 250 kHz. Along with a tape drive and a specialized test bed, it could test Z80s, F8s, and other Mostek products of the day. There was a disk drive, too. The 26-inch platters stored under 10 kilobytes. Despite the relatively low speed of the CPU, the Sentry could test devices running up to 10 MHz, which was plenty for the CPUs it was testing. The actual test interface ran at 11 MHz and used an exotic divider to generate slower frequencies.

According to the post, an informal count of the number of chips in the device came up with around 60,000. That, as you might expect, took a huge power supply, too.

From some 1975 corporate literature:

“Optimized for engineering, sophisticated production needs, QA and test center operations, the Sentry 610 is the most versatile analytical tester available for engineering and production. It can perform the widest range of tests for the broadest range of components. At user option, the Sentry 610 can perform high-speed MaS/LSI, PCB, and bipolar tests simultaneously. It offers complete testing at the wafer level and through automatic handlers at full-rated device speeds up to 10 MHz. The wide choice of peripherals gives the Sentry 610 system massive data handling capacity to manipulate, analyze, compute and generate reports on test procedures in analyzing MaS/LSI.”

These days, you are as likely to stick test hardware on the IC as have a big machine on the outside. And even then, you probably wouldn’t have something this elaborate. But in its day, this was high-tech for sure.

The Z80 sure has had a long lifespan. It shouldn’t surprise you that Z80s need to be tested, just like everything else.

❌