Vista de Lectura

Hay nuevos artículos disponibles. Pincha para refrescar la página.

Sniffing Around Inside a ThinkPad Battery

For most people, a battery pack that’s misbehaving simply means it’s time to get a new battery. But when the battery in their ThinkPad wasn’t able to muster up more than 20 minutes of runtime, [Shrinath Nimare] saw an opportunity to dig deeper and do a bit of investigating.

The problem seemed to be that the battery pack was reporting that it was 100% charged at just 11.7 V instead of the correct 12.3 V. As it turns out, that 11.7 V figure is only slightly above what the battery should be when its run flat — so in reality, the battery was never actually getting a charge and would report that it was dead after just a few minutes of use. But why?

With a logic analyzer attached to the pins of the battery, [Shrinath] set out to sniff its communications with the ThinkPad.  Even if it wouldn’t lead to fixing the battery pack, the information obtained would potentially be useful for other projects, such as creating a custom high-capacity LiFePO4 pack down the line.

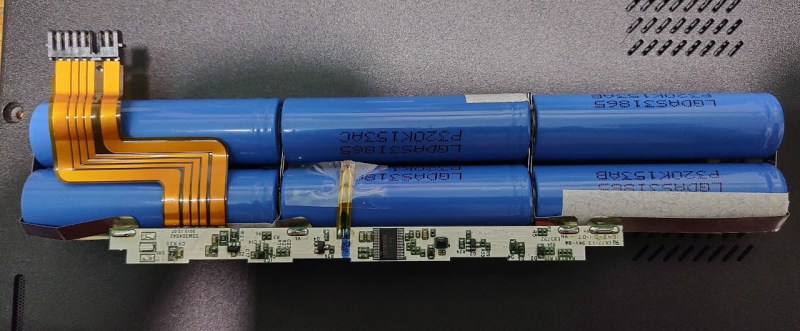
With the pack opened, [Shrinath] determined that a 51F51 BMS IC was running the show. The battery communicates with the host computer over SMBus, which is very similar to I2C. In fact, they’re so similar that [Shrinath] was able to use the I2C decoder in sigrok to break out the read and write commands and compare them to a PDF of the Smart Battery Data Specification.

Using the I2C decoder to read SMBus messages.

With a few captures in hand, [Shrinath] made some good progress in decoding what the two devices are saying to each other. For example, when the computer sent the command 0x15, the battery correctly responded with the desired charge voltage of 12.3 V. The command 0x18 was then given, which the specification says should cause the battery to report its capacity. Here again, valid data was returned, confirming that [Shrinath] was on the right path.

Even though it’s still early in the investigation, [Shrinath] had enough trouble finding practical examples of sniffing SMBus data that they thought it would be worth uploading their captures and notes to Hackaday.io. Hopefully further poking will show if the battery can be revived, but even if not, we’re always glad to see when hackers are willing to document their exploits for the benefit of the community.

This actually isn’t the first time we’ve heard of somebody snooping on their ThinkPad battery — back in 2020, we covered [Alexander Parent]’s efforts to create an open source battery pack for the T420 based on the ATtiny85.

OSHW Battery Tester Aims to Help Tame Lithium Cells

It’s no exaggeration to say that the development of cheap rechargeable lithium-ion batteries has changed the world. Enabling everything from smartphones to electric cars, their ability to pack an incredible amount of energy into a lightweight package has been absolutely transformative over the last several decades. But like all technologies, there are downsides to consider — specifically, the need for careful monitoring during charging and discharging.

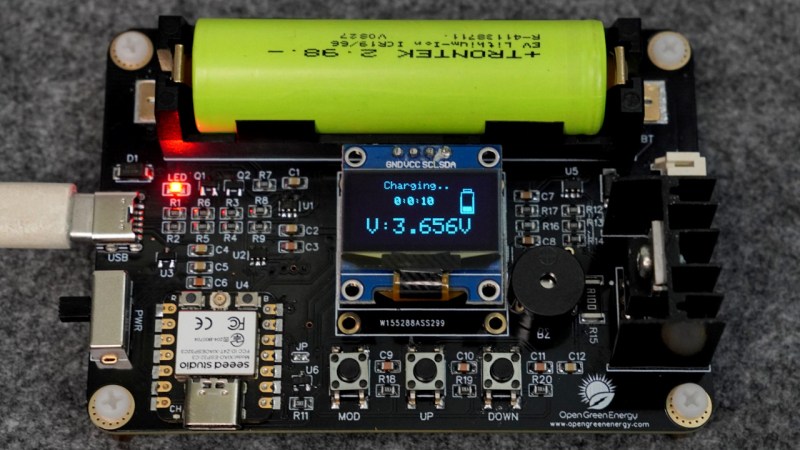
As hardware hackers, we naturally want to harness this technology for our own purposes. But many are uncomfortable about dealing with these high-powered batteries, especially when they’ve been salvaged or come from some otherwise questionable origin. Which is precisely what the Smart Multipurpose Battery Tester from [Open Green Energy] is hoping to address.

Based on community feedback, this latest version of the tester focuses primarily on the convenient 18650 cell — these are easily sourced from old battery packs, and the first step in reusing them in your own projects is determining how much life they still have left. By charging the battery up to the target voltage and then discharging it down to safe minimum, the tester is able to calculate its capacity.

It can also measure the cell’s internal resistance (IR), which can be a useful metric to compare cell health. Generally speaking, the lower the IR, the better condition the battery is likely to be in. That said, there’s really no magic number you’re looking for — a cell with a high IR could still do useful work in a less demanding application, such as powering a remote sensor.

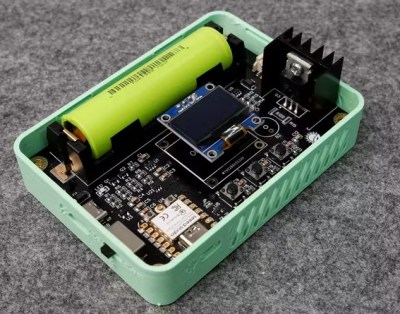
If you’re not using 18650s, don’t worry. There’s a JST connector on the side of the device where you can connect other types of cells, such as the common “pouch” style batteries.

The open source hardware (OSHW) device is controlled by the Seeed Studio XIAO ESP32S3, which has been combined with the LP4060 charger IC and a AP6685 for battery protection. The user interface is implemented on the common 0.96 inch 128X64 OLED, with three buttons for navigation. The documentation and circuit schematics are particularly nice, and even if you’re not looking to build one of these testers yourself, there’s a good chance you could lift the circuit for a particular sub-system for your own purposes.

Of course, testing and charging these cells is only part of the solution. If you want to safely use lithium-ion batteries in your own home-built devices, there’s a few things you’ll need to learn about. Luckily, [Arya Voronova] has been working on a series of posts that covers how hackers can put this incredible technology to work.

FREE-WILi Turns DC32 Badge Into Hardware Dev Tool

With few exceptions, electronic event badges are often all but forgotten as soon as the attendee gets back home. They’re a fun novelty for the two or three days they’re expected to be worn, but after that, they end up getting tossed in a drawer (or worse.) As you might imagine, this can be a somewhat depressing thought thought for the folks who design and build these badges.

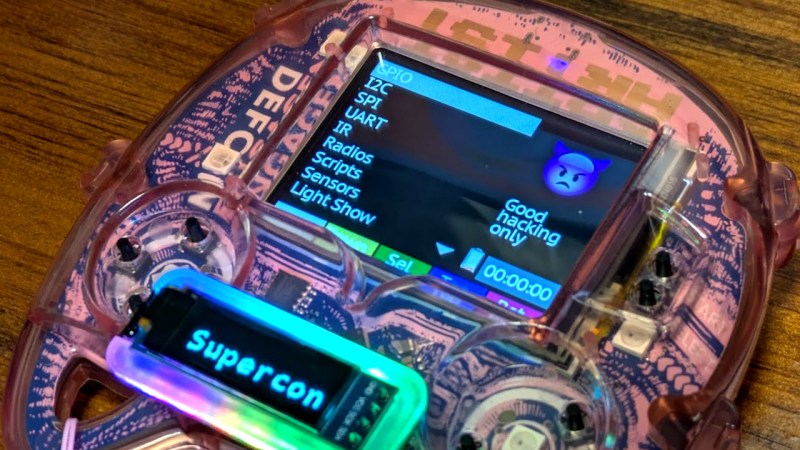
But thanks to a new firmware released by the FREE-WILi project, at least one badge is going to get a shot at having a second life. When loaded onto the RP2350-powered DEF CON 32 badge, the device is turned into a handy hardware hacking multi-tool. By navigating through a graphical interface, users will be able to control the badge’s GPIO pins, communicate over I2C, receive and transmit via infrared, and more. We’re particularly interested in the project’s claims that the combination of their firmware and the DC32 badge create an ideal platform for testing and debugging Simple Add-Ons (SAOs).

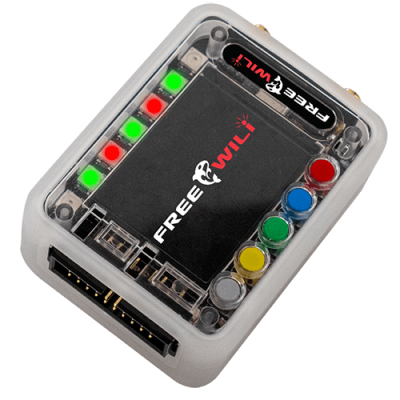
Don’t know what the FREE-WILi project is? Neither did we until today, which is actually kind of surprising now that we’re getting a good look at it. Basically, it’s a handheld gadget with a dozen programmable GPIO pins and a pair of CC1101 sub-GHz radios that’s designed to talk to…whatever you could possibly want to interface with.

It’s a bit like an even more capable Bus Pirate 5, which considering how many tricks that particular device can pull off, is saying something. As an added bonus, apparently you can even wear the FREE-WILi on your wrist for mobile hardware hacking action!

Anyway, while the hardware in the FREE-WILi is clearly more capable than what’s under the hood of the DC32 badge, there’s enough commonality between them that the developers were able to port a few of the key features over. It’s a clever idea — there’s something like 30,000 of these badges out there in the hands of nerds all over the world, and by installing this firmware, they’ll get a taste of what the project is capable of and potentially spring for the full kit.

If you give your DC32 badge the FREE-WILi treatment, be sure to let us know in the comments.

Measuring the Mighty Roar of SpaceX’s Starship Rocket

SpaceX’s Starship is the most powerful launch system ever built, dwarfing even the mighty Saturn V both in terms of mass and total thrust. The scale of the vehicle is such that concerns have been raised about the impact each launch of the megarocket may have on the local environment. Which is why a team from Brigham Young University measured the sound produced during Starship’s fifth test flight and compared it to other launch vehicles.

Published in JASA Express Letters, the paper explains the team’s methodology for measuring the sound of a Starship launch at distances ranging from 10 to 35 kilometers (6 to 22 miles). Interestingly, measurements were also made of the Super Heavy booster as it returned to the launch pad and was ultimately caught — which included several sonic booms as well as the sound of the engines during the landing maneuver.

Sounds were measured at eight different locations.

The paper goes into considerable detail on how the sound produced Starship’s launch and recovery propagate, but the short version is that it’s just as incredibly loud as you’d imagine. Even at a distance of 10 km, the roar of the 33 Raptor engines at ignition came in at approximately 105 dBA — which the paper compares to a rock concert or chainsaw. Double that distance to 20 km, and the launch is still about as loud as a table saw. On the way back in, the sonic boom from the falling Super Heavy booster was enough to set off car alarms at 10 km from the launch pad, which the paper says comes out to a roughly 50% increase in loudness over the Concorde zooming by.

OK, so it’s loud. But how does it compare with other rockets? Running the numbers, the paper estimates that the noise produced during a Starship launch is at least ten times greater than that of the Falcon 9. Of course, this isn’t hugely surprising given the vastly different scales of the two vehicles. A somewhat closer comparison would be with the Space Launch System (SLS); the data indicates Starship is between four and six times as loud as NASA’s homegrown super heavy-lift rocket.

That last bit is probably the most surprising fact uncovered by this research. While Starship is the larger and more powerful  of the two launch vehicles, the SLS is still putting out around half the total energy at liftoff. So shouldn’t Starship only be twice as loud? To try and explain this dependency, the paper points to an earlier study done by two of the same authors which compared the SLS with the Saturn V. In that paper, it was theorized that the arrangement of rocket nozzles on the bottom of the booster may play a part in the measured result.

Spotted at Supercon: Glowtape Wearable Display

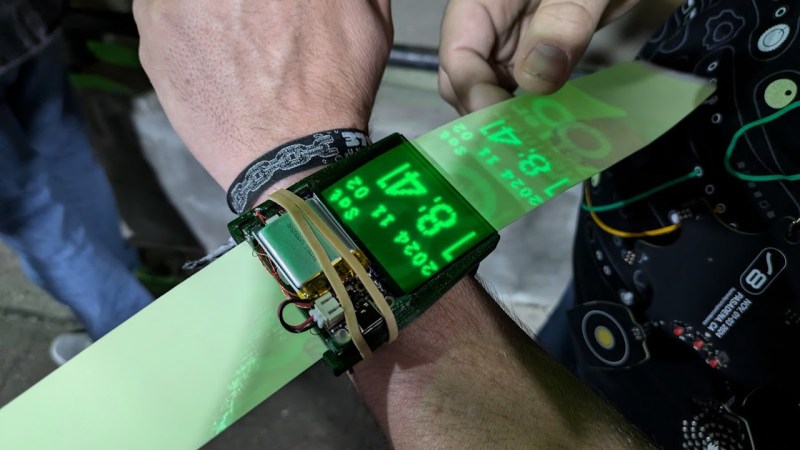
We’re big fans of unusual timepieces here at Hackaday, so it didn’t take long before somebody called our attention to the gloriously luminescent watch that [Henner Zeller] was wearing at this year’s Supercon.

He calls it the Glowtape, and it uses a dense array of UV LEDs and a long strip of glow-in-the-dark material to display the time and date, as well as images and long strings of text written out horizontally to create an impromptu banner. It looked phenomenal in person, with the energized areas on the tape glowing brightly during the evening festivities in the alleyway.

The text and images would fade fairly quickly, but in practice, that’s hardly a problem when you’re just trying to check the current time. If there was something to limit the practicality on this one, it would have to be the meter-long piece of material that you’ve got to keep pushing and pulling through the mechanism — but it’s a price we’re willing to pay.

Want one of your own? [Henner] has shared all of the source code for the wearable, from the OpenSCAD scripts to generate the 3D printed enclosure to the C firmware for the RP2040 that runs the show. The LED array itself is actually a spin-off of his Glowxels project, which is worth checking out if you’d like to recreate this concept on a much larger scale.

This isn’t the first time we’ve seen this technique used for this kind of thing, but it may be the most compact version of the concept we’ve seen so far.

WiFi Status Indicator Keeps Eye on the Network

These days, most of us take the instant availability of a high-speed link to the Internet for granted. But despite all of the latest technology, things still occasionally go pear-shaped — meaning that blistering fiber optic connection you’ve got to the world’s collected knowledge (not to mention, memes) can still go down when you need it the most.

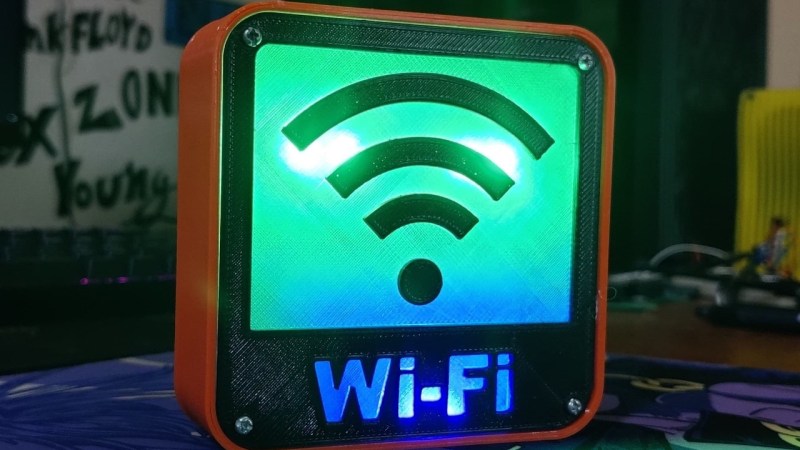
After suffering some connectivity issues, [Arnov Sharma] decided to put together a little box that could alert everyone in visual range to the status of the local router. It won’t fix the problem, of course, but there’s a certain value to getting timely status updates. Using a 3D printed enclosure and a couple of custom PCBs, the build is fairly comprehensive, and could certainly be pressed into more advanced usage if given the appropriate firmware. If you’ve been thinking of a Internet-connected status indicator, this is certainly a project worth copying studying closely.

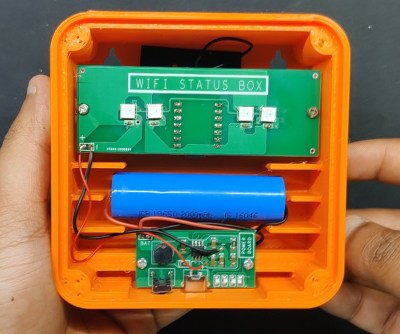
The aptly named “Wi-Fi Status Box” uses two PCBs: one to hold the Seeed Studio XIAO ESP32C3 microcontroller and four WS2812B addressable LEDs, and another that plays host to the IP5306 power management IC.

That latter board in particular is something you may want to file away for a future project, as it not only handles charging lithium-ion batteries such as common 18650 cells, but it also features an LED “fuel gauge” and the ability to boost the output power to 5 VDC with relatively few external components.

As for the firmware on this one, it’s simplicity itself. The goal is to see if the router has gone down, so all the code does is check every ten seconds to see if the ESP32 is still able to connect to the given wireless network. If the connection is good the LEDs are green, but if the link fails, they flip over to red. Combined with a printed front panel that uses transparent filament to soften the glow of the LEDs, and you’ve got an attractive way of knowing when it’s time to panic.

Too obvious for you? Perhaps you’d prefer this version that uses an analog multimeter to display when the net drops out.

Supercon 2024: Badge Add-On Winners

This year we challenged the Hackaday community to develop Shitty Simple Supercon Add-Ons (SAO) that did more than just blink a few LEDs. The SAO standard includes I2C data and a pair of GPIO pins, but historically, they’ve very rarely been used. We knew the talented folks in this community would be able to raise the bar, but as they have a tendency to do, they’ve exceeded all of our expectations.

As we announced live during the closing ceremony at the 2024 Hackaday Supercon, the following four SAOs will be put into production and distributed to all the attendees at Hackaday Europe in Spring of 2025.

Best Overall: SAO Multimeter
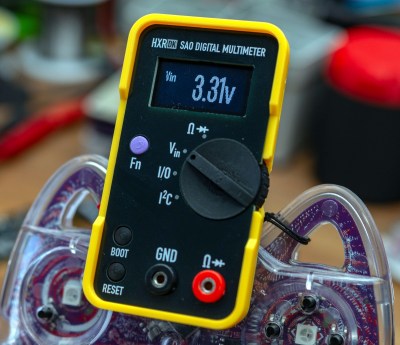
For the “Best Overall” category, we only intended to compare it with the other entries in the contest. But in the end, we think there’s a strong case to be made that [Thomas Flummer] has created the greatest SAO of all time. So far, anyway.

This add-on is a fully functional digital multimeter, with functions for measuring voltage, resistance, and continuity. The design is a pure work of art, with its structure combining stacked PCBs and 3D printed parts. There’s even tiny banana plugs to connect up properly scaled probes. Incredible.

In the documentation [Thomas] mentions there are additional functions he didn’t have time to include in the firmware, such as modes to analyze the I2C and GPIO signals being received. Now that it’s been selected for production, we’re hoping he’ll have the time to get the code finished up before its European debut.

Fun: Etch sAo Sketch

This SAO recreates the iconic art toy in a (hopefully) non-trademarked way, with a 1.5″ inch 128 x 128 grayscale OLED display and a pair of trimpots capped with 3D printed knobs. Drawing is fun enough, but the nostalgia really kicks in when you give it a good shake — the onboard LIS3DH 3-axis accelerometer picks up the motion and wipes the display just like the real thing.
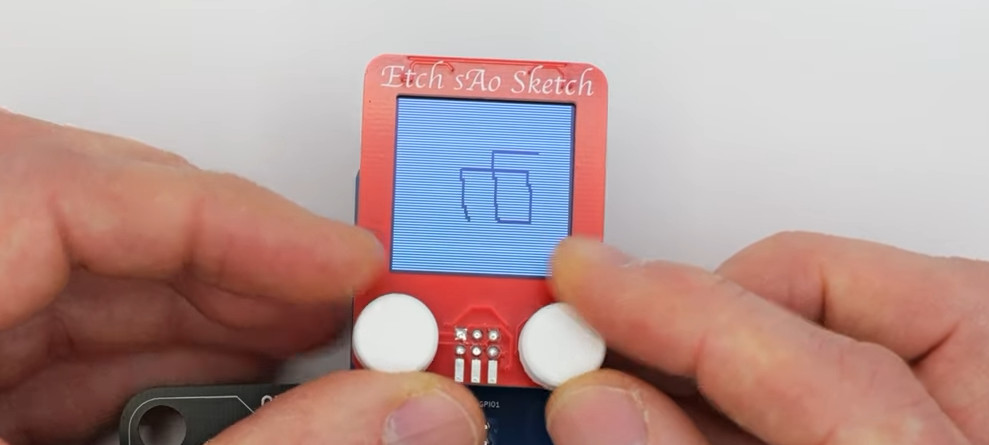
Created by [Andy Geppert], this SAO isn’t just a pretty face. Flipping it over shows an exceptionally clever technique for connecting the display board to the main PCB. Tiny metal balls (or “alignment spheres” if you want to get fancy) mate up with the mounting holes on the OLED board and center it, and a touch of solder locks it all in place.

Fine Art: Bendy SAO
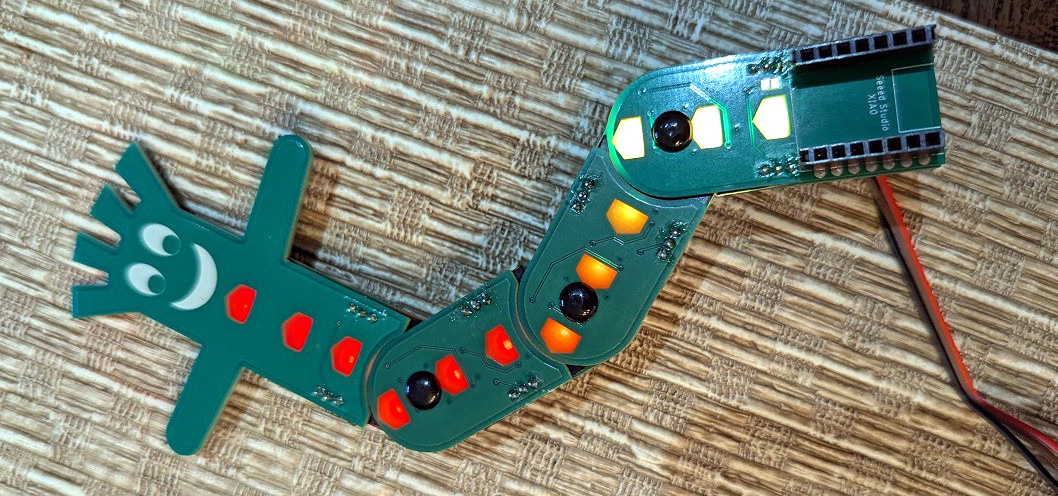
While this wacky, waving, inflatable, arm-flailing SAO might look like the sort of thing that would be outside of a used car dealership, but creator [debraansell] managed to shrink it down so the point that it’s reasonable to plug into your badge. More or less.

There are several fascinating tricks at work here, from lighting the PCB from the back using side-firing LEDs to the integrated slip rings. If this one didn’t look so good, it would have been a strong contender for the “Least Manufacturable” Honorable Mention.

Functional: Vectrex SAO
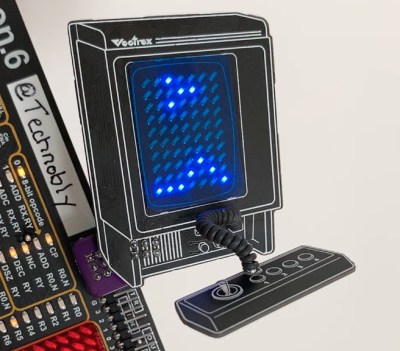
Creating a replica of the Vectrex at SAO scale would have been an impressive enough accomplishment, but [Brett Walach] took this one all the way and made it playable.

The display is a 7 x 10 Charlieplexed LED matrix, while the “joystick” is implemented with a 1-button capacitive touch sensor. A PIC16F886 microcontroller runs the simplified version of Scramble, and there’s even a speaker for era-appropriate audio.

But that’s not all! This SAO was also designed to be hacked — so not only is all the hardware and software open source, but there’re various jumpers to fiddle with various settings and an I2C control protocol that lets you command the action from the badge.

Honorable Mentions

As usual, this contest had several Honorable Mentions categories — while we would have loved to put all of these SAOs into production, there’s only so much we can do before now and Spring.

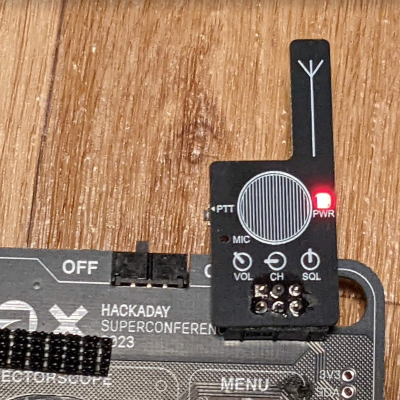
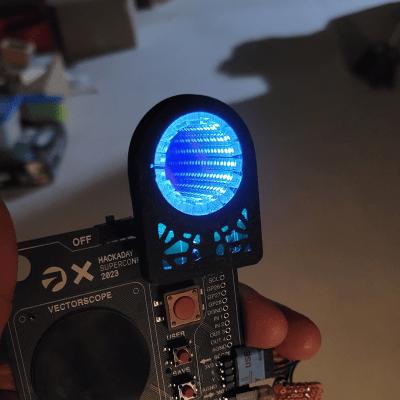
[Jeremy Geppert]’s SAO LoRa Walkie Talkie was a judge favorite, for its simple good looks and the extra functionality that it brings to the table. [Scorch Works]’s SAO Infinity Mirror was absolutely beautiful to see in person, and makes a fantastic display when many of them get together. And [MakeItHackin]’s Skull of Fate SAO not only looked super when its eyes scan the room, but it could read your future as well!
Best Communication:
Using I2C to get SAOs to talk to the badge (or each other) was a big part of this contest, but we were also on the lookout for entries which helped facilitate badge-to-badge communications.

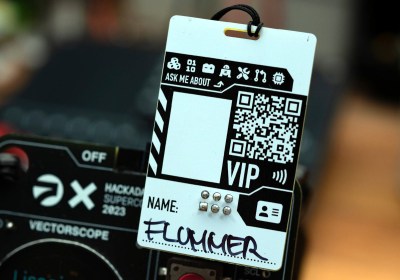
The Badge Tag NFC SAO from [Thomas Flummer] is a perfect example of both — it uses the NXP NTAG I2C Plus to provide 2K of read-write storage that can be accessed either internally through the I2C bus by the badge, or externally by an NFC device such as a smartphone. Modeled after a traditional conference name tag, this SAO was designed to make it easier for sharing your contact info with others during a busy con.

Infrared Communication SAO by [Alec Probst] brings infrared communications to the party, while looking like a classic TV remote. Though the original idea was to get this working in conjunction with the badge to act as a sort of TV-B-Gone, it ended up being used as part of a laser tag game during Supercon.
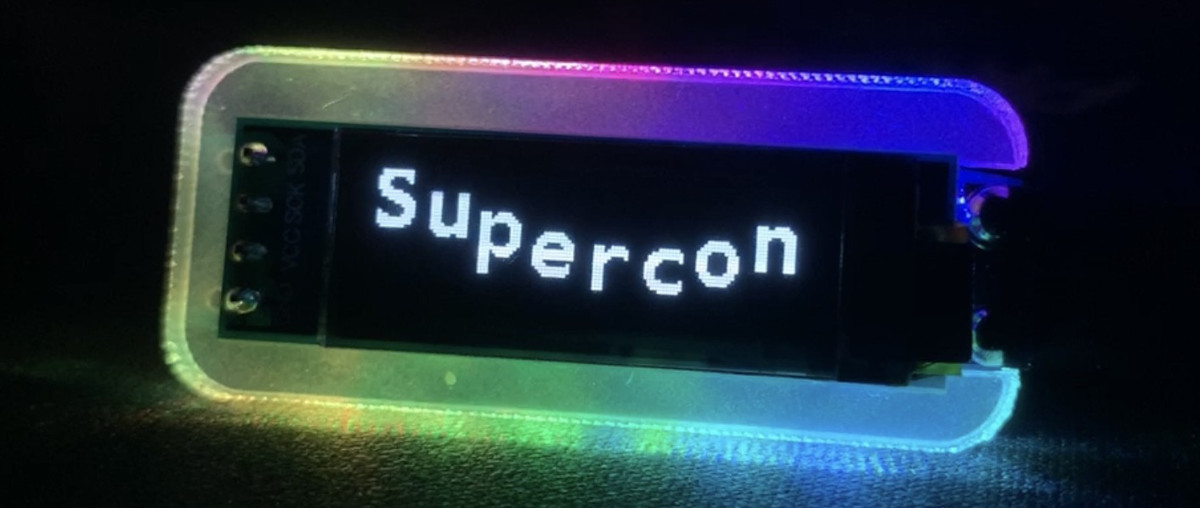
The GAT Nametag SC8 from [true] tackles communication on a more human level by providing a digital name tag for your badge. This compact board’s secret trick is the ability to make sure your name is legible no matter what its orientation thanks to a LIS2DW12 accelerometer that can detect the SAO’s orientation relative to the ground. RGB LEDs catch the viewer’s eye, but it’s the incredible firmware with seemingly endless options for text styling and tweaks that really set this build apart.

Light Show:
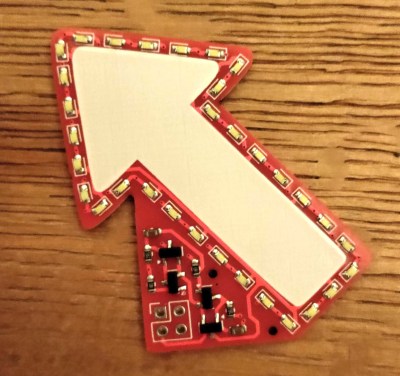
There’s little question that Featuring You! from [Nanik Adnani] is a perfect entry for this category. Nominally, it’s a little arrow you can write your name on and use a name tag. But power it up and you can dazzle anyone standing too close with its array of marching white LEDs. In a particularly nice touch, the circuit is implemented with only discreet components — no microcontroller.

The reDOT_RGB from [Alex] is a tiny 5×7 RGB LED matrix with a minuscule ATtiny816 MCU around the back to control the show. At just 8 x 11 mm, it’s hard to overstate just how tiny this SAO is.

While on the subject of tiny boards, the
Persistence of Vision POV Display is another entry not much larger than the SAO connector itself. Using a row of five tiny white LEDs and a ADXL345 accelerometer, [Michael Yim] is able to write text in mid-air thanks to the gullibility of the human eye.

Least Manufacturable:

Simple Add-Ons are essentially an art form, so it’s not surprising to find that they don’t often lend themselves to mass production. Several of the entries this yeah would be a real challenge to make in large numbers, but the one that really keeps us up at night is the ultra tiny smart SAO from [Alex].
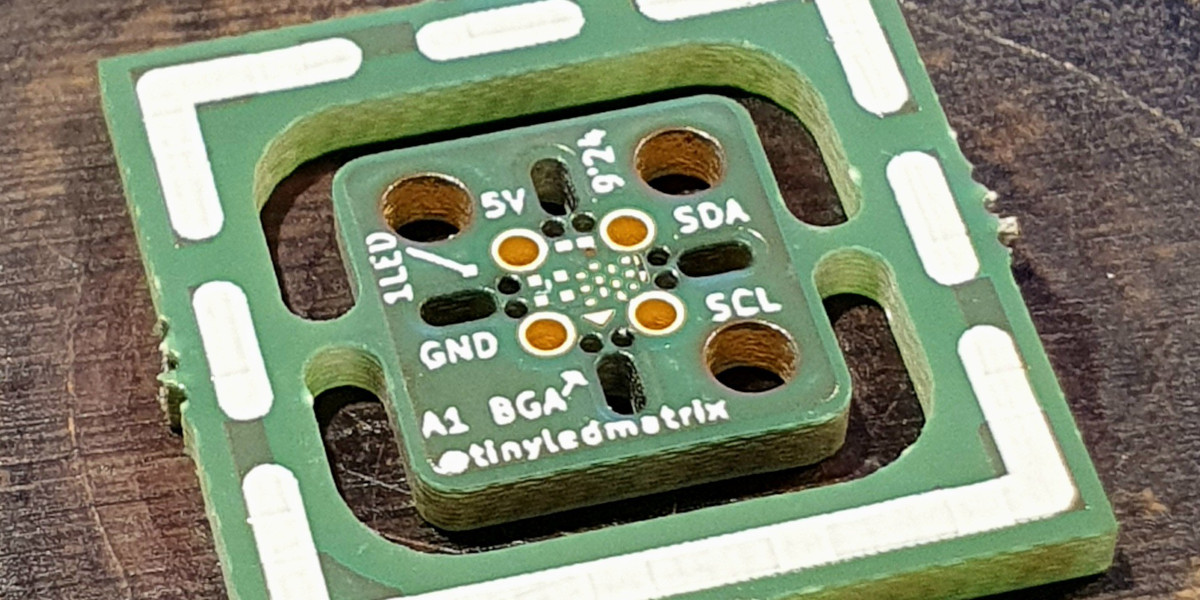
This board is designed to fit inside the space between four header pins. Thanks, but no thanks.

Raising the Bar

Our hope this year was to elevate the Simple Add-On from a decorative piece of flair to something functional, and potentially, even useful. The results were incredible, and while we can only pick four winners this time around, every entry helped push the state-of-the-art forward in its own way. It’s hard to imagine how the SAO envelope can be pushed any further, but we can’t wait to find out.
2024 Hackaday Supercon SAO Contest

Supercon 2024: Streaming Live

The 2024 Hackaday Supercon is on in Pasadena, but if you couldn’t make it to sunny California this year, don’t worry. We’ve got a live streams of the main stage talks, and all of the second track talks are being recorded and will be put up on the YouTube channel after the con.

If you’re watching from home and want to join the conversation, today might be a good time to join the official Hackaday Discord server.

NOTE: Stream will resume Sunday morning.

❌