Vista de Lectura

Hay nuevos artículos disponibles. Pincha para refrescar la página.

Taking “Movies” of Light in Flight

This one isn’t clickbait, but it is cheating. [Brian Haidet], the guy behind Alpha Phoenix, has managed to assemble movie footage of a laser beam crossing his garage, using a rig he put together for just a few hundred dollars. How, you ask? Well, for the long version, you’re going to want to watch the video, also embedded below. But we’ll give you the short version here.

Light travels about a foot in a nanosecond. What have you got that measures signals on a nanosecond scale pretty reliably? Of course, it’s your oscilloscope. The rest of [Brian]’s setup includes a laser that can pull off nanosecond pulses, a sensor with a nanosecond-ish rise time, and optics that collect the light over a very small field of view.

He then scans the effective “pinhole” across his garage, emitting a laser pulse and recording the brightness over time on the oscilloscope for each position. Repeating this many thousands of times and putting them all together relative to the beginning of each laser pulse results in a composite movie with the brightness at each location resolved accurately enough to watch the light beam fly. Or to watch different time-slices of thousands of beams fly, but as long as they’re all the same, there’s no real difference.

Of course, this isn’t simple. The laser driver needs to push many amps to get a fast enough rise time, and the only sensor that’s fast enough to not smear the signal is a photomultiplier tube. But persistence pays off, and the results are pretty incredible for something that you could actually do in your garage.

Photomultiplier tubes are pretty damn cool, and can not only detect very short light events, but also very weak ones, down to a single photon. Indeed, they’re cool enough that if you get yourself a few hundred thousand of them and put them in a dark place, you’re on your way to a neutrino detector. 
A Twenty-Segment Display, Artistically

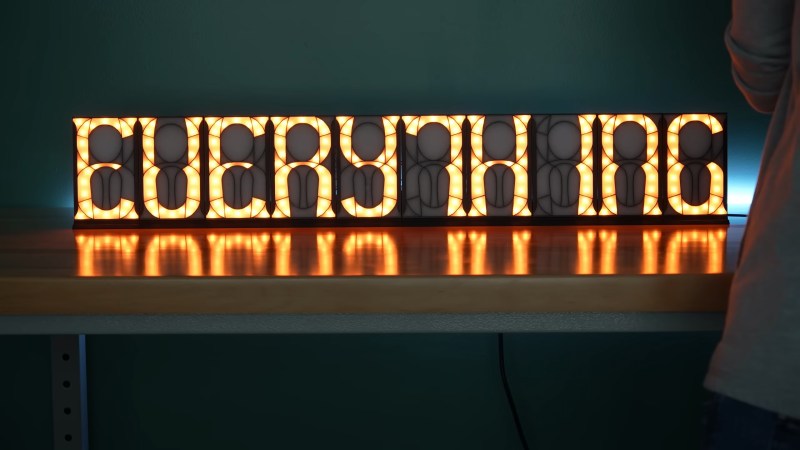
We all know and love the humble seven-segment display, right? And if you want to make characters as well as numbers, you can do an okay job with sixteen segments off the shelf. But if you want something more art-deco, you’ll probably want to roll your own. Or at least, [Ben] did, and you can find his designs up on GitHub.

Taking inspiration from [Posy]’s epic investigation of segmented displays, [Ben] sat down with a sketchpad and created his own 20-segment font that displays numbers and letters with some strange, but frankly lovely, segment shapes. There is no center line, so letters like “T” and numbers like “1” are a little skewed, but we think it’s charming.

We’ve seen about a bazillion takes on the seven-segment idea over the years here. Most recently, we fell in love with this 21-segment beauty, but honestly the original eight(!) segment patent version is charming as well. Anyway, picking a favorite segmented display at Hackaday is like picking your favorite child, if you have a few hundred children. We love them all.

Thanks [Aaron] for the tip!

The Mystery of the Messed-Up Hammond X5

[Filip] got his hands on a sweet old Hammond X5 organ, but it had one crucial problem: only half of the keys worked. Each and every C#, D, D#, E, F, and F# would not play, up and down the keyboard, although the other notes in between sounded just fine.

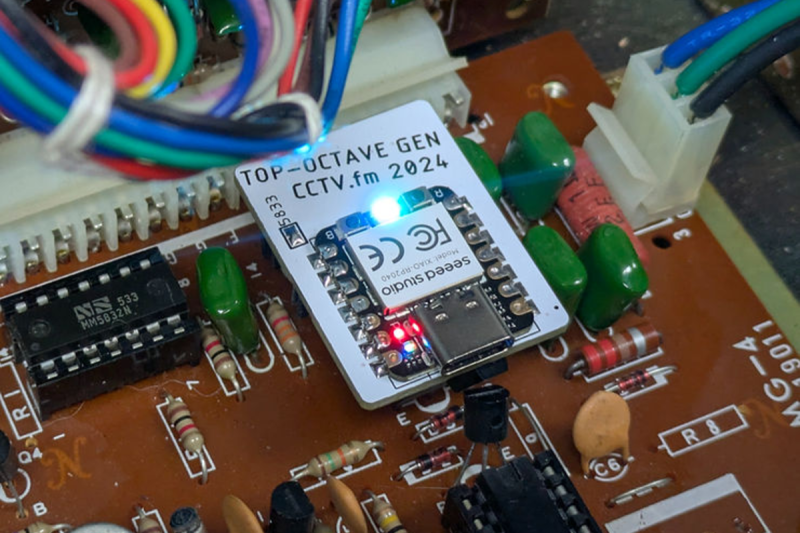
Those of you with an esoteric knowledge of older electric organs will be saying “it’s a busted top-octave generator chip”, and you’re right. One of the TOGs worked, and the other didn’t. [Filip] rolled his own top-octave generator with a Pico, in Python no less, and the old beauty roared to life once more.

But what is a top-octave generator, you may ask? For a brief period of time in the early 70s, there were organs that ran on square waves. Because a musical octave is a doubling or halving of frequency, you can create a pitch for every key on the organ if you simply create one octave’s worth of pitches, and divide them all down using something as simple as a binary counter IC. But nobody makes top-octave chips any more.

Back in 2018, [DC Darsen] wrote in asking us if we knew about any DIY top-octave designs, and we put out an Ask Hackaday to see if you all could make a top-octave generator out of a microcontroller. We got a super-optimized code hack in response, and that’s worth checking out in its own right, but we always had the nagging suspicion that a hardware solution was the best solution.

We love how [Filip]’s design leans heavily on the Pico’s programmable input/output hardware modules to get the job done with essentially zero CPU load, allowing him to write in Python and entirely bypassing the cycle-counting and assembly language trickery. The voltage shifters and the switchable jumpers to swap between different top-octave chip types are a nice touch as well. If you have an organ that needs a top-octave chip in 2024, this is the way we’d do it. (And it sounds fantastic.)

Watch Any Video on Your Game Boy, Via Link Cable

Game Boys have a link cable that lets two of them play together. You know, to battle with a friend’s Pokemon and stuff like that. But who says that it should be limited to transmitting only what Big N wants you to?

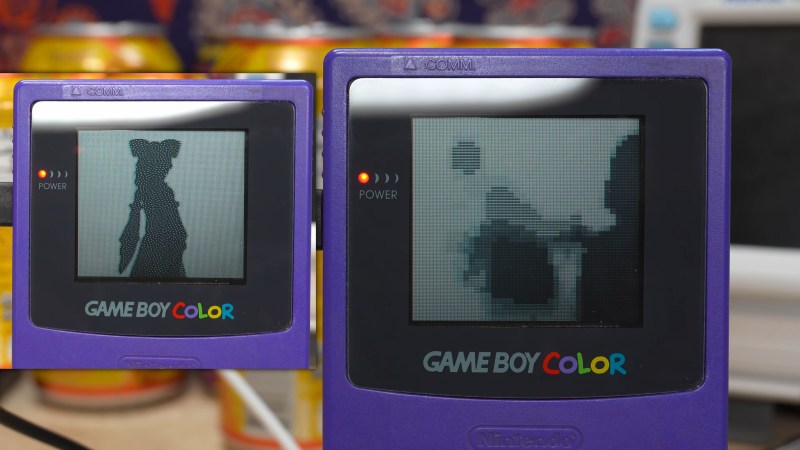
[Chromalock] wrote a custom GB program that takes in data over the link cable, and displays it on the screen as video, as fast as it can be sent. Add in a microcontroller, a level shifter, and software on the big computer side, and you can hook up your Game Boy Color as a normal video device and send it anything you want, from a webcam to any program that outputs video.

Well, almost. The biggest limitation is the data link cable, of course. On the older Game Boys, the link cable is apparently only good for 8 kHz, while the Color models can pull a not-quite-blistering 512 kHz. Still, that’s enough for 60 fps in a low-res black and white mode, or a slow, screen-tearing high-res color experience. You pick your poison.

There are gotchas that have to do with the way the GB displays palettes that get left as “to-do” on the software side. There is room for improvement in hardware too. (GB Link looks like SPI to us, and we’d bet you can push the speeds even higher with clever GB-side code.) In short, this is an awesome demo that just invites further hacking.

If you want to know more about the Game Boy to get started, and maybe even if you don’t, you absolutely must watch The Ultimate Game Boy Talk. Trust us on this one.


❌