Vista de Lectura

Hay nuevos artículos disponibles. Pincha para refrescar la página.

Head to Head: Servos vs Steppers
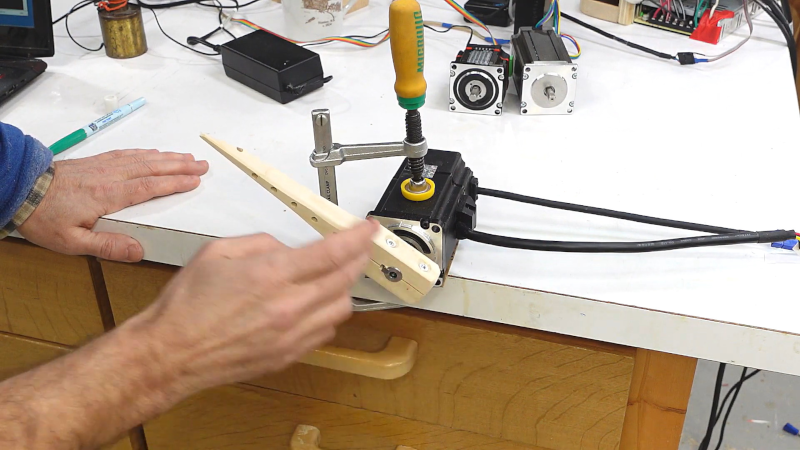
You have a project that needs something to move. Should you use a stepper motor or a servo motor? [Matthias] has an opinion, and you can hear his thoughts in the video below. One tip we’ll take away from the video: when working with motors, shoot some high-frame-rate video and slow it down to see what’s really happening.

The initial tests looked fine at normal speed. But increasing the frame rate and decreasing the playback speed showed some very interesting things like how much each motor was overshooting. The ability to control this sort of thing is a key differentiator for these kinds of motors.

In addition to a regular stepper, he also looks at a closed-loop stepper, which has some benefits and drawbacks, too, of course. The motors with the encoders were sensitive to magnetic fields, for example.

There is plenty to see in the video, but the bottom line is that your choice of motor will depend on a lot of interlocking factors including how fast you need, how much torque you require, and your desired accuracy. You could probably have guessed that but it is still very illustrative to see them on the bench and get a feel for just how these motors work and how to solve some common issues with them.

If you want to learn more about stepper motors, you are on the right site. Servos, too.
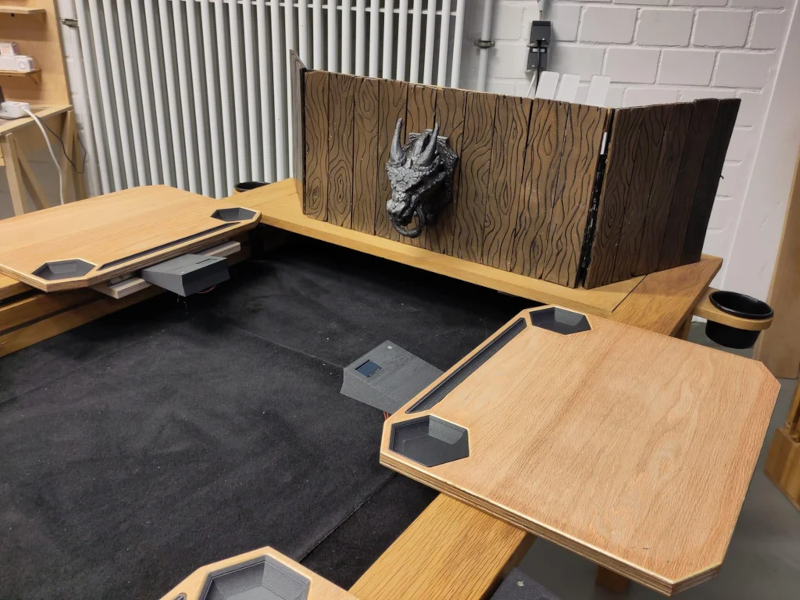
Gaming Table has Lights, Action

We couldn’t decide if [‘s] Dungeons and Dragons gaming table was a woodworking project with some electronics or an electronics project with some woodworking. Either way, it looks like a lot of fun.

Some of the features are just for atmosphere. For example, the game master can set mood lighting. Presets can have a particular light configuration for, say, the woods or a cave.

But the table can also be a game changer since the game runner can send private messages to one or more players. Imagine a message saying, “You feel strange and suddenly attack your own team without any warning.”

A series of ESP32 chips makes it possible. The main screen has an IR touch frame, and the players have smaller screens. The main screen shows an HTML interface that lets you set initiatives, send messages, and control the lighting. Each player also has an RFID reader that the players use to log in.

The ESP32 chips use ESP-NOW for simplified networking. Of course, you could just have everyone show up with a laptop and have some web-based communications like that, but the table seems undeniably cool.

Usually, when we see a gaming table, the table itself is the game. If we were building a D&D table, we might consider adding a printer.

Retrotechtacular: The 1951 Telephone Selector

Telephone systems predate the use of cheap computers and electronic switches. Yesterday’s phone system used lots of stepping relays in a box known as a “selector.” If you worked for the phone company around 1951, you might have seen the Bell System training film shown below that covers 197 selectors.

The relays are not all the normal ones we think of today. There are slow release relays and vertical shafts that are held by a “dog.” The shaft moves to match the customer’s rotary dial input.

Be sure to check out part two to get the whole story. Actually, we think [Periscope] switched the videos, so maybe start with part two. It sort of gives an overview and more of a mechanical perspective. Part one shows the schematic and assumes you know about some things covered in what they are calling part two.

You have to wonder who designed these to start with. Seems hard enough to follow when someone is explaining it, much less dreaming it up from scratch. Like most things, many people contributed to the development of the technology, and we are pretty sure the type 197 selector wasn’t the first device to appear.

Watching the current flow through the wires in the video reminded us of the Falstad circuit simulator.

The Engineer Behind Mine Detection

According to [Joanna Goodrich]  in IEEE Spectrum, prior to World War II, soldiers who wanted to find land mines, simply poked at the ground with pointed sticks or bayonets. As you might expect, this wasn’t very safe or reliable. In 1941, a Polish signals officer, [Józef Stanislaw Kosacki], escaped to Britain and created an effective portable mine detector.

[Kosaci] was an electrical engineer trained at the Warsaw University of Technology. He had worked as a manager for the Polish National Telecommunication Institute. In 1937, the government tasked him with developing a machine that could detect unexploded grenades and shells. The machine was never deployed.

When Germany invaded Poland in 1939, [Kosacki] returned to military service (he had done a year of compulsory service earlier). He was captured and kept in a prison camp in Hungary. But he managed to escape in late 1939 and joined the Polish Army Corps in Britain, teaching Morse code to soldiers.

Britain buried landmines along their coastline to thwart any invasion. Unfortunately, they failed to notify allied forces about it and several Polish soldiers were killed. In response, the British Army set a challenge to develop a mine detector and, as a test, the device had to locate some coins on a beach.

There were seven devices entered, and [Kosacki’s] won. As a military secret, there isn’t much detail, but it sounds like it was the (now) usual BFO metal detector affair with two coils at the end of a bamboo pole. With the tech of the day, the whole affair came in at around 30 pounds. We’d bet a lot of that was in batteries.

By 1942 during the second battle of El Alamein, the new detectors allowed mine clearing operations to happen twice as fast as before. Our engineer didn’t get much recognition. Just a letter from King George. Part of that was due to fear that his family in Poland would suffer.

While land mines aren’t as common for most people as FM radios, we love to meet inventors. Even when it isn’t a very happy story.

A Low Effort, Low Energy Doorbell

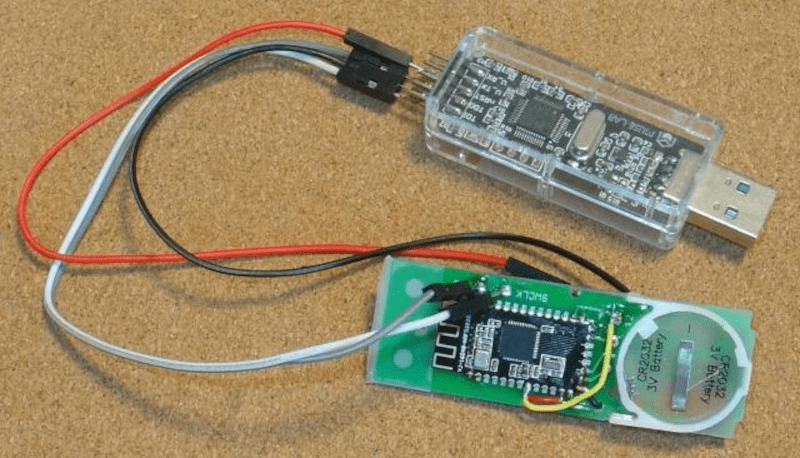
Bluetooth is a good way to connect devices that are near each other. However, it can drain batteries which is one reason Bluetooth Low Energy — BLE — exists. [Drmph] shows how easy it is to deploy BLE to make, in this case, a doorbell. He even shows how you can refit an existing doorbell to use the newer technology.

Like many projects, this one started out of necessity. The existing wireless doorbell failed, but it was difficult to find a new unit with good review. Cheap doorbells tend to ring spuriously due to interference. BLE, of course, doesn’t have that problem. Common BLE modules make up the bulk of the project. It is easy enough to add your own style to the doorbell like a voice announcement or musical playback. The transmitter is little more than a switch, the module, a coin cell, and an LED.

It is, of course, possible to have a single receiver read multiple doorbells. For example, a front door and back door with different tones. The post shows how to make a remote monitor, too, if you need the bell to ring beyond the range of BLE.

A fun, simple, and useful project. Of course, the cool doorbells now have video. Just be careful not to get carried away.

Toner Transfer, but Not for PCBs

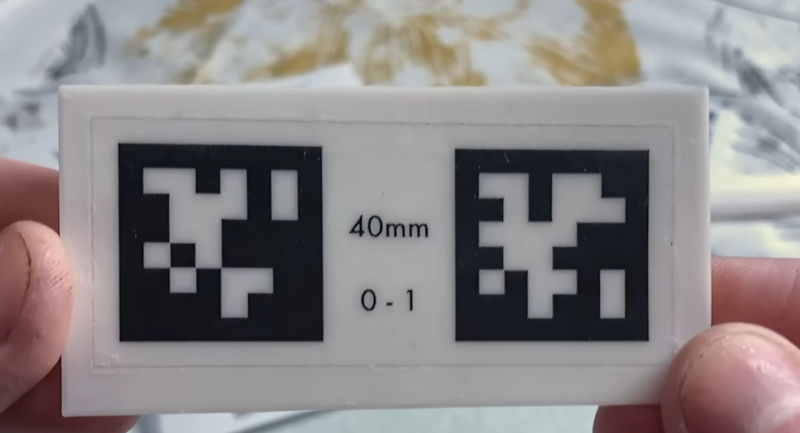
It is old news that you can print PCB artwork on glossy paper and use a clothes iron to transfer the toner to a copper board, which will resist etchant. But [Squalius] shows us how to do a similar trick with 3D prints in a recent video, which you can see below.

The example used is a QR code, although you can use anything you can print in a mirror image. Of course, heat from a clothes iron isn’t going to be compatible with your 3D-printed plastic. The trick is to use some acrylic medium on the part, place the print face down, and apply more medium to the back of the paper.

Once the acrylic dries, you can use water to remove the paper, but the toner pattern will remain. Once it dries, you’ll need to remove bits of paper still left. Be careful, though. The image is now pretty fragile. To make it more durable, the process calls for a clear varnish overcoat. Some commenters on the video mentioned that a UV clear coat would probably work, too.

This is an easy technique to experiment with, and the results look great. Seems perfect for keycaps or front panels. Let us know how it goes!

Retro Big Iron for You

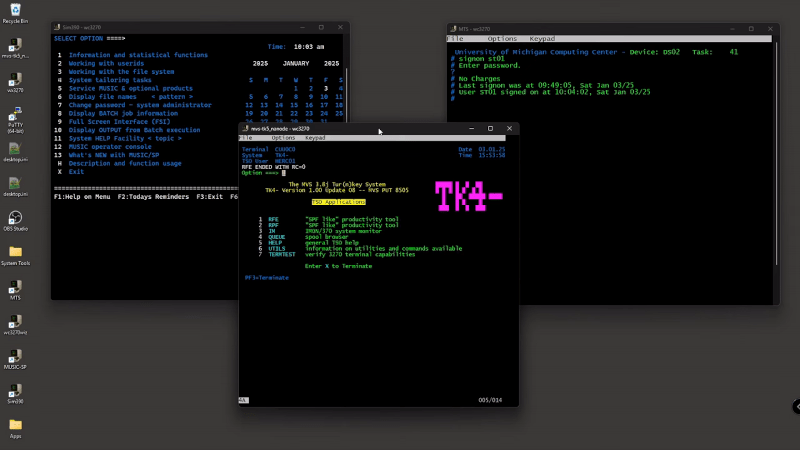
Many of us used “big iron” back in the day. Computers like the IBM S/360 or 3090 are hard to find, transport, and operate, so you don’t see many retrocomputer enthusiasts with an S/370 in their garages. We’ve known for a while that the Hercules emulators would let you run virtual copies of these old mainframes, but every time we’ve looked at setting any up, it winds up being more work than we wanted to spend. Enter [Ernie] of [ErnieTech’s Little Mainframes]. He’s started a channel to show you how to “build” your own mainframe — emulated, of course.

One problem with the mainframe environment is that there are a bunch of operating system-like things like MVS, VM/CMS, and TSO. There were even custom systems like MUSIC/SP, which he shows in the video below.

On top of that, you have to learn a lot of new software. Scripting? Rexx. Editing? Several choices, but none you are likely to know about if you haven’t used a mainframe before. Programming languages? You can find C sometimes, but it might not be a modern dialect. You might have more luck with FORTRAN or COBOL.

In addition, IBM has specific terms for things we don’t use in the rest of the world. Boot? IPL (initial program load). Disk? DASD. Security? RACF.

So far, [Ernie] only has an overview and a short demo. If you can’t wait,  cruise over to the Hercules page and see how far you can get. You may decide to wait for [Ernie’s] next video.

If you want to shortcut, there are entire environments in Docker that can be handy. If your IBM nostalgia runs to the smaller System/3, AS/400, or POWER systems, someone already has something ready for you to use.

Try a PWMPot

[Stephen Woodward] is familiar with digital potentiometers but is also familiar with their limitations. That spurred him to create the PWMPot which performs a similar function, but with better features than a traditional digital pot. Of course, he admits that this design has some limitations of its own, so — as usual — you have to make your design choices according to what’s important to you.

Perhaps the biggest limitation is that the PWMPot isn’t useful at even moderately high frequencies. The circuit works by driving two CMOS switches into an RC circuit. The switches’ inverted phase tends to cancel out any ripple in the signal.

The RC circuit is selected to trade response time with the precision of the final voltage output. The CMOS switches used are part of a 74HC4053B IC. While it might not solve all your digital potentiometer problems, there are cases where it will be just what you need.

We’ve looked at traditional digital pots before. If you prefer the hard way, grab a regular pot and a motor.

Regular (Expression) Chess

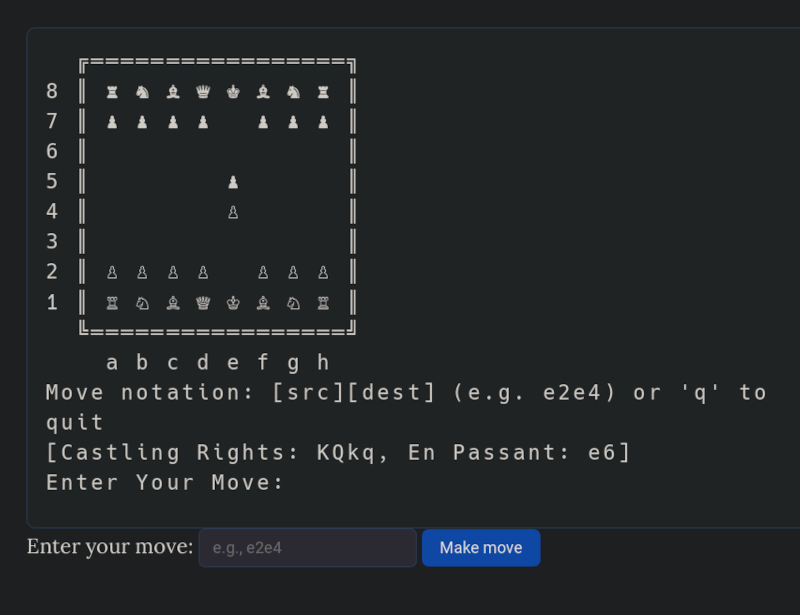
[Nicholas Carlini] found some extra time on his hands over the holiday, so he decide to do something with “entirely no purpose.” The result: 84,688 regular expressions that can play chess using a 2-ply minmax strategy. No kidding. We think we can do some heavy-duty regular expressions, but this is a whole other level.

As you might expect, the code to play is extremely simple as it just runs the board through series of regular expressions that implement the game logic. Of course, that doesn’t count the thousands of strings containing the regular expressions.

How does this work? Luckily, [Nicholas] explains it in some detail. The trick isn’t making a chess engine. Instead, he creates a “branch-free, conditional-execution, single-instruction multiple-data CPU.” Once you have a CPU, of course it is easy to play chess. Well, relatively easy, anyway.

The computer’s stack and registers are all in a long string, perfect for evaluation by a regular expression. From there, the rest is pretty easy. Sure, you can’t have loops and conditionals can’t branch. You can, however, fork a thread into two parts. Pretty amazing.

Programming the machine must be pretty hard, right? Well, no. There’s also a sort-of language that looks a lot like Python that can compile code for the CPU. For example:

def fib():
    a = 1
    b = 2
   for _ in range(10):
        next = a + b
        a = b
        b = next

Then you “only” have to write the chess engine. It isn’t fast, but that really isn’t the point.

Of course, chess doesn’t have to be that hard. The “assembler” reminds us a bit of our universal cross assembler.

The Helicone: Toy or Mathematical Oddity?

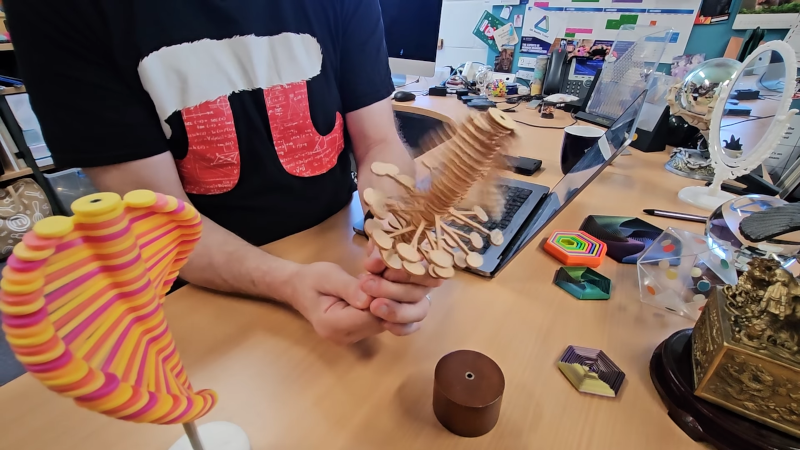
We always enjoy videos from the [Mathologer], but we especially liked the recent video on the Helicone, a toy with a surprising connection to mathematics. The toy is cool all by itself, but the video shows how a sufficiently large heliocone models many “natural numbers” and acts, as [Mathologer] puts it, acts as “microscope to probe the nature of numbers.”

The chief number of interest is the so-called golden ratio. A virtual model of the toy allows easy experimentation and even some things that aren’t easily possible in the real world. The virtual helicone also allows you to make a crazy number of layers, which can show certain mathematical ideas that would be hard to do in a 3D print or a wooden toy.

Apparently, the helicone was [John Edmark’s] sculpture inspired by DNA spirals, so it is no surprise it closely models nature. You can 3D print a real one.

Of course, the constant π makes an appearance. Like fractals, you can dive into the math or just enjoy the pretty patterns. We won’t judge either way.

We’ve seen math sequences in clocks that remind us of [Piet Mondrian]. In fact, we’ve seen more than one of those.

Mechanical Calculator Finds Derivitives

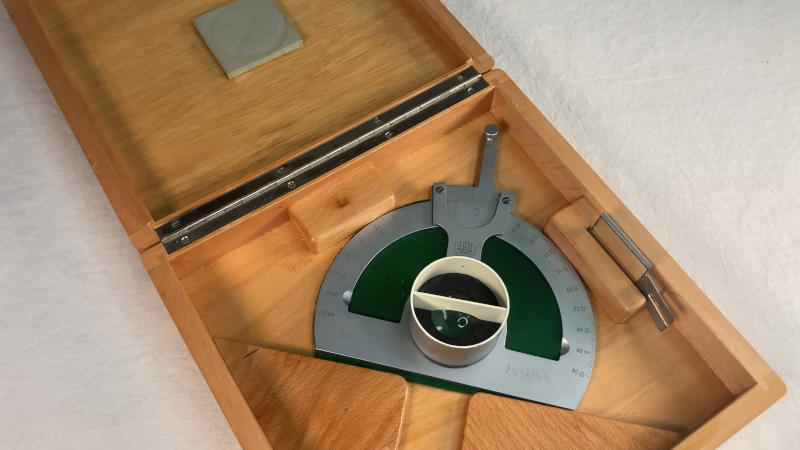
We like mechanical calculators like slide rules, but we have to admit that we had not heard of the Ott Derivimeter that [Chris Staecker] shows us in a recent video. As the name implies, the derivimeter finds the derivative of a function. To do that, you have to plot the function on a piece of paper that the meter can measure.

If you forgot calculus or skipped it altogether, the derivative is the rate of change. If you plot, say, your car’s speed vs time, the parts where you accelerate or decelerate will have a larger derivative (either positive or negative, in the decelerate case). If you hold a steady speed, the derivative will be zero.

To use the derivimeter, you sight the curve through the center glass and twist the device so the cursor, which is a lens and mirror system that lets you precisely find a tangent line. You can read the angle and find the true derivative using a table of tangents.

[Chris] has another derivimeter from Gerber. However, he found a different type of derivimeter that uses a prism, and he sure would like to find one of those for his collection.

Calculus is actually useful and not as hard as people think if you get the right explanations. This isn’t exactly a slide rule, but since it is a mechanical math device, we think it counts anyway.

Perfecting 20 Minute PCBs with Laser

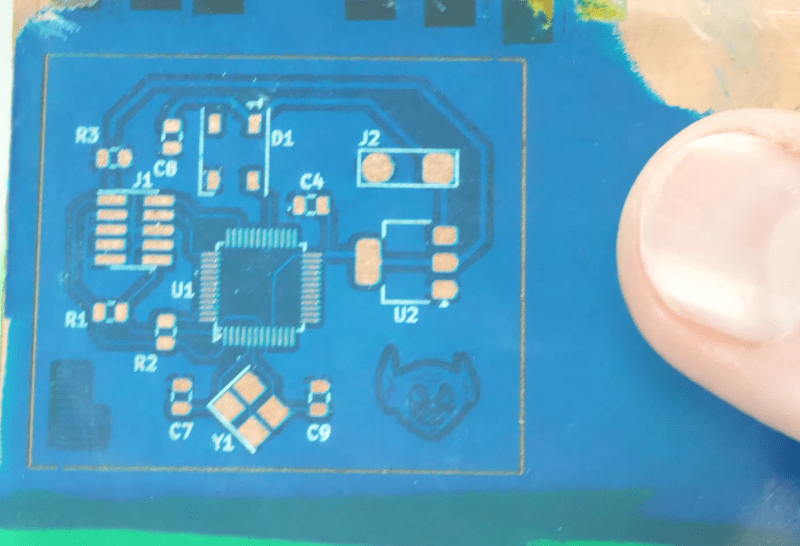
Normally, you have a choice with PCB prototypes: fast or cheap. [Stephen Hawes] has been trying fiber lasers to create PCBs. He’s learned a lot which he shares in the video below. Very good-looking singled-sided boards take just a few minutes. Fiber lasers are not cheap but they are within range for well-off hackers and certainly possible for a well-funded hackerspace.

One thing that’s important is to use FR1 phenolic substrate instead of the more common FR4. FR4 uses epoxy which will probably produce some toxic fumes under the laser.

We were surprised at how good the boards looked. Of course, the line definition was amazing, as you’d expect from a laser with details down to 200 microns (a little less than 0.008″), and he thinks it can go even lower. The laser also drills holes and can cut the board outline. A silk screen makes it easy to add a solder mask, and the laser will even cut the mask. [Stephen] also etched “silk screening” into the solder mask and filled it with a different color solder mask to make nice board legends.

Registration is critical and will be extra critical for two-sided boards which is what he’s working on now. We think if you put some scored carrier edges around the board with fiducials, you could make a jig that would hold the board in a very precise position using the holes in the carrier edges.

Vias are another issue. He mentions using rivets, but we’ve also seen people simply solder both sides of a wire through a hole, which isn’t that hard.

For most people, making your own PCBs is fun but not very practical. But there is something about being able to turn around actually good-looking boards multiple times in a day when you are doing heavy development. If you don’t mind fumes, you can laser mark your PCBs.

Stacy’s Computer Has Got It Going On

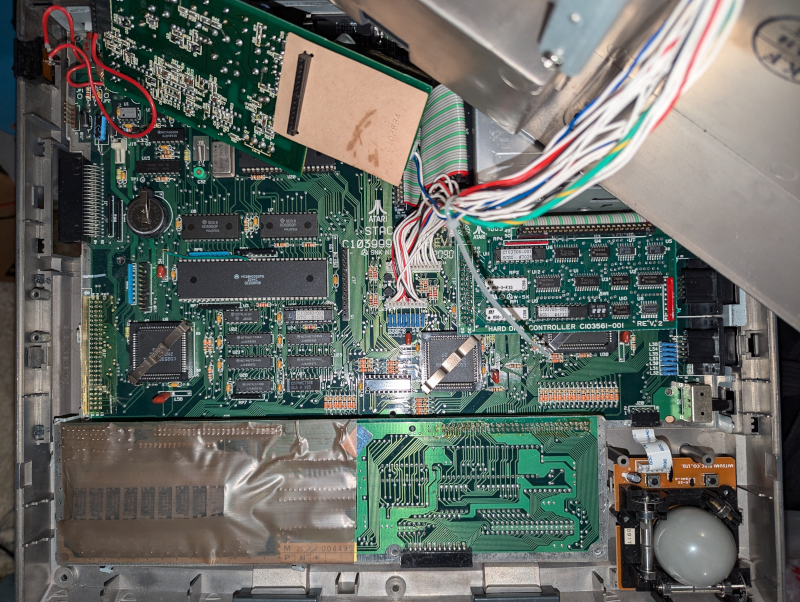
According to [ClassicHasClass], the best way to open an Atari Stacy is to not open an Atari Stacy. Apparently, these old computers were not pleasant to work on. The cables were not keyed and were prone to short against things. Screws easily strip out plastic holes. Of course, there wouldn’t be a story if there wasn’t a teardown and an upgrade that you can check out in the post.

The Stacy was one of Atari’s earliest portable systems and the first ST portable (that is, STacy). There’s a backlit LCD, a keyboard and trackball, and the usual ports. You could make do with a single floppy or spring for a second floppy or an internal SCSI hard drive. The 8 MHz 68000-based machine would set you back north of $2,300 back in 1989.

The original plan was to run the thing on C-cell batteries, but that would give you about 15 minutes of operation. They finally decided it was a luggable — you’d have to plug it into the wall. The battery compartment was there, but empty and glued shut.

Apparently, there were about 35,000 of these made, but they seem somewhat rare. But we do like a rare retrocomputer. Or even some that aren’t so rare.

16-bit Linux-like Goodness

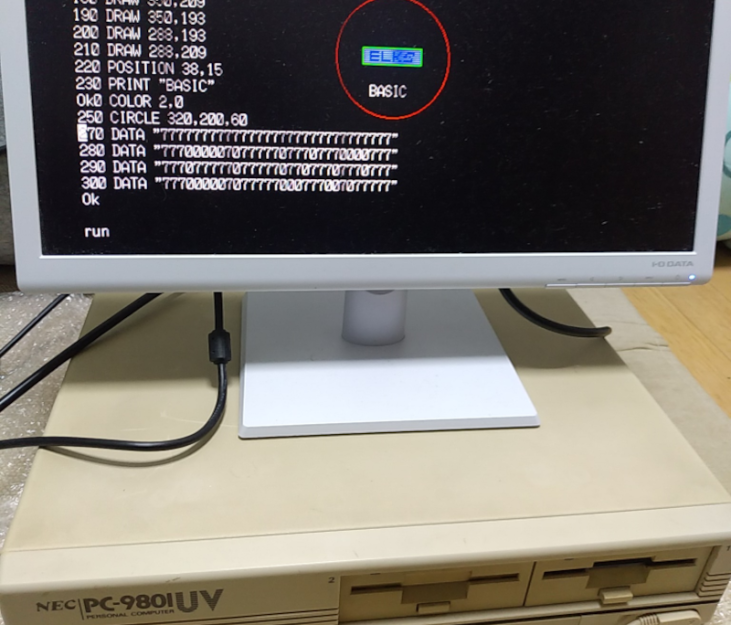
We see many 16-bit retrocomputers around here based on Intel and Intel-like chips such as the 8086, 8088, V20, and similar. While they don’t seem very powerful by today’s standards, they were perfectly capable machines and, thanks to Elks (Embeddedable Linux Kernel Subset), you can run something fairly Linux-like on these devices.

The requirements are light: 512K of RAM is desirable, but you can do something with 256K. If you have ROM, you can even get by with 128K. Most importantly, the system doesn’t require a memory management unit to remap memory like many operating systems.

The project has been around for a bit, but has had some recent updates both for the runtime and the build system. For example, you can now build under WSL or using the Open Watcom C compiler. Executables are now compressed, and there’s a new cache system. The kernel and standard library no longer use long division, to improve perfomance.

If you want to try the system, you can boot it in an emulator on your browser. Just log in as “root.” There’s even a fake serial port available. Plus you can play Adventure. Or Doom.

We’ve seen Elks in some very strange places. Really strange.

Self Driving Like it’s 1993

In a stunning example of the Baader Meinhof effect, we’ve recently heard several times this week about events like the “carbage run.” That is, a motoring event where you can only buy some garbage car to compete. In the case of [Robbe Derks], the idea was to take a six-day journey to the polar circle in a car. But not just any car. It had to be at least 20 years old and cost less than €1000. That wasn’t hard enough for [Robbe] and friends. They also decided to make the car self-driving.

If you have a car that is new enough, this might not be as hard as it sounds. The OpenPilot project adds L2 self-driving features to about 275 car models. But probably not a 20-year-old junker or, in particular, a 1993 Volvo 940. [Robbe] took up the challenge and is doing a series of blog posts covering how it all worked.

Most (or maybe all) cars in 1993 didn’t have actuators for remote steering, so the car needed a transplant from a 2020 Toyota Corolla part. Adaptive cruise control also needed some help in the brake system. Add an accelerator servo and an optional radar sensor and you are almost ready to go.

We are waiting for more blog posts to tell us just how close to ready you are at that point. But even the first post has a lot of cool car info. It won’t be a weekend project to duplicate, but it does have a certain cool factor.

Now add a decidedly non-1993 Android phone… If you want to start with something less complex, maybe settle for driving assistance only in certain conditions.

High Performance RISC-V

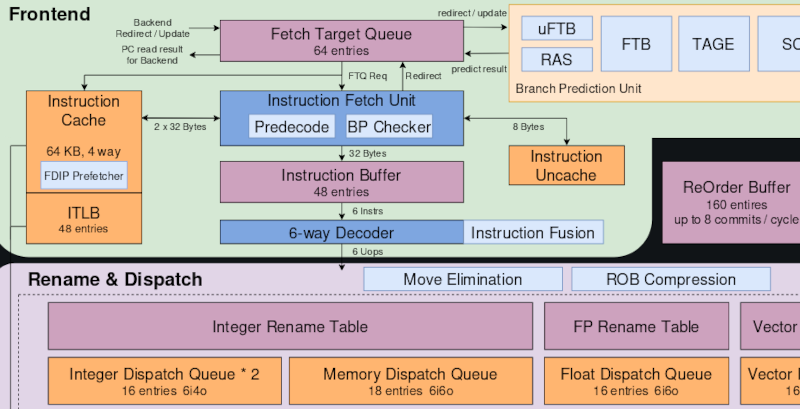
From the Institute of Computing Technology division of the Chinese Academy of Sciences and Peng Cheng Laboratory comes a high-performance and well-documented RISC-V core called XiangShan.

In the Git repository, you’ll find several branches including at least two stable branches: Yanqihu and Nanhu. The currently developed architecture, Kunminghu, is impressive, with a sophisticated instruction fetch unit, a reorder buffer, and a register renaming scheme.

The point of these types of circuits in a CPU is to allow multiple instructions to process at once. This also implies that instructions can be executed out of order. A cursory glance didn’t show any branch prediction logic, but that may be a limitation of the documentation. If there isn’t one, that would be an interesting thing to add in a fork if you are looking for a project.

On the computing side, the processor contains an integer block, a floating point unit, and a vector processor. Clearly, this isn’t a toy processor and has the capability to compete with serious modern CPUs.

There is a separate GitHub for documentation. It looks like they try to keep documentation in both Mandarin and English. You can also find some of the academic papers about the architecture there, too.

We love CPU design, and this is an interesting chance to contribute to an open CPU while there are still interesting things to do. If you need to start with something easier, plenty of small CPUs exist for educational purposes.

Organizing Components, The Easy Way

There’s an old joke: What do you get someone who has everything? A place to put it. For hackers like [Christian], everything is a hoard of priceless electronic components. His solution is using small zipper bags, either regular plastic or anti-static. These attach using hook and loop fastener to plastic binder sheets which then live in a binder. Combined with some custom printed labels and a few other tricks, it makes for a nice system, as you can see in the video below.

Honestly, we’ve done something similar before, using a binder with little pockets, but the bag and custom labels beat our system. He even has QR codes on some of them to locate data sheets easily. Seems like a barcode for inventory management might have been good, too.

Some advice from us. If you are just starting out, this might seem like overkill. But if you start out doing something — this or something else — then ten years from now, you won’t have to be like us and think, “I’d get everything organized, but it is going to take months to work through what I already have…” That usually makes it a project you never really get started with. Develop good habits early!

Even if you don’t want to store your components this way, his binder hacks probably work for lots of other things, too. It isn’t as flashy as some systems we’ve seen, but it is very practical. If only you didn’t have to turn the pages in the binder yourself.

[Kerry Wong] Talks (and Talks) About a 300 MHz Oscilloscope

There aren’t many people who could do an hour-long video reviewing an oscilloscope, but [Kerry Wong] is definitely one of them. This time, he’s looking at a UNI-T MSO2304X 300 MHz scope. The review might be a little long, but the scope — like many modern scopes — has a lot of features for measuring power, accommodating digital signals with an add-on pod, and protocol decoding.

The scope has a touchscreen and four normal inputs, plus two frequency generator outputs. You can also use a mouse or an external display. But, of course, what you really want to know is how the scope performs when reading signals.

Thanks to its 5 GSa/s sampling rate, this 300 MHz scope was still able to handle much higher frequencies. Of course, the amplitude isn’t meaningful as you go over the limit, but sometimes, you just want to see the shape of the signal.

[Kerry] has promised a teardown video for this scope soon, and we’ll be watching for it. He sure knows his way around a scope. The scope reminded us a bit of our Rigol DHO924S, and we wondered how its trigger modes compare with this scope.

A Review That Asks: Do You Need a Thermal Camera?

[Maker’s Fun Duck] has a recent video review of a cheap thermal camera from a company called Kaiweets, which you can see below. It checked all of his boxes: It was standalone, handheld, cheap, and not too cheap. The question is: does it work well for the kinds of things we would do with such a camera?

That’s a tricky question, of course, because everyone’s uses are different. Considering a soldering iron. A tiny one is great for working on PCBs, but lousy for soldering large coax connectors. A soldering gun works well for that purpose, but is too much for the PCB. The same goes for thermal cameras. Some are great for, for example, finding leaky parts of houses, but might not be so great at locating defective components on a PCB.

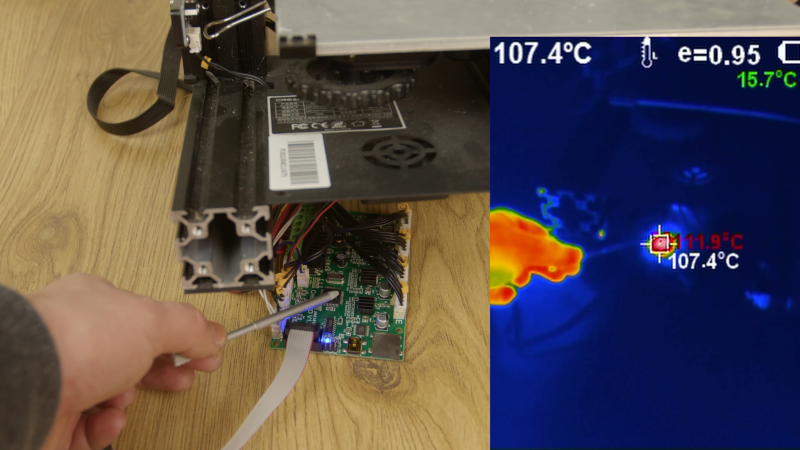
[Duck] starts out looking at coffee cups and hand prints. But he quickly moves on to printed circuit boards like a 3D printer controller. He also provides a number of tips on how to get accurate readings.

He seems to like the camera. But your use case might be different. There are some advantages to having cameras connected to your phone, for example, and there are other considerations. The camera appears to have a 256×192 resolution and can connect to a PC. It retails on the street for around $250.

Small cameras are valuable, even if you need to cable them to a phone. Like many things, thermal cameras get better and cheaper every year.

❌