Vista de Lectura

Hay nuevos artículos disponibles. Pincha para refrescar la página.

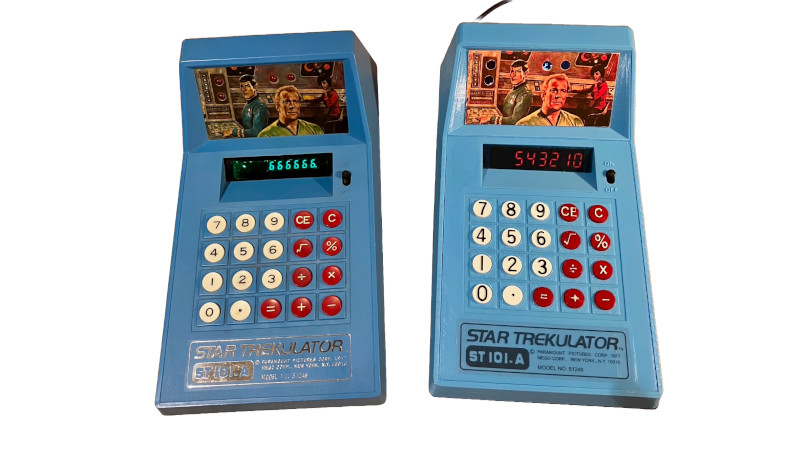
Trekulator: A Reproduction of the 1977 Star Trek Themed Calculator

A recent project over on Hackaday.io from [Michael Gardi] is Trekulator – Where No Maker Has Gone Before.

This is a fun build and [Michael] has done a very good job of emulating the original device. [Michael] used the Hackaday.io logging feature to log his progress. Starting in September 2024 he modeled the case, got his original hardware working, got the 7-segment display working, added support for sound, got the keypad working and mounted it, added the TFT display and mounted it, wired up the breadboard implementation, designed and implemented the PCBs, added some finishing touches, installed improved keys, and added a power socket back in March.

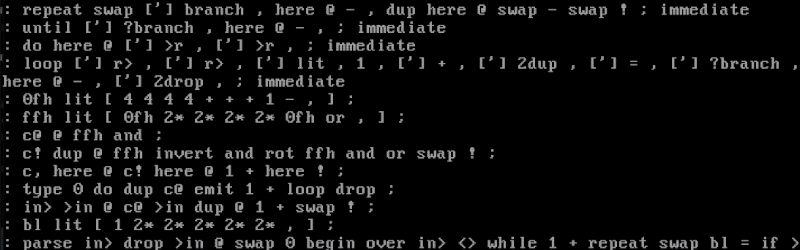
It is perhaps funny that where the original device used four red LEDs, [Michael] has used an entire TFT display. This would have been pure decadence by the standards of 1977. The software for the ESP32 microcontroller was fairly involved. It had to support audio, graphics, animations, keyboard input, the 7-segment display, and the actual calculations.

The calculations are done using double-precision floating-point values and eight positions on the display so this code will do weird things in some edge cases. For instance if you ask it to sum two eight digit numbers as 90,000,000 and 80,000,000, which would ordinarily sum to the nine digit value 170,000,000, the display will show you a different value instead, such as maybe 17,000,000 or 70,000,000. Why don’t you put one together and let us know what it actually does! Also, can you find any floating-point precision bugs?

This was a really fun project, thanks to [Michael] for writing it up and letting us know via the tips line!

milliForth-6502, a Forth for the 6502 CPU

Forth is popular on small computers because it is simple to implement, yet quite powerful. But what happens when you really need to shrink it? Well, if your target is the 6502, there’s milliForth-6502.

This is a port of milliForth, which is a fork of sectorforth. The sectorforth project set the standard, implementing a Forth so small it could fit in a 512-byte boot sector. The milliForth project took sectorforth and made it even smaller, weighing in at only 336 bytes. However, both milliForth and sectorforth are for the x86 architecture. With milliForth-6502, [Alvaro G. S. Barcellos] wanted to see how small he could make a 6502 implementation.

So how big is the milliForth-6502 binary? Our tests indicate: 1,110 bytes. It won’t quite fit in a boot sector, but it’s pretty small!

Most of the code for milliForth-6502 is assembly code in sector-6502.s. This code is compiled using tools from the cc65 project. To run the code lib6502 is used for 6502 emulation.

Emulation is all well and good as far as it goes, especially for development and testing, but we’d love to see this code running on a real 6502. Even better would be a 6502 built from scratch! If you get this code running we’d love to hear how it went!

Building a Custom Zynq-7000 SoC Development Board from the Ground Up

Zynq-7000 banner.

In this series of 23 YouTube videos [Rich] puts the AMD Zynq-7000 SoC through its paces by building a development board from the ground up to host it along with its peripherals. The Zynq is part FPGA and part CPU, and while it has been around for a while, we don’t see nearly as many projects about it as we’d like.

Rich covers everything from the power system to HDMI, USB, DDR RAM, and everything in between. By the end, he’s able to boot PetaLinux.

The Zynq SoC includes an ARM Cortex-A9 Based APU and an Artix-7 FPGA (or a Kintex-7 FPGA on higher models). In case you missed it, Xilinx was recently acquired by AMD, which is why you might have remembered this as a Xilinx part.

We’ve heard from [Rich] before. Back in 2021 we saw his Arduino Brings USB Mouse To Homebrew Computer. Don’t miss his follow-up playlist: Building on my Zynq-7000 in which he takes his Zynq-7000 board even further.

If you’re interested in FPGA technology but need something more easy going to get you started, be sure to check out how to build a 6809 CPU on an FPGA. Or, if you need something even simpler, report for boot camp.

Thanks to [Alex] for the tip!

Rockbox 4.0 Released

This is the Rockbox logo banner.

It’s traditional to launch new software on April Fool’s Day, which is when we heard that Rockbox 4.0 has been released. But, in this case, the venerable MP3 firmware actually did update after a long absence. It’s great to see that good old Rockbox is still kicking along. We first mentioned Rockbox here at Hackaday approaching 20 years ago. How time flies. There used to be a whole ‘scene’ around hacking Personal Media Players (PMPs), also known as “MP3 Players”.

We tracked down Rockbox contributor [Solomon Peachy] to ask for some simple advice: If someone wants to install Rockbox on a personal media player today, what hardware should they buy? [Solomon] referred us to the AIGO EROS Q / EROS K, which is the only compatible hardware still being manufactured and sold. Beyond that, if you want to buy compatible hardware, you’ll need to find some secondhand somewhere, such as eBay. See the Rockbox Wiki for supported hardware.

Smartphones and streaming services have subsumed the single-purpose personal media player. Will you put the new Rockbox on something? Let us know in the comments.

They Hacked a Nuclear Power Plant! Whoops! Don’t Make a Sound!

A nuclear coolant tower dwarfs other buildings in the area.

What do you do with an unused nuclear reactor project? In Washington, one of them was hacked to remove sound, all in the name of science.

In 1977, a little way outside of Seattle, Washington Nuclear Projects 3 and 5 (WNP-3 and WNP-5) were started as part of Washington Public Power Supply System (WPPSS, pronounced “whoops”). They ran over budget, and in the 80s they were mothballed even though WNP-3 was nearly complete.

In 2010 when [Ron] and [Bonnie Sauro] were starting their new acoustical lab, NWAA Labs, they thought they wanted to build in a mountain, but what they found was an auxiliary reactor building. The structure was attached to a defunct nuclear power facility. With concrete and rebar walls five feet thick, it was the ideal site for their acoustical experiments and tests.

There are strict facility requirements from standards bodies such as American National Standards Institute (ANSI) and the International Organization for Standardization (ISO) for acoustical labs which help ensure that different labs achieve comparable results. For example, you need stable temperature, humidity, and reverberation. The temperature within the facility is a stable 54 degrees Fahrenheit (12 degrees Celsius) regardless of the temperature outside.

Companies use acoustical labs to inform their designs and ensure that they meet acoustic standards or requirements, particularly those related to noise emissions. Over the last fifteen years, NWAA Labs has tested carpet samples, noise-cancelling headphones, sound-dampening construction materials, noisy washing machines, and even an airplane’s crew cabin!

If there was any question about whether [Ron Sauro] qualifies as a hacker, this quote removes all doubt: “I’m a carpenter, a plumber, a welder, I can fix a car,” he says. “Anything that needs to be done, I can do. Because I have to.”

Maybe we should send a wearable cone of silence to [Ron] for a complete test. If you’ve ever hacked a nuclear power plant, do let us know in the comments!

Using a MIG Welder, Acetylene Torch, and Air Hammer to Remove a Broken Bolt

A broken bolt is removed by welding on a hut and then using a wrench to unscrew.

If your shop comes complete with a MIG welder, an acetylene torch, and an air hammer, then you have more options than most when it comes to removing broken bolts.

In this short video [Jim’s Automotive Machine Shop, Inc] takes us through the process of removing a broken manifold bolt: use a MIG welder to attach a washer, then attach a suitably sized nut and weld that onto the washer, heat the assembly with the acetylene torch, loosen up any corrosion on the threads by tapping with a hammer, then simply unscrew with your wrench! Everything is easy when you know how!

Of course if your shop doesn’t come complete with a MIG welder and acetylene torch you will have to get by with the old Easy Out screw extractor like the rest of us. And if you are faced with a nasty bolt situation keep in mind that lubrication can help.

Making a Variable Speed Disc Sander from an Old Hard Drive

Our hacker converts an old hard disk drive into a disc sander.

This short video from [ProShorts 101] shows us how to build a variable speed disc sander from not much more than an old hard drive.

We feel that as far as hacks go this one ticks all the boxes. It is clever, useful, and minimal yet comprehensive; it even has a speed control! Certainly this hack uses something in a way other than it was intended to be used.

Take this ingenuity and add an old hard drive from your junkbox, sandpaper, some glue, some wire, a battery pack, a motor driver, a power socket and a potentiometer, drill a few holes, glue a few pieces, and voilà! A disc sander! Of course the coat of paint was simply icing on the cake.

The little brother of this hack was done by the same hacker on a smaller hard drive and without the speed control, so check that out too.

One thing that took our interest while watching these videos is what tool the hacker used to cut sandpaper. Here we witnessed the use of both wire cutters and a craft knife. Perhaps when you’re cutting sandpaper you just have to accept that the process will wear out the sharp edge on your tool, regardless of which tool you use. If you have a hot tip for the best tool for the job when it comes to cutting sandpaper please let us know in the comments! (Also, did anyone catch what type of glue was used?)

If you’re interested in a sander but need something with a smaller form factor check out how to make a sander from a toothbrush!

Introducing Infrared Remote Control Protocols

The host stands in his electronics lab with the image of four remote controls overlaid.

Over on his YouTube channel [Electronic Wizard] has released a video that explains how infrared (IR) remote controllers work: IR Remote Controllers protocol: 101 to advanced.

This diagram indicates how the 38 kHz carrier wave is used to encode a binary signal.This video covers the NEC family of protocols, which are widely used in typical consumer IR remote control devices, and explains how the 38 kHz carrier wave is used to encode a binary signal.  [Electronic Wizard] uses his Rigol DS1102 oscilloscope and a breadboard jig to sniff the signal from an example IR controller.

There is also an honorable mention of the HS0038 integrated-circuit which can interpret the light waves and output a digital signal. Of course if you’re a tough guy you don’t need no stinkin’ integrated-circuit IR receiver implementation because you can build your own!

Before the video concludes there is a brief discussion about how to interpret the binary signal using a combination of long and short pulses. If this looks similar to Morse Code to you that’s because it is similar to Morse Code! But not entirely the same, as you will learn if you watch the video!

Gemini 2.0 + Robotics = Slam Dunk?

A humanoid robot packs a lunch bag in the kitchen

Over on the Google blog [Joel Meares] explains how Google built the new family of Gemini Robotics models.

The bi-arm ALOHA robot equipped with Gemini 2.0 software can take general instructions and then respond dynamically to its environment as it carries out its tasks. This family of robots aims to be highly dexterous, interactive, and general-purpose by applying the sort of non-task-specific training methods that have worked so well with LLMs, and applying them to robot tasks.

There are two things we here at Hackaday are wondering. Is there anything a robot will never do? And just how cherry-picked are these examples in the slick video? Let us know what you think in the comments!

❌