Vista de Lectura

Hay nuevos artículos disponibles. Pincha para refrescar la página.

Making A One-Of-A-Kind Lime2 SBC

BGA soldering

Upgrading RAM on most computers is often quite a straightforward task: look up the supported modules, purchase them, push a couple of levers, remove the old, and install the new. However, this project submitted by [Mads Chr. Olesen] is anything but a simple.

In this project, he sets out to double the RAM on a Olimex A20-OLinuXino-LIME2 single-board computer. The Lime2 came with 1 GB of RAM soldered to the board, but he knew the A20 processor could support more and wondered if simply swapping RAM chips could double the capacity. He documents the process of selecting the candidate RAM chip for the swap and walks us through how U-Boot determines the amount of memory present in the system.

While your desktop likely has RAM on removable sticks, the RAM here is soldered to the board. Swapping the chip required learning a new skill: BGA soldering, a non-trivial technique to master. Initially, the soldering didn’t go as planned, requiring extra steps to resolve issues. After reworking the soldering, he successfully installed both new chips. The moment of truth arrived—he booted up the LIME2, and it worked! He now owns the only LIME2 with 2 GB of RAM.

Be sure to check out some other BGA soldering projects we’ve featured over the years.
Frankenflair 58: Manual Roots, Advanced Brew

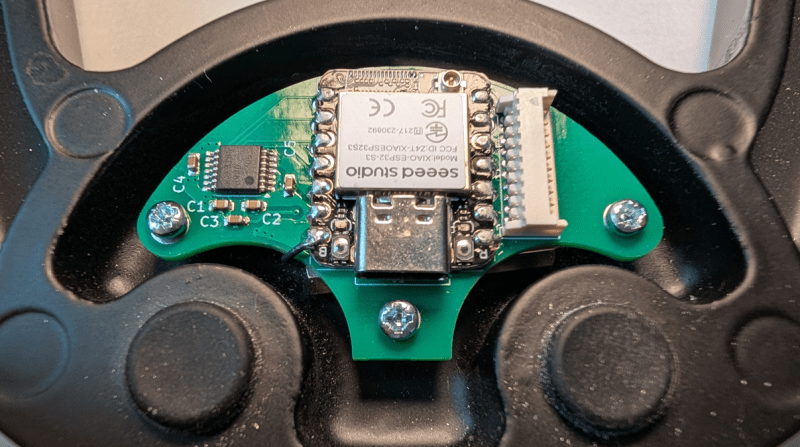
The user interface of things we deal with often makes or breaks our enjoyment of using a device. [Janne] thinks so, he has an espresso machine he enjoys but the default controls were not what he was looking for and so in true hacker fashion he took what was and made it his own.

This Kickstarter-born Flair 58 is a manual espresso machine with minimal moving parts and no electronics in its default configuration. An optional preheater was available, but it felt like an afterthought. He decided to add a bit more finesse into his solution, with a sleek touchscreen display controlling a custom heater board with closed-loop temperature control, and provisions to connect an external scale scale for precise pour measurements. We’ve seen coffee maker hacks before, but this one certainly stands out for adding features absent from the machine’s initial design.

To accommodate the two custom PCBs and the touchscreen, [Janne] modified the machine’s frame. The Flair 58’s swooping curves posed a challenge, but instead of using an external enclosure, he shaped the PCBs to fit seamlessly within the machine’s structure. A wonderfully done hack given the open, exposed design of the base hardware.

Certainly head over to his site and check out this beautiful solution to improving on an existing device, and check out his other cool project based around laser fault injection. All the hardware and software for this project is freely available over on his site so if you’d like to upgrade your machine be sure to go check it out.

Track Your Circuits: A Locomotive PCB Badge

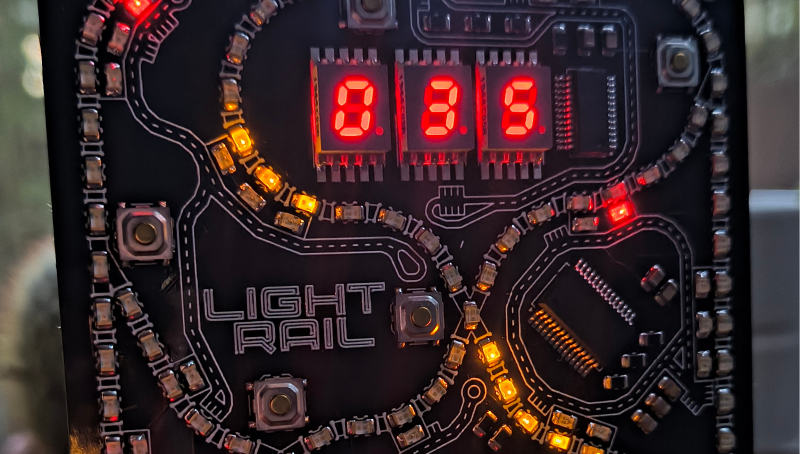
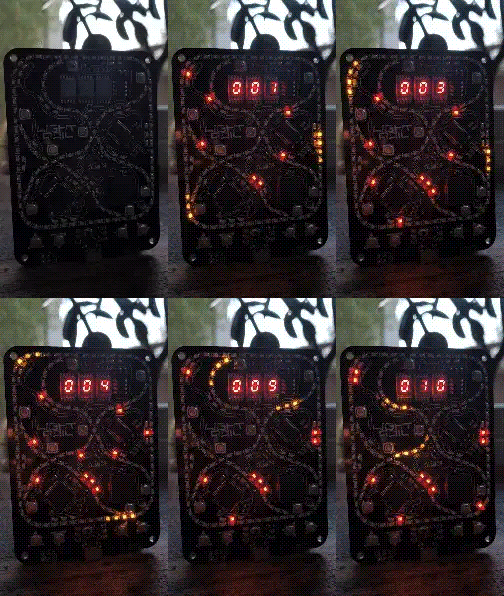
This fun PCB from [Nick Brown] features a miniature railroad implemented with 0805-sized LEDs. With an eye towards designing his own fun interactive PCB badge, the Light-Rail began its journey. He thoroughly documented his process, from shunting various late-night ideas together to tracking down discrepancies between the documentation of a part and the received part.

Inspired by our very own Supercon 2022 badge, he wanted to make a fun badge with a heavy focus on the aesthetics of the final design. He also wanted to challenge himself some in this project, so even though there are over 100 LEDs, they are not laid out in a symmetrical or matrix pattern. Instead, it’s an organic, winding railroad with crossings and stations throughout the board. Designed in KiCad the board contains 144 LEDS, 3 seven-segment displays, and over a dozen buttons that all come together in use for the built in game.

The challenges didn’t stop at just the organic layout of all those LEDs. He decided to use Rust for this project, which entailed writing his own driver for the seven-segment displays as well as creating a tone library for the onboard buzzer. As with all projects, unexpected challenges popped up along the way. One issue with how the oscillator was hooked up meant he wasn’t able to use the ATmega32U4, which was the brains of the entire railroad. After some experimenting, he came up with a clever hack: using a pogo pin jig to connect the clock where it needed to go while programming the board.

Be sure to check out all the details of this journey in his build log. If you love interactive badges also check out some of the other creative boards we’ve featured.

Modernizing an Enigma Machine

Enigma buttons

This project by [Miro] is awesome, not only did he build a replica Enigma machine using modern technologies, but after completing it, he went back and revised several components to make it more usable. We’ve featured Enigma machines here before; they are complex combinations of mechanical and electrical components that form one of the most recognizable encryption methods in history.

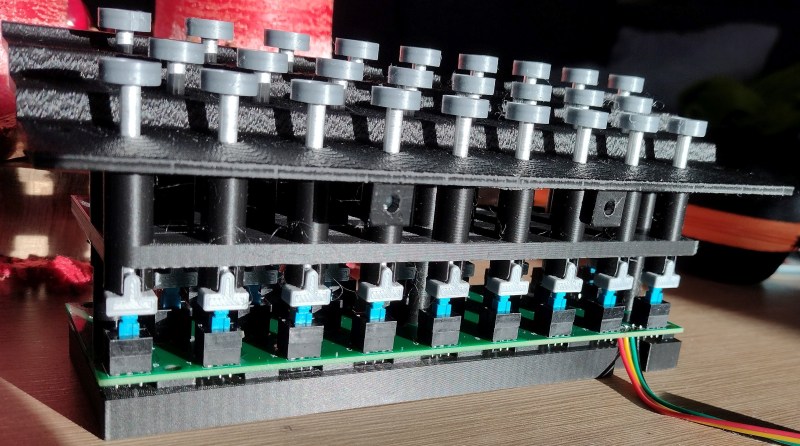
His first Enigma machine was designed closely after the original. He used custom PCBs for the plugboard and lightboard, which significantly cleaned up the internal wiring. For the lightboard, he cleverly used a laser printer on semi-transparent paper to create crisp letters, illuminated from behind. For the keyboard, he again designed a custom PCB to connect all the switches. However, he encountered an unexpected setback due to error stack-up. We love that he took the time to document this issue and explain that the project didn’t come together perfectly on the first try and how some adjustments were needed along the way.

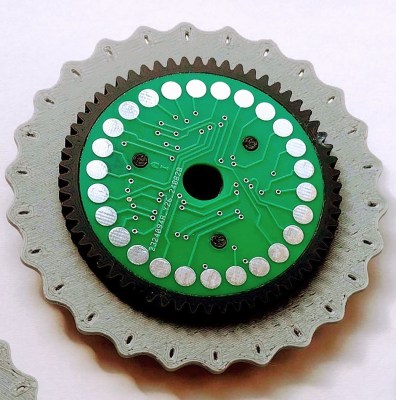
Custom rotary wheelThe real heart of this build is the thought and effort put into the design of the encryption rotors. These are the components that rotate with each keystroke, changing the signal path as the system is used. In a clever hack, he used a combination of PCBs, pogo pins, and 3D printed parts to replicate the function of the original wheels.
Enigma machine connoisseurs will notice that the wheels rotate differently than in the original design, which leads us to the second half of this project. After using the machine for a while, it became clear that the pogo pins were wearing down the PCB surfaces on the wheels. To solve this, he undertook an extensive redesign that resulted in a much more robust and reliable machine.

In the redesign, instead of using pogo pins to make contact with pads, he explored several alternative methods to detect the wheel position—including IR light with phototransistors, rotary encoders, magnetic encoders, Hall-effect sensors, and more. The final solution reduced the wiring and addressed long-term reliability concerns by eliminating the mechanical wear present in the original design.

Not only did he document the build on his site, but he also created a video that not only shows what he built but also gives a great explanation of the logic and function of the machine. Be sure to also check out some of the other cool enigma machines we’ve featured over the years.

Binner Makes Workshop Parts Organization Easy

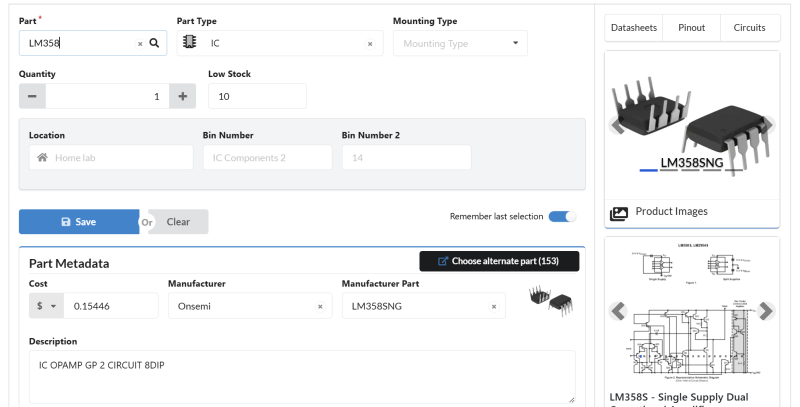
We’ve all had times where we knew we had some part but we had to go searching for it all over as it wasn’t where we thought we put it. Organizing the numerous components, parts, and supplies that go into your projects can be a daunting task, especially if you use the same type of part at different times for different projects. It helps to have a framework to keep track of all the small details. Binner is an open source project that aims to allow you to easily maintain a database that can be customized to your use.

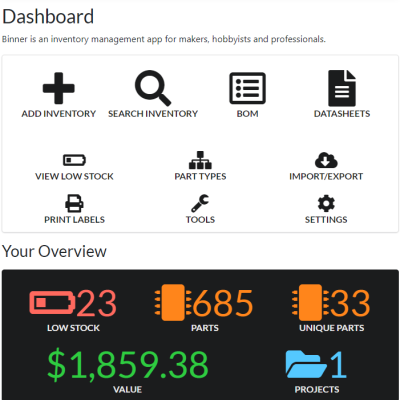
dashboard of binner UIIn a recent video for DigiKey, [Byte Sized Engineer] used Binner to track the locations of his components and parts in his freshly organized workshop. Binner already has the ability to read the labels used by well-known electronics suppliers via a barcode scanner, and uses that information to populate your inventory. It even grabs quantities and links in a datasheet for your newly added part. The barcode scanner can also be used to retrieve the contents of a location, so with a single scan Binner can bring up everything residing at that location.

Binner can be run locally so there isn’t the concern of putting in all the effort to build up your database just to have an internet outage make it inaccessible. Another cool feature is that it allows you to print labels, you can customize the fields to display the values you care about.

The project already has future plans to tie into a “smart bin” system to light up the location of your component — a clever feature we’ve seen implemented in previous setups.

❌