Vista de Lectura

Hay nuevos artículos disponibles. Pincha para refrescar la página.

3D Print Your Own Injection Molds, Ejector Pins and All
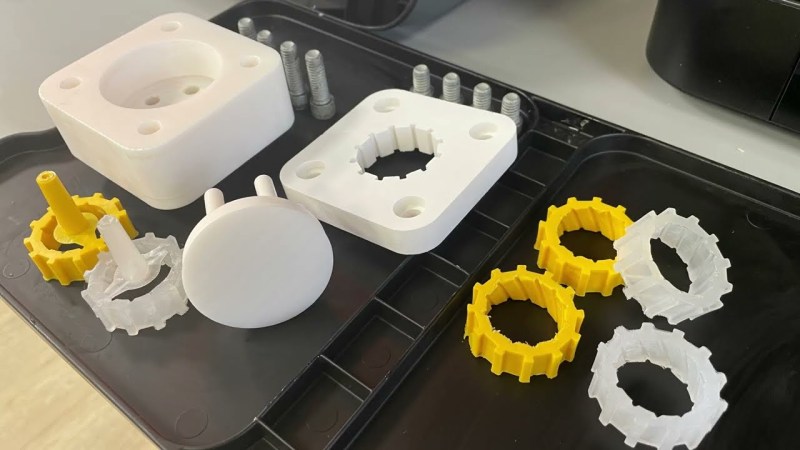
3D printing is all well and good for prototyping, and it can even produce useful parts. If you want real strenght in plastics, though, or to produce a LOT of parts, you probably want to step up to injection molding. As it turns out, 3D printing can help in that regard, with injection molding company [APSX] has given us a look at how it printed injection molds for its APSX-PIM machine.

The concept is simple enough—additive manufacturing is great for producing parts with complex geometries, and injection molds fit very much under that banner. To demonstrate, [APSX] shows us a simple injection mold that it printed with a Formlabs Form3+ using Rigid 10K resin. The mold has good surface finish, which is crucial for injection molding nice parts. It’s also fitted with ejection pins for easy part removal after each shot of injection molded plastic. While it’s not able to hold up like a traditional metal injection mold, it’s better than you might think. [APSX] claims it got 500 automatic injection cycles out of the mold while producing real functional parts. The mold was used with the APSX-PIM injection molding machine squirting polypropylene at a cycle time of 65 seconds, producing a round part that appears to be some kind of lid or gear.

This looks great, but it’s worth noting it’s still not cheap to get into this sort of thing. On top of purchasing a Formlabs Form3+, you’ll also need the APSX-PIM V3, which currently retails for $13,500 or so. Still, if you regularly need to make 500 of something, this could be very desirable. You could get your parts quicker and stronger compared to running a farm of many 3D printers turning out the same parts.

We’ve seen similar projects along these lines before. The fact is that injections molds are complicated geometry to machine, so being able to 3D print them is highly desirable. Great minds and all that. Video after the break.
Infill Injection Experiment Makes Stronger Parts

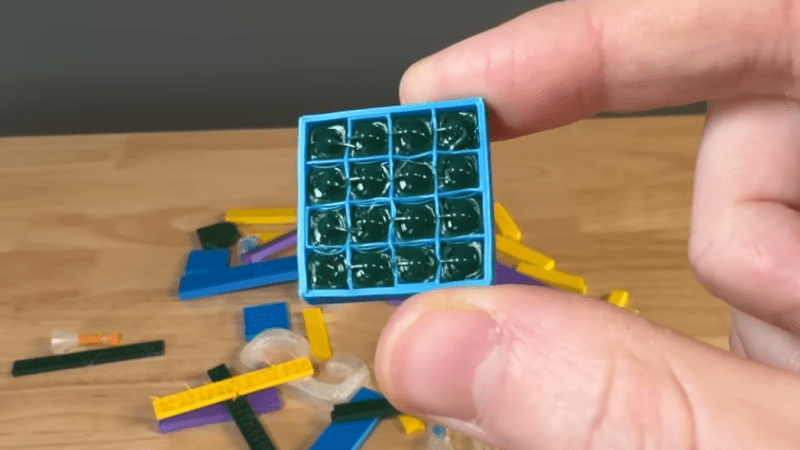
[JanTec Engineering] was fascinated by the idea of using a 3D printer’s hot end to inject voids and channels in the infill with molten plastic, leading to stronger prints without the need to insert hardware or anything else. Inspiration came from two similar ideas: z-pinning which creates hollow vertical channels that act as reinforcements when filled with molten plastic by the hot end, and VoxelFill (patented by AIM3D) which does the same, but with cavities that are not uniform for better strength in different directions. Craving details? You can read the paper on z-pinning, and watch VoxelFill in (simulated) action or browse the VoxelFill patent.

With a prominent disclaimer that his independent experiments are not a copy of VoxelFill nor are they performing or implying patent infringement, [JanTec] goes on to use a lot of custom G-code (and suffers many messy failures) to perform some experiments and share what he learned.

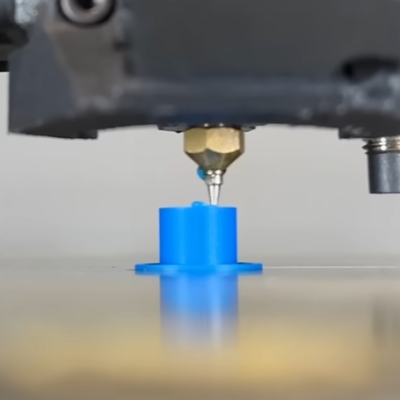
Using an airbrush nozzle as a nozzle extension gains about 4 mm of extra reach.

One big finding is that one can’t simply have an empty cylinder inside the print and expect to fill it all up in one go. Molten plastic begins to cool immediately after leaving a 3D printer’s nozzle, and won’t make it very far down a deep hole before it cools and hardens. One needs to fill a cavity periodically rather than all in one go. And it’s better to fill it from the bottom-up rather than from the top-down.

He got better performance by modifying his 3D printer’s hot end with an airbrush nozzle, which gave about 4 mm of extra length to work with. This extra long nozzle could reach down further into cavities, and fill them from the bottom-up for better results. Performing the infill injection at higher temperatures helped fill the cavities more fully, as well.

Another thing learned is that dumping a lot of molten plastic into a 3D print risks deforming the print because the injected infill brings a lot of heat with it. This can be mitigated by printing the object with more perimeters and a denser infill so that there’s more mass to deal with the added heat, but it’s still a bit of a trouble point.

[JanTec] put his testing hardware to use and found that parts with infill injection were noticeably more impact resistant than without. But when it came to stiffness, an infill injected part resisted bending only a little better than a part without, probably because the test part is very short and the filled cavities can’t really shine in that configuration.

These are just preliminary results, but got him thinking there are maybe there are possibilities with injecting materials other than the one being used to print the object itself. Would a part resist bending more if it were infill injected with carbon-fibre filament? We hope he does some follow-up experiments; we’d love to see the results.

❌