Vista de Lectura

Hay nuevos artículos disponibles. Pincha para refrescar la página.

TeensyROM NFC Game Loading on the C64

C64 on desk with NFC TeensyROM and game token

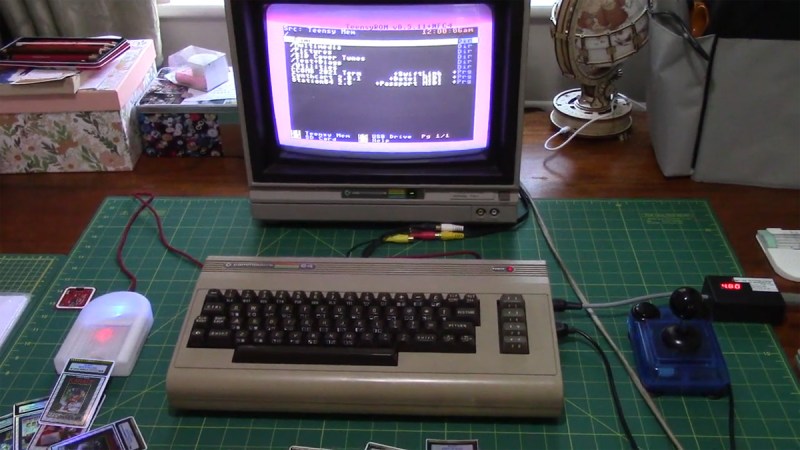
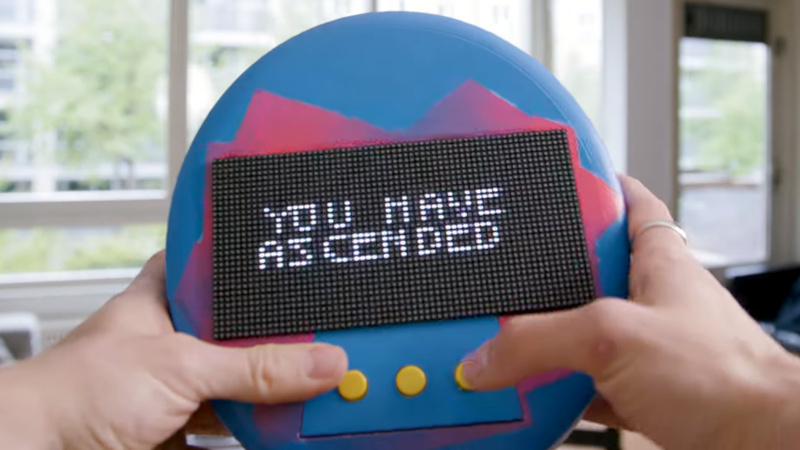
When retro computing nostalgia meets modern wireless wizardry, you get a near-magical tap-to-load experience. It’ll turn your Commodore 64 into a console-like system, complete with physical game cards. Inspired by TapTo for MiSTer, this latest hack brings NFC magic to real hardware using the TeensyROM. It’s been out there for a while, but it might not have caught your attention as of yet. Developed by [Sensorium] and showcased by YouTuber [StatMat], this project is a tactile, techie love letter to the past.

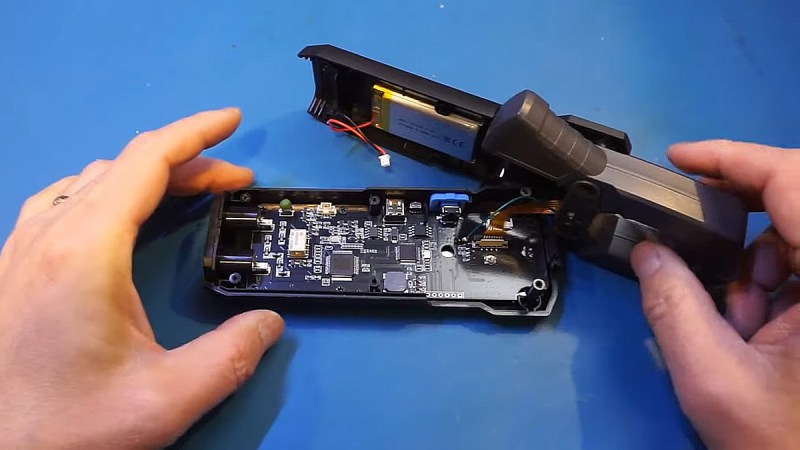
At the heart of it is the TeensyROM cartridge, which – thanks to some clever firmware modding – now supports reading NFC tags. These are writable NTag215 cards storing the path to game files on the Teensy’s SD card. Tap a tag to the NFC reader, and the TeensyROM boots your game. No need to fumble with LOAD “*”,8,1. That’s not only cool, it’s convenient – especially for retro demo setups.

What truly sets this apart is the reintroduction of physical tokens. Each game lives on its own custom-designed card, styled after PC Engine HuCards or printed with holographic vinyl. It’s a tangible, collectible gimmick that echoes the golden days of floppies and cartridges – but with 2020s tech underneath. Watch it here.

Running DOOM on an Atari ST

Atari ST desktop with Doom shortcut

If you grew up with a beige Atari ST on your desk and a faint feeling of being left out once Doom dropped in 1993, brace yourself — the ST strikes back. Thanks to [indyjonas]’s incredible hack, the world now has a working port of DOOM for the Atari STe, and yes — it runs. It’s called STDOOM, and even though it needs a bit of acceleration or emulation to perform, it’s still an astonishing feat of retro-software necromancy.

[indyjonas] did more than just recompile and run: he stripped out chunks of PC-centric code, bent GCC to his will (cheers to Thorsten Otto’s port), and shoehorned Doom into a machine never meant to handle it. That brings us a version that runs on a stock machine with 4MB RAM, in native ST graphics modes, including a dithered 16-colour mode that looks way cooler than it should. The emotional punch? This is a love letter to the 13-year-old Jonas who watched Doom from the sidelines while his ST chugged along faithfully. A lot of us were that kid.

Sound is still missing, and original 8MHz hardware won’t give you fluid gameplay just yet — but hey, it’s a start. Want to dive in deeper? Read [indyjonas]’ thread on X.

Honey, I Blew Up The Line Follower Robot

[Austin Blake] sitting on line follower cart in garage

Some readers may recall building a line-following robot during their school days. Involving some IR LEDs, perhaps a bit of LEGO, and plenty of trial-and-error, it was fun on a tiny scale. Now imagine that—but rideable. That’s exactly what [Austin Blake] did, scaling up a classroom robotics staple into a full-size vehicle you can actually sit on.

The robot uses a whopping 32 IR sensors to follow a black line across a concrete workshop floor, adjusting its path using a steering motor salvaged from a power wheelchair. An Arduino Mega Pro Mini handles the logic, sending PWM signals to a DIY servo. The chassis consists of a modified Crazy Cart, selected for its absurdly tight turning radius. With each prototype iteration, [Blake] improved sensor precision and motor control, turning a bumpy ride into a smooth glide.

The IR sensor array, which on the palm-sized vehicle consisted of just a handful of components, evolved into a PCB-backed bar nearly 0.5 meters wide. Potentiometer tuning was a fiddly affair, but worth it. Crashes? Sure. But the kind that makes you grin like your teenage self. If it looks like fun, you could either build one yourself, or upgrade a similar LEGO project.

MiSTer For Mortals: Meet the Multisystem 2

MiSTER Multisystem 2 on a wooden table

If you’ve ever squinted at a DE10-Nano wondering where the fun part begins, you’re not alone. This review of the Mr. MultiSystem 2 by [Lee] lifts the veil on a surprisingly noob-friendly FPGA console that finally gets the MiSTer experience out of the tinker cave and into the living room. Developed by Heber, the same UK wizards behind the original MultiSystem, this follow-up console dares to blend flexibility with simplicity. No stack required.

It comes in two varieties, to be precise: with, or without analog ports. The analog edition features a 10-layer PCB with both HDMI and native RGB out, Meanwell PSU support, internal USB headers, and even space for an OLED or NFC reader. The latter can be used to “load” physical cards cartridge-style, which is just ridiculously charming. Even the 3D-printed enclosure is open-source and customisable – drill it, print it, or just colour it neon green. And for once, you don’t need to be a soldering wizard to use the thing. The FPGA is integrated in the mainboard. No RAM modules, no USB hub spaghetti. Just add some ROMs (legally, of course), and you’re off.

Despite its plug-and-play aspirations, there are some quirks – for example, the usual display inconsistencies and that eternal jungle of controller mappings. But hey, if that’s the price for versatility, it’s one you’d gladly pay. And if you ever get stuck, the MiSTer crowd will eat your question and spit out 12 solutions. It remains 100% compatible with the MiSTer software, but allows some additional future features, should developers wish to support them.

Want to learn more? This could be your entrance to the MiSTer scene without having to first earn a master’s in embedded systems. Will this become an alternative to the Taki Udon announced Playstation inspired all-in-one FPGA console? Check the video here and let us know in the comments.

Work, Eat, Sleep, Repeat: Become a Human Tamagotchi

When [Terence Grover] set out to build a Tamagotchi-inspired simulator, he didn’t just add a few modern tweaks. He ditched the entire concept and rebuilt it from the ground up. Forget cute wide-eyed blobby animals and pixel-poop. This Raspberry Pi-powered project ditches nostalgia in favour of brutal realism: inflation, burnout, capitalism, and the occasional existential crisis. Think Sims meets cyberpunk, rendered charmingly in Python on a low-res RGB LED matrix.

Instead of hunger and poop meters, this dystopian pet juggles Maslow’s hierarchy: hunger, rest, safety, social life, esteem, and money. Players make real-life-inspired decisions like working, socialising, and going into education – each affecting the stats in logical (and often unfair) ways. No free lunch here: food requires money, money requires mind-numbing labour, and labour tanks your rest. You can even die of overwork à la Amazon warehouse. The UI and animation logic are all hand-coded, and there’s a working buzzer, pixel-perfect sprite movement, and even mini-games to simulate job repetition.

It’s equal parts social commentary and pixel art fever dream. While we have covered Tamagotchi recreations some time ago, this one makes you the needy survivor. Want your own dystopia in 64×32? Head over to [Terence Grover]’s Github and fork the full open source code. We’ll be watching. The Tamagotchi certainly is.

Nebula Mouse: The 6-DOF You Build Yourself

Nebula Mouse with sliced CAD view in the back

Let’s say your CAD workflow is starving for spatial awareness. Your fingers yearn to push, twist, and orbit – not just click. Enter the Nebula Mouse. A 6-DOF DIY marvel, blending 3D printing, magnets, and microcontroller wizardry into a handheld input device that emulates the revered 3DConnexion SpaceMouse – at a hacker price. It’s wireless, RGB-lit, powered by a chunky 1500 mAh cell, and fully configurable through standard apps. The catch? You print and build it yourself, with a little help of [DoTheDIY]’s design files.

This isn’t some half-baked enclosure on Thingiverse. The Nebula’s internals are crafted with the kind of precision that makes you file plastic for hours just to fit weights correctly. Hall effect sensors track real-world movement in all axes; a Seeed Xiao nRF52840 handles Bluetooth duty. It’s hefty (280 g), intentional, and smartly designed: auto-wake, USB-C, even a diffused LED bezel for night-time geek cred. Just beware that screw lengths matter. Misplace a 20 mm and you’ll hear the soft crack of PCB grief. No open firmware either – you’ll get compiled code only, unlocked per build via Discord.

In short: it’s not open source, but it is deeply open-ended. If your fingers itch after having seen the SpaceMouse teardown of last month, this might be what you’re looking for.

Frnisi DMC-100: A Clamp Meter Worth Cracking Open

Pried open clamp meter on blue desk

Not all clamp meters are the same, and this video shows just that. In a recent teardown by [Kerry Wong], the new Fnirsi DMC-100 proves that affordable doesn’t mean boring. This 10,000-count clamp meter strays from the classic rotary dial in favour of a fully button-based interface – a choice that’s got sparks flying in the comments. And yes, it even auto-resumes its last function after reboot, like it knows you’re busy frying other fish.

What sets this meter apart isn’t just its snappy interface or surprisingly nice gold-tipped probes. It’s the layered UX – a hackable interface where short- and long-presses unlock hidden menus, memory functions, and even a graphing mode. A proper “hold-my-beer” moment comes when you discover it can split-display voltage and current and calculate real-time power (albeit with a minor asterisk: apparent power only, no power factor). Despite a few quirks, like accidentally triggering the flashlight when squeezing the jaw, it holds up well in accuracy tests. Even at higher currents where budget meters usually wobble.

Prusa Mini Nozzle Cam on the Cheap

Prusa Mini with endoscope nozzle cam and pip preview

Let me throw in a curveball—watching your 3D print fail in real-time is so much more satisfying when you have a crisp, up-close view of the nozzle drama. That’s exactly what [Mellow Labs] delivers in his latest DIY video: transforming a generic HD endoscope camera into a purpose-built nozzle cam for the Prusa Mini. The hack blends absurd simplicity with delightful nerdy precision, and comes with a full walkthrough, a printable mount, and just enough bad advice to make it interesting. It’s a must-see for any maker who enjoys solder fumes with their spaghetti monsters.

What makes this build uniquely brilliant is the repurposing of a common USB endoscope camera—a tool normally reserved for inspecting pipes or internal combustion engines. Instead, it’s now spying on molten plastic. The camera gets ripped from its aluminium tomb, upgraded with custom-salvaged LEDs (harvested straight from a dismembered bulb), then wrapped in makeshift heat-shrink and mounted on a custom PETG bracket. [Mellow Labs] even micro-solders in a custom connector just so the camera can be detached post-print. The mount is parametric, thanks to a community contribution.

This is exactly the sort of hacking to love—clever, scrappy, informative, and full of personality. For the tinkerers among us who like their camera mounts hot and their resistor math hotter, this build is a weekend well spent.

Improved and Open Source: Non-Planar Infill for FDM

Non-planar 3d-print on bed

Strenghtening FDM prints has been discussed in detail over the last years. Solutions and results vary as each one’s desires differ. Now [TenTech] shares his latest improvements on his post-processing script that he first created around January. This script literally bends your G-code to its will – using non-planar, interlocking sine wave deformations in both infill and walls. It’s now open-source, and plugs right into your slicer of choice: PrusaSlicer, OrcaSlicer, or Bambu Studio. If you’re into pushing your print strength past the limits of layer adhesion, but his former solution wasn’t quite the fit for your printer, try this improvement.

Traditional Fused Deposition Modeling (FDM) prints break along layer lines. What makes this script exciting is that it lets you introduce alternating sine wave paths between wall loops, removing clean break points and encouraging interlayer grip. Think of it as organic layer interlocking – without switching to resin or fiber reinforcement. You can tweak amplitude, frequency, and direction per feature. In fact, the deformation even fades between solid layers, allowing smoother transitions. Structural tinkering at its finest, not just a cosmetic gimmick.

This thing comes without needing a custom slicer. No firmware mods. Just Python, a little G-code, and a lot of curious minds. [TenTech] is still looking for real-world strength tests, so if you’ve got a test rig and some engineering curiosity, this is your call to arms.

The script can be found in his Github. View his full video here , get the script and let us know your mileage!

The Evertop: a Low-Power, Off-Grid Solar Gem

Black and white photo of Evertop computer on desk

When was the last time you saw a computer actually outlast your weekend trip – and then some? Enter the Evertop, a portable IBM XT emulator powered by an ESP32 that doesn’t just flirt with low power; it basically lives off the grid. Designed by [ericjenott], hacker with a love for old-school computing and survivalist flair, this machine emulates 1980s PCs, runs DOS, Windows 3.0, and even MINIX, and stays powered for hundreds of hours. It has a built-in solar panel and 20,000mAh of battery, basically making it an old-school dream in a new-school shell.

What makes this build truly outstanding – besides the specs – is how it survives with no access to external power. It sports a 5.83-inch e-ink display that consumes zilch when static, hardware switches to cut off unused peripherals (because why waste power on a serial port you’re not using?), and a solar panel that pulls 700mA in full sun. And you guessed it – yes, it can hibernate to disk and resume where you left off. The Evertop is a tribute to 1980s computing, and a serious tool to gain some traction at remote hacker camps.

For the full breakdown, the original post has everything from firmware details to hibernation circuitry. Whether you’re a retro purist or an off-grid prepper, the Evertop deserves a place on your bench. Check out [ericjenott]’s project on Github here.

Virtual Nodes, Real Waves: a Colpitts Walkthrough

If you’ve ever fumbled through circuit simulation and ended up with a flatline instead of a sine wave, this video from [saisri] might just be the fix. In this walkthrough she demonstrates simulating a Colpitts oscillator using NI Multisim 14.3 – a deceptively simple analog circuit known for generating stable sine waves. Her video not only shows how to place and wire components, but it demonstrates why precision matters, even in virtual space.

You’ll notice the emphasis on wiring accuracy at multi-node junctions, something many tutorials skim over. [saisri] points out that a single misconnected node in Multisim can cause the circuit to output zilch. She guides viewers step-by-step, starting with component selection via the “Place > Components” dialog, through to running the simulation and interpreting the sine wave output on Channel A. The manual included at the end of the video is a neat bonus, bundling theory, waveform visuals, and circuit diagrams into one handy PDF.

If you’re into precision hacking, retro analogue joy, or just love watching a sine wave bloom onscreen, this is worth your time. You can watch the original video here.

❌