Vista de Lectura

Hay nuevos artículos disponibles. Pincha para refrescar la página.

From Burnt to Brilliant: A Toaster’s Makeover
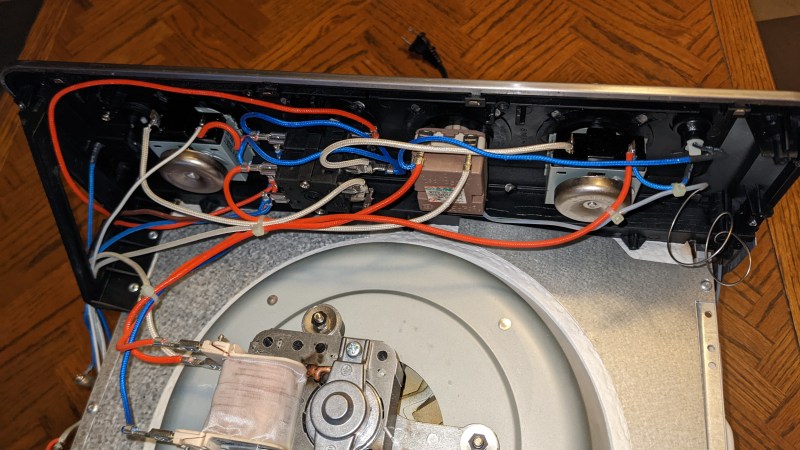
Air Fryer rPi upgrade

Appliances fail, but that doesn’t mean it’s the end for them. This impressive hack from [solopilot] shows the results possible when not just fixing but also improving upon its original form. The toaster’s failed function selector switch presented an opportunity to add smart features to the function selection and refine control over its various settings.

Before upgrading the toaster, [solopilot] first had to access its components, which is no trivial task with many modern appliances. Photos document his process of diving into the toaster, exposing all the internals to enable the upgrade. Once everything was accessible, some reverse engineering was required to understand how the failed function selector controlled the half-dozen devices it was wired to.
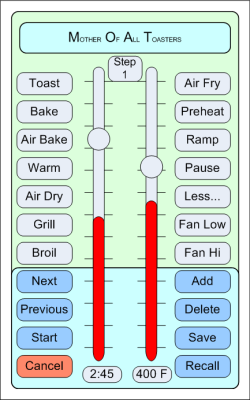
Toaster App GuiNext came the plan for the upgrades—a long list that included precise temperature control and the ability to send an SMS showing the state of your meal. A Raspberry Pi Zero, a solid-state relay, a relay control board, and a thermocouple were added to the toaster, unlocking far more capability and control than it had originally. Some tuning is required to fully enable these new features and to dial in the precision this once run-of-the-mill toaster is now capable of.

The work wasn’t limited to the toaster itself. [solopilot] also seized the opportunity to create an Android app with speech recognition to control his now one-of-a-kind Cuisinart. It’s probably safe to say his TOA-60 is currently the smartest toaster in the world. If you check out his documentation, you’ll find all the pinouts, circuits, code, and logic explanations needed to add serious improvements to your own toaster. We’ve featured several other toaster oven projects over the years, most of which have focused on turning them into reflow ovens, so it’s exciting to see one aimed at improving upon its original design.


Automated Blinds Opener On The Cheap

Window Shade Motor

We love seeing hacks that involve salvaging parts from what you have on hand to make a new project work, and this project is a great example of that. [Simon], in a quick weekend build, created an automated blinds opener using parts he had available.

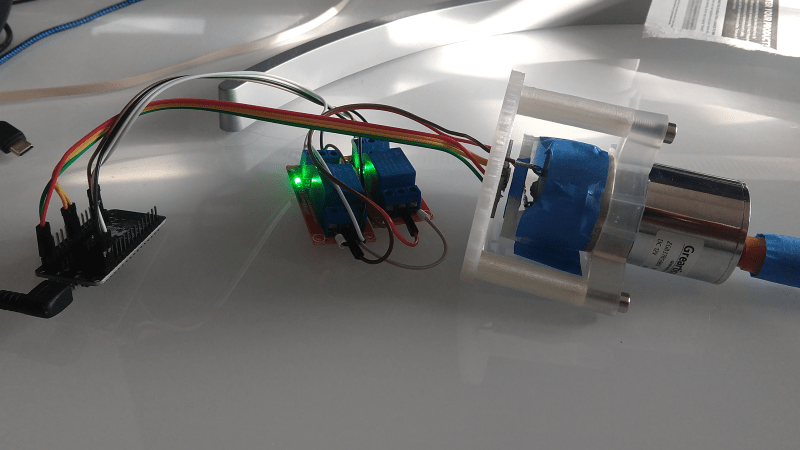
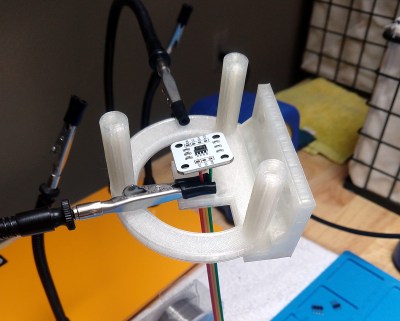
The project began with the desire to have his blinds open slowly and silently, gradually letting in more light. To accomplish this, a few key components were needed, including a motor with a gearbox to provide the torque required to actuate the blinds and a magnetic encoder to track their progress. To isolate vibrations and keep the system silent, the motor is mounted using a silicone motor mount that he salvaged from a broken water flosser.

The printed holder for the magnetic encoder is a nice touch.

To mount the motor to the wall near the window, he used some 3D printed parts. A clever combination of surgical silicone tubing and silicone tape attaches the motor to the window blind shaft while limiting vibration transfer, keeping things quiet. [Simon] advises against using magnetic encoders as he did, noting that while he had them on hand and made them work, the magnetic shaft’s misalignment with the encoders makes it a less-than-ideal approach. Nevertheless, he got it working.

Automating blinds is a fairly common project around these parts, made all the more accessible with clever 3D printed mechanisms. We’ve even seen variations that can be used in rentals, dorms, and other places were permanent modifications need to be avoided.

2025 Pet Hacks Contest: Aquassist Fish Feeder

Aquassist fish feeder

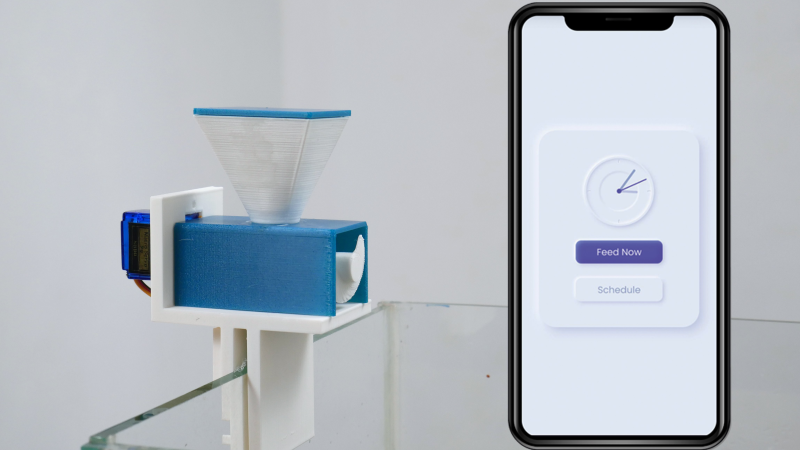
This project submitted to the 2025 Pet Hacks Contest brings a bit of IoT to your finned friends. Aquassist is a fish feeder that is primarily 3D printed only requiring a servo and a microcontroller to give you remote control of feeding your fish.

The Aquassist consists of just six 3D-printed parts. At its core is an Archimedes screw, a mechanism that ensures consistent portions of fish food are dispensed into the fish tank. A small hopper on top holds the food, and to minimize the part count, all 3D-printed components are designed to be glued together.

The brains of the operation take place in a Wemos D1 mini, a compact ESP8266 board programed using the Arduino IDE. The feeding mechanism relies on an SG90 continuous rotation servo, which rotates the Archimedes screw to dispense food. Unlike standard servos, this model offers ample torque in a small package and can rotate continuously without hitting an angular limit.

The Aquassist is controlled via a web-based application accessible from any device. The D1 Mini connects to Firebase to check the feeding schedule or detect if the “Feed Now” button has been pressed. Users can set feeding times or trigger an immediate feeding through the app’s intuitive interface. Check out a video below to see the Aquassist in action, and check our our other entries into the 2025 Pet Hacks Contest.

2025 Hackaday Pet Hacks Contest

A UV Meter For The Flipper Zero

flipper zero uv sensor

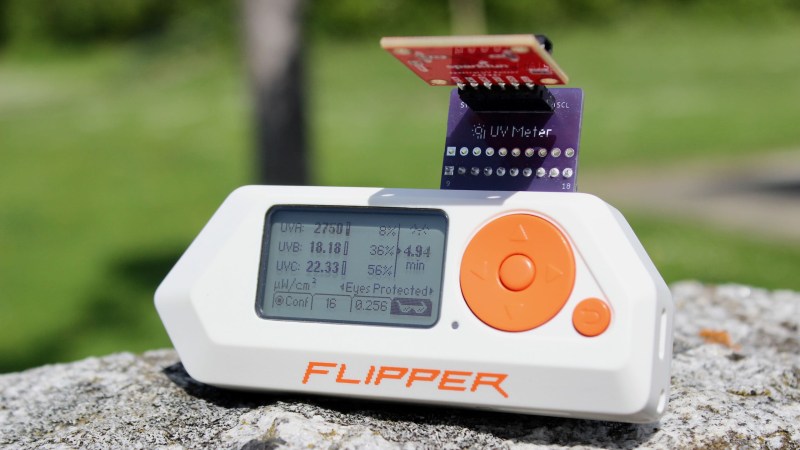
We all know UV radiation for its contributions to getting sunburned after a long day outside, but were you aware there are several types different types of UV rays at play? [Michael] has come up with a Flipper Zero add on board and app to measure these three types of radiation, and explained some of the nuances he learned about measuring UV along the way.

At the heart of this project is an AS7331 sensor, it can measure the UV-A, UV-B, and UV-C radiation values that the Flipper Zero reads via I2C. While first using this chip he realized to read these values is more complex than just querying the right register, and by the end of this project he’d written his own AS7331 library to help retrieve these values. There was also a some experimenting with different GUI designs for the app, the Flipper Zero screen is only 128x64px and he had a lot of data to display. One feature we really enjoyed was the addition of the wiring guide to the app, if you install this Flipper Zero app and have just the AS7331 sensor on hand you’ll know how to hook it up. However if you want he also has provided the design files for a PCB that just plugs into the top of the Flipper Zero.

Head over to his site to check out all the details of this Flipper Zero project, and to learn more about the different types of UV radiation. Also be sure to let us know about any of your Flipper Zero projects.

Reading the color of money

Dollar bill validator

Ever wondered what happens when you insert a bill into a vending machine? [Janne] is back with his latest project: reverse engineering a banknote validator. Curious about how these common devices work, he searched for information but found few resources explaining their operation.

To learn more, [Janne] explored the security features that protect banknotes from counterfeiting. These can include microprinting, UV and IR inks, holograms, color-shifting coatings, watermarks, magnetic stripes, and specialty paper. These features not only deter fraud but also enable validators to quickly verify a bill’s authenticity.

[Janne] purchased several banknote validators to disassemble and compare. Despite varied exteriors, their core mechanisms were similar: systems to move the bill smoothly, a tape head to detect magnetic ink or security strips, and optical sensors to inspect visible, UV, and IR features. By reverse engineering the firmware of two devices, he uncovered their inner workings. There is a calibration procedure they use to normalize their readings, then it will analyze a bill through a sophisticated signal processing pipeline. If the data falls within a narrow acceptance range, the device authenticates the bill; otherwise, it rejects it.

Head over to his site to check out all the details he discovered while exploring these devices, as well as exploring the other cool projects he’s worked on in the past. Reverse engineering offers a unique window into technology Check out other projects we’ve featured showcasing this skill.

Boxie – a Gameboy-Esque Audio Player

boxie player

This little audiobook player is a stellar example of the learning process behind a multifaceted project blending mechanical, electrical, and software design. [Mario] designed this audiobook player, dubbed Boxie, for his 3-year-old son to replace the often-used but flawed Toniebox.

The inspiration for Boxie was the Toniebox, a kid-friendly audiobook player. While functional, the Toniebox had drawbacks: it required internet connectivity, limited media selection, and had unreliable controls. Enter Boxie, a custom-built, standalone audiobook player free from web services, designed to address these issues with superior audio quality and toddler-friendly controls.

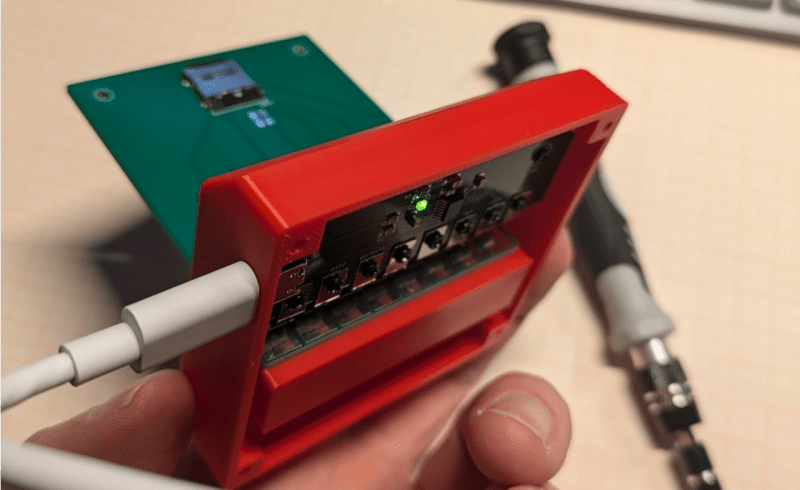
Boxie’s media is stored on microSD cards inserted into a slot on the device. To make this manageable for a toddler, he designed a PCB with a standard microSD card interface, ensuring easy swapping of audiobooks. The enclosure, crafted via 3D printing, is durable and compact, tailored for small hands.

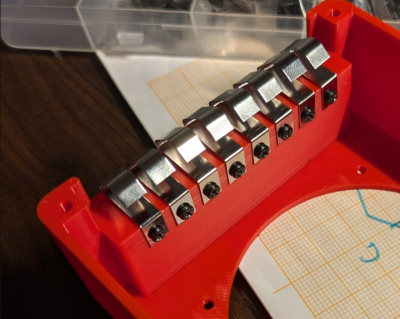
The cartridges slide into the body of the Boxie. This presented a problem, most cartridge media utilize edge connectors. Strictly speaking, his DIY cartridges didn’t have those and couldn’t use traditional cartridge reader components. First trying pogo pins, he ran into several issues, most notably the inability to hold up to the wear and tear of a 3-year-old. A clever hack to add robustness was achieved when he switched to using a series of battery springs to interface with the cartridge.

Inside the Boxie lives an ESP32-S3 microcontroller, which provides the smarts to read all the controls, play audio from the inserted cartridge. The main housing also contains the battery, DAC, amp, and speaker. Mario faced a fair number of new challenges on this project, including designing a battery charging circuit and building his own ESP32-S3 board with support for charging NiMH batteries.

All of the 3D designs, PCB files, and source code are available on his GitHub account. If you’re interested in making a Boxie for a young one in your life, be sure to go check out his detailed write-up. If you enjoyed this project, be sure to check out the other DIY audio players we’ve featured.

Pinoutleaf: Simplifying Pinout References

pinout leaf

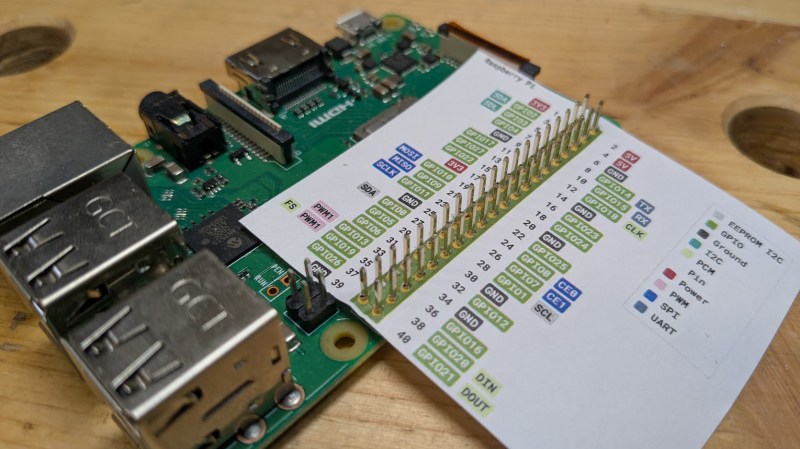
We all appreciate clear easy-to-read reference materials. In that pursuit [Andreas] over at Splitbrain sent in his latest project, Pinoutleaf. This useful web app simplifies the creation of clean, professional board pinout reference images.

The app uses YAML or JSON configuration files to define the board, including photos for the front and back, the number and spacing of pins, and their names and attributes.For example, you can designate pin 3 as GPIO3 or A3, and the app will color-code these layers accordingly. The tool is designed to align with the standard 0.1″ pin spacing commonly used in breadboards. One clever feature is the automatic mirroring of labels for the rear photo, a lifesaver when you need to reverse-mount a board. Once your board is configured, Pinoutleaf generates an SVG image that you can download or print to slide over or under the pin headers, keeping your reference key easily accessible.

Visit the GitHub page to explore the tool’s features, including its Command-Line Interface for batch-generating pinouts for multiple boards. Creating clear documentation is challenging, so we love seeing projects like Pinoutleaf that make it easier to do it well.

EclairM0, the pocket notepad

EclairM0

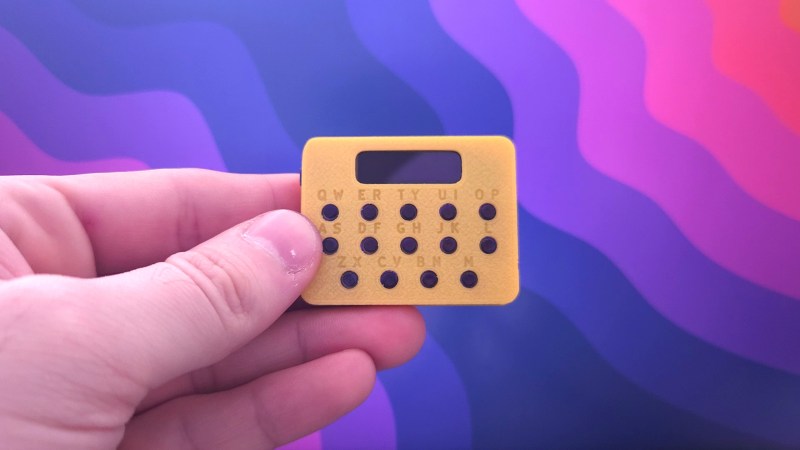
Roughly the size of a Tic Tac container, this project packs a punch in a compact package. [Matt] sent in this beautifully documented pocket device that brings back great memories of texting on early cellphones.

The EclairM0’s firmware is written in TinyGo, a language he hadn’t used before but found perfect for a microcontroller project where storage space is tight. The 14-button input mimics early phone keypads, using multi-tapping and combo key presses to offer various functions. The small SSD1306 OLED display is another highlight. Building on an earlier CircuitPython project, [Matt] optimized the screen’s performance, speeding up its response time for a snappy user experience. The battery picked was only 3 mm thick, however the protection circuity on the battery added another 2 mm so he moved that protection circuity to the main PCB itself to keep it as thin as initially planned.

Weighing just 15 grams, this lightweight device runs on a SAMD21 microcontroller, which supports USB host functionality. This allows the EclairM0 to act as a keyboard, mouse, or even USB peripherals. Housed in a 3D-printed case, the entire project is open-source, with design and firmware files available on GitHub.

We love small handheld projects around here and this well-documented, fun pocket device is no exception, if you want your own he has a page dedicated to helping you build a EclairM0.

The Mohmmeter: A Steampunk Multimeter

mohmmeter

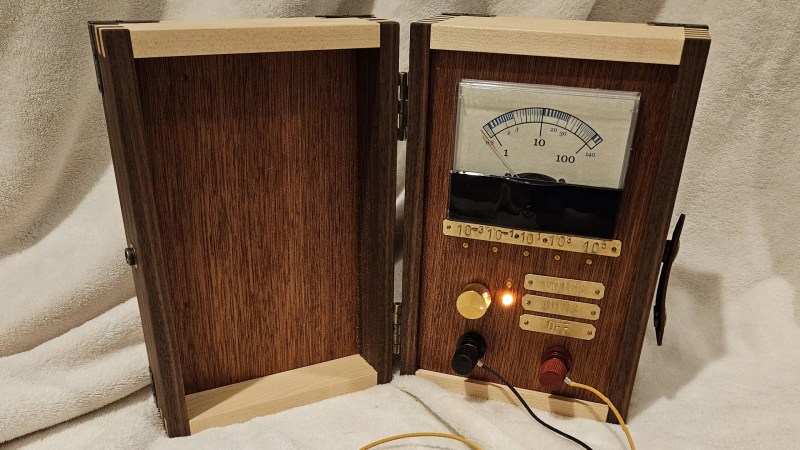
[Agatha] sent us this stunning multimeter she built as a gift for her mom. Dubbed the Mohmmeter — a playful nod to its ohmmeter function and her mom — this project combines technical ingenuity with heartfelt craftsmanship.

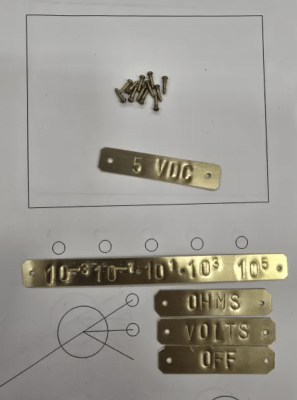
brass nameplates

At its core, a Raspberry Pi Pico microcontroller reads the selector knob, controls relays, and lights up LEDs on the front panel to show the meter’s active range. The Mohmmeter offers two main measurement modes, each with two sub-ranges for greater precision across a wide spectrum.

She also included circuitry protections against reverse polarity and over-voltage, ensuring durability. There was also a great deal of effort put into ensuring it was accurate, as the device was put though its paces using a calibrated meter as reference to ensure the final product was as useful as it was beautiful.

The enclosure is a work of art, crafted from colorful wooden panels meticulously jointed together. Stamped brass plates label the meter’s ranges and functions, adding a steampunk flair. This thoughtful design reflects her dedication to creating something truly special.

Want to build a meter for mom, but she’s more of the goth type? The blacked-out Hydameter might be more here style.

Making A One-Of-A-Kind Lime2 SBC

BGA soldering

Upgrading RAM on most computers is often quite a straightforward task: look up the supported modules, purchase them, push a couple of levers, remove the old, and install the new. However, this project submitted by [Mads Chr. Olesen] is anything but a simple.

In this project, he sets out to double the RAM on a Olimex A20-OLinuXino-LIME2 single-board computer. The Lime2 came with 1 GB of RAM soldered to the board, but he knew the A20 processor could support more and wondered if simply swapping RAM chips could double the capacity. He documents the process of selecting the candidate RAM chip for the swap and walks us through how U-Boot determines the amount of memory present in the system.

While your desktop likely has RAM on removable sticks, the RAM here is soldered to the board. Swapping the chip required learning a new skill: BGA soldering, a non-trivial technique to master. Initially, the soldering didn’t go as planned, requiring extra steps to resolve issues. After reworking the soldering, he successfully installed both new chips. The moment of truth arrived—he booted up the LIME2, and it worked! He now owns the only LIME2 with 2 GB of RAM.

Be sure to check out some other BGA soldering projects we’ve featured over the years.

Frankenflair 58: Manual Roots, Advanced Brew

The user interface of things we deal with often makes or breaks our enjoyment of using a device. [Janne] thinks so, he has an espresso machine he enjoys but the default controls were not what he was looking for and so in true hacker fashion he took what was and made it his own.

This Kickstarter-born Flair 58 is a manual espresso machine with minimal moving parts and no electronics in its default configuration. An optional preheater was available, but it felt like an afterthought. He decided to add a bit more finesse into his solution, with a sleek touchscreen display controlling a custom heater board with closed-loop temperature control, and provisions to connect an external scale scale for precise pour measurements. We’ve seen coffee maker hacks before, but this one certainly stands out for adding features absent from the machine’s initial design.

To accommodate the two custom PCBs and the touchscreen, [Janne] modified the machine’s frame. The Flair 58’s swooping curves posed a challenge, but instead of using an external enclosure, he shaped the PCBs to fit seamlessly within the machine’s structure. A wonderfully done hack given the open, exposed design of the base hardware.

Certainly head over to his site and check out this beautiful solution to improving on an existing device, and check out his other cool project based around laser fault injection. All the hardware and software for this project is freely available over on his site so if you’d like to upgrade your machine be sure to go check it out.

Track Your Circuits: A Locomotive PCB Badge

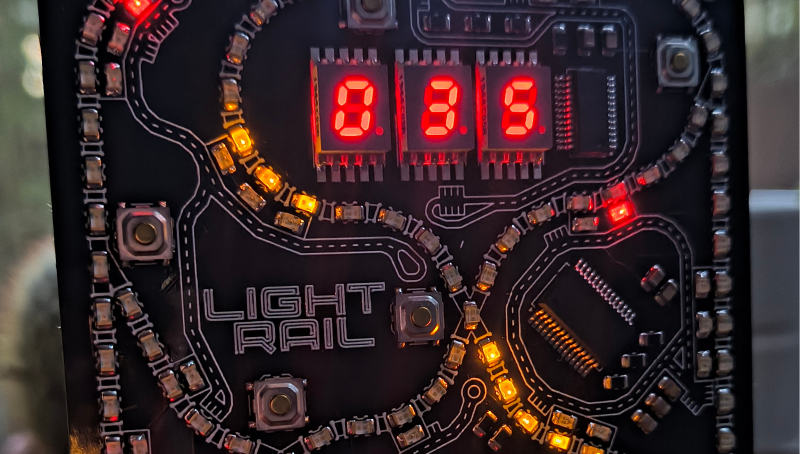
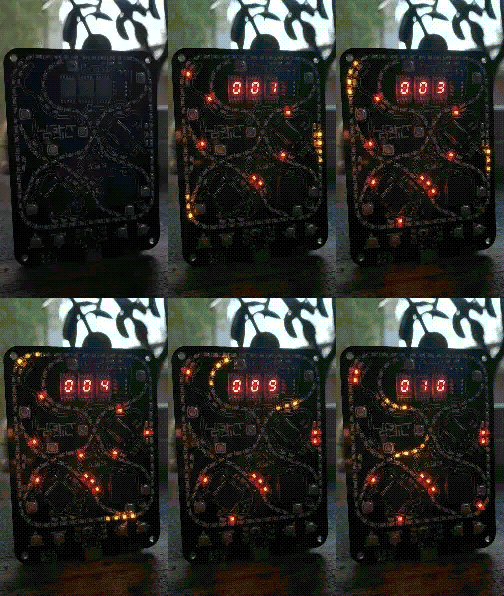
This fun PCB from [Nick Brown] features a miniature railroad implemented with 0805-sized LEDs. With an eye towards designing his own fun interactive PCB badge, the Light-Rail began its journey. He thoroughly documented his process, from shunting various late-night ideas together to tracking down discrepancies between the documentation of a part and the received part.

Inspired by our very own Supercon 2022 badge, he wanted to make a fun badge with a heavy focus on the aesthetics of the final design. He also wanted to challenge himself some in this project, so even though there are over 100 LEDs, they are not laid out in a symmetrical or matrix pattern. Instead, it’s an organic, winding railroad with crossings and stations throughout the board. Designed in KiCad the board contains 144 LEDS, 3 seven-segment displays, and over a dozen buttons that all come together in use for the built in game.

The challenges didn’t stop at just the organic layout of all those LEDs. He decided to use Rust for this project, which entailed writing his own driver for the seven-segment displays as well as creating a tone library for the onboard buzzer. As with all projects, unexpected challenges popped up along the way. One issue with how the oscillator was hooked up meant he wasn’t able to use the ATmega32U4, which was the brains of the entire railroad. After some experimenting, he came up with a clever hack: using a pogo pin jig to connect the clock where it needed to go while programming the board.

Be sure to check out all the details of this journey in his build log. If you love interactive badges also check out some of the other creative boards we’ve featured.

Modernizing an Enigma Machine

Enigma buttons

This project by [Miro] is awesome, not only did he build a replica Enigma machine using modern technologies, but after completing it, he went back and revised several components to make it more usable. We’ve featured Enigma machines here before; they are complex combinations of mechanical and electrical components that form one of the most recognizable encryption methods in history.

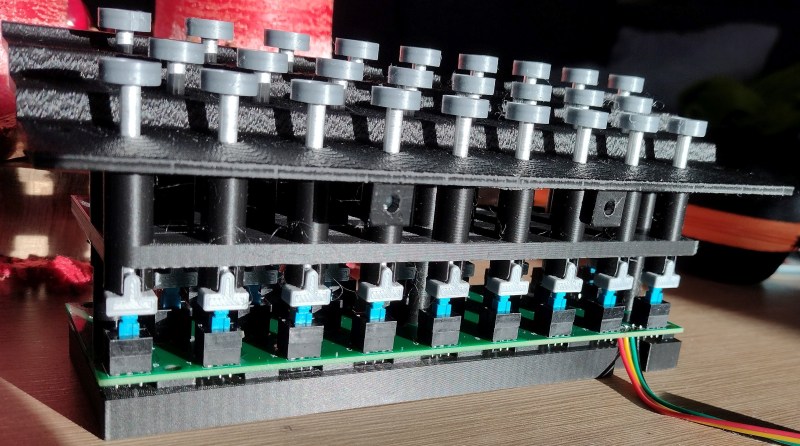
His first Enigma machine was designed closely after the original. He used custom PCBs for the plugboard and lightboard, which significantly cleaned up the internal wiring. For the lightboard, he cleverly used a laser printer on semi-transparent paper to create crisp letters, illuminated from behind. For the keyboard, he again designed a custom PCB to connect all the switches. However, he encountered an unexpected setback due to error stack-up. We love that he took the time to document this issue and explain that the project didn’t come together perfectly on the first try and how some adjustments were needed along the way.

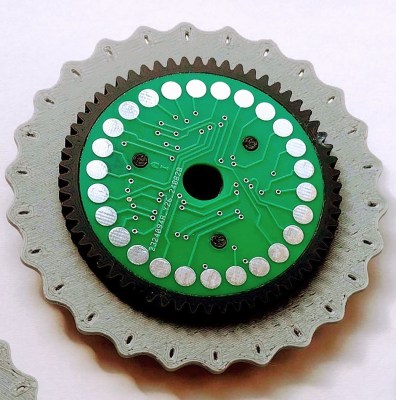
Custom rotary wheelThe real heart of this build is the thought and effort put into the design of the encryption rotors. These are the components that rotate with each keystroke, changing the signal path as the system is used. In a clever hack, he used a combination of PCBs, pogo pins, and 3D printed parts to replicate the function of the original wheels.
Enigma machine connoisseurs will notice that the wheels rotate differently than in the original design, which leads us to the second half of this project. After using the machine for a while, it became clear that the pogo pins were wearing down the PCB surfaces on the wheels. To solve this, he undertook an extensive redesign that resulted in a much more robust and reliable machine.

In the redesign, instead of using pogo pins to make contact with pads, he explored several alternative methods to detect the wheel position—including IR light with phototransistors, rotary encoders, magnetic encoders, Hall-effect sensors, and more. The final solution reduced the wiring and addressed long-term reliability concerns by eliminating the mechanical wear present in the original design.

Not only did he document the build on his site, but he also created a video that not only shows what he built but also gives a great explanation of the logic and function of the machine. Be sure to also check out some of the other cool enigma machines we’ve featured over the years.

Binner Makes Workshop Parts Organization Easy

We’ve all had times where we knew we had some part but we had to go searching for it all over as it wasn’t where we thought we put it. Organizing the numerous components, parts, and supplies that go into your projects can be a daunting task, especially if you use the same type of part at different times for different projects. It helps to have a framework to keep track of all the small details. Binner is an open source project that aims to allow you to easily maintain a database that can be customized to your use.

dashboard of binner UIIn a recent video for DigiKey, [Byte Sized Engineer] used Binner to track the locations of his components and parts in his freshly organized workshop. Binner already has the ability to read the labels used by well-known electronics suppliers via a barcode scanner, and uses that information to populate your inventory. It even grabs quantities and links in a datasheet for your newly added part. The barcode scanner can also be used to retrieve the contents of a location, so with a single scan Binner can bring up everything residing at that location.

Binner can be run locally so there isn’t the concern of putting in all the effort to build up your database just to have an internet outage make it inaccessible. Another cool feature is that it allows you to print labels, you can customize the fields to display the values you care about.

The project already has future plans to tie into a “smart bin” system to light up the location of your component — a clever feature we’ve seen implemented in previous setups.

❌