Vista de Lectura

Hay nuevos artículos disponibles. Pincha para refrescar la página.

An Emulated Stroll Down Macintosh Memory Lane

Screenshot of "Frame of Preference"

If you’re into Macs, you’ll always remember your first. Maybe it was the revolutionary classic of 1984 fame, perhaps it was the adorable G3 iMac in 1998, or even a shiny OS X machine in the 21st century. Whichever it is, you’ll find it emulated in [Marcin Wichary]’s essay “Frame of preference: A history of Mac settings, 1984–2004” — an exploration of the control panel and its history.

Image of PowerBook showing the MacOS 8.0 desktop.
That’s not a photograph, it’s an emulator. (At least on the page. Here, it’s a screenshot.)

[Marcin] is a UI designer as well as an engineer and tech historian, and his UI chops come out in full force, commenting and critiquing Curputino’s coercions. The writing is excellent, as you’d expect from the man who wrote the book on keyboards, and it provides a fascinating look at the world of retrocomputing through the eyes of a designer. That design-focused outlook is very apropos for Apple in particular. (And NeXT, of course, because you can’t tell the story of Apple without it.)

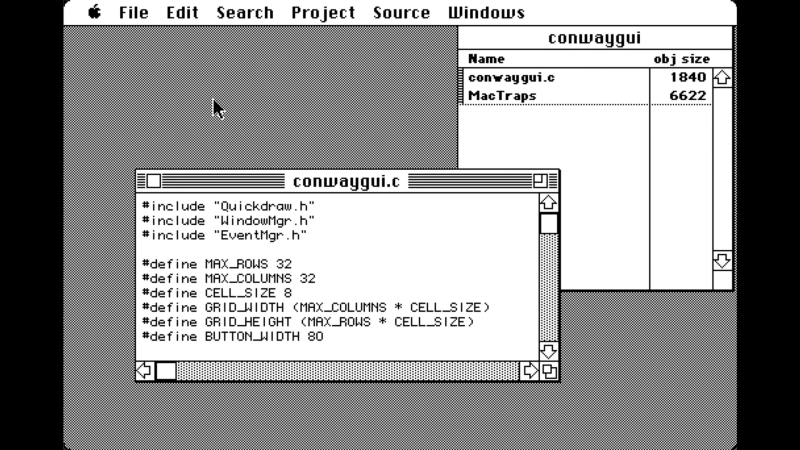
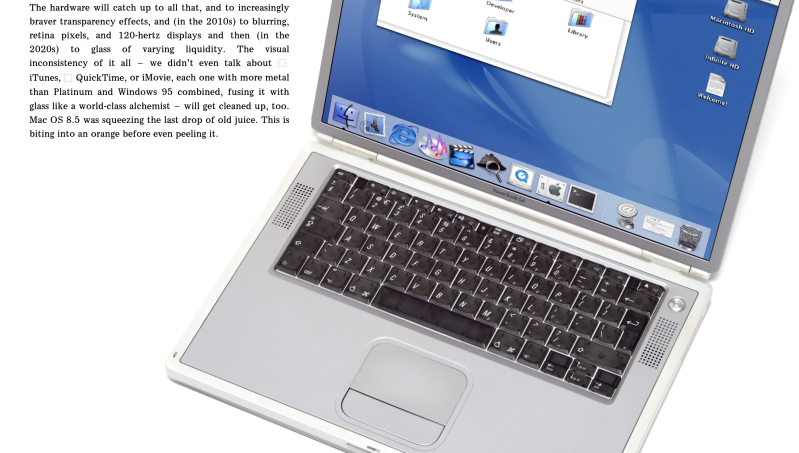
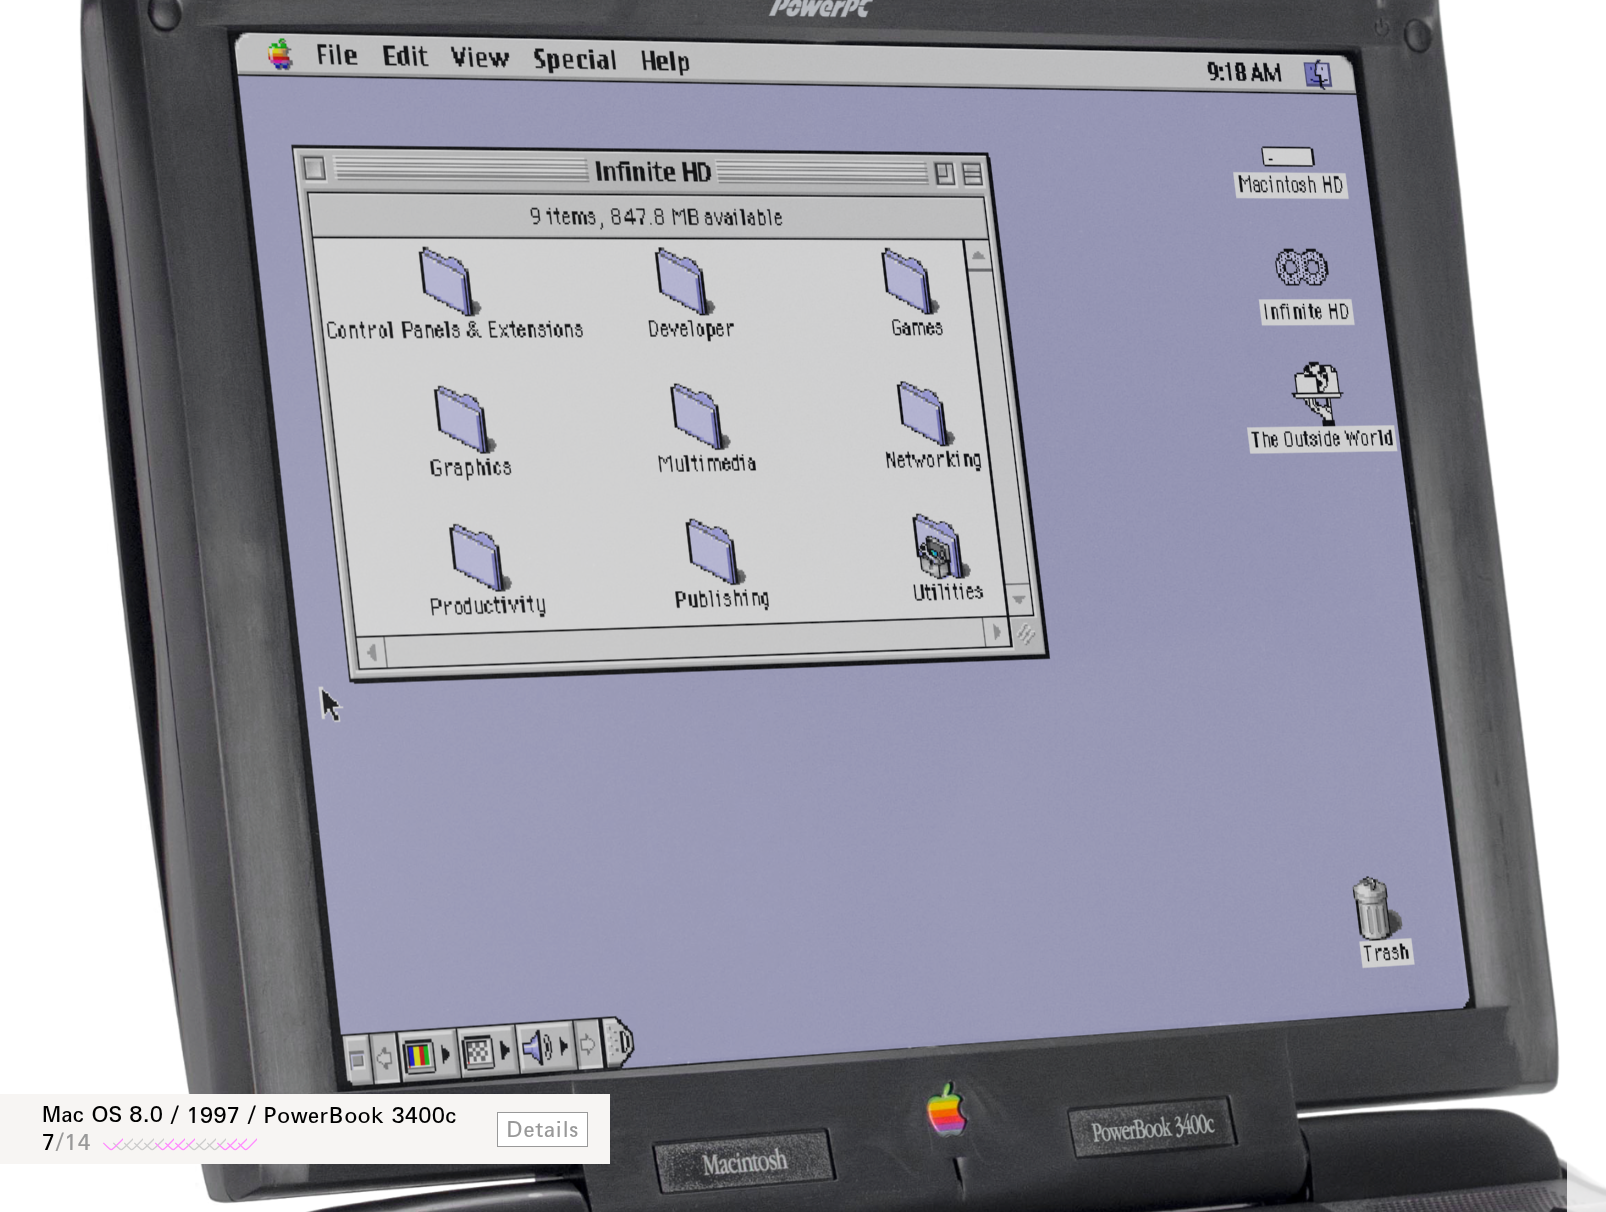
There are ten emulators on the page, provided by [Mihai Parparita] of Infinite Mac. It’s like a virtual museum with a particularly knowledgeable tour guide — and it’s a blast, getting to feel hands-on, the design changes being discussed. There’s a certain amount of gamification, with each system having suggested tasks and a completion score when you finish reading. There are even Easter eggs.

This is everything we wish the modern web was like: the passionate deep-dives of personal sites on the Old Web, but enhanced and enabled by modern technology. If you’re missing those vintage Mac days and don’t want to explore them in browser, you can 3D print your own full-size replica, or a doll-sized picoMac.


Volume Controller Rejects Skeumorphism, Embraces the Physical

The volume slider on our virtual desktops is a skeuomorphic callback to the volume sliders on professional audio equipment on actual, physical desktops. [Maker Vibe] decided that this skeuomorphism was so last century, and made himself a physical audio control box for his PC.

Since he has three audio outputs he needs to consider, the peripheral he creates could conceivably be called a fader. It certainly has that look, anyway: each output is controlled by a volume slider — connected to a linear potentiometer — and a mute button. Seeing a linear potentiometer used for volume control threw us for a second, until we remembered this was for the computer’s volume control, not an actual volume control circuit. The computer’s volume slider already does the logarithmic conversion. A Seeed Studio Xiao ESP32S3 lives at the heart of this thing, emulating a Bluetooth gamepad using a library by LemmingDev. A trio of LEDs round out the electronics to provide an indicator for which audio channels are muted or active.

Those Bluetooth signals are interpreted by a Python script feeding a software called Voicmeeter Banana, because [Maker Vibe] uses Windows, and Redmond’s finest operating system doesn’t expose audio controls in an easily-accessible way. Voicmeeter Banana (and its attendant Python script) takes care of telling Windows what to do. 

The whole setup lives on [Maker Vibe]’s desk in a handsome 3D printed box. He used a Circuit vinyl cutter to cut out masks so he could airbrush different colours onto the print after sanding down the layer lines. That’s another one for the archive of how to make front panels.

If volume sliders aren’t doing it for you, perhaps you’d prefer to control your audio with a conductor’s baton. 

Programming Like It’s 1986, For Fun and Zero Profit

screenshot of C programming on Macintosh Plus

Some people slander retrocomputing as an old man’s game, just because most of those involved are more ancient than the hardware they’re playing with. But there are veritable children involved too — take the [ComputerSmith], who is recreating Conway’s game of life on a Macintosh Plus that could very well be as old as his parents. If there’s any nostalgia here, it’s at least a generation removed — thus proving for the haters that there’s more than a misplaced desire to relive one’s youth in exploring these ancient machines.

So what does a young person get out of programming on a 1980s Mac? Well, aside from internet clout, and possible YouTube monetization, there’s the sheer intellectual challenge of the thing. You cant go sniffing around StackExchange or LLMs for code to copy-paste when writing C for a 1986 machine, not if you’re going to be fully authentic. ANSI C only dates to 1987, after all, and figuring out the quirks and foibles of the specific C implementation is both half the fun, and not easily outsourced. Object Pascal would also have been an option (and quite likely more straightforward — at least the language was clearly-defined), but [ComputerSmith] seems to think the exercise will improve his chops with C, and he’s likely to be right. 

Apparently [ComputerSmith] brought this project to VCS Southwest, so anyone who was there doesn’t have to wait for Part 2 of the video to show up to see how this turns out, or to snag a copy of the code (which was apparently available on diskette). If you were there, let us know if you spotted the youngest Macintosh Plus programmer, and if you scored a disk from him.

If the idea of coding in this era tickles the dopamine receptors, check out this how-to for a prizewinning Amiga demo.  If you think pre-ANSI C isn’t retro enough, perhaps you’d prefer programming by card?

Five-minute(ish) Beanie is the Fastest We’ve Seen Yet

Yes, you read that right– not benchy, but beanie, as in the hat. A toque, for those of us under the Maple Leaf. It’s not 3D printed, either, except perhaps by the loosest definition of the word: it is knit, by [Kevr102]’s motorized turbo knitter.

The turbo-knitter started life as an Addi Express King knitting machine. These circular knitting machines are typically crank-operated, functioning  with a cam that turns around to raise and lower special hooked needles that grab and knit the yarn. This particular example was not in good working order when [Kevr102] got a hold of it. Rather than a simple repair, they opted to improve on it.

A 12 volt motor with a printed gear and mount served for motorizing the machine. The original stitch counter proved a problem, so was replaced with an Arduino Nano and a hall effect sensor driving a 7-digit display. In theory, the Arduino could be interfaced with the motor controller and set to run the motor for a specific number of stitches, but in practice there’s no point as the machine needs babysat to maintain tension and avoid dropping stitches and the like. Especially, we imagine, when it runs fast enough to crank out a hat in under six minutes. Watch it go in the oddly cropped demo video embedded below.

Five minutes would still be a very respectable time for benchy, but it’s not going to get you on the SpeedBoatRace leaderboards against something like the minuteman we covered earlier.

If you prefer to take your time, this knitting machine clock might be more your fancy. We don’t see as many fiber arts hacks as perhaps we should here, so if you’re tangled up in anything interesting in that scene, please drop us a line


Touch Lamp Tracks ISS with Style

In the comments of a recent article, the question came up as to where to find projects from the really smart kids the greybeards remember being in the 70s. In the case of [Will Dana] the answer is YouTube, where he’s done an excellent job of producing an ISS-tracking lamp, especially considering he’s younger than almost all of the station’s major components.*

There’s nothing ground-breaking here, and [Will] is honest enough to call out his inspiration in the video. Choosing to make a ground-track display with an off-the-shelf globe is a nice change from the pointing devices we’ve featured most recently. Inside the globe is a pair of stepper motors configured for alt/az control– which means the device must reset every orbit, since [Willis] didn’t have slip rings or a 360 degree stepper on hand.  A pair of magnets couples the motion system inside the globe to the the 3D printed ISS model (with a lovely paintjob thanks to [Willis’s girlfriend]– who may or may be from Canada, but did show up in the video to banish your doubts as to her existence), letting it slide magically across the surface. (Skip to the end of the embedded video for a timelapse of the globe in action.) The lamp portion is provided by some LEDs in the base, which are touch-activated thanks to some conductive tape inside the 3D printed base.

It’s all controlled by an ESP32, which fetches the ISS position with a NASA API. Hopefully it doesn’t go the way of the sighting website, but if it does there’s more than enough horsepower to calculate the position from orbital parameters, and we are confident [Will] can figure out the code for that. That should be pretty easy compared to the homebrew relay computer or the animatronic sorting hat we featured from him last year.

Our thanks to [Will] for the tip. The tip line is for hackers of all ages,  but we admit that it’s great to see what the new generation is up to.

*Only the Roll Out Solar Array, unless you only count on-orbit age, in which case the Nakua module would qualify as well.

When is a synth a woodwind? When it’s a Pneumatone

Ever have one of those ideas that’s just so silly, you just need to run with it? [Chris] from Sound Workshop ran into that when he had the idea that became the Pneumatone: a woodwind instrument that plays like a synth.

In its 3D printed case, it looks like a giant polyphonic analog synth, but under the plastic lies a pneumatic heart: the sound is actually being made by slide whistles. We always thought of the slide whistle as a bit of a gag instrument, but this might change our minds. The sliders on the synth-box obviously couple to the sliders in the whistles. The ‘volume knobs’ are actually speed controllers for computer fans that feed air into the whistles. The air path is possibly not ideal– there’s a bit of warbling in the whistles at some pitches– but the idea is certainly a fun one. Notes are played by not blocking the air path out the whistle, as you can see in the video embedded below.

Since the fans are always on, this is an example of a drone instrument, like bagpipes or the old hacker’s favourite, the hurdy gurdy. [Chris] actually says in his tip– for which we are very thankful– that this project takes inspiration not from those projects but from Indian instruments like the Shruthi Box and Tanpura. We haven’t seen those on Hackaday yet, but if you know of any hacks involving them, please leave a tip.

IR Point and Shoot Has a Raspberry Heart in a 35mm Body

Photography is great, but sometimes it can get boring just reusing the same wavelengths over and over again. There are other options, though and when [Malcolm Wilson] decided he wanted to explore them, he decided to build a (near) IR camera. 

The IR images are almost ethereal.
Image : Malcom Wilson.

The housing is an old Yashica Electro 35 — apparently this model was prone to electrical issues, and there are a lot of broken camera bodies floating around– which hides a Pi NoIR Camera v3. That camera module, paired with an IR pass filter, makes for infrared photography like the old Yashica used to do with special film. The camera module is plugged into a Pi Zero 2 W, and it’s powered by a PiSugar battery. There’s a tiny (0.91″) OLED display, but it’s only for status messages. The viewfinder is 100% optical, as the designers of this camera intended. Point, shoot, shoot again.

There’s something pure in that experience; we sometimes find stopping to look at previews pulls one out of the creative zone of actually taking pictures. This camera won’t let you do that, though of course you do get to skip on developing photos. [Malcom] has the Pi set up to connect to his Wifi when he gets home, and he grabs the RAW (he is a photographer, after all) image files via SSH.  Follow the link above to [Malcom]’s substack, and you’ll get some design details and his python code.

The Raspberry Pi Foundation’s NoIR camera shows up on these pages from time to time, though rarely so artistically. We’re more likely to see it spying on reptiles, or make magic wands work.  So we are quite grateful to [Malcom] for the tip, via Petapixel. Yes, photographers and artists of all stripes are welcome to use the tips line to tell us about their work.

Follow the links in this article for more images like this.
Image: Malcom Wilson

160-core RISC V Board is the m.2 CoProcessor You Didn’t know you needed

Aside from GPUs, you don’t hear much about co-processors these days. [bitluni] perhaps missed those days, because he found a way to squeeze a 160 core RISC V supercluster onto a single m.2 board, and shared it all on GitHub.

OK, sure, each core isn’t impressive– he’s using CH32V003, so each core is only running at 48 MHz, but with 160 of them, surely it can do something? This is a supercomputer by mid-80s standards, after all.  Well, like anyone else with massive parallelism, [bitluni] decided to try a raymarcher. It’s not going to replace RTX anytime soon, but it makes for a good demo.

Like his previous m.2 project, an LED matrix,  the cluster is communicating over PCIe via a WCH CH382 serial interface. Unlike that project, blinkenlights weren’t possible: the tiny, hair-thin traces couldn’t carry enough power to run the cores and indicator LEDs at once. With the power issue sorted, the serial interface is the big bottleneck. It turns out this cluster can crunch numbers much faster than it can communicate. That might be a software issue, however, as the cluster isn’t using all of the CH382’s bandwidth at the moment. While that gets sorted there are low-bandwidth, compute-heavy tasks he can set for the cluster. [bitluni] won’t have trouble thinking of them; he has a certain amount of experience with RISCV microcontroller clusters.

We were tipped off to this video by [Steven Walters], who is truly a prince among men. If you are equally valorous, please consider dropping informational alms into our ever-present tip line

Daisy chain of hacks lets new Arm board run Doom

Running DOOM on ARM? Old hat. Running Doom (2016) on an ARM SBC? Well, that’s a bit more interesting, and [Interfacing Linux] shows us how with this handy guide, and in a video embedded below.

The ARM SBC in question is the Radxa Orion O6, which claims to be the world’s first open source ARMv9 motherboard. It has a 12-core ARM9.2 SoC from Cix, and crucially for gaming, a PCIe x16 slot to fit a graphics card. There’s onboard graphics in the SoC, of course, but that’s only going to cut it for old DOOM, not Doom (2016).

Obviously there is no ARMv9 build of this nine-year-old classic. Thus, a certain degree of hacking is required. An x86 emulation layer called FEX is used to run Steam, which includes the Proton compatibility layer to sit between the Linux system and the Windows system calls the games are making.

So, again: Windows games, running via a compatibility layer on a Linux system running on an x86 emulator, running on another Linux system, running on ARM hardware. Yeah, we’d call that a hack, and just possibly cursed. The amazing thing is that it works. As long as you use a PCI 3.0 graphics card, anyway; apparently newer ones don’t work, or at least not the one [Interfacing Linux] had to try. (Some report better luck with newer NVIDIA cards.) Which is a pity, because every game tested is GPU-throttled on this system. Considering the CPU should be handling all the emulation, that just goes to show how GPU-heavy even 10-year-old games are.

[Interfacing Linux] seems to enjoy running things where they should not; we just wrote up their SteamOS console.

This isn’t the first time a Radxa board has shown up on Hackaday either, but they don’t seem to be nearly as popular as the fruit-flavoured competition for the sort of projects we usually see. If you’ve got a good project using one of these powerful ARM boards– or anything else, don’t hesitate to send us a tip!


Software Defined Retro ROM Makes 8-bit Easy

Like the rest of us, 8-bit hardware is not getting any newer, and failed ROMs are just a fact of life. Of course you can’t call up Commadore corporation for replacement parts anymore, so something is needed. [Peirs Rocks] wasn’t satisfied with the existing options, so he came up with the Software Defined Retro ROM to serve as a drop-in replacement for 2364, 2332, and 2316 ROM chips.

Physically, the Software Defined Retro ROM is a PCB that matches the footprint of the original ROM chip, and holds an STM32F4 family microcontroller with a number of extra pins facing upwards. Some of those pins are for programming, so you can flash the board in-situ without removing it from the system using a Pi Pico. The others pins are jumpers for image selection or chip configuration. Depending which STM32 you use, you can have upto 16 ROM images on the board, at whatever chip select behaviour you require. The ROM’s chip select lines could be configured at the factory to answer to HIGH or LOW, and this board can handle either with a jumper swap.

The documentation on the GitHub is very well done, for which we applaud [Piers]. Instructions and demos are also available in the video embedded below. We could certainly see this hack becoming popular in the retrocomputer community, especially as everything ages and memories continue to, uh, y’know. What were we talking about, again?

Oh, right, ROMs. You might think an mask ROM would last a very long time, but it’s been a very long time since some of these were made. Best to dump them while you still can. If the chip is really far gone electrically, you might try decoding a photograph of the die.


CIS-4 Is a Monkish Clock Inside a Ceiling Lamp

It’s always clock time at Hackaday, and this time we have an interesting hack of a clock by [danjovic]– the CIS4, a Cistercian digital clock.

The Cistertians, in case you weren’t paying close attention to European holy orders during the 13th to 15th centuries were the group of monks you’d most likely have found us in. They were the hackers of the middle ages, establishing monestaries across western Europe that were chock full of hacks– including their own numeral system. Cistercian numerals were much more efficient (in spaces and penstrokes) than the Roman numerals they replaced, and even the “Arabic” numerals that replaced them. A single glyph could record anything from 1 to 9,999. (The Europeans hadn’t yet cottoned on to zero.)

The Cistertian glyphs reduced to a 4×4 display.

Depending how you wanted to count time, a single glyph could be used; it looks like [danjovic] is using the thousands and hundreds portions of the glyph for hours and the tens and ones for minutes. This is all accomplished with a 4×4 neopixel matrix, run by an Attiny85 Digispark with a DS3231 RTC module keeping time. A slight simplification is required to reduce the glyphs to 4×4, but we don’t think the monks would mind. For those of us who don’t wear tonsures, an easy read mode scrolls the time in Arabic numerals. (Which still aren’t super easy,with only 4×4 LEDs to display them. See the demo video embedded below and try and guess the time.)

One nice quality of life feature is an LDR for ambient light detection, to automatically adjust the neopixels’ brightness. The hackiest part, which we thought was really clever, is the enclosure: it’s a cheap LED ceiling light. This provides a diffuser, housing and mounting hardware with decent design for no effort. A 3D-printed mask sits between the diffuser and the LEDs and doubles as a PCB holder. All very elegant.

[danjovic] did include a buzzer in the design, but does say if its been programed to sound off for matins, nones and vespers. In any case, at least it’s easier to read than his binary-coded-octal clock that we featured a few years back. This isn’t our first look at this number system,so evidently people can read them with practice.

Have you made or seen a cool clock? Send us a tip. We always have time for clocks.

Video Cable Becomes Transmitter with TEMPEST-LoRa

EFI from cables is something every ham loves to hate. What if you modulated, that, though, using an ordinary cable as an antenna? If you used something ubiquitous like a video cable, you might have a very interesting exploit– which is exactly what [Xieyang Sun] and their colleagues have done with TEMPEST-LoRa, a technique to encode LoRa packets into video files.

The concept is pretty simple: a specially-constructed video file contains information to be broadcast via LoRa– the graphics card and the video cable serve as the Tx, and the Rx is any LoRa module. Either VGA or HDMI cables can be used, though the images to create the LoRa signal are obviously going to differ in each case. The only restriction is that the display resolution must be 1080×1920@60Hz, and the video has to play fullscreen. Fullscreen video might make this technique easy to spot if used in an exploit, but on the other hand, the display does not have to be turned on at the time of transmission. If employed by blackhats, one imagines syncing this to power management so the video plays whenever the screen blanks. 

This image sends LoRa. Credit: TEMPEST-LoRa

According to the pre-print, a maximum transmission distance of 81.7m was achieved, and at 21.6 kbps. That’s not blazing fast, sure, but transmission out of a totally air-gapped machine even at dialup speeds is impressive. Code is on the GitHub under an MIT license, though [Xieyang Sun] and the team are white hats, so they point out that it’s provided for academic use. There is a demo video, but as it is on bilbili we don’t have an easy way to embed it. The work has been accepted to the ACM Conference on Computer and Communications Security (2025), so if you’re at the event in Taiwan be sure to check it out. 

We’ve seen similar hacks before, like this one that uses an ethernet cable as an antenna. Getting away from RF, others have used fan noise, or even the once-ubiquitous HDD light. (And here we thought casemakers were just cheaping out when they left those off– no, it’s security!)

Thanks to [Xieyang Sun] for the tip! We’ll be checking the tips line for word from you, just as soon as we finish wrapping ferrites around all our cables.

Reliving VHS Memories with NFC and ESPHome

Like many of us of a certain vintage, [Dillan Stock] at The Stock Pot is nostalgic for VHS tapes. It’s not so much the fuzzy picture or the tracking issues we miss, but the physical experience the physical medium brought to movie night. To recreate that magic, [Dillan] made a Modern VHS with NFC and ESPHome.

NFC tags are contained in handsomely designed 3D printed cartridges. You can tell [Dillan] put quite a bit of thought into the industrial design of these: there’s something delightfully Atari-like about them, but they have the correct aspect ratio to hold a miniaturized movie poster as a label. They’re designed to print in two pieces (no plastic wasted on supports) and snap together without glue. The printed reader is equally well thought out, with print-in-place springs for that all important analog clunk.

Electronically, the reader is almost as simple as the cartridge: it holds the NFC reader board and an ESP32. This is very similar to NFC-based audio players we’ve featured before, but it differs in the programming. Here, the ESP32 does nothing related directly to playing media: it is simply programmed to forward the NFC tag id to ESPHome. Based on that tag ID, ESPHome can turn on the TV, cue the appropriate media from a Plex server (or elsewhere), or do… well, literally anything. It’s ESPHome; if you wanted to make this and have a cartridge to start your coffee maker, you could.

If this tickles your nostalgia bone, [Dillan] has links to all the code, 3D files and even the label templates on his site. If you’re not sold yet, check out the video below and you might just change your mind. We’ve seen hacks from The Stock Pot before, everything from a rebuilt lamp to an elegant downspout and a universal remote.

Hack Swaps Keys for Gang Signs, Everyone Gets In

The door-unlocking mechanism, featuring a 3D printed bevel gear and NEMA 17 stepper.

How many times do you have to forget your keys before you start hacking on the problem? For [Binh], the answer was 5 in the last month, and his hack was to make a gesture-based door unlocker. Which leads to the amusing image of [Binh] in a hallway throwing gang signs until he is let in.

The system itself is fairly simple in its execution: the existing deadbolt is actuated by a NEMA 17 stepper turning a 3D printed bevel gear. It runs 50 steps to lock or unlock, apparently, then the motor turns off, so it’s power-efficient and won’t burn down [Binh]’s room.

The software is equally simple; mediapipe is an ML library that can already do finger detection and be accessed via Python. Apparently gesture recognition is fairly unreliable, so [Binh] just has it counting the number of fingers flashed right now. In this case, it’s running on a Rasberry Pi 5 with a webcam for image input. The Pi connects via USB serial to an ESP32 that is connected to the stepper driver. [Binh] had another project ready to be taken apart that had the ESP32/stepper combo ready to go so this was the quickest option. As was mounting everything with double-sided tape, but that also plays into a design constraint: it’s not [Binh]’s door.

[Binh] is staying in a Hacker Hotel, and as you might imagine, there’s been more penetration testing on this than you might get elsewhere. It turns out it’s relatively straightforward to brute force (as you might expect, given it is only counting fingers), so [Binh] is planning on implementing some kind of 2FA. Perhaps a secret knock? Of course he could use his phone, but what’s the fun in that?

Whatever the second factor is, hopefully it’s something that cannot be forgotten in the room. If this project tickles your fancy, it’s open source on GitHub, and you can check it out in action and the build process in the video embedded below.

After offering thanks to [Binh] for the tip, the remaining words of this article will be spent requesting that you, the brilliant and learned hackaday audience, provide us with additional tips.


Subpixel Rendering For Impossibly Small Terminal Text

When it comes to text, how small is too small? The experts say a six point font is the minimum for readability, but as [James Bowman] shows us, you can get away with half of that. 

The goal is to produce a 40-character display on a 24 mm x 24 mm LCD that has a resolution of 240 x 240 to show a serial terminal (or other data) on the “TermDriver2” USB-to-Serial adapter. With 24 lines, that’s a line per millimeter: very small text. Three points, to be precise, half what the experts say you need. Diving this up into 40 columns gives a character cell of six by nine pixels. Is it enough?

The raw font on the left, the subpixel rendering on the right. For once, it’s better if you don’t click to enlarge.

Not by itself, no. That’s where the hack comes in: sub-pixel rendering. After all, a “white” pixel on an LCD is actually three elements: a red, a green, and a blue subpixel, stacked side-by-each. Drive each of those subpixels independently and 240 pixels now becomes 720. That’s plenty for a 40 column terminal.

The article discusses how, in general terms, they pulled off the subpixel rendering and kept the font as legible as possible. We think it’s a good try, though the colored fringe around the characters can be uncomfortable to look at for some people — and then we can’t forget the physical size of the characters being 1 mm tall.

If this trick were being used on a larger display with a 240-wide resolution, we’d say “yes, very legible, good job!”– but at this size? We hope we can find our reading glasses. Still, it’s a neat trick to have in your back pocket for driving low-resolution LCDs.

It may not surprise you that aside from improving legibility, subpixel rendering is also used for pixel (er, sub-pixel) art.


The full set of glyphs in their subpixel-rendered glory.

Move Over, Cybertruck: Series Hybrids from Edison Are on the Way

It’s been awhile since we checked in with Canada’s Edison Motors, so let’s visit [DeBoss Garage] for an update video. To recap, Edison Motors is a Canadian company building diesel-electric hybrid semi-trucks and more.

Arial view of Edison's new property
The last interesting thing to happen in Donald, BC was when it burned down in the 1910s.

Well, they’ve thankfully moved out of the tent in their parents’ back yard where the prototype was built. They’ve bought themselves a company town: Donald, British Columbia, complete with a totally-not-controversial slogan “Make Donald Great Again”.

More interesting is that their commercial-off-the-shelf (COTS), right-to-repair centered approach isn’t just for semi-trucks: they’re now a certified OEM manufacturer of a rolling heavy truck chassis you can put your truck cab or RV body on, and they have partnered with three coach-builders for RVs and a goodly number of manufacturing partners for truck conversion kits. The kits were always in the plan, but selling the rolling chassis is new.

One amazingly honest take-away from the video is the lack of numbers for the pickups: top speed, shaft horsepower, torque? They know what all that should be, but unlike the typical vaporware startup, Edison won’t tell you the engineering numbers on the pickup truck kits until it has hit the race track and proved itself in the real world. These guys are gear-heads first and engineers second, so for once in a long time the adage “engineers hate mechanics” might not apply to a new vehicle.

The dirt track is the first thing under construction in Donald, so hopefully the next update we hear from Edison Motors will include those hard numbers, including pesky little things like MSRP and delivery dates. Stay tuned.

In our last post about an electric truck, a lot of you in the comments wanted something bigger, heavier duty, not pure battery, and made outside the USA. Well, here it is.

Thanks to [Keith Olson] for the tip. Remember, the lines are always open!

Windows 95 on PlayStation 2 Works as Well as You Expected

When you hear “PS2” and “Windows 95,” you probably think someone forgot a slash and are talking about peripherals, but no — this hack is very much about the Sony PlayStation 2, the best-selling game console of all time. [MeraByte] walks us through the possibly ridiculous task of installing Windows 95 on the last hardware anyone at Microsoft would ever endorse in a video you can watch below.

Obviously, the MIPS-based Emotion Engine at the heart of the PS2 is not going to be able to handle x86 instructions Win95 is expecting, but that’s all solved by the magic of emulation. [MeraByte] is running a version of Bochs, an x86 emulator that has been built for PS/2 after trying and failing to install Windows (both 3.1 and 95) to an experimental DOSBox build.

As expected, it is not a smooth journey for [MeraByte], but the flailing about and troubleshooting make for entertaining viewing. Once loaded, it works surprisingly well, in that anything works at all. Unfortunately, neither the mouse nor Ultimate Doom 95 worked. We suppose that ultimately means that this hack fails since even Doom can run Doom. The mouse thing is also important, probably.

If you have a PlayStation 2, maybe skip Windows 95 and try running GoLang.  If you do have DOOM running on the PlayStation 2, send us a tip. There was never an official release for PS2, but after 26 years, someone must have done it by now.

GEEKDeck is a SteamDeck for Your Living Room

You know what the worst thing about the Steam Deck is? Being able to play your games on the go. Wouldn’t it be better if it was a screenless brick that lived under your TV? Well, maybe not, but at least one person thought so, because [Interfacing Linux] has created the GeekDeck, a Steam OS console of sorts in this video embedded below.

The hack is as simple as can be: he took a GEEKOM A5, a minicomputer with very similar specs to the Steam Deck, and managed to load SteamOS onto it. We were expecting that to be a trial that took most of the video’s runtime, but no! Everything just… sorta worked. It booted to a live environment and installed like any other Linux. Which was unexpected, but Steam has released SteamOS for PC. 

In case you weren’t aware, SteamOS is an immutable distribution based on Arch Linux. Arch of course has all the drivers to run on… well, any modern PC, but it’s the immutable part that we were expecting to cause problems. Immutable distributions are locked down in a similar manner to Mac OS (everything but /home/ is typically read-only, even to the superuser) and SteamOS doesn’t ship with package manager that can get around this, like rpm-ostree in Fedora’s Silverblue ecosystem. Actually, if you don’t have a hardware package that matches the SteamDeck to the same degree this GEEKOM does, Bazzite might be a good bet– it’s based on Siverblue and was made to be SteamOS for PC, before Steam let you download their OS to try on your PC.

Anyway, you can do it. Should you? Well, based on the performance shown in the video, not if you want to run triple-A games locally. This little box is no more powerful than the SteamDeck, after all. It’s not a full gaming rig. Still, it was neat to see SteamOS off of the ‘deck and in the wild.

Usually we see hacks that use the guts of the SteamDeck guts with other operating systems, not the other way around. Like the Bento Box AR machine we liked so much it was actually  featured twice.  The SteamDeck makes for a respectable SBC, if you can find a broken one. If not, apparently a Chinese MiniPC will work just as well.

Simulating Empires with Procedurally Generated History

Procedural generation is a big part of game design these days. Usually you generate your map, and [Fractal Philosophy] has decided to go one step further: using a procedurally-generated world from an older video, he is procedurally generating history by simulating the rise and fall of empires on that map in a video embedded below.

Now, lacking a proper theory of Psychohistory, [Fractal Philosophy] has chosen to go with what he admits is the simplest model he could find, one centered on the concept of “solidarity” and based on the work of [Peter Turchin], a Russian-American thinker. “Solidarity” in the population holds the Empire together; external pressures increase it, and internal pressures decrease it. This leads to an obvious cellular automation type system (like Conway’s Game of Life), where cells are evaluated based on their nearest neighbors: the number of nearest neighbors in the empire goes into a function that gives the probability of increasing or decreasing the solidarity score each “turn”. (Probability, in order to preserve some randomness.) The “strength” of the Empire is given by the sum of the solidarity scores in every cell.

Each turn, Empires clash, with the the local solidarity, sum strength, and distance from Imperial center going into determining who gains or loses territory. It is a simple model; you can judge from the video how well it captures the ebb and flow of history, but we think it did surprisingly well all things considered. The extra 40-minute video of the model running is oddly hypnotic, too.

3D model of an Alpaca next to a Llama
In v2 of the model, one of these fluffy creatures will betray you.

After a dive into more academic support for the main idea, and a segue into game theory and economics, a slight complication is introduced later in the video, dividing each cell into two populations: “cooperators” or “selfish” individuals.

This allows for modeling of internal conflicts between the two groups. This hitch gives a very similar looking map at the end of its run, although has an odd quirk that it automatically starts with a space-filling empire across the whole map that quickly disintegrates.

Unfortunately, the model not open-source, but the ideas are discussed in enough detail that one could probably produce a very similar algorithm in an afternoon. For those really interested, [Fractal Philosophy] does offer a one-time purchase through his Patreon. It also includes the map-generating model from his last video.

We’re much more likely to talk about simulating circuits, or feature projects that use fluid simulations here at Hackaday, but this hack of a history model


❌