Vista Normal

Hay nuevos artículos disponibles. Pincha para refrescar la página.
AnteayerSalida Principal

Keebin’ with Kristina: the One with the SEGA Pico Keyboard

10 Febrero 2025 at 18:00
Illustrated Kristina with an IBM Model M keyboard floating between her hands.

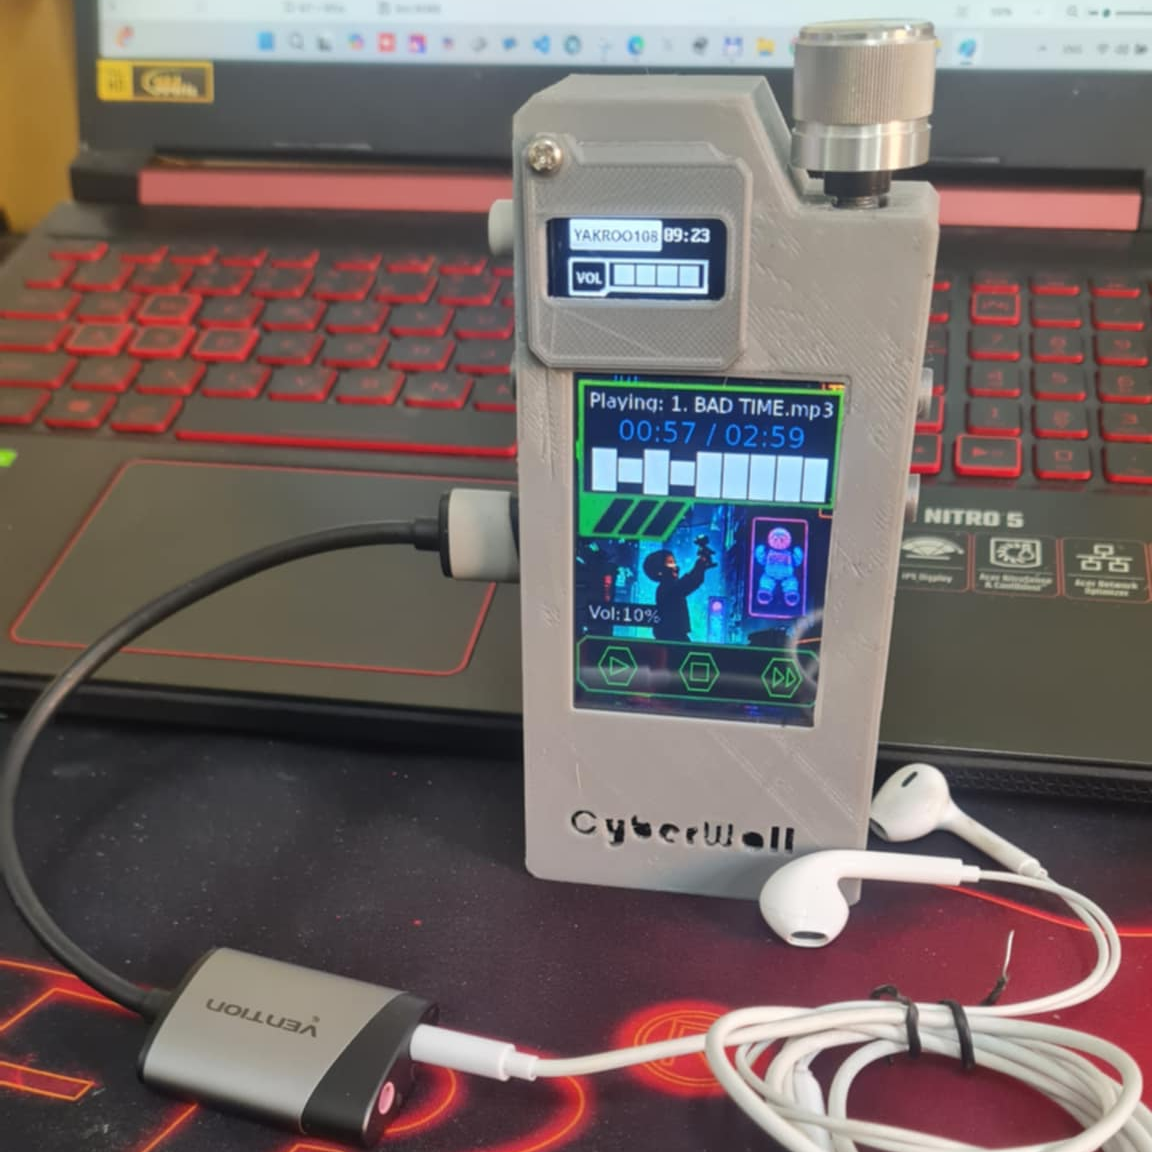
It’s been a minute since I featured a tiny keyboard, and that’s okay. But if you want to get your feet wet in the DIY keyboarding community, making a little macro pad like [Arnov Sharma]’s Paste Pal is a great place to start.

A macro pad with five switches and a small OLED display.
Image by [Arnov Sharma] via Hackaday.IO
This is a follow-up to his original Paste Pal, which only had two buttons for copy and paste plus an OLED display. This updated version does three more things thanks to a total of five blue (!) switches. The selected command shows up on the screen so you know what you’ve done.

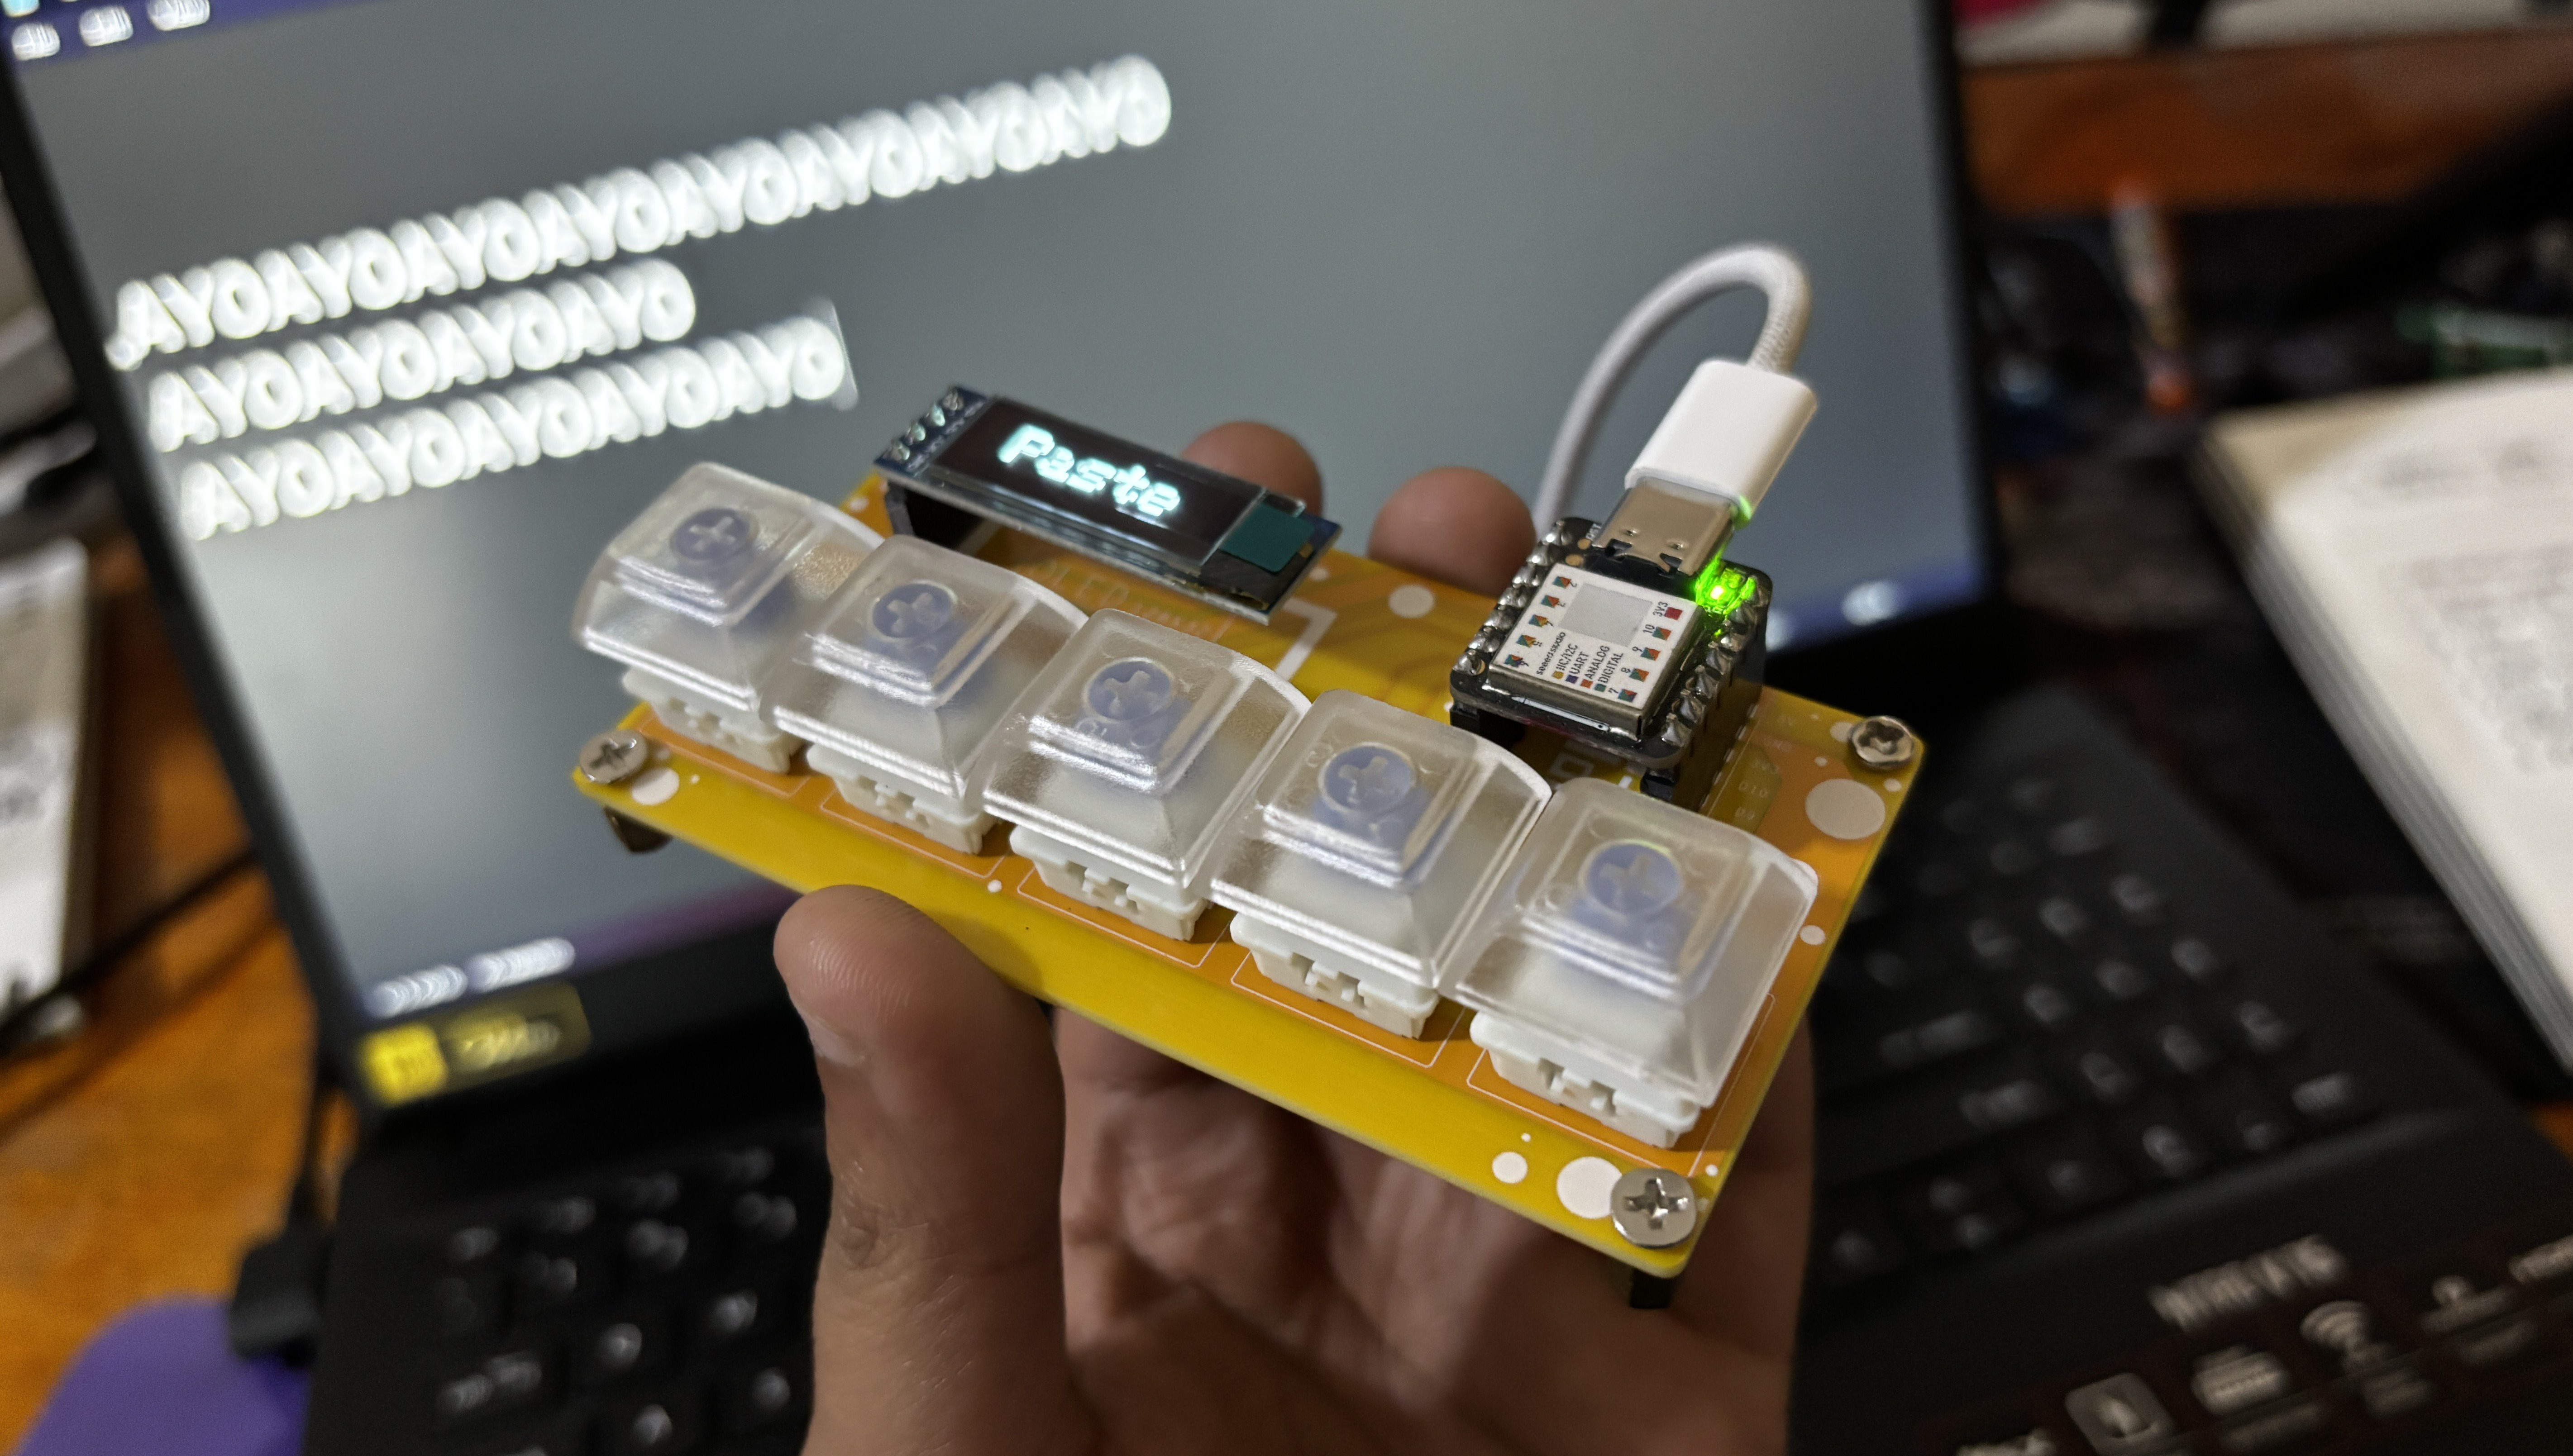
Right now, [Arnov] has the Paste Pal set up to do Copy, Paste, Enter, Scroll Up, and Scroll Down, but changing the assignments is as easy as updating a few lines of code.

Paste Pal Mk. II is at heart a Seeed Xiao SAMD21, which in this case is programmed in Arduino. If you want to make things easier on yourself, you could program it in CircuitPython instead, although [Arnov] includes the Arduino code in his excellent build guide.

A Good Soldier, Indeed

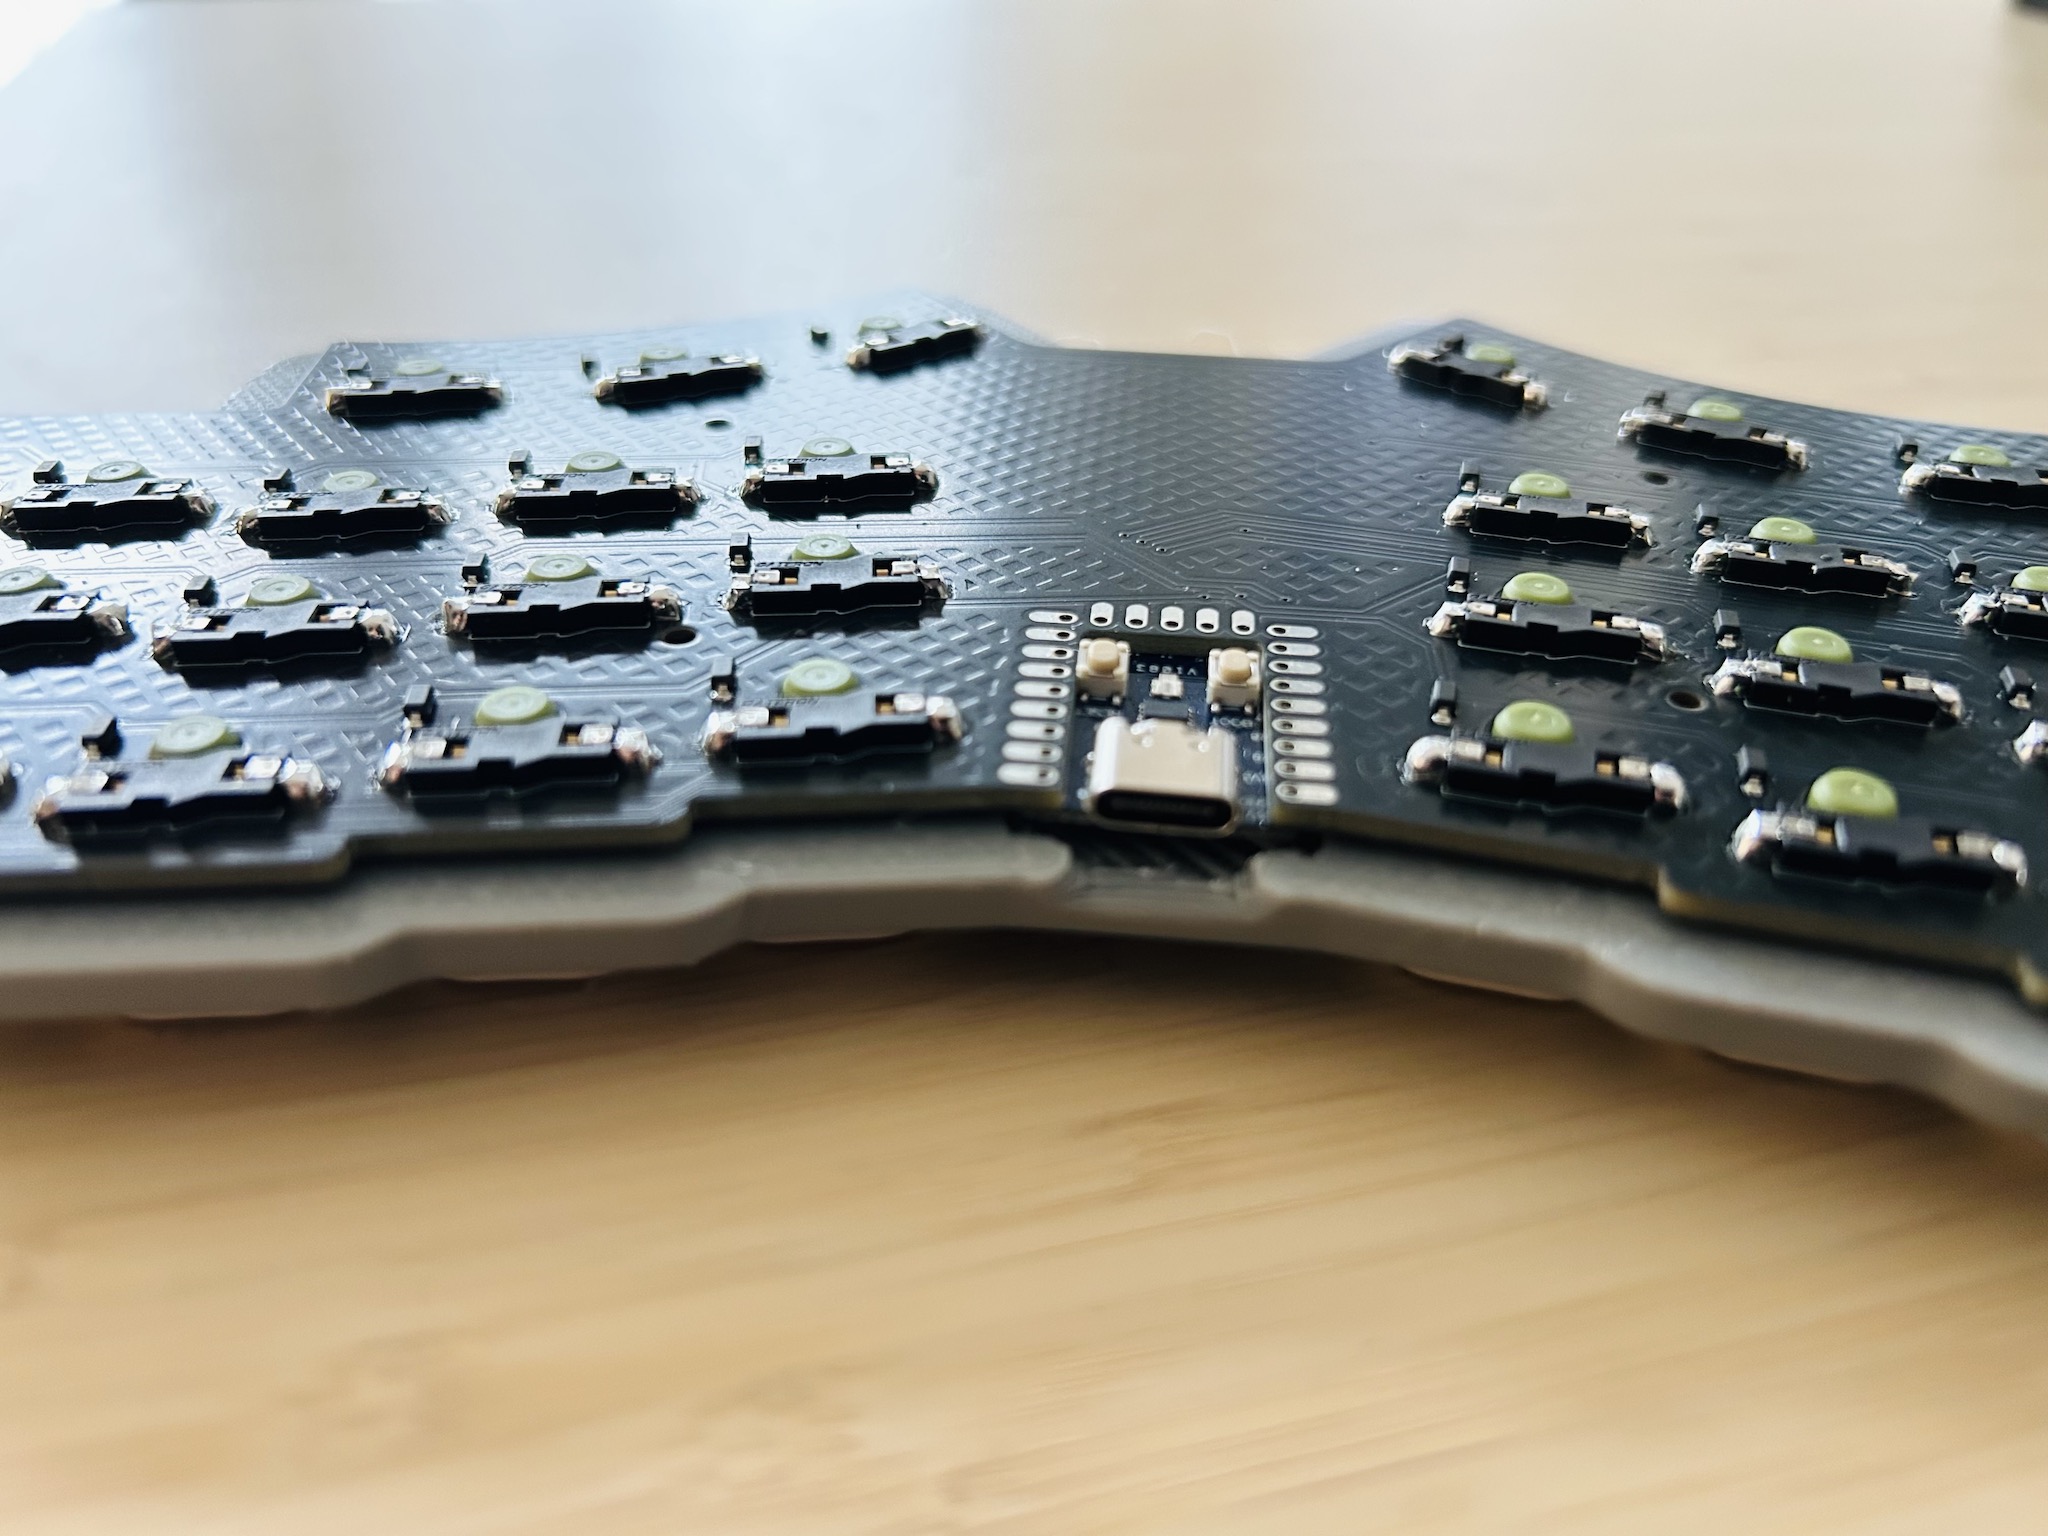
RIP to [Pure-Bullfrog-2569]’s 7-year-old masterpiece of a hand-wired build, which recently gave its last keystroke.

A lovely hand-built keyboard in what can only be described as Easter pastels.
Image by [Pure-Bullfrog-2569] via reddit
Evidently this beauty is heavy, crappy, and hand-wired, but I have big doubts about the crappy part. It’s built out of layers of laser cut wood and hand-painted. It took [Pure-Bullfrog-2569] the better part of a year to pull this together. And now they feel too lazy to debug it.

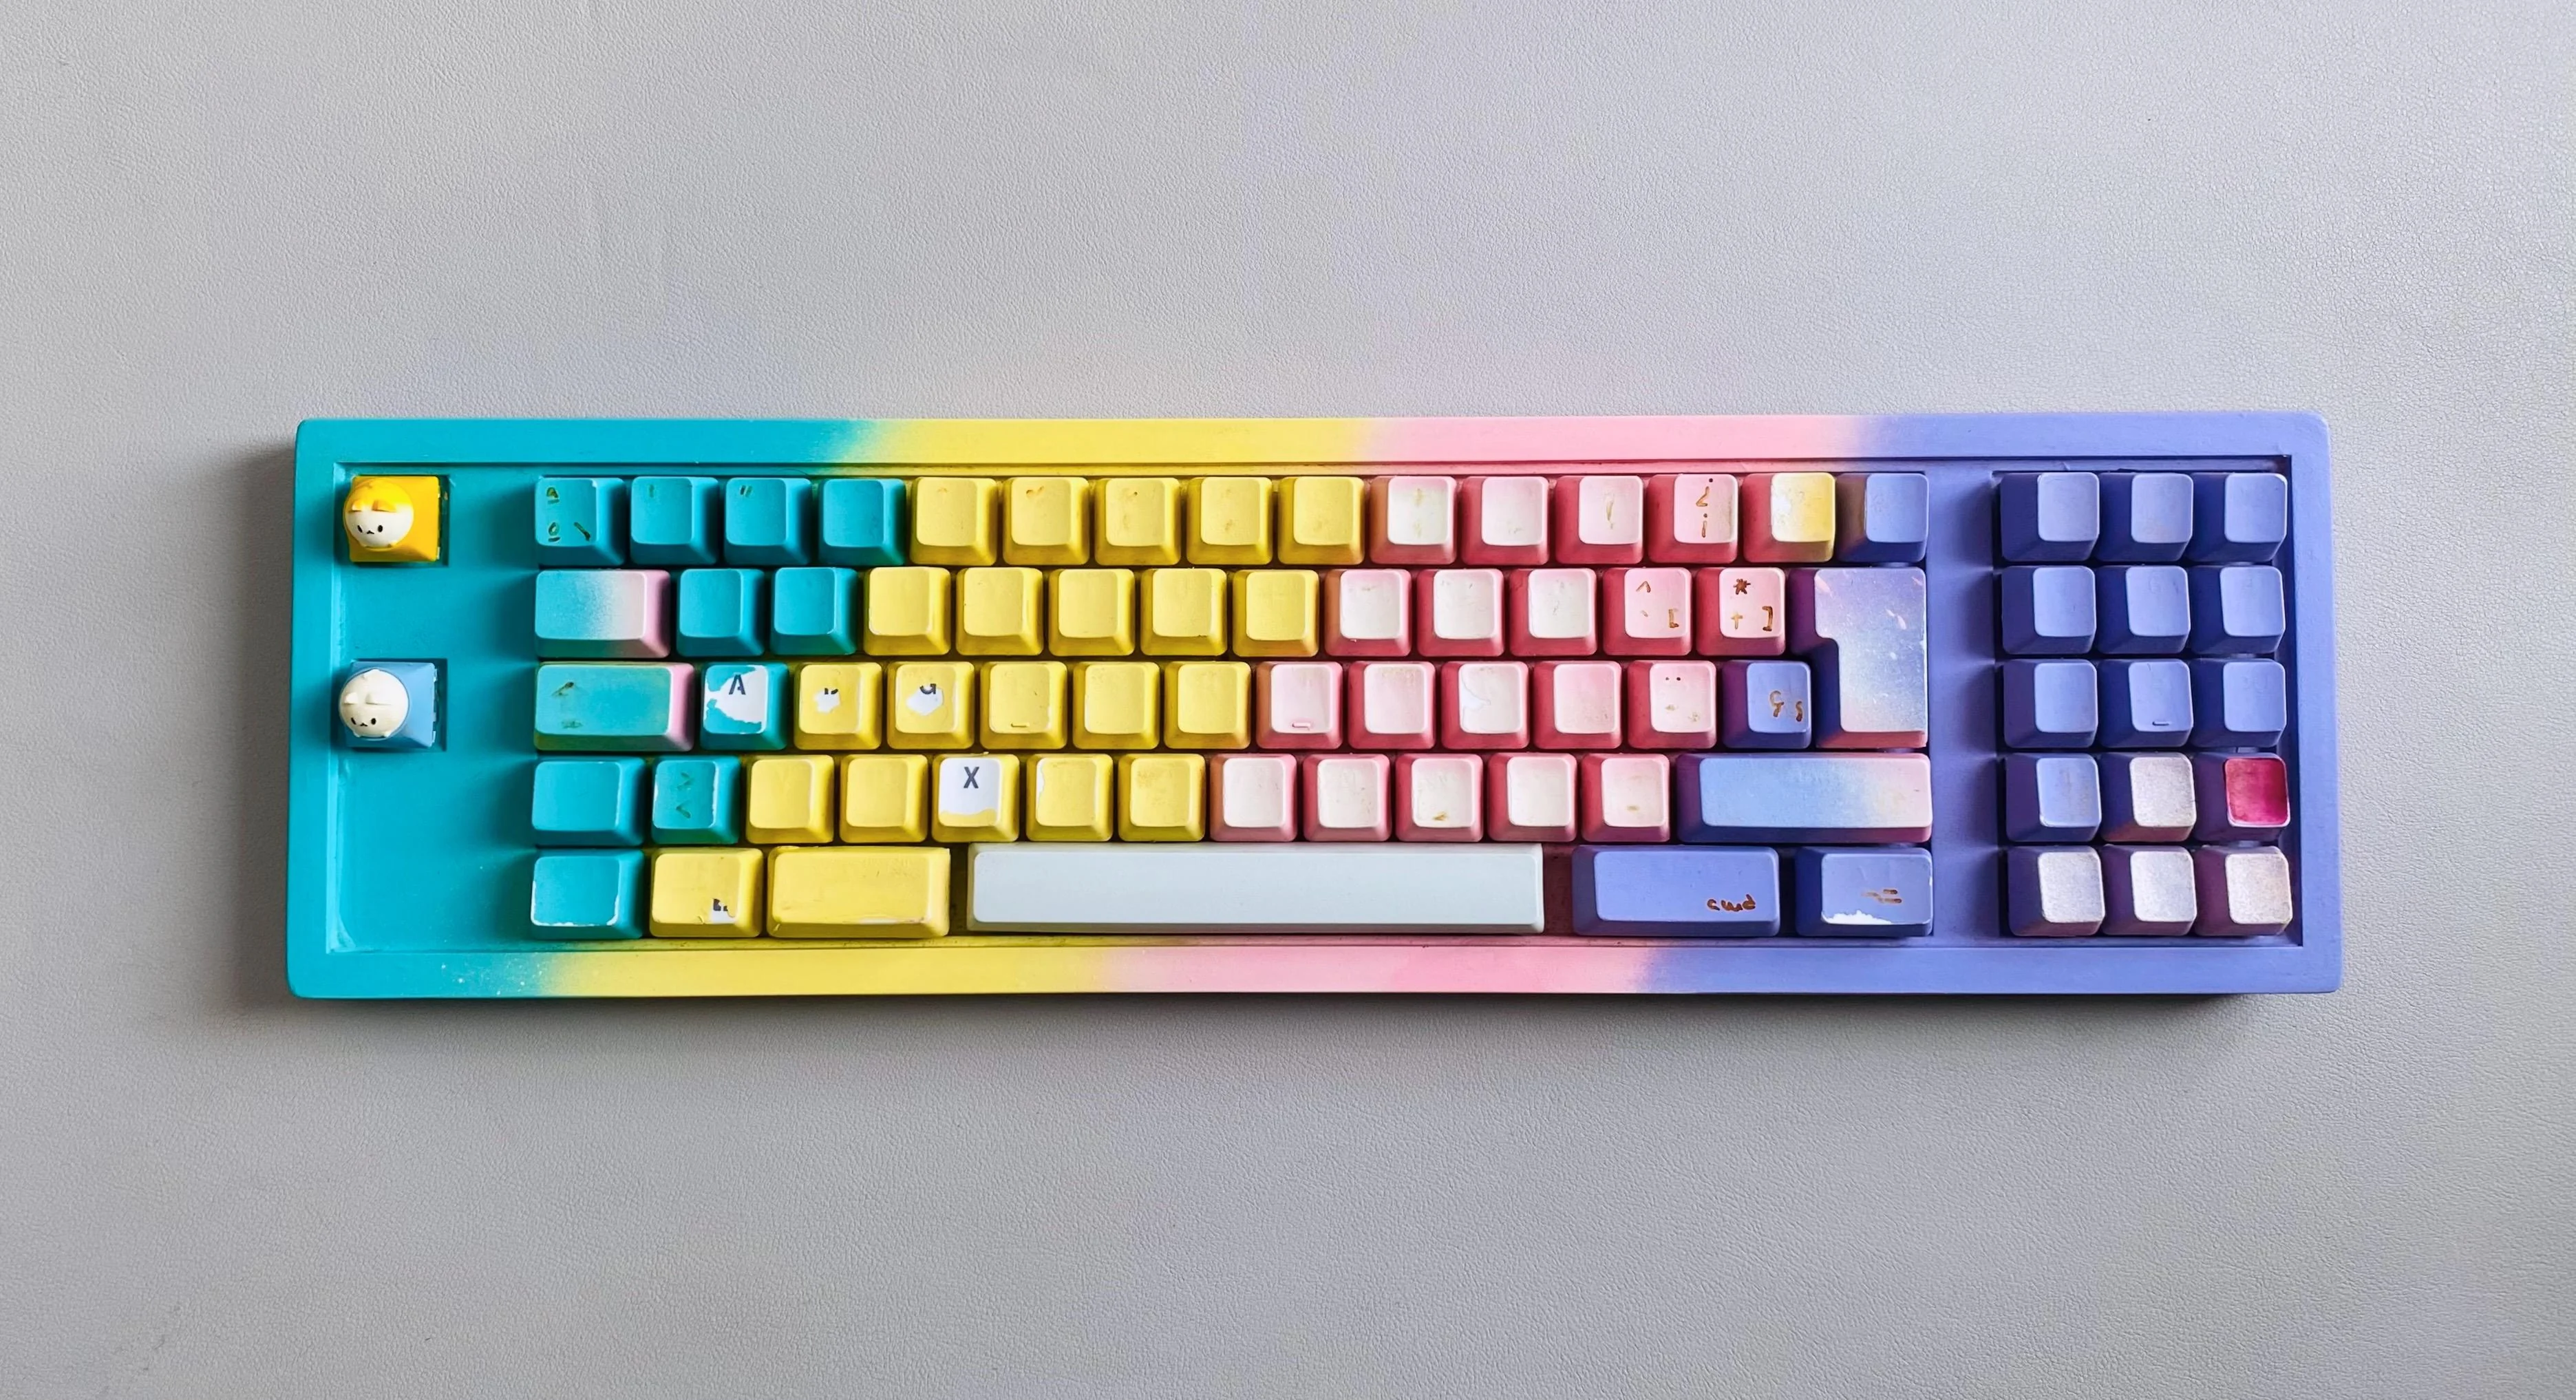
At the urging of many redditors, it appears that [Pure-Bullfrog-2569] will set the keyboard aside for a later date, rather than just throwing or parting it out, or hanging it on the wall.

The controller itself is dead, which was a fake Teensy anyway, so maybe they’ll solder in an RP2040 or something and bring it back to life. Apparently it sounded pretty cool to type on. I bet it did!

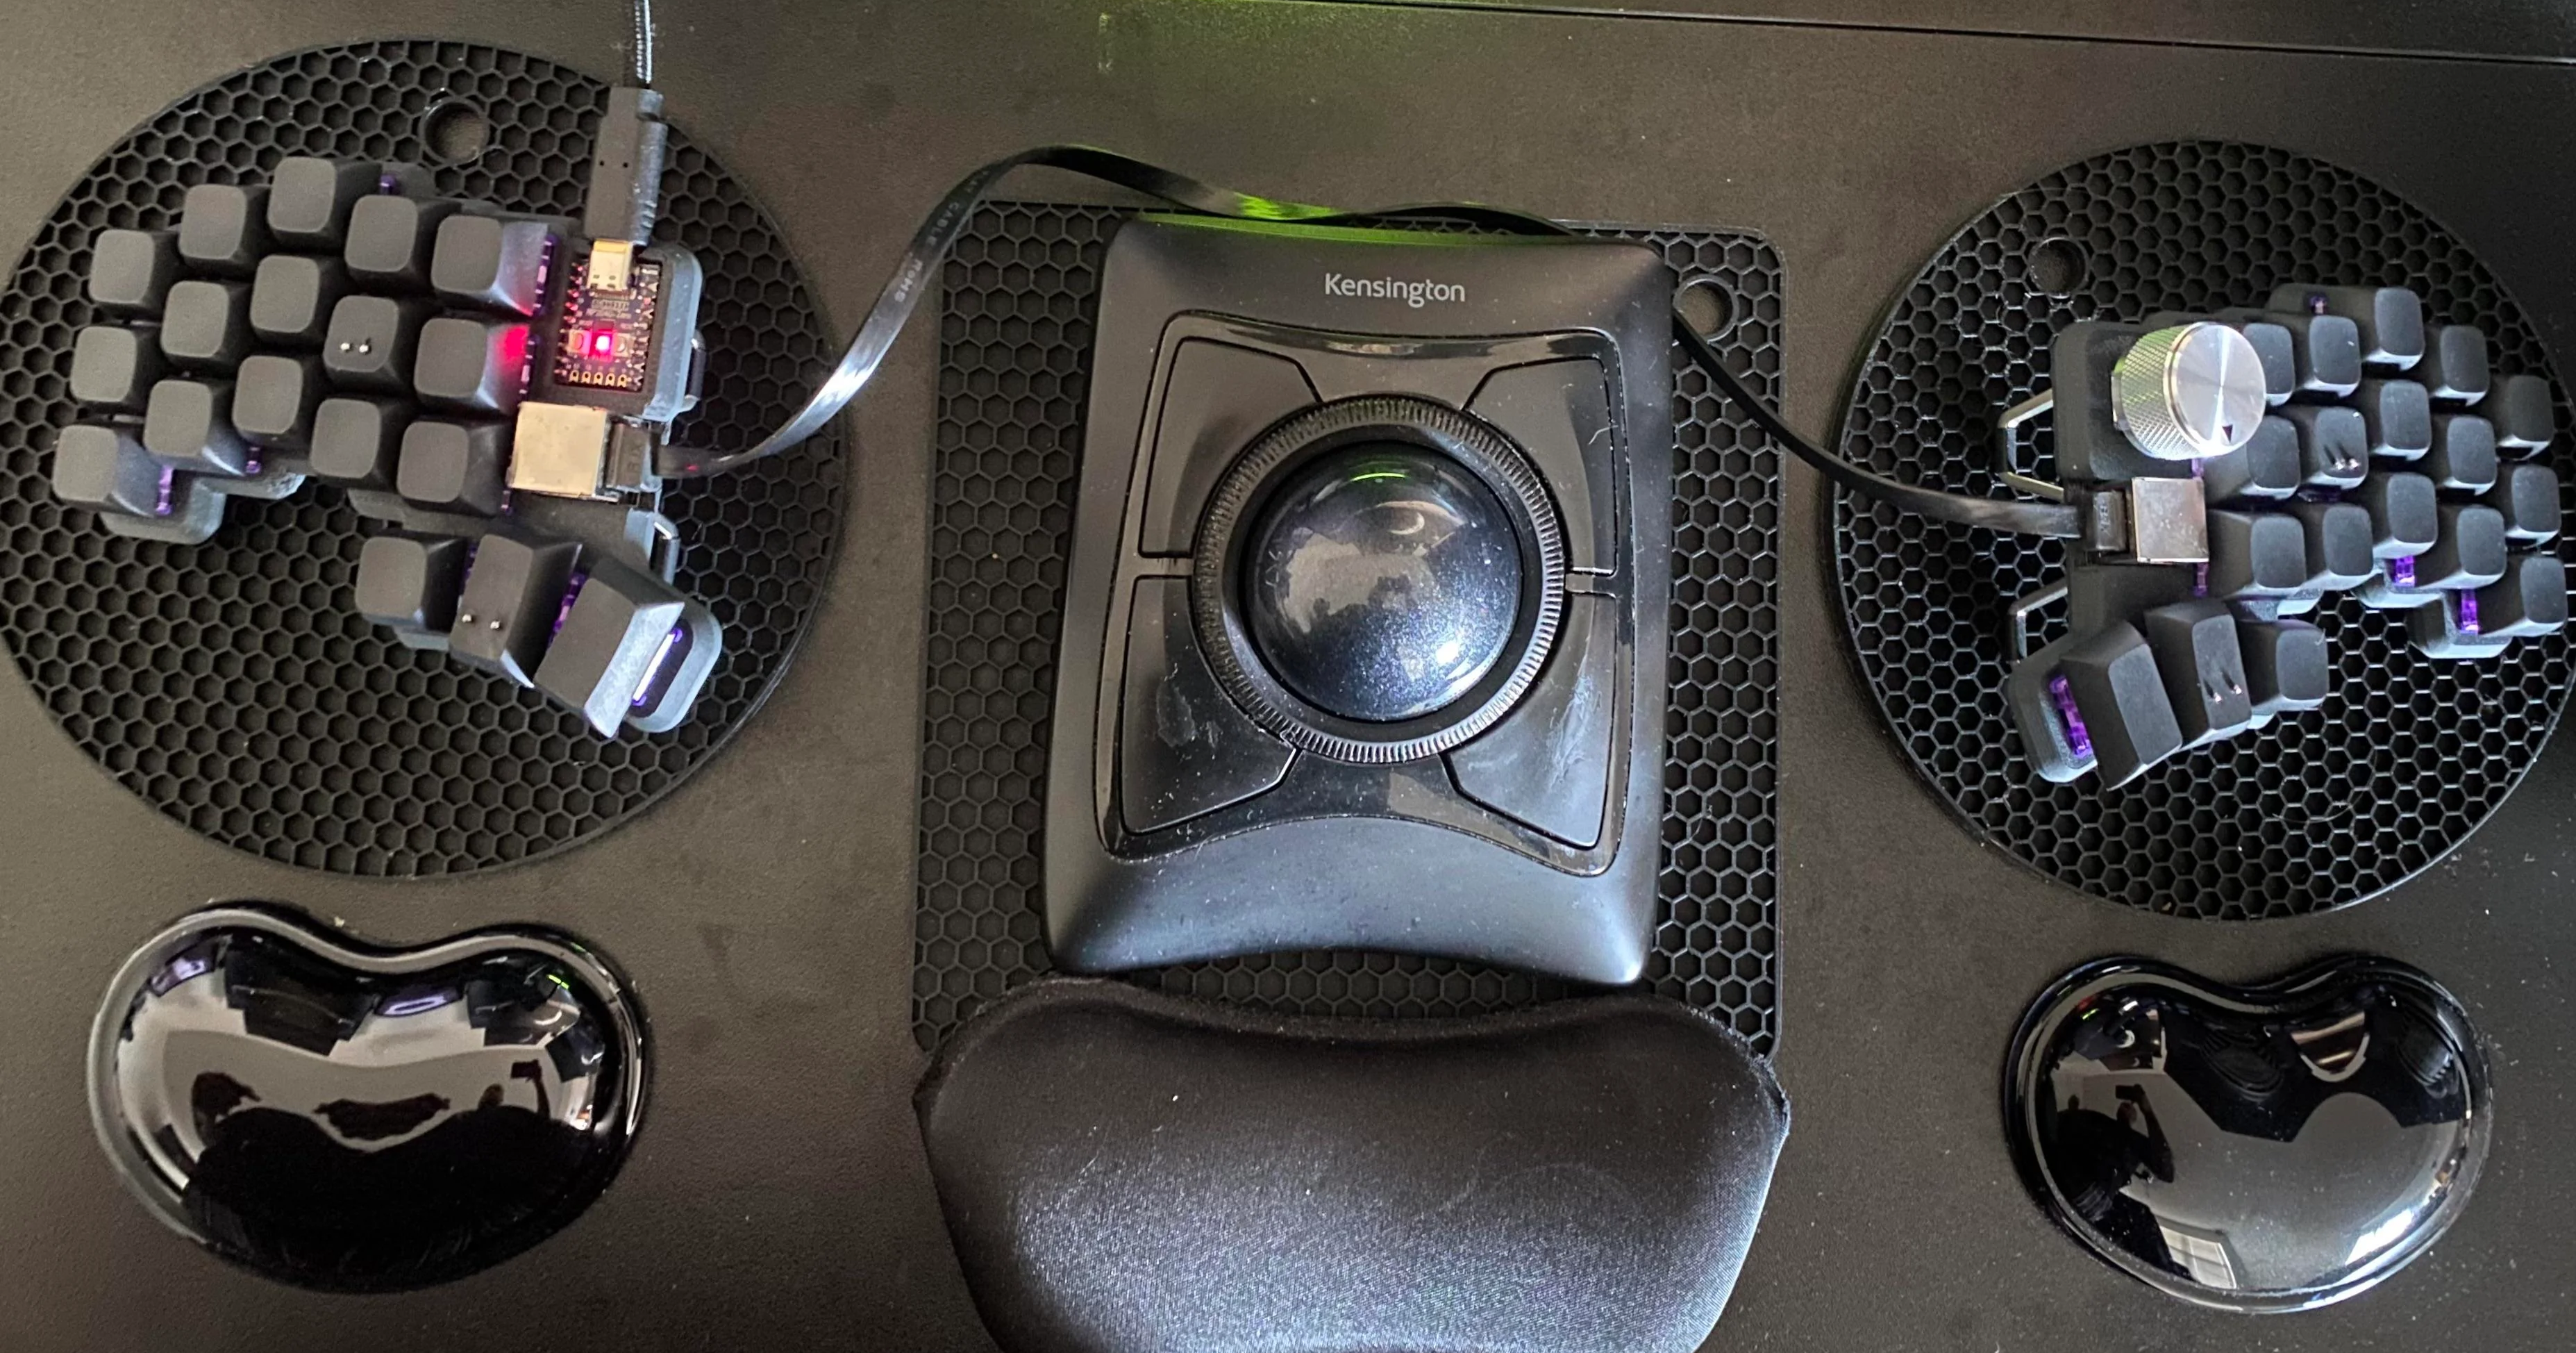
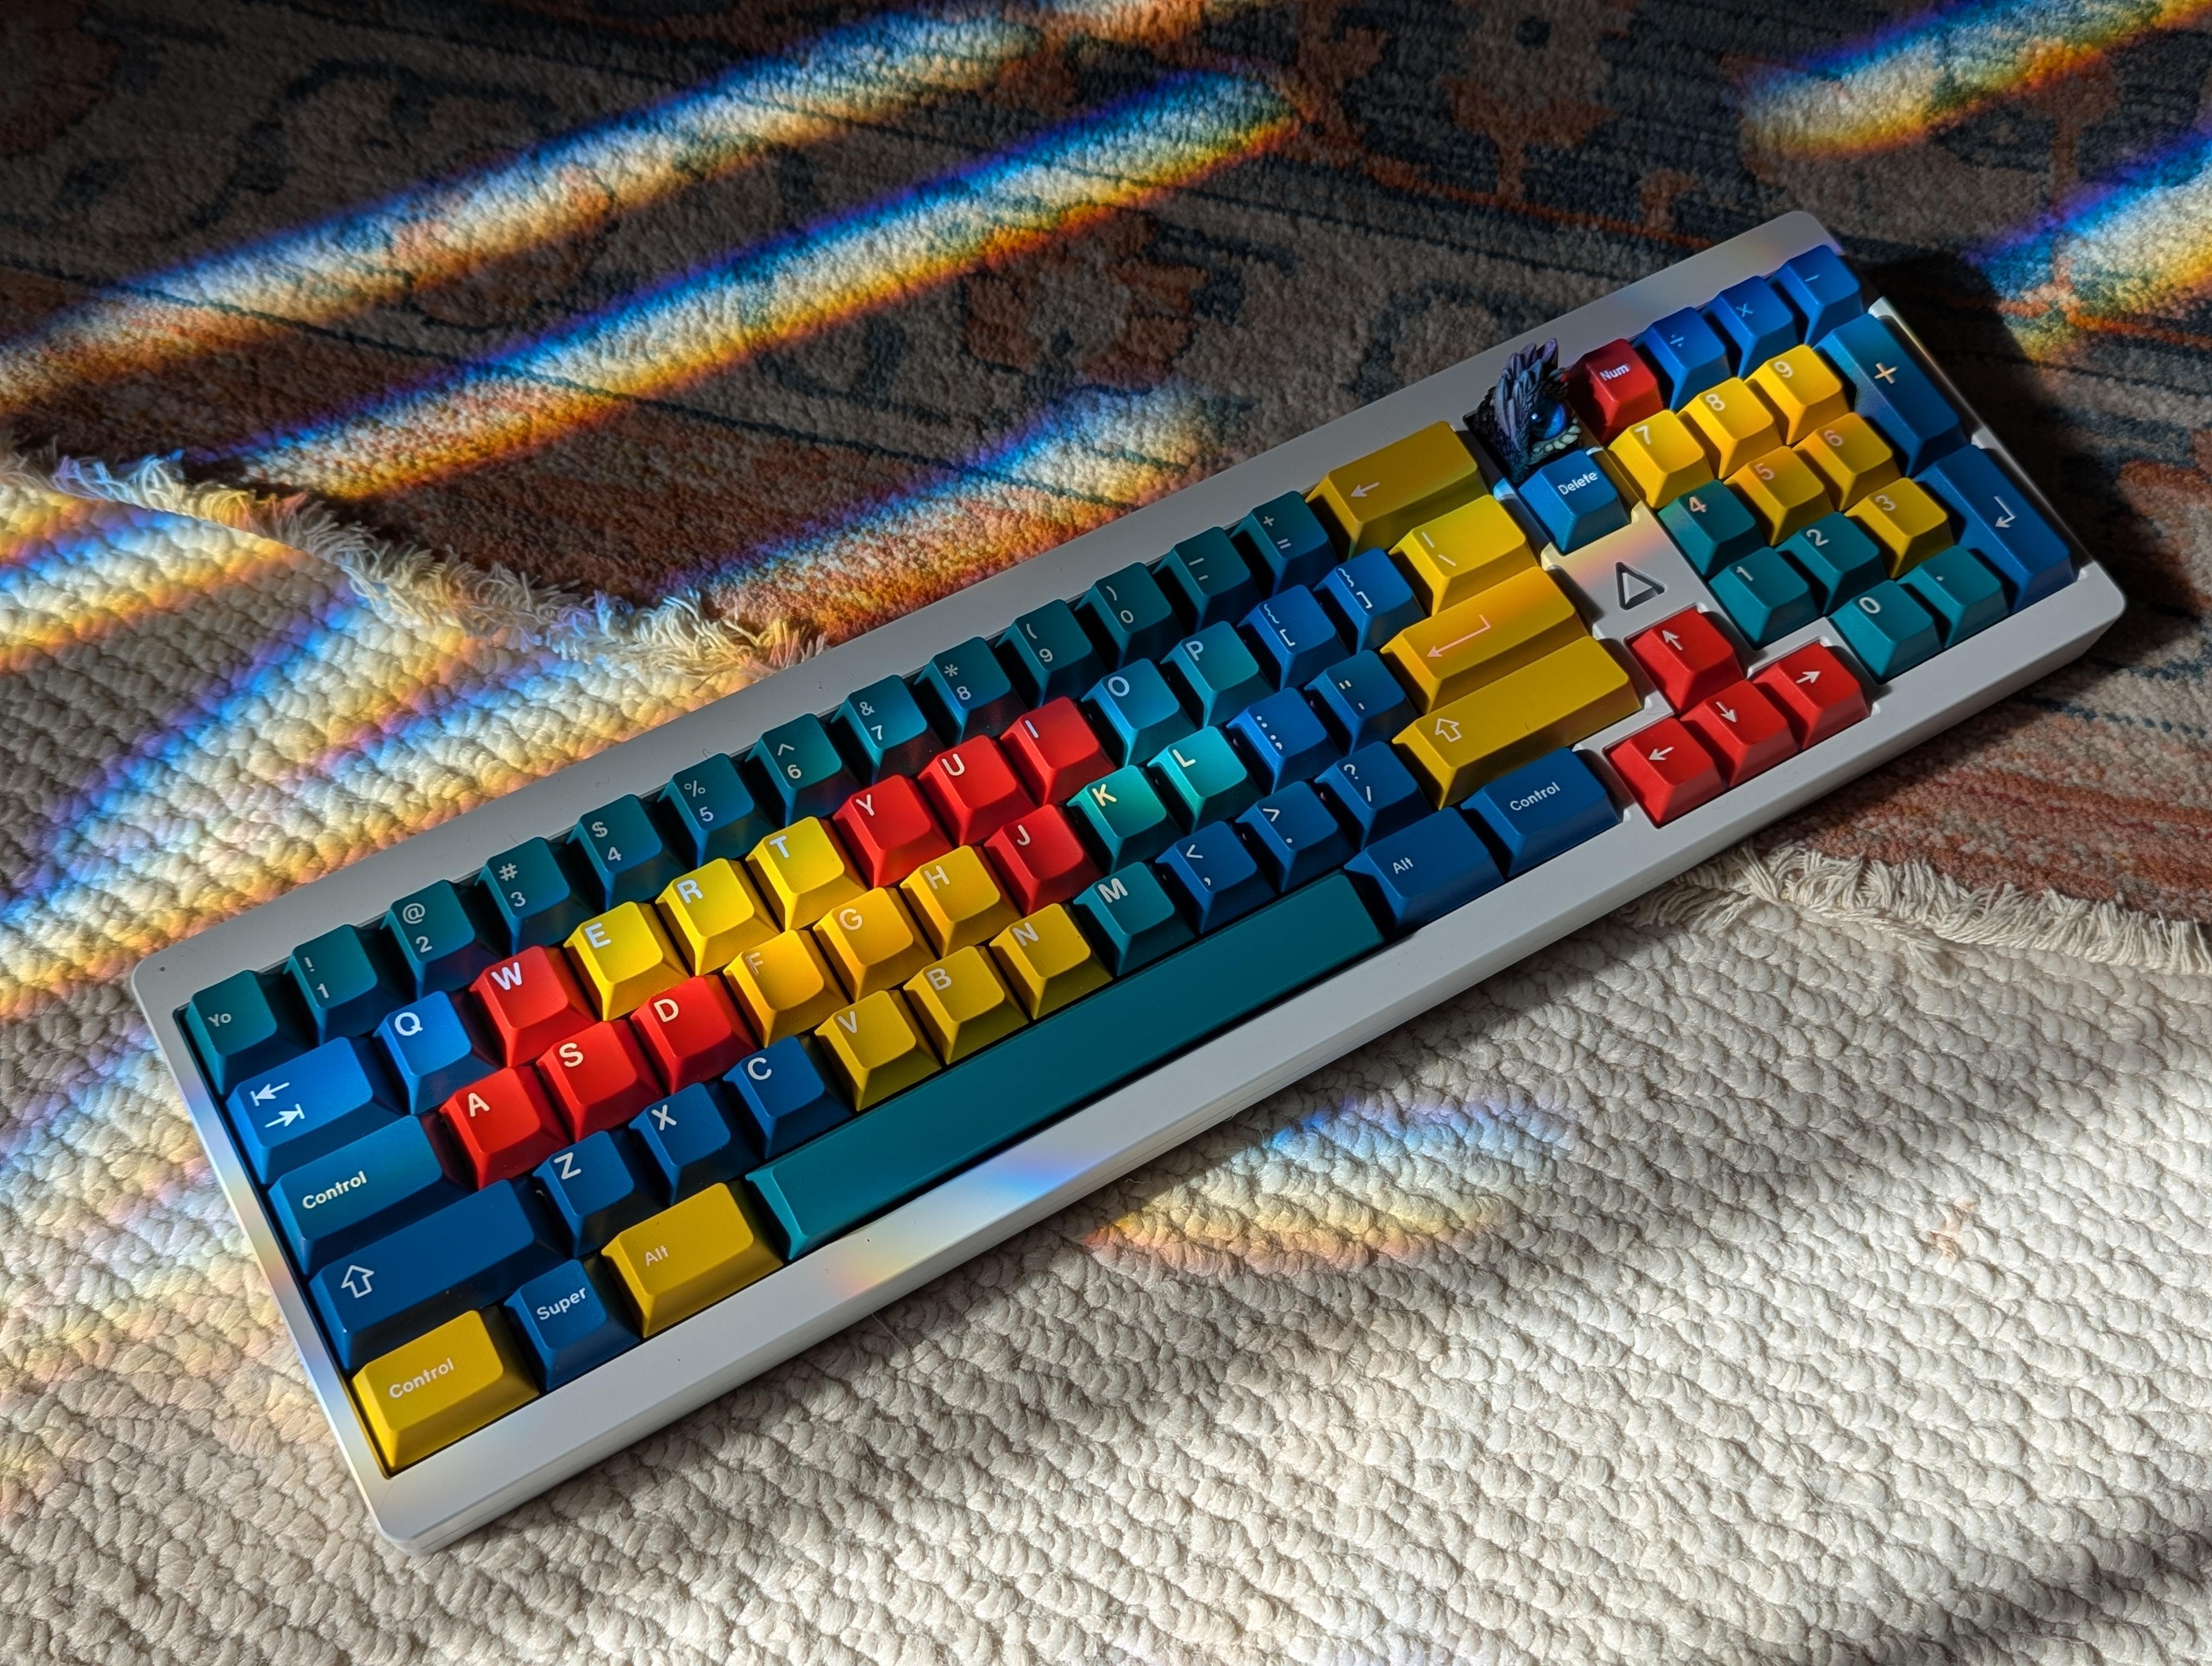
The Centerfold: Screens, Screens Everywhere

Screens. Lots of screens, all with that cool astronaut wallpaper.
Image by [theslinkyvagabond] via reddit
Do you like screens, bro? Some people do. I myself have two, but I also used a tablet back when I was streaming so I could manage my unruly chat full of tumbleweeds and crickets. Having sort of been there, I can see why a person would want a lot of screens if they have a lot going on. Apparently [theslinkyvagabond] does, what with the three-server home lab and all to manage. Maybe it’s the relative darkness, or the fact that all the screens are currently the same, but this somehow seems cozy for a five-screen setup. No mention of the keyboards, although the one on the left looks intriguing.

Do you rock a sweet set of peripherals on a screamin’ desk pad? Send me a picture along with your handle and all the gory details, and you could be featured here!

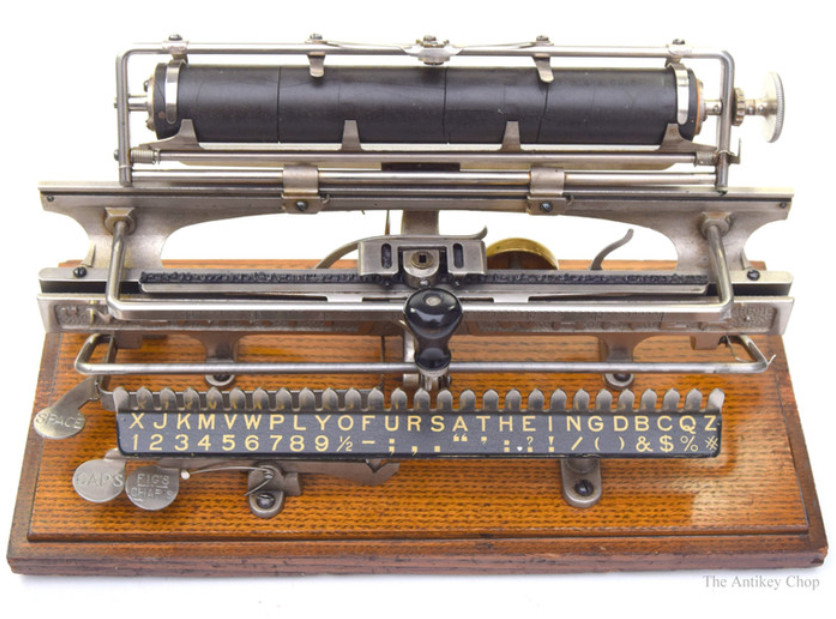
Historical Clackers: the SEGA Pico Keyboard

I know, I know; this looks like my typical centerfold choice. But hear me out. So I was trying to get ChatGPT to trawl GitHub for new-ish hardware keyboard projects on my behalf, and it came back with this intriguing picture of a SEGA keyboard. There was also a Hello Kitty variant!

The SEGA Keyboard Pico, which looks like Japanese Fisher Price.
Image via Video Game Database

Now of course the actual link it listed goes to a DIY keyboard with a Raspberry Pi Pico inside, which is a nice build, by the way. You should check it out.

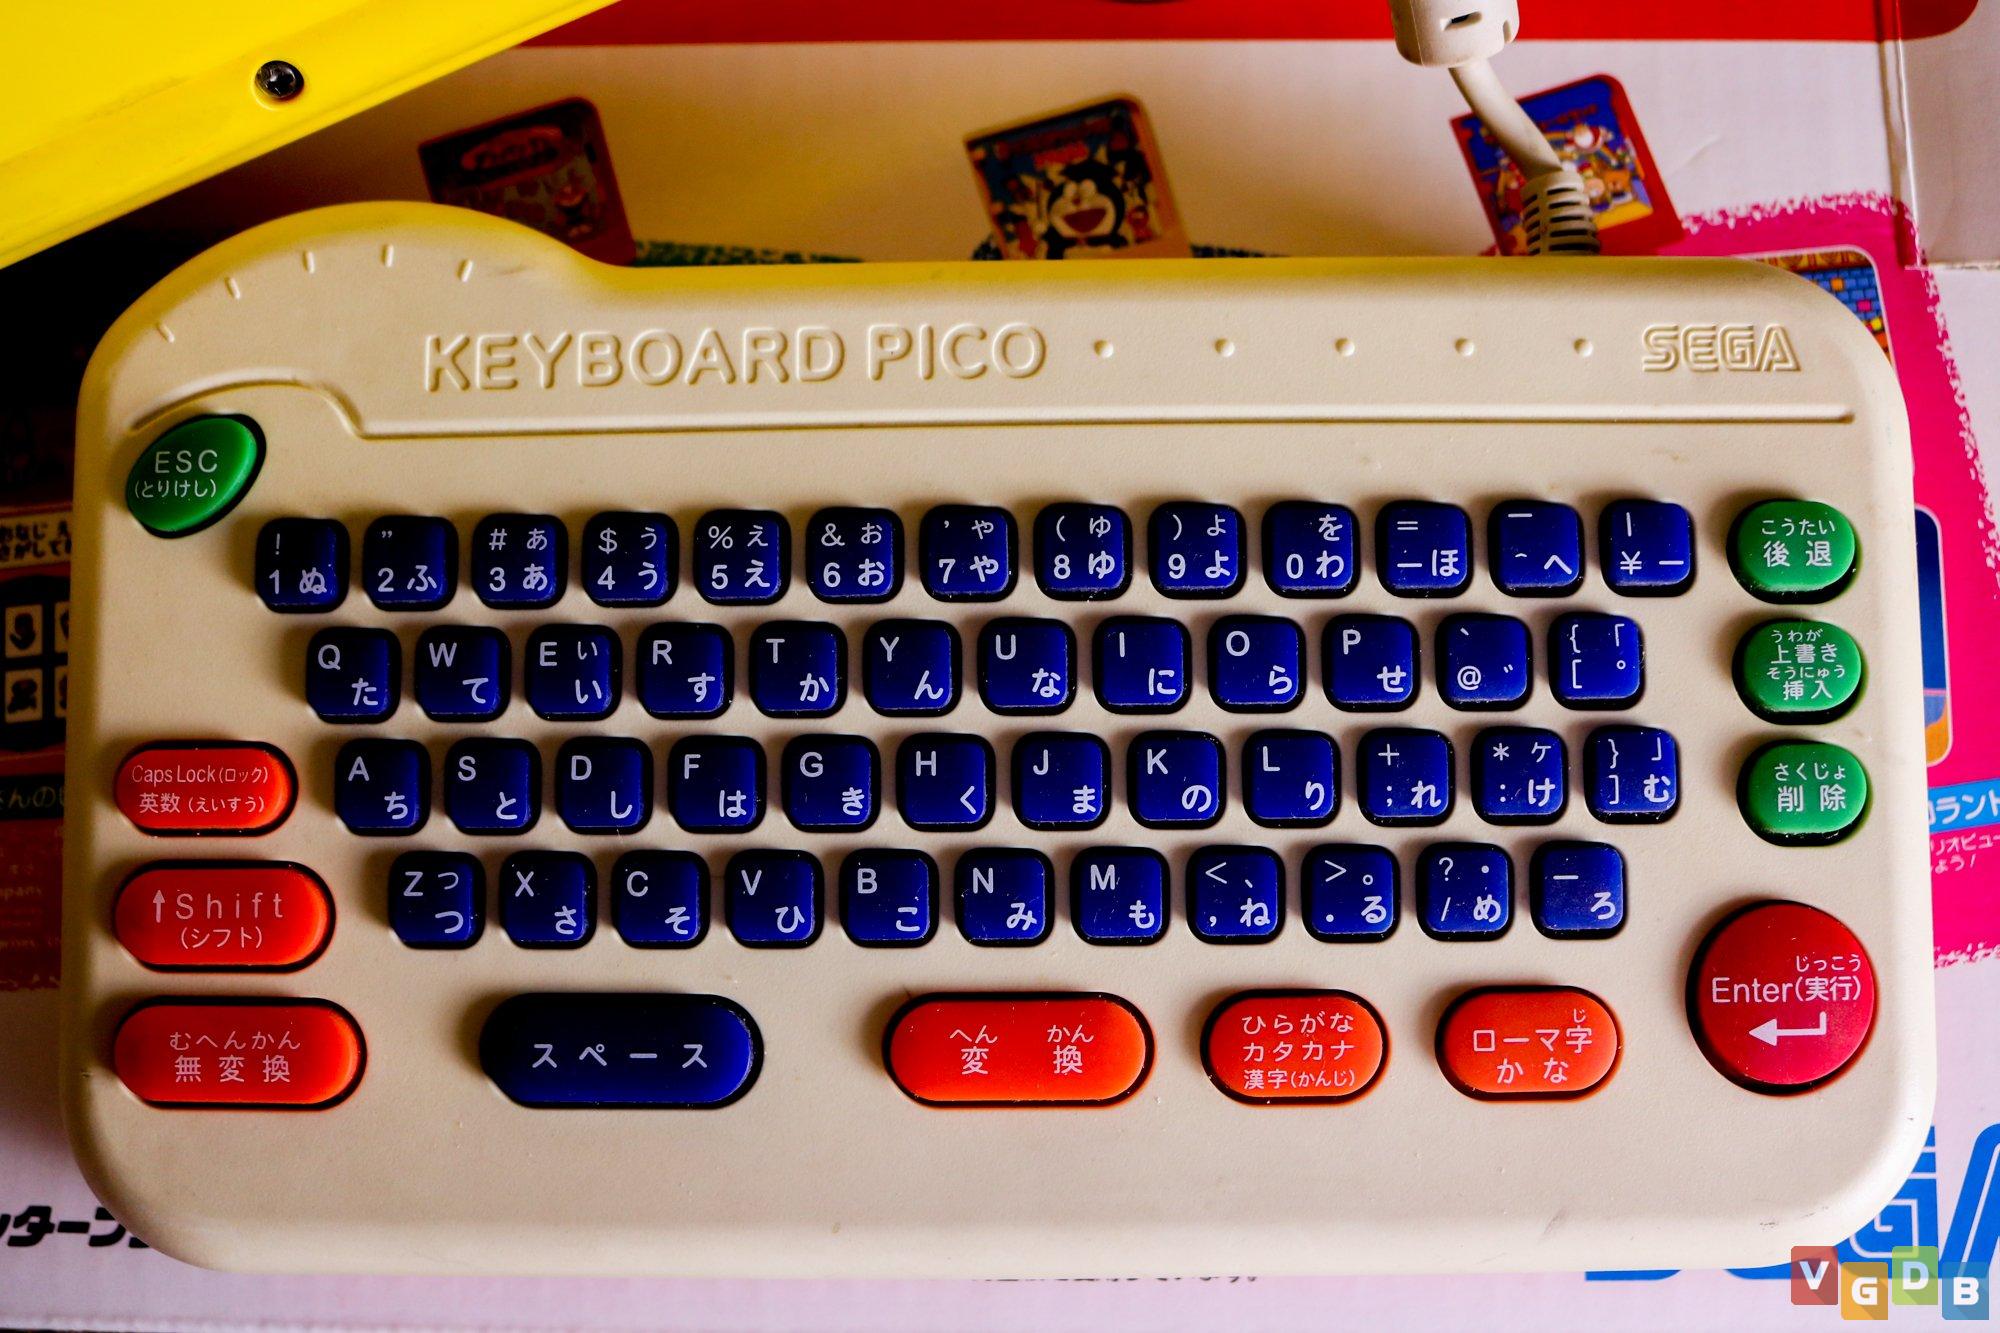
But anyway, back to this Japanese Fisher Price situation. It is apparently an accessory for the SEGA Pico system, which was a lot like a LeapPad, and used the same processor as the SEGA Mega Drive. It did sell in North America and Europe, but only for an unsuccessful four years before being discontinued. Apparently it has a regular PS/2 connector (Indonesian, translated) and works just fine as a computer input.

I don’t know what kind of  switches this thing has, but I would love to find out. It looks fun to type on, at least. And I don’t just mean because of the colors. Those keycaps remind me of that 80s square gum with the goo inside. Freshen Up.

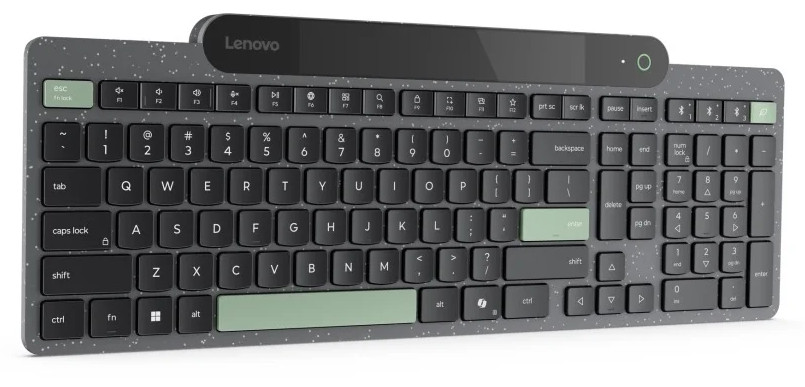
Finally, a Keyboard for Writers

So this floaty mechanical keyboard is the latest offering from Astrohaus, who rose to fame with their AlphaSmart NEO-like device called the Freewrite, which apparently I disliked enough to never even cover. Why bother with that when you have OG NEOs lying around? Also, those Freewrite things are pricey for what they are, and I’ve seen plenty of writer decks on Hackaday to believe that I could build my own if I wanted.

A mechanical keyboard with a word counter and a sprint timer.
Image via Astrohaus/Freewrite

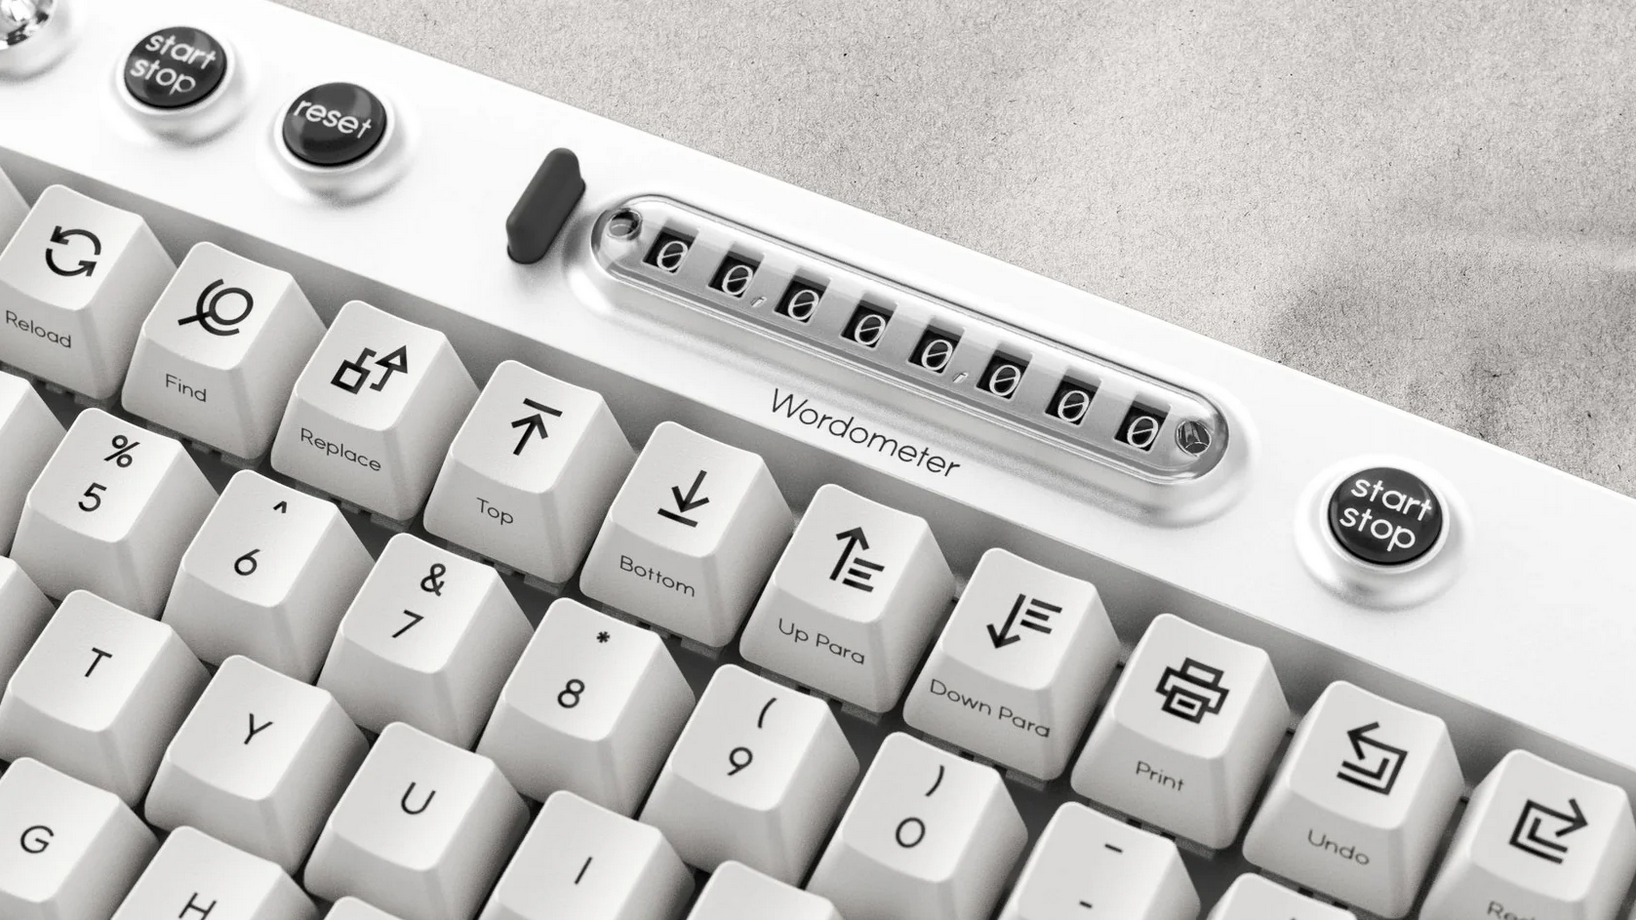
Much like the Freewrite, the Wordrunner is aimed squarely at writers. And how do we feel about it? Well, as much as I love my Kinesis Advantage, it sure doesn’t have an electromechanical word counter or a sprint timer built into it like this one does.

It looks white, but the body is all metal and feels great according to Tom’s Hardware. All Wordrunners will ship with Kailh box browns and are not hot-swappable. Well, I suppose these are for writers and not necessarily keyboard enthusiasts. Perhaps the most interesting bit is that the F keys are replaced by common writerly actions, and there are a couple of programmable macro keys on top of those.

If there’s one thing writers love, it’s watching that word count go up. I can imagine how awesome it would be to watch it spin the faster you type, although that might trigger an urge to write nonsense. But sometimes great things come from such brainstorms.

Of course I don’t love that the Wordrunner is a standard TKL rectangle, but you gotta start somewhere, I suppose. Maybe they’ll make an ergonomic one someday. Like the other products under the Astrohaus/Freewrite umbrella, this one will launch on Kickstarter. Who knows how much it will be, probably at least $200, but you can reserve one for a refundable $1 ahead of time.


Got a hot tip that has like, anything to do with keyboards? Help me out by sending in a link or two. Don’t want all the Hackaday scribes to see it? Feel free to email me directly.

Hack That Broken Zipper!

10 Febrero 2025 at 06:00
Fixing a hoodie zipper with a drinking straw and hot glue.

We’ve all been there. That sad day when the zipper on our favorite hoodie, bag, or pair of pants breaks in some seemingly irreparable way. But there is hope, and [Magic Stitches] is gonna show you how to make some common repairs using household items and, in some cases, just a little bit of easy hand sewing. After a warm up with a kitchen fork, the video moves on to more significant problems.

The first problem — a chewed-away zipper bottom — is quite common, but requires no sewing to fix. As you’ll see in the video below, all it takes is a drinking straw, some hot glue, a lighter, and a pair of scissors to recreate the plastic bit that keeps the zipper from splitting in twain.

Sewing the teeth of a zipper together after cutting the tape just enough to slide the head back on. Now the second issue concerns a pair of pants wherein the head has come off the static side of the zipper. This one seems impossible to fix, but [Magic Stitches] cuts into the static side about five teeth from the bottom, slides the head back on, and sews the bottom of the zipper together.

This one we take a little bit of an issue with, because it assumes that you can get your jeans on over your hips without needing the zipper head to be fully down. But what else are you going to do but throw the jeans away upcycle the jeans into a fanny pack or something to immortalize them?

For the third issue, we’re back to the poor red hoodie, which also has a run in the zipper tape. After cutting off the fuzzies, [Magic Stitches] sews it back together with a contrasting thread (presumably to help us see the repair). If they had used black, it wouldn’t show at all, except now there is just a tiny bit of pull on the hoodie where the snag was. Again, we’re saving a presumably beloved hoodie here, and some people like their repairs to show.

Finally, [Magic Stitches] has a duffel bag with a zipper that comes back apart once it’s been zipped. At first, they tried squeezing the zipper head with pliers while the zipper was still attached, but that didn’t fix the problem. By carefully cutting the end of the tape, they could slide the head off of the ends and squish both sides with pliers more effectively. This is probably the hardest repair of all because it involves threading the head back on. In the end, all you have to do is sew a few stitches across the end of the teeth and then sew the tape back to the bag.

Got a broken zipper box? You can fix that with 3D printing. Mystified about how zippers work? No need to be.

Lorem Ipsum 36? Dolor Sit Amet Keyboard!

6 Febrero 2025 at 12:00
A 36-key monoblock split keyboard with three thumb keys on each side.

You know, it’s a tale as old as custom mechanical keyboards. [penkia] couldn’t find any PCBs with 36 keys and Gateron low-profile switch footprints, so they made their own and called it the LoremIpsum36. Isn’t it lovely?

Close-up of the RP2040 sitting flush as can be in the PCB.This baby runs on an RP2040, which sits flush as can be in a cutout in the PCB. This maneuver, along with the LP switches in hard-to-find SK-33 sockets results in quite the thin board.

[penkia] says that despite using a 3 mm tray for added rigidity, the entire thing is thinner than the Nuphy Air60 v2, which is just over half an inch (13.9 mm) thick. For keycaps, [penkia] has used both XVX profile and FKcaps’ LPF.

And yeah, that area in the middle is crying out for something; maybe a trackball or something similar. But [penkia] is satisfied with it as-is for the first version, so we are, too.

Do you like 36-key boards, but prefer curves? Check out the Lapa keyboard, which doubles as a mouse.

Good-Looking HAT Does Retro Displays Right

5 Febrero 2025 at 21:00
A Raspberry Pi HAT with retro LED displays and a buttons, sitting on the keys of a laptop.

Mick Jagger famously said that you cain’t always get what you want. But this is Hackaday, and we make what we want or can’t get. Case in point: [Andrew Tudoroi] is drawn to retro LEDs and wanted one of Pimoroni’s micro-LED boards pretty badly, but couldn’t get his hands on one. You know how this ends — with [Andrew] designing his first PCB.

The Pitanga hat is equally inspired by additional fruit that [Andrew] had lying around in the form of an 8devices Rambutan board. (Trust us, it’s a fruit.) With some research, he discovered the HT16K33 LED driver, which checked all the boxen.

Pitanga hats with various cool LED displays.The first version worked, but needed what looks like a couple of bodge wires. No shame in that! For the next revision, [Andrew] added buttons and decided to make it into a Raspberry Pi HAT.

This HAT is essentially a simple display with a basic input device, and a beauty at that. You can see all the various cool displays that [Andrew] tried both here and in the project log. Although he included pads for an ARM M0 microcontroller, he never did populate it. Maybe in the future.

Of course, this project was not without its challenges. For one thing, there was power compatibility to wrestle with. The Pi can sometimes work with I²C devices at 5 V, but this isn’t ideal long-term. So [Andrew] put the LED driver on the 3.3 V I²C bus. Despite the data sheet calling for 4.5 to 5.5 V, the setup worked fine. But for better reliability, [Andrew] threw a dedicated I²C logic level converter chip into the mix.

Don’t forget, you can run a noble amassment of HATs with the PiSquare.

What Is the Hour? It’s XVII o’ Clock

4 Febrero 2025 at 19:30
A glowing pocket watch with Roman numerals.

When live-action role playing, or LARPing, one must keep fully in tune with the intended era. That means no digital watches, and certainly no pulling out your fantastic rectangle from the future to find out if you’re late picking up the kid.

The guts of a pocket watch with glowing Roman numerals.So what do you do when you’re LARPing at 2 PM, but you gotta be back at the soccer practice field by 5 PM? Well, you fashion a period-appropriate timepiece like [mclien]’s 17 o’ Clock. Visually, it’s about as close to a pocket sundial as you can get. It’s deliberately non-connected, and its only function is to tell the time.

But how? If you visually divide the watch across the top and bottom, you get two sets of Roman numerals. The top half handles the hour, and the bottom half the minute. [mclien] started designing this in 2018 and picked it back up in the second half of 2024.

Back to the non-connected part. The only permanently-powered part of the project is a high-precision real-time clock (RTC). The rest uses a power latching circuit, which turns on the Adafruit Trinket M0 to show the time using a NeoPixel ring. Be sure to check out the awesome project logs with fantastic pictures throughout.

Looking for a smarter pocket watch? It’s time you built one yourself. And speaking of pocket sundials…

Keebin’ with Kristina: the One with the DIY Homing Keys

28 Enero 2025 at 18:00
Illustrated Kristina with an IBM Model M keyboard floating between her hands.

r/keebgirlies Is Totally a Thing Now

When [coral-bells] posted her first build to r/mechanicalkeyboards, she likely felt some trepidation. After all this is reddit we’re talking about, so right away you’ve got two layers of male-domination hobby.

Most of a lovely plant-themed keyboard.
Image by [coral-bells] via reddit
What she likely didn’t expect was to be upvoted into the tens of thousands, or to receive such a response from other girlies who came out of the woodwork to share their builds.

And so r/keebgirlies was born, and already has a few thousand members. This is a brand-new subreddit for women and non-binary folks who are into mechanical keyboards. As it says in the sidebar, men are welcome but limited to the comments for now, so don’t go trying to post your builds. The girlies are currently seeking moderators, so give that some thought.

As for [coral-bells]’ lovely build, this is an Epomaker MS68 with MMD Vivian V2 switches, and those flowery keycaps are from Etsy. She is currently waiting for supplies to mod a Yunzii AL66, but wants to build a kit at some point.

Bear In Mind That You Can DIY Homing Keys

Ahh, homing keys. F and J, with their little bumps or lines that home your fingers on the… home row. The Kinesis Advantage doesn’t have them, unfortunately, but makes up for it with deep-dish DSA keycaps on the home row that are bright blue against a sea of black.

A split keyboard with tiny ball bearings on a few keys as homing devices.
Image by [theTechRun] via reddit
I still miss having bumps around because I like to pick at them sometimes when I can’t find the words I want. So there’s a good chance I will try [theTechRun]’s DIY homing key method at some point.

After trying and failing several ways, [theTechRun] came up with this ball bearing method lovingly outlined in the reddit post. Basically, you draw a line across the keycap where you want the bearings to sit, make indentations with a spring-loaded center punch set on the lowest pressure setting, then use an unfolded paperclip to dab super glue in the divots and set 1/16″ bearings in there. Evidently, two bearings feel nicer than one, and they look cooler, too.

This is a great step-by-step with shopping links for everything but the pencil. [theTechRun] offers a lot of tips as well, like erasing the pencil line before you set the bearings, and using a leveler to mark it in the first place.

The Centerfold: the Rainbow Connection

A lovely KBDFans TET with GMK Panels keycaps and some rainbows from nature.
Image by [SpockIsMyHomeboy] via reddit
Happy 8-year cake day to [SpockIsMyHomeboy], proud owner of a bunch of rainbows and a lovely peripheral. This is a KBDFans TET keyboard sporting GMK Panels keycaps on HMX Hyacinth V2U switches. That lovely artisan keycap is none other than a Muad’ib DuneDragon.

Do you rock a sweet set of peripherals on a screamin’ desk pad? Send me a picture along with your handle and all the gory details, and you could be featured here!

Historical Clackers: the Merritt Had Merit

I keep featuring the odd index typewriter here and there because I want you to get the sense of how popular they used to be before the masses had really mastered the keyboard, whatever the layout might have been.

The Merritt index typewriter had an interesting layout -- XCKMVWPLYOFURSATHEINGDBCQZ.
Image via The Antikey Chop

The Merritt index typewriter, which was marketed as “The People’s Type-Writer”, went for a cool $15 in the 1890s until the brand’s demise in 1896. That’s around $500 in 2025 money.

All versions of the Merritt were blindwriters that typed in a linear up-striking fashion. Thanks to a double Shift mechanism, the machine could produce 78 characters. The inking was handled with a couple of rollers. I find the layout intriguing and wonder how fast I could get going on the thing, though it seems like a recipe for a repetitive stress injury.

Interestingly, the Antikey Chop found an ad from 1901 that was placed by a department store. Hamburger & Sons claimed to have acquired “an immense quantity” of Merritts and were offering them for $3.98 and $4.98. They chose to market the machines as “typewriters for those who cannot afford typewriters”, “handy typewriters for tourists”, and “ideal machines for boys and girls”.

This Keyboard Charges Itself

Wireless keyboards are cool and all, but they whole keeping-it-charged thing adds a level of stress that many believe isn’t worth it. After all, what are you supposed to do when your keyboard is dead? Use the — gasp — laptop keyboard? Uh, no. I mean, unless you have a ThinkPad or something; those have pretty nice keyboards, or at least they did a few years ago.

A new Lenovo keyboard that charges itself through a photovoltaic panel.
Image by [Lenovo] via PC Magazine
Lenovo is here for you with their Self-Charging Bluetooth Keyboard, which debuted at CES. It uses a photovoltaic panel and supercapacitors to harness and store both solar and ambient artificial light. I don’t have to tell you that supercapacitors last much longer than lithium batteries.

I for one like the paint spatter design, but I wish only three keycaps were green. It’s a nitpick for sure, ignoring the elephant in the room with a sign around its neck that reads ceci n’est pas une ergonomic keyboard.

Bonus: Lenovo also debuted the AdaptX Mouse, a modular affair which appears to be a pretty sweet multi-functional peripheral for those who don’t want to carry too much. It can be a compact mouse, an ergonomic mouse, a travel hub, a memory card holder, and an emergency power bank. Sheesh! Unfortunately, it’s just a proof-of-concept for now. Gauntlet laid?


Got a hot tip that has like, anything to do with keyboards? Help me out by sending in a link or two. Don’t want all the Hackaday scribes to see it? Feel free to email me directly.

It’s Raining From the BlueSky

28 Enero 2025 at 16:30
A gif of a BlueSky feed, visualized as Matrix-style digital rain.

Which would you rather feel? The blast of a fire hose, or a cool, digital rain? That’s what we thought. Introducing Blue Rain — the fire hose that is the BlueSky feed, falling semi-cryptically down your screen in Matrix-style letter droplets. Ahh, isn’t that nice?

BlueSky skeets in a cube animation. Now, the rain doesn’t have to be blue. You can change the color, the speed at which it falls, the font, the font size, and other stuff like toggling NSFW, uh, tweets. (Wait, what are we calling BlueSky messages, anyway? Skeets? Really?)

You can even choose between a few fonts for the rain. And if you want to like, actually read one of the skeets, just shoot one carefully with your mouse while it’s still falling.

[Simone] has the project files on GitHub, but you should really read the blog post. Inspired by the lovely firehose3d, [Simone] thought instead of displaying the BlueSky fire hose as digital rain.

First, she collects as many skeets as there are empty columns on a screen from a Jetstream sever. This is calculated based on font style and size. She wrote an algorithm loosely inspired by CodePen, which does digital rain. If the skeet doesn’t fully render by the time it reaches the bottom of the screen, the rest appears at the top of the same column and falls until it’s done displaying. Then the column clears out and waits for a new skeet.

Want to take Matrix-style digital rain on the go? You can cram it onto a Pico, you know.

Thanks for the tip, [FrancisF]!

What Day Is It Again? Check the Clock

23 Enero 2025 at 00:00
A light-up clock displays the day of the week.

If you’re lucky enough to work from home, you’ll soon find that it presents its own set of challenges, mostly related to work/life balance. It can get so bad that you don’t know what day of the week it is. Really. Ask us how we know.

Rather than miss a meeting (or a day off), prolific hacker [Arnov Sharma] created this day of the week clock. It uses a customized LED driver board with seven sets of three LEDs, each driven by a MOSFET. Each MOSFET is controlled by a DFRobot Mini Beetle ESP32-C3. It runs on a 2200 mAh, 3.7 V lithium-ion battery.

While this is mostly PCBs, there are three printed parts that turn it into a displayable object. We really like the look of this clock — it has just the right amount of pizazz to it and reminds us of a and old movie marquee. Be sure to check out the great build instructions.

We love a good clock around here. In case you missed it, here is the latest from [Moritz v. Sivers] that uses a caustic lens to display the time.

Probably Ruining a Keyboard For Science

22 Enero 2025 at 00:00
Lubricating a keyboard switch the proper way, with a brush and the switch opened up.

Lubing your keyboard’s switches is definitely a personal preference, though we’re sure that many would call it absolutely necessary. However, people from both camps would probably not suggest is using WD-40 to do so, instead pointing toward Krytox or at least Super Lube. But there are enough people out there who have tried the great water displacer and claim to have experienced no problems that [Sea_Scheme6784] decided to give it a go (so you don’t have to).

Having now collected enough boards to sacrifice one to the lubrication gods, [Sea_Scheme6784] chose a completely stock Logitech G413 SE with brown switches and heavily sprayed every one. Oh yeah, there was no taking them apart first as most lube enthusiasts would advise. No carefully painting it on in the right places with a small brush. Just mad spraying, y’all.

The effects were noticeable immediately — it changed the feel for the better and made the switches way less scratchy. Also the sound is more poppy, despite drowning in not-lubricant. Interesting! [Sea_Scheme6784] says the stabilizers are still rattling away, so that’s no good. Keep an eye on r/mechanicalkeyboards for updates on these shenanigans. We know we will.

Want to know what else you can do to to switches besides lube? Lots of stuff.

Main and thumbnail images via Kinetic Labs

Cyber Walkman Does It In Style

21 Enero 2025 at 12:00
The guts of a cyberpunk Walkman.

One of the best things about adulthood is that finally we get to, in most cases, afford ourselves the things that our parents couldn’t (or just didn’t for whatever reason). When [Yakroo108] was a child, Walkmans were expensive gadgets that were out of reach of the family purse. But today, we can approximate these magical music machines ourselves with off-the-shelf hardware.

A cyberpunk Walkman.Besides the cyberpunk aesthetic, the main attraction here is the UNIHIKER Linux board running the show. After that, it’s probably a tie between that giant mystery knob and the super-cool GUI made with Tkinter.

We also like the fact that there are two displays: the smaller one on the SSD1306 OLED handles the less exciting stuff like the volume level and the current time, so that the main UNIHIKER screen can have all the equalizer/cyberpunk fun.

Speaking of, this user-friendly GUI shows play/stop buttons and next buttons, but it looks like there’s no easy way to get to the previous track. To each their own, we suppose. Everything is enclosed in a brick-like 3D-printed enclosure that mimics early Walkmans with orange foam headphones.

If you want an updated Walkman with keyboard switches (who wouldn’t?), check this out.

Trinteract Mini Space Mouse Does It In 3D

18 Enero 2025 at 00:00
Trinteract, a small space mouse, operating in Blender.

We’re not sure how we managed to miss this one, but better late than never, right? This is Trinteract, a 3-DOF input device that’s both open-source and Arduino compatible. There’s even a neat 3D-printed clip to add it to the side of your laptop.

Imagine navigating 2D and 3D environments, or flying around in Minecraft with ease. [Görkem]’s custom PCB features a Hall effect sensor which picks up readings from the magnet embedded in the bottom of the joystick. You can use any magnetic object as input. In the video below the break, [Görkem] shows a 3D-printed sphere with a disc magnet trapped inside as an alternative. The super-neat part is that the thing moves around entirely on flexures. You know how much we love flexures around here.

[Görkem] has written up a fantastic guide for those who must have one of their own. As a bonus, the guide details the background and thought process behind the design, which we love to see.

Don’t like magnets? This space mouse uses an accelerometer and a spring.

Thanks for the tip, [James]!

Landing Soon: This Beautiful Weather Display

3 Enero 2025 at 21:00
Front and rear views of a lander circuit sculpture that retrieves weather data and displays it on a screen.

All wiring is beautiful, except when it isn’t. But is there anything more lovely to behold than circuit sculpture? Once again, [Mohit Bhoite] has made this process look easy like Sunday morning. This time, he’s created a weather display in the form of a lander.

Drawings that will guide wire-bending for a circuit-sculpture, lunar-lander weather info center.This lander runs on the Particle Photon 2, which connects over Wi-Fi and retrieves the weather forecast for the day, along with sunrise and sunset times and wind conditions. Everything is beautifully displayed on a vertically-oriented Adafruit 170×320 TFT screen.

There’s also a pulse-density microphone (PDM) breakout board and a buzzer, and the build is capped off with a red 0805 LED. We’re not sure what the feet are made of, but they sure make this lander cute (and accurate).

All the project logs are picture-rich, which is really the most we could ask for when trying to imitate this level of greatness. This is apparently an ongoing project, and we’re excited for the end result, although it looks fairly complete from here.

Do you want to bend it like Bhoite? Then be sure to check out his Hackaday Supercon talk on the subject.

Time Management for Toddlers

26 Diciembre 2024 at 03:00
A visual timer for toddlers that uses LEDs that go out.

It’s really never too early (or too late) to learn time management. All joking aside, carefully managing one’s time can result in some really wondrous achievements. So it’s best to learn early, when most of your time is spent generally having fun.

Let’s say you’ve just heard you have five minutes left to play, but what does that mean if you’re three years old? Not much, unless you have some visual cues to go by. That’s the idea behind [Julius Curt]’s visual timer for toddlers.

This lovely reverse progress bar uses a Wemos D1 mini to control a strip of six WS2812B LEDs at 30 LEDs/meter density. There’s a small OLED display for literate users, and the whole thing is childproof. [Julius] challenged himself to do this entire project in one day, and ended up finishing it in a little over eight hours total, including time to design the way cool knob. Be sure to check out the build video below.

If you struggle with managing your time, check out our own [Arya Voronova]’s personal account.

❌
❌