Making GameCube Keyboard Controller Work with Animal Crossing
[Hunter Irving] is a talented hacker with a wicked sense of humor, and he has written in to let us know about his latest project which is to make a GameCube keyboard controller work with Animal Crossing.
This project began simply enough but got very complicated in short order. Initially the goal was to get the GameCube keyboard controller integrated with the game Animal Crossing. The GameCube keyboard controller is a genuine part manufactured and sold by Nintendo but the game Animal Crossing isn’t compatible with this controller. Rather, Animal Crossing has an on-screen keyboard which players can use with a standard controller. [Hunter] found this frustrating to use so he created an adapter which would intercept the keyboard controller protocol and replace it with equivalent “keypresses” from an emulated standard controller.
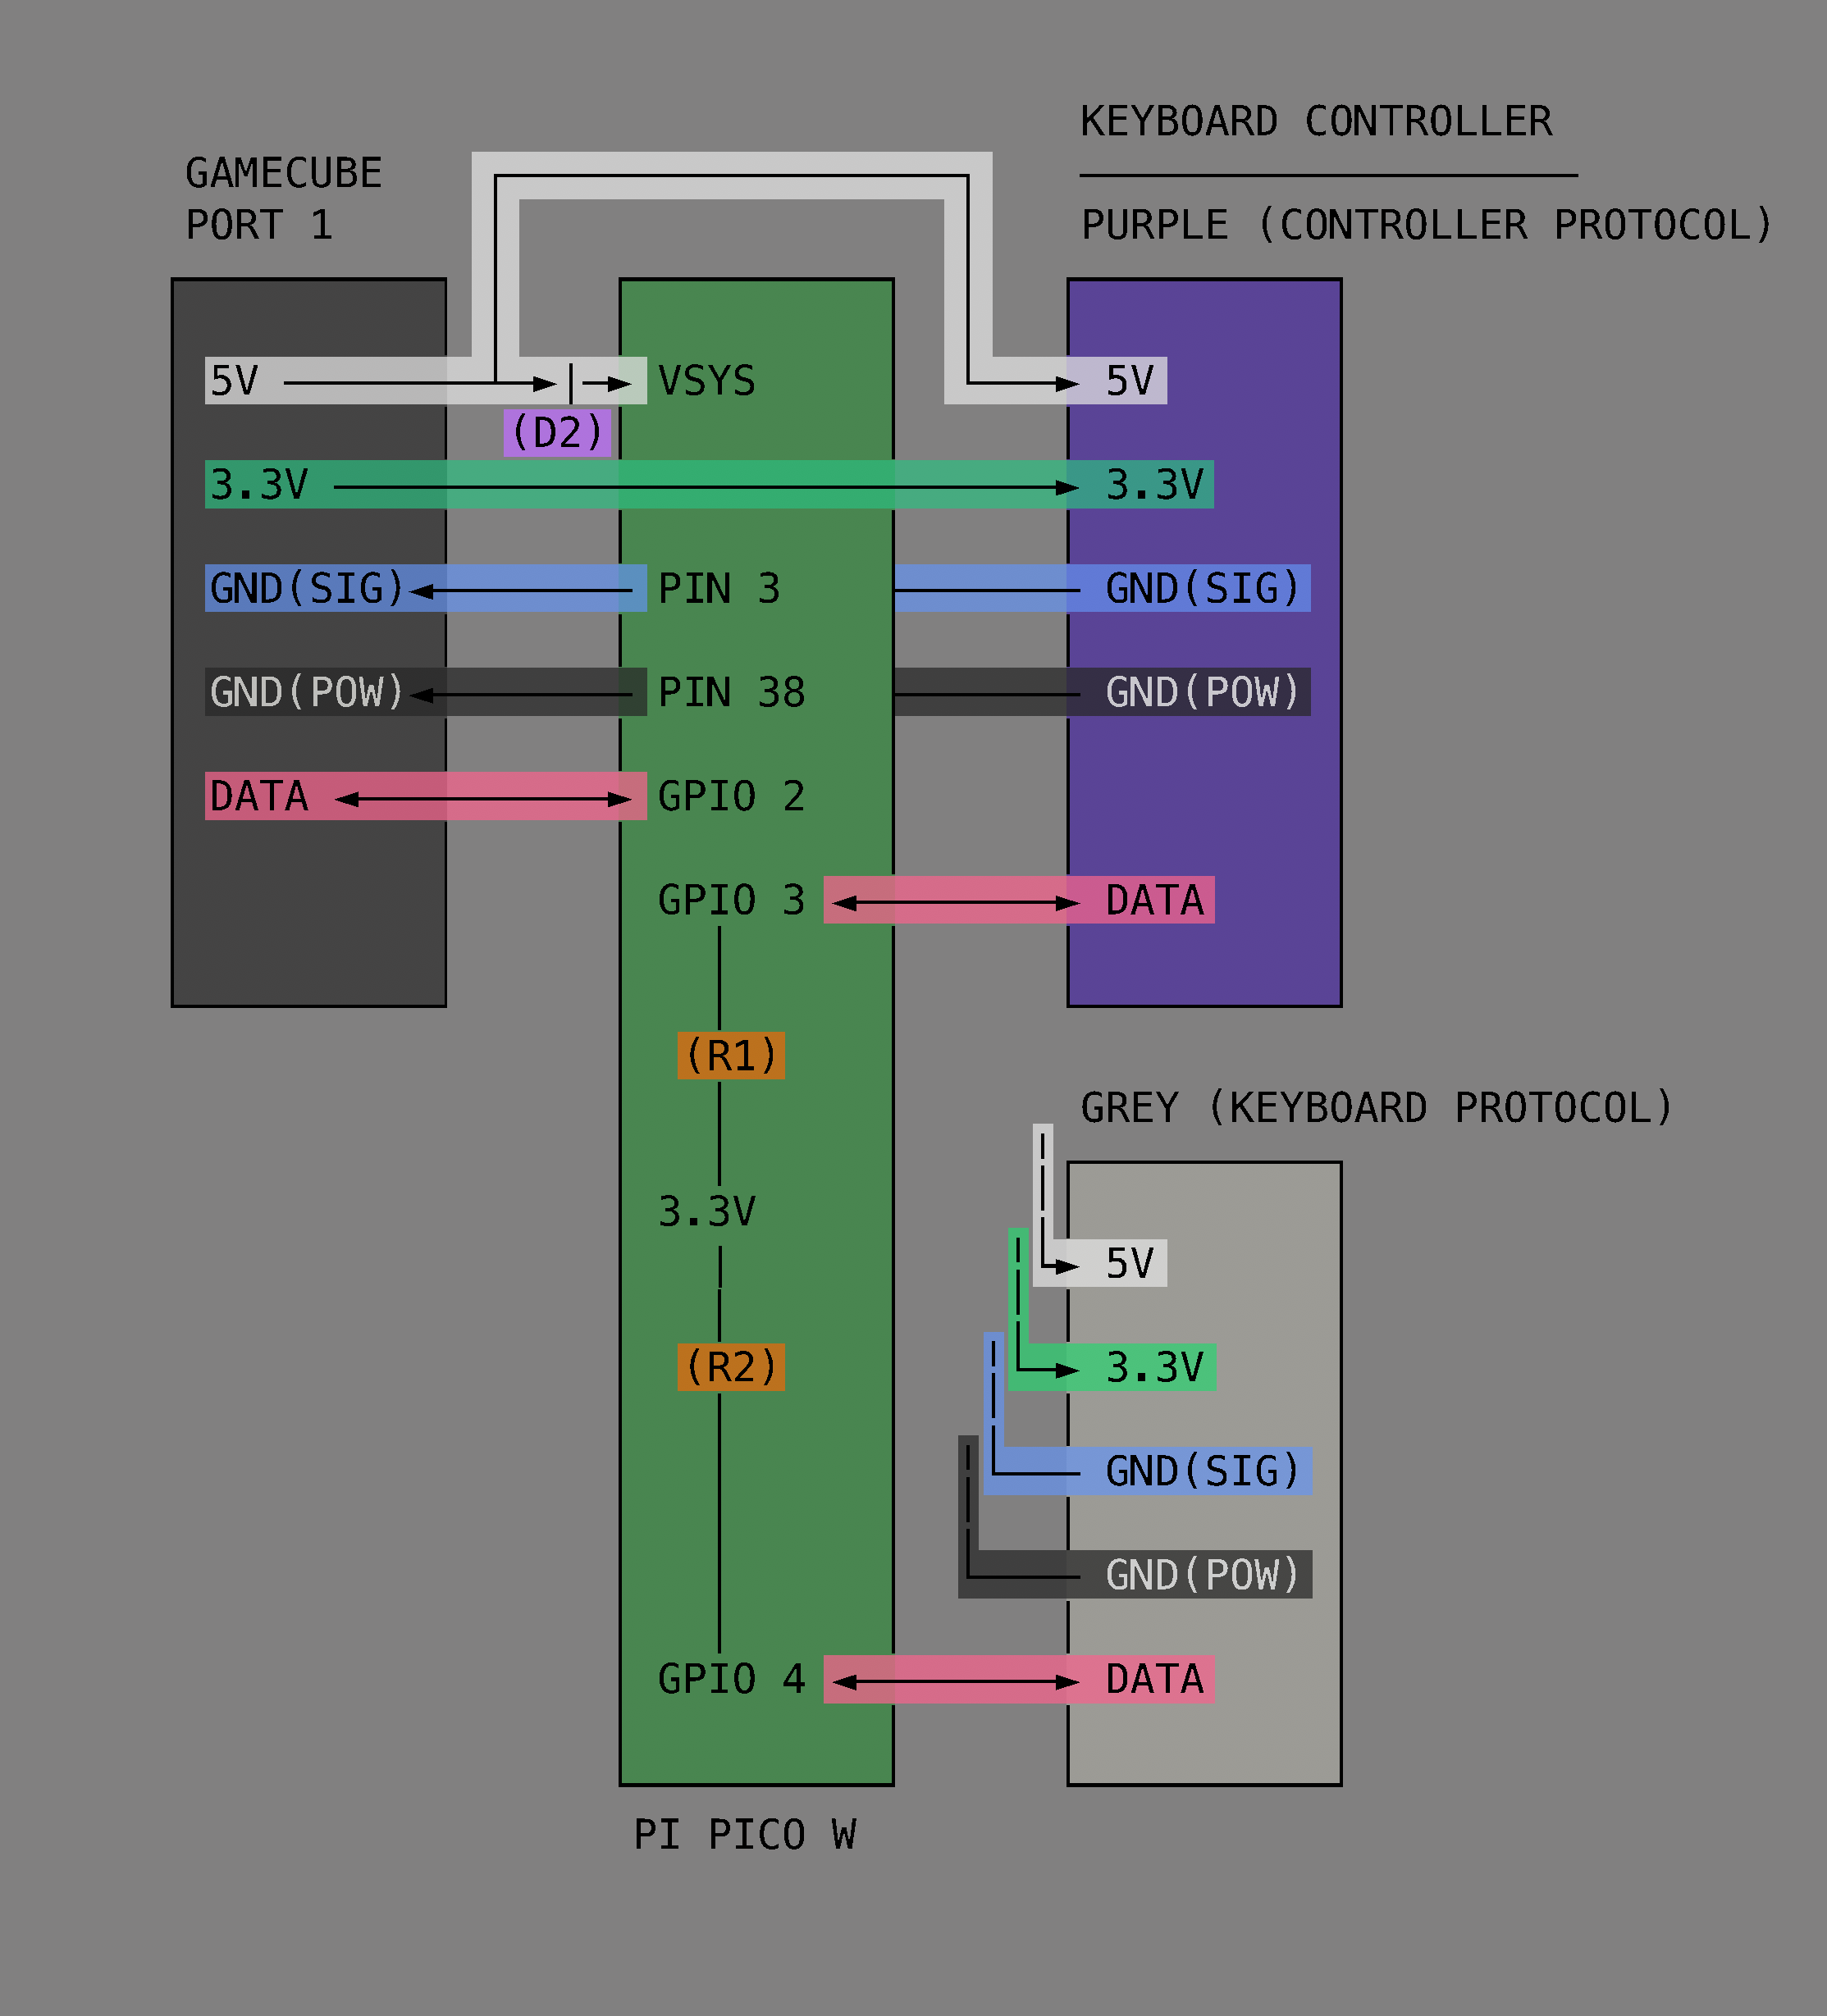 In this project [Hunter] intercepts the controller protocol and the keyboard protocol with a Raspberry Pi Pico and then forwards them along to an attached GameCube by emulating a standard controller from the Pico. Having got that to work [Hunter] then went on to add a bunch of extra features.
First he designed and 3D-printed a new set of keycaps to match the symbols available in the in-game character set and added support for those. Then he made a keyboard mode for entering musical tunes in the game. Then he integrated a database of cheat codes to unlock most special items available in the game. Then he made it possible to import images (in low-resolution, 32×32 pixels) into the game. Then he made it possible to play (low-resolution) videos in the game. And finally he implemented a game of Snake, in-game! Very cool.
If you already own a GameCube and keyboard controller (or if you wanted to get them) this project would be good fun and doesn’t demand too much extra hardware. Just a Raspberry Pi Pico, two GameCube controller cables, two resistors, and a Schottky diode. And if you’re interested in Animal Crossing you might enjoy getting it to boot Linux!
Thanks very much to [Hunter] for writing in to let us know about this project. Have your own project? Let us know on the tipsline!