Software Hacks Unlock Cheap Spectrometer
A spectrometer is one of those tools that many of us would love to have, but just can’t justify the price of. Sure there are some DIY options out there, but few of them have the convenience or capability of what’s on the commercial market. [Chris] from Zoid Technology recently found a portable spectrometer complete with Android application for just $150 USD on AliExpress which looked very promising…at least at first.
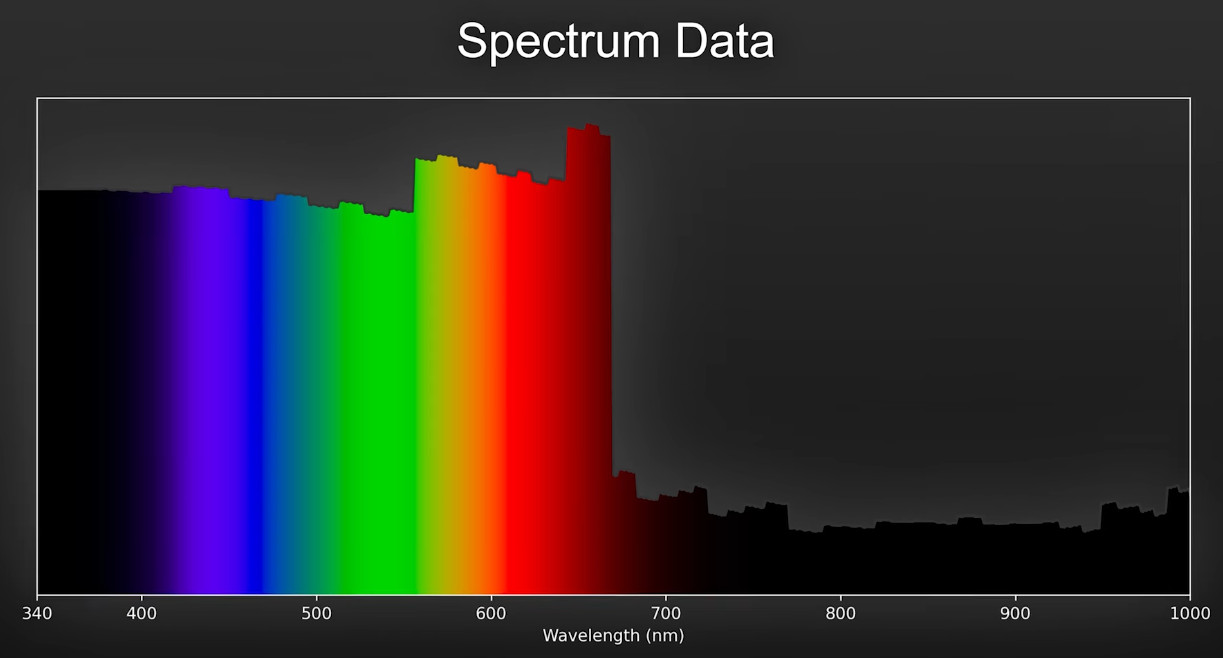
The problem is that the manufacturer, Torch Bearer, offers more expensive models of this spectrometer. In an effort to push users into those higher-priced models, arbitrary features such as data export are blocked in the software. [Chris] first thought he could get around this by reverse engineering the serial data coming from the device (interestingly, the spectrometer ships with a USB-to-serial adapter), but while he got some promising early results, he found that the actual spectrometer data was obfuscated — a graph of the results looked like stacks of LEGOs.
His next step was to decompile the Android application and manually edit out the model number checks. This let him enable the blocked features, although to be fair, he did find that some of them actually did require additional hardware capabilities that this cheaper model apparently doesn’t posses. He was able to fix up a few other wonky issues in the application that are described in the video below, and has released a patch that you can use to bring your own copy of the software up to snuff.
But that’s not all — while fiddling around inside the Android tool’s source code, he found the missing pieces he needed to understand how the serial data was being obfuscated. The explanation to how it works is pretty long-winded, so we’ll save time and just say that the end result was the creation of a Python library that lets you pull data from the spectrometer without relying on any of the manufacturer’s software. This is the kind of thing a lot of people have been waiting for, so we’re eager to see what kind of response the GPLv3 licensed tool gets from the community.
If you’d still rather piece together your own spectrometer, we’ve seen some pretty solid examples you can use to get started.