Modern RC cars can be pretty darn fast. That’s fun and all, but it also makes it easy to crash them into things. This problem inspired [Narrow Studios] to whip up something to offer a bit of protection.
The concept is simple enough—the RC car just needs some way to detect obstacles and stop before hitting them. The build relies on ultrasonic sensors as rangefinders to spot solid objects in the path of the vehicle. An Arduino Nano is in charge of reading the sensors. When it appears the car is approaching a wall or similar obstacle, it fires off a PWM signal to the car’s motor controller commanding it to brake. The additional hardware is held to the car with a bunch of custom printed brackets.
The setup isn’t perfect; the video notes that if you insist on accelerating quickly when close to a wall, you still have a fair chance of hitting it. That’s largely put down to the refresh time of the sensors and the overall system, which could be improved with further work. Still, if you’re always crashing your RC car into walls or curbs, this kind of thing might appeal to you.
YOLO can mean many things, but in the context of [be_riddickulous]’s AI Talking Robot Dinosaur it refers to the “You Only Look Once” YOLOv11 object-detection algorithm by Ultralytics, the method by which this adorable dino recognizes colors and shapes to teach them to children.
If you’re new to using YOLO or object recognition more generally, [be_riddiculous]’s tutorial is not a bad place to get started. She goes through how many images you’ll need and what types to get the shape-and-color recognition needed for this project, as well as how to annotate them and train the model, either locally or in the cloud.
The project itself is an adorable paper-mache dinosaur with a servo-actuated mouth hiding some LEDs and a Raspberry Pi camera module to provide images. In operation, the dinosaur “talks” to children using pre-recorded voice lines, inviting them to play a game and put a specific shape, or shape of a specific color (or both) in its mouth. Then the aforementioned object detection (running on a laptop) goes “YOLO” and identifies the shape so the toy can provide feedback on the child’s choice via a speaker in the belly of the beast.
The link to the game code is currently not valid, but it looks like they used PyGame for the audio output code. A servo motor controls the mouth, but without that code it’s not entirely clear to us what it’s doing. We expect by the time you read this there’s good odds [be_riddickulous] will have fixed that link and you can see for yourself.
The only thing that holds this back from being a great toy to put in every Kindergarten class is the need to have a laptop close by to plug the webcam into. A Raspberry Pi 5 ought to have the horsepower to run YOLOv11, so with a little extra effort the whole thing could be standalone — there might even be room in there for batteries.We’ve had other hacks aimed at little ones, like a kid-friendly computer to relive the glory days of the school computer lab or one of the many iterations of the RFID jukebox idea. If you want to wow the kiddos with AI, perhaps take a look at this talking Santa plush.
Got a cool project, AI, kid-related, or otherwise? Don’t forget to toss us a tip!
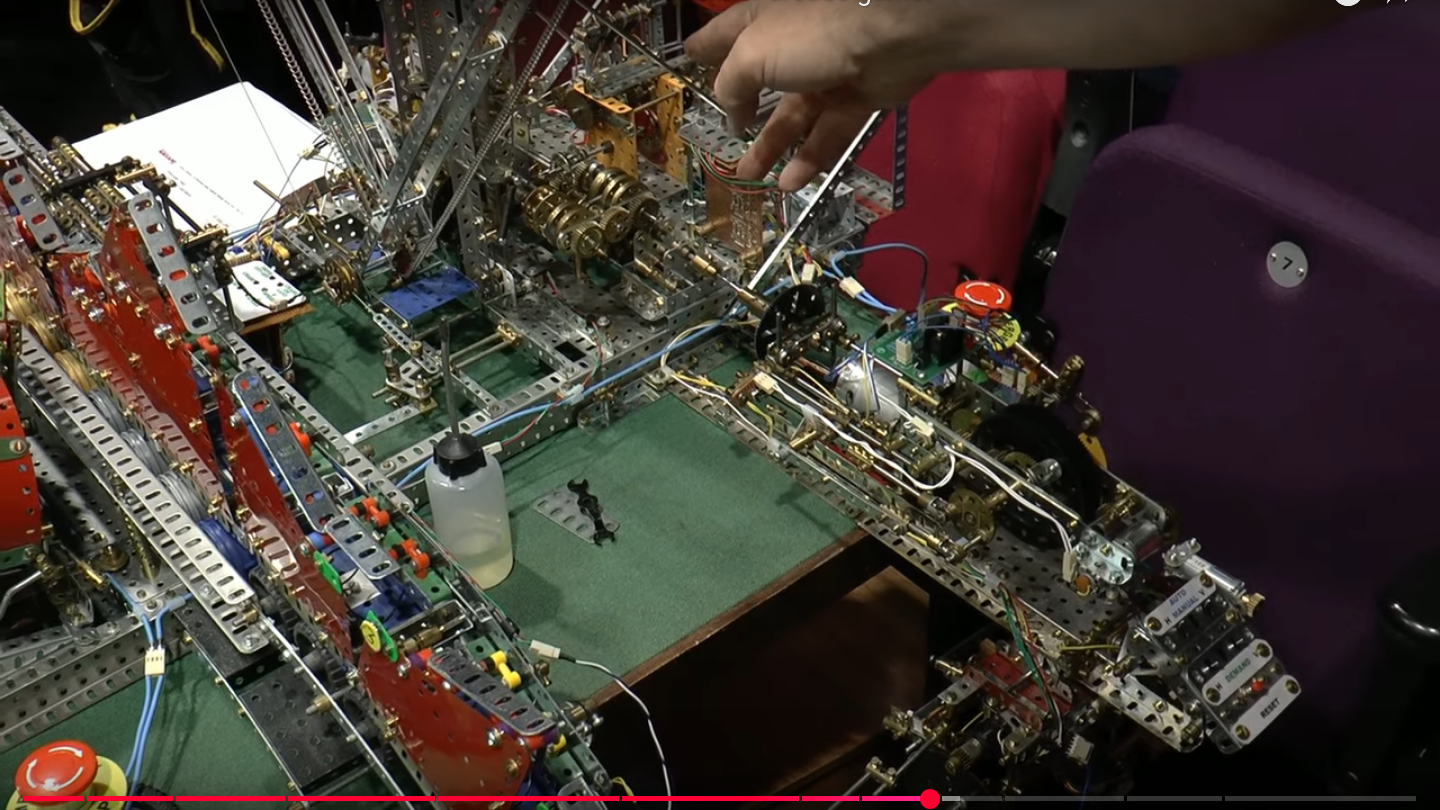
If William Gibson and Bruce Sterling had written an arcade scene into “The Difference Engine”, it probably would have looked a lot like [Pete Wood]’s Meccano Martian Mission, as illustrated in the video below by the [London Meccano Club]. Meccano Martian Mission is an homage to Atari’s 1978 Lunar Lander video game, but entirely electromechanical and made of– you guessed it– Meccano.
You might think Meccano is “too modern” to count as steampunk, but it squeaks just into the Victorian era. The first sets hit stores in 1901, the last year of Queen Victoria’s long reign. Since then, Meccano has developed a large following that has produced some truly impressive constructions, and this arcade game can stand amongst the best of them.
The game has all the features of the original: a swiveling spaceship, two-axis speed control, and even a little yellow flame that pops out when you are applying thrust. There’s a timer and a fuel gauge, and just like the original, there are easier and harder landing pads that offer score multipliers. While the score must be totted up manually, the game will detect a crash and flag it with a pop-down banner. It really has to be seen to be believed. It’s all done with cams and differentials hitting potentiometers and microswitches — not an Arduino in sight; [Pete] does a good job explaining it in the second half of the embedded video, starting about 10 minutes in.
The brains of the operation: cams and gears, and ingenuity.
Sure, might not be new or groundbreaking — these are old, old techniques — but not many people know them well enough to use them anymore, especially not with this degree of sophistication. To see these electromechanical techniques applied anachronistically to replicate one of the great pioneers of the arcade world tickles our fancy. It’s no wonder that perfecting this mechanical marvel has taken [Pete Wood] a decade.
The project reminds us of the Meccano Pinball Machine featured here years ago, but that somehow felt like a more natural fit for the apparently undead building kits. We lamented Meccano’s demise in 2023,but the brand is apparently being revived this year. Hopefully, that means there can be more young members for the [London Meccano Club] and groups like them, to keep the perforated-steel flame alive through another six reigns.
This hack is the bee’s knees, and we’re very thankful to [Tim Surtell] for the tip. Remember, the tip line is always open!.
What do you do when you’re a starving student and you need a 400 MHz logic analyzer for your digital circuit investigations? As [nanofix] shows in a recent video, you find one that’s available as an open hardware project and build it yourself.
The project, aptly named LogicAnalyzer was developed by [Dr. Gusman] a few years back, and has actually graced these pages in the past. In the video below, [nanofix] concentrates on the mechanics of actually putting the board together with a focus on soldering. The back of the build is the Raspberry Pi Pico 2 and the TXU0104 level shifters.
If you’d like to follow along at home, all the build instructions and design files are available on GitHub. For your convenience the Gerber files have been shared at PCBWay
Here is a hacker showing off their engineering chops. This video shows successive design iterations for a LEGO vehicle which can cross increasingly large gaps.
At the time of writing this video from [Brick Experiment Channel] has been seen more than 110,000,000 times, which is… rather a lot. We guess with a view count like that there is a fairly good chance that many of our readers have already seen this video, but this is the sort of video one could happily watch twice.
This video sports a bunch of engineering tricks and approaches. We particularly enjoy watching the clever use of center of gravity. They hack gravity to make some of their larger designs work.
Some hacks just tickle the brain in a very particular way. They’re, for a change, not overly engineered; they’re just elegant, anachronistic, and full of mischief. That’s exactly what [Frans] pulls off with A Gentleman’s Orrery, a tiny, simple clockwork solar system. Composed of shiny brass and the poise of 18th-century craftsmanship, it hides a modern secret: there’s barely any clockwork inside. You can build it yourself.
Peek behind the polished face and you’ll find a mechanical sleight of hand. This isn’t your grandfather’s gear-laden planetarium. Instead of that, it operates on a pared-down system that relies on a stepper motor, driving planetary movement through a 0.8 mm axle nested inside a 1 mm brass tube. That micro-mechanical coupling, aided by a couple of bevel gears, manages to rotate the Moon just right, including its orientation. Most of the movement relies on clever design, not gear cascades. The real wizardry happens under the hood: a 3D-printed chassis cradles an ESP32-C6, a TTP223 capacitive touch module, STSPIN220 driver, and even a reed switch with magnetic charging.
You can even swap out the brass for a stone shell where the full moon acts as the touch control. It’s tactile, it’s poetic, and therefore, a nice hack for a weekend project. To build it yourself, read [Frans]’ Instructable.
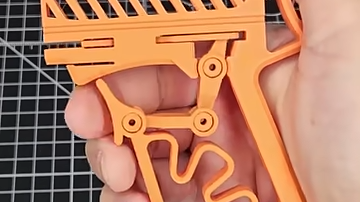
[It’s on my MIND] designed a clever BB blaster featuring a four-bar linkage that prints in a single piece and requires no additional hardware. The interesting part is how it turns a trigger pull into launching a 6 mm plastic BB. There is a spring, but it only acts as a trigger return and plays no part in launching the projectile. So how does it work?
There’s a spring in this BB launcher, but it’s not used like you might expect.
The usual way something like this functions is with the trigger pulling back a striker of some kind, and putting it under tension in the process (usually with the help of a spring) then releasing it. As the striker flies forward, it smacks into a BB and launches it. We’ve seen print-in-place shooters that work this way, but that is not what is happening here.
With [It’s on my MIND]’s BB launcher, the trigger is a four-bar linkage that transforms a rearward pull of the trigger into a forward push of the striker against a BB that is gravity fed from a hopper. The tension comes from the BB’s forward motion being arrested by a physical detente as the striker pushes from behind. Once that tension passes a threshold, the BB pops past the detente and goes flying. Thanks to the mechanical advantage of the four-bar linkage, the trigger finger doesn’t need to do much work. The spring? It’s just there to reset the trigger by pushing it forward again after firing.
It’s a clever design that doesn’t require any additional hardware, and even prints in a single piece. Watch it in action in the video, embedded just below.
Some readers may recall building a line-following robot during their school days. Involving some IR LEDs, perhaps a bit of LEGO, and plenty of trial-and-error, it was fun on a tiny scale. Now imagine that—but rideable. That’s exactly what [Austin Blake] did, scaling up a classroom robotics staple into a full-size vehicle you can actually sit on.
The robot uses a whopping 32 IR sensors to follow a black line across a concrete workshop floor, adjusting its path using a steering motor salvaged from a power wheelchair. An Arduino Mega Pro Mini handles the logic, sending PWM signals to a DIY servo. The chassis consists of a modified Crazy Cart, selected for its absurdly tight turning radius. With each prototype iteration, [Blake] improved sensor precision and motor control, turning a bumpy ride into a smooth glide.
The IR sensor array, which on the palm-sized vehicle consisted of just a handful of components, evolved into a PCB-backed bar nearly 0.5 meters wide. Potentiometer tuning was a fiddly affair, but worth it. Crashes? Sure. But the kind that makes you grin like your teenage self. If it looks like fun, you could either build one yourself, or upgrade a similar LEGO project.
If you’ve ever squinted at a DE10-Nano wondering where the fun part begins, you’re not alone. This review of the Mr. MultiSystem 2 by [Lee] lifts the veil on a surprisingly noob-friendly FPGA console that finally gets the MiSTer experience out of the tinker cave and into the living room. Developed by Heber, the same UK wizards behind the original MultiSystem, this follow-up console dares to blend flexibility with simplicity. No stack required.
It comes in two varieties, to be precise: with, or without analog ports. The analog edition features a 10-layer PCB with both HDMI and native RGB out, Meanwell PSU support, internal USB headers, and even space for an OLED or NFC reader. The latter can be used to “load” physical cards cartridge-style, which is just ridiculously charming. Even the 3D-printed enclosure is open-source and customisable – drill it, print it, or just colour it neon green. And for once, you don’t need to be a soldering wizard to use the thing. The FPGA is integrated in the mainboard. No RAM modules, no USB hub spaghetti. Just add some ROMs (legally, of course), and you’re off.
Despite its plug-and-play aspirations, there are some quirks – for example, the usual display inconsistencies and that eternal jungle of controller mappings. But hey, if that’s the price for versatility, it’s one you’d gladly pay. And if you ever get stuck, the MiSTer crowd will eat your question and spit out 12 solutions. It remains 100% compatible with the MiSTer software, but allows some additional future features, should developers wish to support them.
Want to learn more? This could be your entrance to the MiSTer scene without having to first earn a master’s in embedded systems. Will this become an alternative to the Taki Udon announced Playstation inspired all-in-one FPGA console? Check the video here and let us know in the comments.
You’d think a paper from a science team from Carnegie Mellon would be short on fun. But the team behind LegoGPT would prove you wrong. The system allows you to enter prompt text and produce physically stable LEGO models. They’ve done more than just a paper. You can find a GitHub repo and a running demo, too.
The authors note that the automated generation of 3D shapes has been done. However, incorporating real physics constraints and planning the resulting shape in LEGO-sized chunks is the real topic of interest. The actual project is a set of training data that can transform text to shapes. The real work is done using one of the LLaMA models. The training involved converting Lego designs into tokens, just like a chatbot converts words into tokens.
There are a lot of parts involved in the creation of the designs. They convert meshes to LEGO in one step using 1×1, 1×2, 1×4, 1×6, 1×8, 2×2, 2×4, and 2×6 bricks. Then they evaluate the stability of the design. Finally, they render an image and ask GPT-4o to produce captions to go with the image.
The most interesting example is when they feed robot arms the designs and let them make the resulting design. From text to LEGO with no human intervention! Sounds like something from a bad movie.
We wonder if they added the more advanced LEGO sets, if we could ask for our own Turing machine?
When [Terence Grover] set out to build a Tamagotchi-inspired simulator, he didn’t just add a few modern tweaks. He ditched the entire concept and rebuilt it from the ground up. Forget cute wide-eyed blobby animals and pixel-poop. This Raspberry Pi-powered project ditches nostalgia in favour of brutal realism: inflation, burnout, capitalism, and the occasional existential crisis. Think Sims meets cyberpunk, rendered charmingly in Python on a low-res RGB LED matrix.
Instead of hunger and poop meters, this dystopian pet juggles Maslow’s hierarchy: hunger, rest, safety, social life, esteem, and money. Players make real-life-inspired decisions like working, socialising, and going into education – each affecting the stats in logical (and often unfair) ways. No free lunch here: food requires money, money requires mind-numbing labour, and labour tanks your rest. You can even die of overwork à la Amazon warehouse. The UI and animation logic are all hand-coded, and there’s a working buzzer, pixel-perfect sprite movement, and even mini-games to simulate job repetition.
It’s equal parts social commentary and pixel art fever dream. While we have covered Tamagotchi recreations some time ago, this one makes you the needy survivor. Want your own dystopia in 64×32? Head over to [Terence Grover]’s Github and fork the full open source code. We’ll be watching. The Tamagotchi certainly is.