Most of us learned to design circuits with schematics. But if you get to a certain level of complexity, schematics are a pain. Modern designers — especially for digital circuits — prefer to use some kind of hardware description language.
There are a few options to do similar things with PCB layout, including tscircuit. There’s a walk-through for using it to create an LED matrix and you can even try it out online, if you like. If you’re more of a visual learner, there’s also an introductory video you can watch below.
The example project imports a Pico microcontroller and some smart LEDs. They do appear graphically, but you don’t have to deal with them graphically. You write “code” to manage the connections. For example:
<trace from={".LED1 .GND"} to="net.GND" />
If that looks like HTML to you, you aren’t wrong. Once you have the schematic, you can do the same kind of thing to lay out the PCB using footprints. If you want to play with the actual design, you can load it in your browser and make changes. You’ll note that at the top right, there are buttons that let you view the schematic, the board, a 3D render of the board, a BOM, an assembly drawing, and several other types of output.
Will we use this? We don’t know. Years ago, designers resisted using HDLs for FPGAs, but the bigger FPGAs get, the fewer people want to deal with page after page of schematics. Maybe a better question is: Will you use this? Let us know in the comments.
This isn’t a new idea, of course. Time will tell which HDLs will survive and which will whither.
If you’ve dealt with reactance, you surely know the two equations for computing inductive and capacitive reactance. But unless you’ve really dug into it, you may only know the formula the way a school kid knows how to find the area of a circle. You have to have a bit of higher math to figure out why the equation is what it is. [Old Hack EE] wanted to figure out why the formulas are what they are, so he dug in and shared what he learned in a video you can see below.
The key to understanding this is simple. The reactance describes the voltage over the current through the element, just like resistance. The difference is that a resistance is just a single number. A reactance is a curve that gives you a different value at different frequencies. That’s because current and voltage are out of phase through a reactance, so it isn’t as easy as just dividing.
If you know calculus, the video will make a lot of sense. If you don’t know calculus, you might have a few moments of panic, but you can make it. If you think of frequency in Hertz as cycles per second, all the 2π you find in these equations convert Hz to “radian frequency” since one cycle per second is really 360 degrees of the sine wave in one second. There are 2π radians in a circle, so it makes sense.
We love developing intuition about things that seem fundamental but have a lot of depth to them that we usually ignore. If you need a refresher or a jump start on calculus, it isn’t as hard as you probably think. Engineers usually use vectors or imaginary numbers to deal with reactance, and we’ve talked about that too, if you want to learn more.
The Star Trek tricorder was a good example of a McGuffin. It did anything needed to support the plot or, in some cases, couldn’t do things also in support of the plot. We know [SirGalaxy] was thinking about the tricorder when he named the Tinycorder, but the little device has a number of well-defined features. You can see a brief video of it working below the break.
The portable device has a tiny ESP32 and a battery. The 400×240 display is handy, but has low power consumption. In addition to the sensors built into the ESP32, the Tinycorder has an AS7341 light sensor, an air quality sensor, and a weather sensor. An odd combination, but like its namesake, it can do lots of unrelated things.
The whole thing goes together in a two-part printed case. This is one of those projects where you might not want an exact copy, but you very well might use it as a base to build your own firmware. Even [SirGalaxy] has plans for future developments, such as adding a buzzer and a battery indicator.
This physically reminded us of those ubiquitous component testers. That another multi-purpose tester that started simple and gets more features through software.
It is easier than ever to produce projects with nice enclosures thanks to 3D printing and laser cutting. However, for a polished look, you also need a labeled front panel. We’ve looked at several methods for doing that in the past, but we enjoyed [Accidental Science’s] video showing his method for making laminated panels.
His first step is to draw the panel in Inkscape, and he has some interesting tips for getting the most out of the program. He makes a few prints and laminates one of them. The other is a drill guide. You use the drill guide to make openings in the panel, which could be aluminum, steel, plastic, or whatever material you want to work in.
The laminated print goes on last with just enough glue to hold it. Is it a lot of work? You bet it is. But the results look great. There are a number of things to look out for, so if you plan to do this, the video will probably save you from making some mistakes.
There are many ways to get this job done. We’ve asked you for ideas before and, as usual, you came through. If you want a different take on laminated panels, there are a few different tips you can glean from this project.
If you build electronics, you will eventually need a coil. If you spend any time winding one, you are almost guaranteed to think about building a coil winder. Maybe that’s why so many people do. [Jtacha] did a take on the project, and we were impressed — it looks great.
The device has a keypad and an LCD. You can enter a number of turns or the desired inductance. It also lets you wind at an angle. So it is suitable for RF coils, Tesla coils, or any other reason you need a coil.
There are a number of 3D printed parts, so this doesn’t look like an hour project. Luckily, none of the parts are too large. The main part is 2020 extrusion, and you will need to tap the ends of some of the pieces.
There is a brief and strangely dark video in the post if you want to see the machine in operation. The resulting coil looked good, especially if you compare it to how our hand-wound ones usually look.
While most hams and hackers have at least heard of Heathkit, most people don’t know the strange origin story of the legendary company. [Ham Radio Gizmos] takes us all through the story.
In case you don’t remember, Heathkit produced everything from shortwave radios to color TVs to test equipment and even computers. But, for the most part, when you bought something from them, you didn’t get a finished product. You got a bag full of parts and truly amazing instructions about how to put them together. Why? Well, if you are reading Hackaday, you probably know why. But some people did it to learn more about electronics. Others were attracted by the lower prices you paid for some things if you built them yourself. Others just liked the challenge.
But Heathkit’s original kit wasn’t electronic at all. It was an airplane kit. Not a model airplane, it was an actual airplane. Edward Heath sold airplane kits at the affordable price around $1,000. In 1926, that was quite a bit of money, but apparently still less than a commercial airplane.
Sadly, Heath took off in a test plane in 1931, crashed, and died. The company struggled to survive until 1935, when Howard Anthony bought the company and moved it to the familiar Benton Harbor address. The company still made aircraft kits.
During World War II, the company mobilized to produce electronic parts for wartime aircraft. After the war, the government disposed of surplus, and Howard Anthony casually put in a low bid on some. He won the bid and was surprised to find out the lot took up five rail cars. Among the surplus were some five-inch CRTs used in radar equipment. This launched the first of Heathkit’s oscilloscopes — the O1. At $39.50, it was a scope people could afford, as long as they could build it. The O-series scopes would be staples in hobby workshops for many years.
There’s a lot more in the video. Well worth the twenty minutes. If you’ve never seen a Heathkit manual, definitely check out the one in the video. They were amazing. Or download a couple. No one creates instructions like this anymore.
If you watch the video, be warned, there will be a quiz, so pay attention. But here’s a hint: there’s no right answer for #3. We keep hearing that someone owns the Heathkit brand now, and there have been a few new products. But, at least so far, it hasn’t really been the same.
[IMSAI Guy] grabbed an obsolete XOR gate and tried a classic circuit to turn it into a frequency doubler. Of course, being an old part, it won’t work at very high frequencies, but the circuit is super simple, just using the gate and an RC network. You can see a video of his exploration below.
The simple circuit seems like it should work, but in practice, it needed an extra component. In theory, the RC circuit acts as an edge detector. So, each edge of the input signal causes a pulse on the output as the second input lags the first.
That sounds good, but it looked terrible on the scope until a 1K resistor tied to the capacitor shifted the bias point of the gate. In all fairness, the original schematic used a Schmitt trigger gate, which may have made a difference had one been available. There were slight differences, though, depending on the type of device. An LS part, for example, didn’t need the extra resistor.
Of course, an RC network is just one way to delay the input, and the delay determines the width of the output pulse and constrains the input frequency and duty cycle. However, you could use other gates, including the other XOR gates in the package to realize a fast delay.
Frequency doublers are very common at microwave frequencies, but they don’t work in the same way. There are several ways to do it, but a common method is to use a nonlinear element to generate plenty of harmonics and then filter off everything but the second one. Or the third one, if you wanted a tripler instead.
There was a time when each and every printer and typesetter had its own quirky language. If you had a wordprocessor from a particular company, it worked with the printers from that company, and that was it. That was the situation in the 1970s when some engineers at Xerox Parc — a great place for innovation but a spotty track record for commercialization — realized there should be a better answer.
That answer would be Interpress, a language for controlling Xerox laser printers. Keep in mind that in 1980, a laser printer could run anywhere from $10,000 to $100,000 and was a serious investment. John Warnock and his boss, Chuck Geschke, tried for two years to commercialize Interpress. They failed.
So the two formed a company: Adobe. You’ve heard of them? They started out with the idea of making laser printers, but eventually realized it would be a better idea to sell technology into other people’s laser printers and that’s where we get PostScript.
Early PostScript and the Birth of Desktop Publishing
PostScript is very much like Forth, with words made specifically for page layout and laser printing. There were several key selling points that made the system successful.
First, you could easily obtain the specifications if you wanted to write a printer driver. Apple decided to use it on their LaserWriter. Of course, that meant the printer had a more powerful computer in it than most of the Macs it connected to, but for $7,000 maybe that’s expected.
Second, any printer maker could license PostScript for use in their device. Why spend a lot of money making your own when you could just buy PostScript off the shelf?
Finally, PostScript allowed device independence. If you took a PostScript file and sent it to a 300 DPI laser printer, you got nice output. If you sent it to a 2400 DPI typesetter, you got even nicer output. This was a big draw since a rasterized image was either going to look bad on high-resolution devices or have a huge file system in an era where huge files were painful to deal with. Even a page at 300 DPI is fairly large.
If you bought a Mac and a LaserWriter you only needed one other thing: software. But since the PostScript spec was freely available, software was possible. A company named Aldus came out with PageMaker and invented the category of desktop publishing. Adding fuel to the fire, giant Lionotype came out with a typesetting machine that accepted PostScript, so you could go from a computer screen to proofs to a finished print job with one file.
If you weren’t alive — or too young to pay attention — during this time, you may not realize what a big deal this was. Prior to the desktop publishing revolution, computer output was terrible. You might mock something up in a text file and print it on a daisy wheel printer, but eventually, someone had to make something that was “camera-ready” to make real printing plates. The kind of things you can do in a minute in any word processor today took a ton of skilled labor back in those days.
Take Two
Of course, you have to innovate. Adobe did try to prompt Display PostScript in the late 1980s as a way to drive screens. The NeXT used this system. It was smart, but a bit slow for the hardware of the day. Also, Adobe wanted licensing fees, which had worked well for printers, but there were cheaper alternatives available for displays by the time Display PostScript arrived.
In 1991, Adobe released PostScript Level 2 — making the old PostScript into “Level 1” retroactively. It had all the improvements you would expect in a second version. It was faster and crashed less. It had better support for things like color separation and handling compressed images. It also worked better with oddball and custom fonts, and the printer could cache fonts and graphics.
Remember how releasing the spec helped the original PostScript? For Level 2, releasing it early caused a problem. Competitors started releasing features for Level 2 before Adobe. Oops.
They finally released PostScript 3. (And dropped the “Level”.) This allowed for 12-bit colors instead of 8-bit. It also supported PDF files.
PDF?
While PostScript is a language for controlling a printer, PDF is set up as a page description language. It focuses on what the page looks like and not how to create the page. Of course, this is somewhat semantics. You can think of a PostScript file as a program that drives a Raster Image Processor (RIP) to draw a page. You can think of a PDF as somewhat akin to a compiled version of that program that describes what the program would do.
Up to PDF 1.4, released in 2001, everything you could do in a PDF file could be done in PostScript. But with PDF 1.4 there were some new things that PostScript didn’t have. In particular, PDFs support layers and transparency. Today, PDF rules the roost and PostScript is largely static and fading.
What’s Inside?
Like we said, a PostScript file is a lot like a Forth program. There’s a comment at the front (%!PS-Adobe-3.0) that tells you it is a PostScript file and the level. Then there’s a prolog that defines functions and fonts. The body section uses words like moveto, lineto, and so on to build up a path that can be stroked, filled, or clipped. You can also do loops and conditionals — PostScript is Turing-complete. A trailer appears at the end of each page and usually has a command to render the page (showpage), which may start a new page.
A simple PostScript file running in GhostScript
A PDF file has a similar structure with a %PDF-1.7 comment. The body contains objects that can refer to pages, dictionaries, references, and image or font streams. There is also a cross-reference table to help find the objects and a trailer that points to the root object. That object brings in other objects to form the entire document. There’s no real code execution in a basic PDF file.
If you want to play with PostScript, there’s a good chance your printer might support it. If not, your printer drivers might. However, you can also grab a copy of GhostScript and write PostScript programs all day. Use GSView to render them on the screen or print them to any printer you can connect to. You can even create PDF files using the tools.
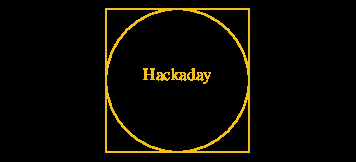
For example, try this:
%!PS
% Draw square
100 100 moveto
100 0 rlineto
0 100 rlineto
-100 0 rlineto
closepath
stroke

% Draw circle
150 150 50 0 360 arc
stroke

% Draw text "Hackaday" centered in the circle
/Times-Roman findfont 12 scalefont setfont % Choose font and size
(Hackaday) dup stringwidth pop 2 div % Calculate half text width
150 exch sub % X = center - half width
150 % Y = vertical center
moveto
(Hackaday) show

showpage
If you want to hack on the code or write your own, here’s the documentation. Think it isn’t really a programming language? [Nicolas] would disagree.
[Michal Sapka] wanted to learn a new skill, so he decided on the Commodore 64 assembly language. We didn’t say he wanted to learn a new skill that might land him a job. But we get it and even applaud it. Especially since he’s written a multi-part post about what he’s doing and how you can do it, too. So far, there are four parts, and we’d bet there are more to come.
The series starts with the obligatory “hello world,” as well as some basic setup steps. By part 2, you are learning about registers and numbers. Part 3 covers some instructions, and by part 4, he finds that there are even more registers to contend with.
One of the great things about doing a project like this today is that you don’t have to have real hardware. Even if you want to eventually run on real hardware, you can edit in comfort, compile on a fast machine, and then debug and test on an emulator. [Michal] uses VICE.
The series is far from complete, and we hear part 5 will talk about branching, so this is a good time to catch up.
China played host to what, presumably, was the world’s first robot and human half-marathon. You can check out the action and the Tiangong Ultra robot that won in the video below. The event took place in Beijing and spanned 21.1 km. There was, however, a barrier between lanes for humans and machines.
The human rules were the same as you’d expect, but the robots did need a few concessions, such as battery swap stops. The winning ‘bot crossed the finish line in just over 160 minutes. However, there were awards for endurance, gait design, and design innovation.
Humans still took the top spots, though. We also noted that some of the robots had issues where they lost control or had other problems. Even the winner fell down once and had three battery changes over the course.
Of the 21 robots that started, only six made the finish line. We don’t know how many of the 12,000 humans finished, but we are pretty sure it was more than six, so we don’t think runners have to worry about robot overlords yet. But they’re getting better all the time.
While ham radio operators have been embracing digital mobile radio (DMR), the equipment is most often bought since — at least in early incarnations — it needs a proprietary CODEC to convert speech to digital and vice versa. But [QRadioLink] decided to tackle a homebrew and open source DMR modem.
The setup uses a LimeSDR, GNU Radio, and Codec2. There are some other open DMR projects, such as OpenRTX. So we are hopeful there are going to be more choices. The DMR modem, however, is only a proof-of-concept and reuses the MMDVMHost code to do the data link layer.
[QRadioLink] found several receiver implementations available, but only one other DMR transmitter — actually, a transceiver. Rather than use an AMBE hardware device or the potentially encumbered mbelib codec, the project uses Codec2 which is entirely open source.
There’s a lot of explanation about the data collection to prepare for the project, and then a deep dive into the nuts and bolts of the implementation. You might enjoy the video below to see things in action.
If you just want to listen to DMR, it’s easy. If Codec2 sounds familiar, it is part of M17.
We don’t think of computers as something you’d find in the 17th century. But [Levi McClain] found plans for one in a book — books, actually — by [Athanasius Kirker] about music. The arca musarithmica, a machine to allow people with no experience to compose church music, might not fit our usual definition of a computer, but as [Levi] points out in the video below, there are a number of similarities to mechanical computers like slide rules.
Apparently, there are a few of these left in the world, but as you’d expect, they are quite rare. So [Levi] decided to take the plans from the book along with some information available publicly and build his own.
The computer is a box of wooden cards — tablets — with instructions written on them. Honestly, we don’t know enough about music theory to quite get the algorithm. [Kirker] himself had this to say in his book about the device:
Mechanical music-making is nothing more than a particular system invented by us whereby anyone, even the ἀμουσος [unmusical] may, through various applications of compositional instruments compose melodies according to a desired style. We shall briefly relate how this mechanical music-making is done and, lest we waste time with prefatory remarks, we shall begin with the construction of the Musarithmic Ark.
If you want to try it yourself, you won’t need to break out the woodworking tools. You can find a replica on the web, of course. Let us know if you set any Hackaday posts to music.
We know not everyone thinks something mechanical can be a computer, but we disagree. True, some are more obvious than others.
It is hard to imagine that it has been more than four decades since two of the original designers of the Sinclair ZX Spectrum broke off to market the Jupiter Ace. [Nemanja Trifunovic] remembers the tiny computer in a recent post, and we always love to recall the old computers that used TVs for screens and audio tape recorders for mass storage.
One thing we always loved about the Jupiter Ace is that while most computers of the era had Basic as their native tongue, the Ace used Forth. As the post points out, while this may have given it great geek cred, it didn’t do much for sales, and the little machine was history within a year. However, the post also proposes that Forth wasn’t the real reason for the machine’s lack of commercial success.
Why did they pick Forth? Why not? It is efficient and interactive. The only real disadvantage was that Basic was more familiar to more people. Books and magazines of the day showed Basic, not Forth. But, according to the post, the real reason for its early demise was that it was already using outdated hardware from day one.
The Ace provided only 3K of RAM and did not offer color graphics. While this may sound laughable today, it wasn’t totally out of the question in 1978. Unfortunately, the Ace debuted in 1982. There were options that offered much more for just a little less. There is also the argument that as users became less technical, they just wanted to load pre-programmed tapes or cartridges and didn’t really care what language was running the computer.
Maybe, but we did and we can’t help but imagine a future where Forth was the language of choice for personal computers. Given how few of these were made, we see a lot of projects around them or, at least, replicas. Of course, these days that can be as simple as a single chip.
Is a bicycle like a motorcycle? Of course, the answer is it is and it isn’t. Saying something is “like” something else presupposes a lot of hidden assumptions. In the category “things with two wheels,” we have a winner. In the category “things that require gasoline,” not so much. We’ve noticed before that news stories about astronomy often talk about “sun-like stars” or “Earth-like planets.” But what does that really mean? [Paul Gilster] had the same questions, if you want to read his opinion about it.
[Paul] mentions that even textbooks can’t agree. He found one that said that Centauri A was “sun-like” while Centauri B was sometimes considered sun-like and other times not. So while Paul was looking at the examples of press releases and trying to make sense of it all, we thought we’d just ask you. What makes a star like our sun? What makes a planet like our planet?
Part of the problem is we don’t really know as much as we would like about other planets and their stars. We know more than we used to, of course. Still, it would be like wondering if the motorcycle was like that distant point of light. Maybe.
This is one of those things that seems deceptively simple until you start thinking about it. Is a planet Earth-like if it is full of water? What if it is totally covered in water? What if there’s no life at all? But life isn’t it, either. Methane-breathing silicon-based life probably doesn’t live on Earth-like planets.
Maybe Justice Potter Stewart was on to something when he said, “I know it when I see it!” Unfortunately, that’s not very scientific.
So what do you think? What’s a sun-like star? What’s an Earth-like planet? Discuss in the comments.
Don’t even get us started on super-earths, whatever they are. We are learning more about our neighbors every day, though.
[BorisDigital] was mesmerised by a modern elevator. He decided to see how hard it would be to design his own elevator based on Raspberry Pis. He started out with a panel for the elevator and a call panel for the elevator lobby. Of course, he would really need three call panels since he is pretending to have a three-floor building.
It all looks very professional, and he has lots of bells and whistles, including an actual alarm. With the control system perfected, it was time to think about the hydraulics and mechanical parts to make a door and an actual lift.
It is still just a model, but he does have 10A AC switches for the pumps. Everything talks via MQTT over WiFi. There’s also a web-based control dashboard. We didn’t count how many Pi boards are in the whole system, but it is definitely more than three.
If you are wondering why this was built, we are too. But then again, we never really need an excuse to go off on some project, so we can’t throw stones.
Want to see a more practical build? Check it out. Perhaps he’ll start on an escalator next.
If you want to get started in microfluidic robotics, [soiboi soft’s] salamander is probably too complex for a first project. But it is impressive, and we bet you’ll learn something about making this kind of robot in the video below.
The pneumatic muscles are very impressive. They have eight possible positions using three sources of pressure. This seems like one of those things that would have been nearly impossible to fabricate in a home lab a few decades ago and now seems almost trivial. Well, maybe trivial isn’t the right word, but you know what we mean.
The soft robots use layers of microfluidic channels that can be made with a 3D printer. Watching these squishy muscles move in an organic way is fascinating. For right now, the little salamander-like ‘bot has a leash of tubes, but [soiboi] plans to make a self-contained version at some point.
IBM mainframes are known for very unusual terminals. But IBM made many different things, including the IBM 3151 ASCII terminal, which uses a cartridge to emulate a VT220 terminal. [Norbert Keher] has one and explains in great detail how to connect it to a mainframe.
It had the 3151 personality cartridge for emulating multiple IBM and DEC terminals. However, the terminal would not start until he unplugged it. The old CRT was burned in with messages from an IBM 3745, which helped him work out some of the configuration.
If you’ve only used modern ASCII terminals, you might not realize that many terminals from IBM and other vendors used to use a block mode where the computer would dump a screen to the terminal. You could “edit” the screen (that is, fill in forms or enter lines). Then you’d send the whole screen back in one swoop. This is “block” mode, and some of the terminals the 3151 can emulate are character mode, and others are block mode, which explains its odd keyboard and commands.
[Norbert] gets the terminal running with a virtual mainframe, but along the way, he explains a lot about what’s going on. The video is about an hour long, but it is an hour well spent if you are interested in mainframe history.
The RTL-SDR dongles get most of the love from people interested in software-defined radio, but the Pluto is also a great option, too. [FromConceptToCircuit] shares code to turn one of these radios into a spectrum analyzer that sweeps up to 6 GHz and down to 100 MHz. You can see a video of how it works below.
While it may seem that 100 MHz is a bit limiting, there’s plenty of activity in that range, including WiFi, Bluetooth, radio systems, both commercial and amateur, and even cell phones.
The system uses a lock-in amplifier technique for best performance. The Python code is straightforward. You simply scan all frequencies and determine the signal strength at each point. Of course, the devil is in the details.
We covered using Pluto with GNU Radio a while back. We like how it connects like a network adapter, among other things. Spectrum analysis is a common project for one of these SDRs.
[Georges Gagnerot] has been trying to emulate iOS and run iPhone software in a virtual environment. There were a few choices, and qemu-t8030 had a number of interesting features that you can check out in his post.
The project requires a patched QEMU, and [Georges] did some basic jailbreaking techniques. The real problem, of course, was not having the Apple Silicon GPU. Older versions of iOS let you select software rendering, but that option is gone on newer versions. However, it was possible to patch the phone to still use software rendering. There are still apps that directly use Metal or OpenGL that won’t run, but that’s another problem.
There is a plan to explore forwarding GPU calls to a real device. However, that seems difficult so it will have to wait for now.
That wasn’t the last problem, of course. But the post gives you a great view into the detective work. There is still work to go, but it looks like a lot of progress.