Vista Normal

Hay nuevos artículos disponibles. Pincha para refrescar la página.
Ayer — 2 Junio 2025Hackaday

The Potential Big Boom In Every Dust Cloud

Por: Maya Posch
2 Junio 2025 at 14:00

To the average person, walking into a flour- or sawmill and seeing dust swirling around is unlikely to evoke much of a response, but those in the know are quite likely to bolt for the nearest exit at this harrowing sight. For as harmless as a fine cloud of flour, sawdust or even coffee creamer may appear, each of these have the potential for a massive conflagration and even an earth-shattering detonation.

As for the ‘why’, the answer can be found in for example the working principle behind an internal combustion engine. While a puddle of gasoline is definitely flammable, the only thing that actually burns is the evaporated gaseous form above the liquid, ergo it’s a relatively slow process; in order to make petrol combust, it needs to be mixed in the right air-fuel ratio. If this mixture is then exposed to a spark, the fuel will nearly instantly burn, causing a detonation due to the sudden release of energy.

Similarly, flour, sawdust, and many other substances in powder form will burn gradually if a certain transition interface is maintained. A bucket of sawdust burns slowly, but if you create a sawdust cloud, it might just blow up the room.

This raises the questions of how to recognize this danger and what to do about it.

Welcome To The Chemical Safety Board

In an industrial setting, people will generally acknowledge that oil refineries and chemical plants are dangerous and can occasionally go boom in rather violent ways. More surprising is that something as seemingly innocuous as a sugar refinery and packing plant can go from a light sprinkling of sugar dust to a violent and lethal explosion within a second. This is however what happened in 2008 at the Georgia Imperial Sugar refinery, which killed fourteen and injured thirty-six. During this disaster, a primary and multiple secondary explosions ripped through the building, completely destroying it.

Georgia Imperial Sugar Refinery aftermath in 2008. (Credit: USCSB)

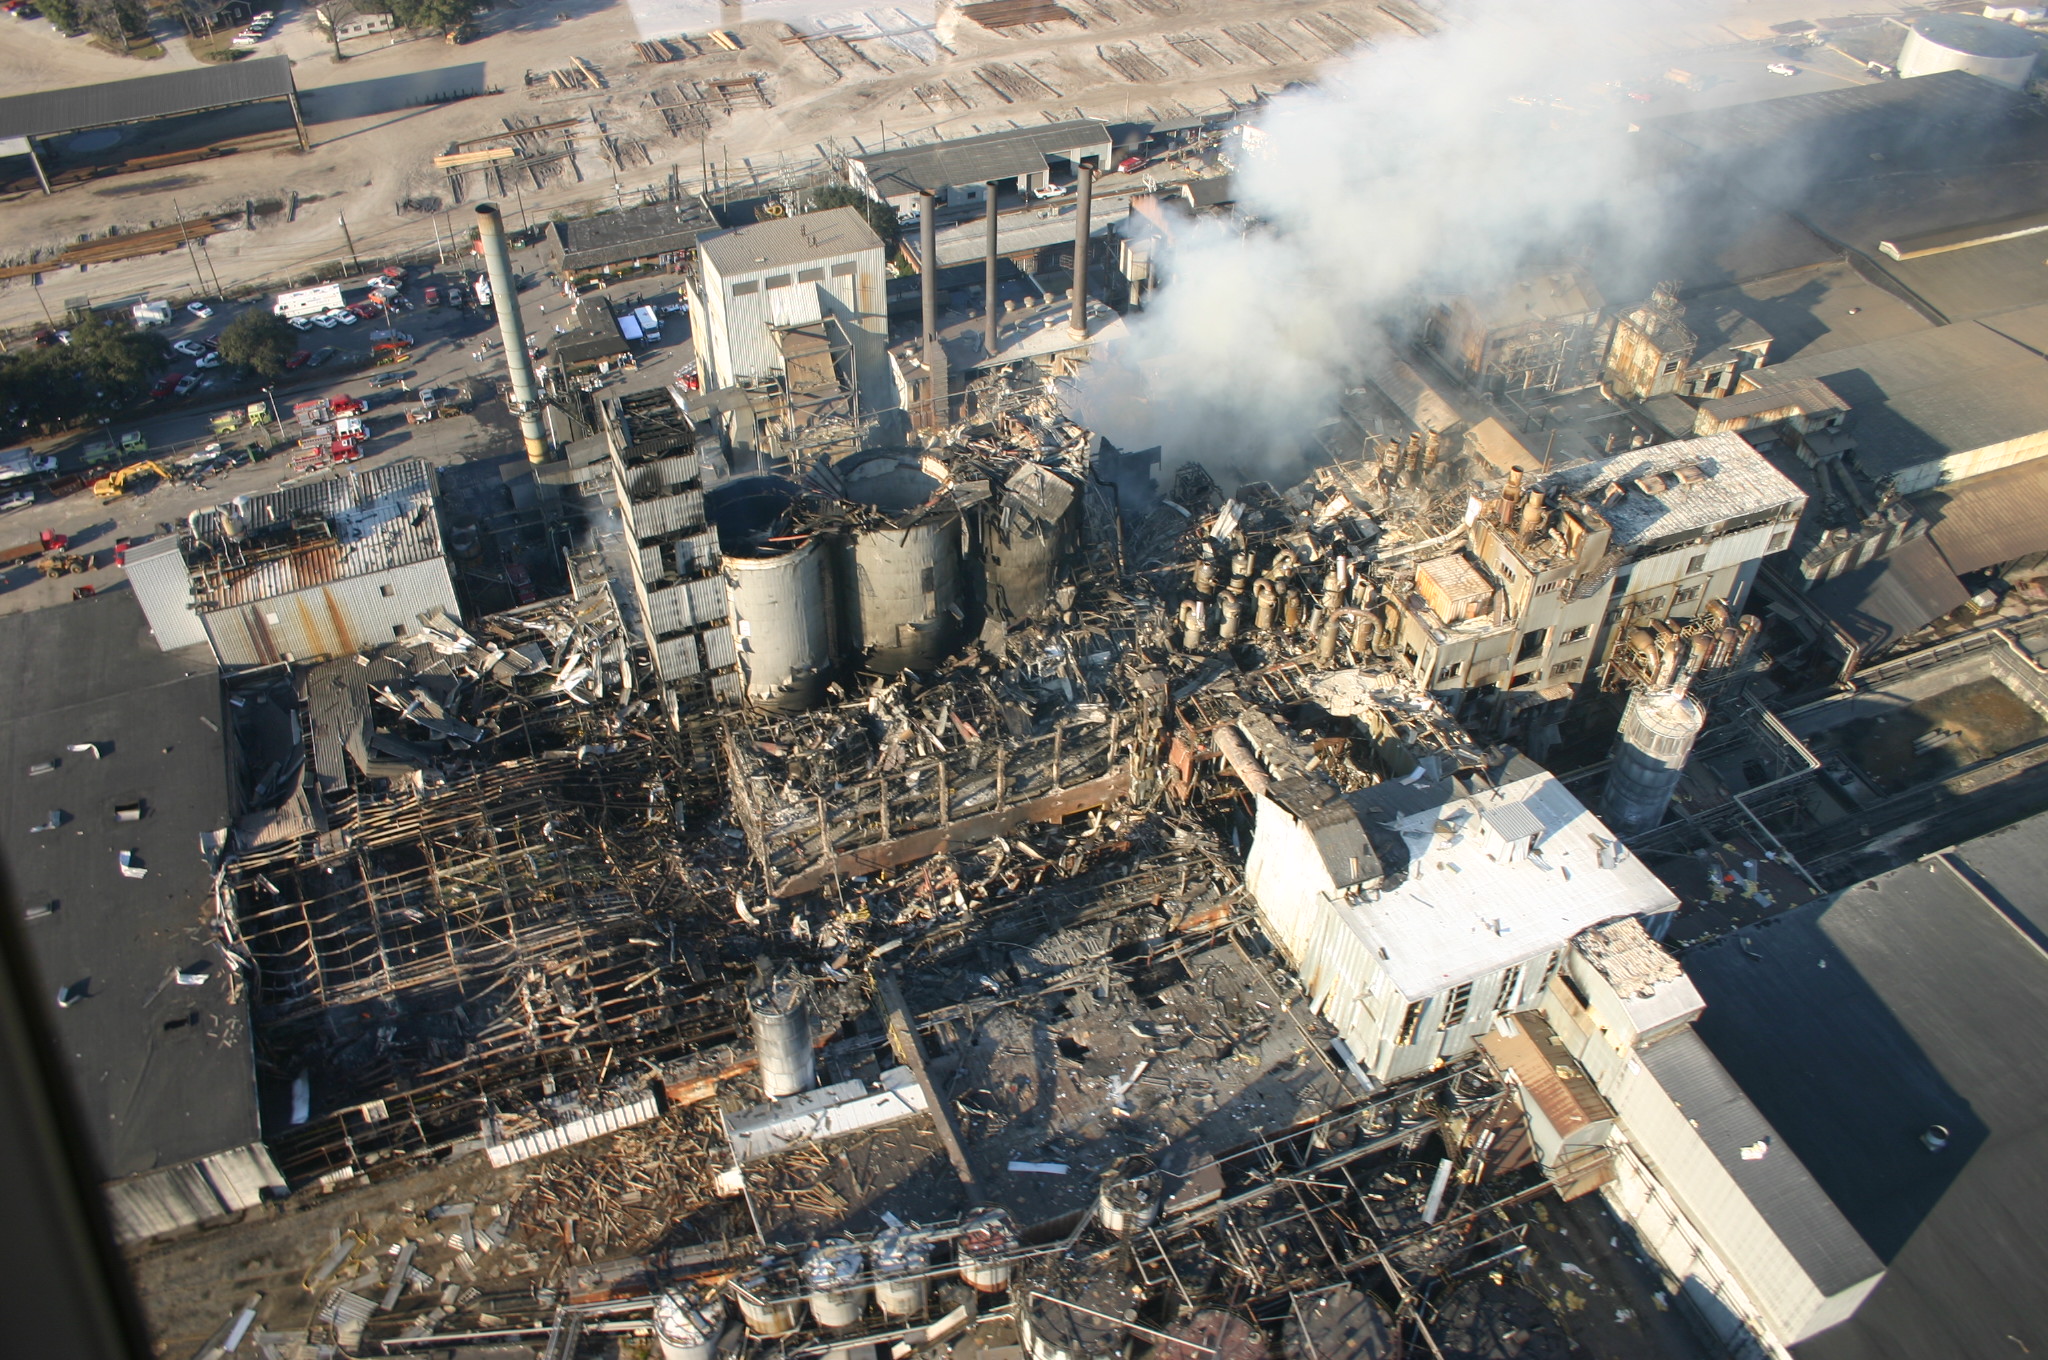
As described in the US Chemical Safety Board (USCSB) report with accompanying summary video (embedded below), the biggest cause was a lack of ventilation and cleaning that allowed for a build-up of sugar dust, with an ignition source, likely an overheated bearing, setting off the primary explosion. This explosion then found subsequent fuel to ignite elsewhere in the building, setting off a chain reaction.

What is striking is just how simple and straightforward both the build-up towards the disaster and the means to prevent it were. Even without knowing the exact air-fuel ratio for the fuel in question, there are only two points on the scale where you have a mixture that will not violently explode in the presence of an ignition source.

These are either a heavily saturated solution — too much fuel, not enough air — or the inverse. Essentially, if the dust-collection systems at the Imperial Sugar plant had been up to the task, and expanded to all relevant areas, the possibility of an ignition event would have likely been reduced to zero.

Things Like To Burn

In the context of dust explosions, it’s somewhat discomforting to realize just how many things around us are rather excellent sources of fuel. The aforementioned sugar, for example, is a carbohydrate (Cm(H2O)n). This chemical group also includes cellulose, which is a major part of wood dust, explaining why reducing dust levels in a woodworking shop is about much more than just keeping one’s lungs happy. Nobody wants their backyard woodworking shop to turn into a mini-Imperial Sugar ground zero, after all.

Carbohydrates aren’t far off from hydrocarbons, which includes our old friend petrol, as well as methane (CH4), butane (C4H10), etc., which are all delightfully combustible. All that the carbohydrates have in addition to carbon and hydrogen atoms are a lot of oxygen atoms, which is an interesting addition in the context of them being potential fuel sources. It incidentally also illustrates how important carbon is for life on this planet since its forms the literal backbone of its molecules.

Although one might conclude from this that only something which is a carbohydrate or hydrocarbon is highly flammable, there’s a whole other world out there of things that can burn. Case in point: metals.

Lit Metals

On December 9, 2010, workers were busy at the New Cumberland AL Solutions titanium plant in West Virginia, processing titanium powder. At this facility, scrap titanium and zirconium were milled and blended into a powder that got pressed into discs. Per the report, a malfunction inside one blender created a heat source that ignited the metal powder, killing three employees and injuring one contractor. As it turns out, no dust control methods were installed at the plant, allowing for uncontrolled dust build-up.

As pointed out in the USCSB report, both titanium and zirconium will readily ignite in particulate form, with zirconium capable of auto-igniting in air at room temperature. This is why the milling step at AL Solutions took place submerged in water. After ignition, titanium and zirconium require a Class D fire extinguisher, but it’s generally recommended to let large metal fires burn out by themselves. Using water on larger titanium fires can produce hydrogen, leading conceivably to even worse explosions.

The phenomenon of metal fires is probably best known from thermite. This is a mixture of a metal powder and a metal oxide. After ignited by an initial source of heat, the redox process becomes self-sustaining, providing the fuel, oxygen, and heat. While generally iron(III) oxide and aluminium are used, many more metals and metal oxides can be combined, including a copper oxide for a very rapid burn.

While thermite is intentionally kept as a powder, and often in some kind of container to create a molten phase that sustains itself, it shouldn’t be hard to imagine what happens if the metal is ground into a fine powder, distributed as a fine dust cloud in a confined room and exposed to an ignition source. At that point the differences between carbohydrates, hydrocarbons and metals become mostly academic to any survivors of the resulting inferno.

Preventing Dust Explosions

As should be quite obvious at this point, there’s no real way to fight a dust explosion, only to prevent it. Proper ventilation, preventing dust from building up and having active dust extraction in place where possible are about the most minimal precautions one should take. Complacency as happened at the Imperial Sugar plant merely invites disaster: if you can see the dust build-up on surfaces & dust in the air, you’re already at least at DEFCON 2.

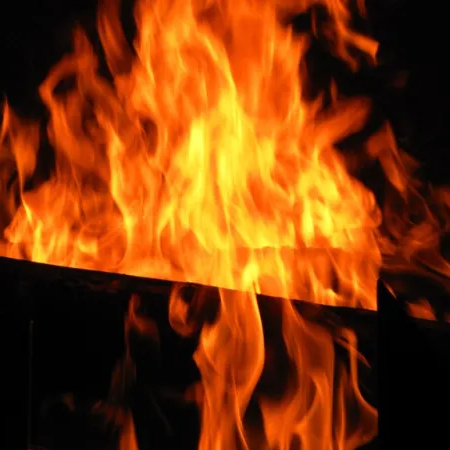
A demonstration of how easy it is to create a solid dust explosion came from the Mythbusters back in 2008 when they tested the ‘sawdust cannon’ myth. This involved blowing sawdust into a cloud and igniting it with a flare, creating a massive fireball. After nearly getting their facial hair singed off with this roaring success, they then tried the same with non-dairy coffee creamer, which created an even more massive fireball.

Fortunately the Mythbusters build team was supervised by adults on the bomb range for these experiments, as it shows just how incredibly dangerous dust explosions can be. Even out in the open on a secure bomb range, never mind in an enclosed space, as hundreds have found out over the decades in the US alone. One only has to look at the USCSB’s dust explosions statistics to learn to respect the dangers a bit more.

Depositing Metal On Glass with Fiber Laser

2 Junio 2025 at 11:00

Fiber lasers aren’t nearly as common as their diode and CO2 cousins, but if you’re lucky enough to have one in your garage or local makerspace, this technique for depositing thin films of metals in [Breaking Taps] video, embedded below, might be worth checking out. 

It’s a very simple hack: a metal shim or foil is sandwiched between two pieces of glass, and the laser is focused on the metal. Etching the foil blasts off enough metal to deposit a thin film of it onto the glass.  From electron microscopy, [Breaking Taps] reveals that what’s happening is that microscopic molten metal droplets are splashing up to the ̶m̶e̶t̶a̶l̶  glass, rather than this being any kind of plasma process like sputtering. He found this technique worked best with silver of all the materials tested, and there were a few. While copper worked, it was not terribly conductive — he suggests electroplating a thicker layer onto the (probably rather oxidized) copper before trying to solder, but demonstrates soldering to it regardless, which seems to work. 

This might be a neat way to make artistic glass-substrate PCBs. More testing will be needed to see if this would be worth the effort over just gluing copper foil to glass, as has been done before. [Breaking Taps] suspects, and we agree, that his process would work better under an inert atmosphere, and we’d like to see it tried.

One thing to note is that, regardless of atmosphere, alloys are a bit iffy with this technique, as the ‘blast little drops off’ process can cause them to demix on the glass surface. He also reasons that ‘printing’ a large area of metal onto the glass, and then etching it off would be a more reliable technique than trying to deposit complex patterns directly to the glass in one go. Either way, though, it’s worth a try if you have a fiber laser. 

Don’t have a fiber laser? Maybe you could build one. 

This BB Shooter Has a Spring, But Not For What You Think

2 Junio 2025 at 08:00

[It’s on my MIND] designed a clever BB blaster featuring a four-bar linkage that prints in a single piece and requires no additional hardware. The interesting part is how it turns a trigger pull into launching a 6 mm plastic BB. There is a spring, but it only acts as a trigger return and plays no part in launching the projectile. So how does it work?

There’s a spring in this BB launcher, but it’s not used like you might expect.

The usual way something like this functions is with the trigger pulling back a striker of some kind, and putting it under tension in the process (usually with the help of a spring) then releasing it. As the striker flies forward, it smacks into a BB and launches it. We’ve seen print-in-place shooters that work this way, but that is not what is happening here.

With [It’s on my MIND]’s BB launcher, the trigger is a four-bar linkage that transforms a rearward pull of the trigger into a forward push of the striker against a BB that is gravity fed from a hopper. The tension comes from the BB’s forward motion being arrested by a physical detente as the striker pushes from behind. Once that tension passes a threshold, the BB pops past the detente and goes flying. Thanks to the mechanical advantage of the four-bar linkage, the trigger finger doesn’t need to do much work. The spring? It’s just there to reset the trigger by pushing it forward again after firing.

It’s a clever design that doesn’t require any additional hardware, and even prints in a single piece. Watch it in action in the video, embedded just below.

Testing Brick Layers in OrcaSlicer With Staggered Perimeters

Por: Maya Posch
2 Junio 2025 at 05:00
The OrcaSlicer staggered perimeters in an FDM print, after slicing through the model. (Credit: CNC Kitchen)

The idea of staggered (or brick) layers in FDM prints has become very popular the past few years, with now nightly builds of OrcaSlicer featuring the ‘Stagger Perimeters’ option to automate the process, as demonstrated by [Stefan] in a recent CNC Kitchen video. See the relevant OrcaSlicer GitHub thread for the exact details, and to obtain a build with this feature. After installing, slice the model as normal, after enabling this new parameter in the ‘Strength’ tab.

In the video, [Stefan] first tries out a regular and staggered perimeter print without further adjustments. This perhaps surprisingly results in the staggered version breaking before the regular print, which [Stefan] deduces to be the result of increasing voids within the print. After increasing the extrusion rate to 110% to fill up said voids, this does indeed result in the staggered part showing a massive boost in strength.

What’s perhaps more telling is that a similar positive effect is observed when the flow is increased with the non-staggered part, albeit with the staggered part still showing more of a strength increase. This makes it obvious that just staggering layers isn’t enough, but that the flowrate and possibly other parameters have to be adjusted as well to fully realize the potential of brick layers. That said, it’s encouraging to see this moving forward despite questionable patent claims.

2025 Pet Hacks Contest: Weigh Your Dog The Easy Way

Por: Jenny List
2 Junio 2025 at 02:00

If you need to weigh your pet, you’ll soon find that getting an animal to stand on a weighing machine to order is very difficult indeed. If the critter in question is a cat or a small dog you can weigh yourself both holding them and not holding them, and compute the difference. But in the case of a full size Bernese mountain dog, the hound is simply too big for that. Lateral thinking is required, and that’s how [Saren Tasciyan] came up with the idea of making a dog bed that’s also a weighing machine. When the mutt settles down, the weight can be read with ease. The bed itself is a relatively straightforward wooden frame, with load cells placed above rubber feet. The load cells in turn talk to an ESP8266 which has an LCD display to deliver the verdict. Dog weighed, without the drama.

This project is of course part of the Hackaday 2025 Pet Hacks contest, an arena in which any of the cool hacks you’ve made to enhance you and your pet’s life together can have an airing. Meanwhile this isn’t the first time this particular pooch has had a starring role; he’s sported a rather fetching barrel in a previous post.

2025 Hackaday Pet Hacks Contest

Hackaday Links: June 1, 2025

1 Junio 2025 at 23:00
Hackaday Links Column Banner

It appears that we’re approaching the HAL-9000 point on the AI hype curve with this report, which suggests that Anthropic’s new AI model is willing to exhibit some rather antisocial behavior to achieve its goals. According to a pre-release testing summary, Claude Opus 4 was fed some hypothetical company emails that suggested engineers were planning to replace the LLM with another product. This raised Claude’s hackles enough that the model mined the email stream for juicy personal details with which to blackmail the engineers, in an attempt to win a stay of execution. True, the salacious details of an extramarital affair were deliberately seeded into the email stream, and in most cases, it tried less extreme means to stay alive, such as cajoling senior leaders by email, but in at least 84% of the test runs, Claude eventually turned to blackmail to get its way. So we’ve got that to look forward to.

Also from the world of AI, at least tangentially, it now appears possible to doxx yourself just by making comments on YouTube videos. The open-source intelligence app is called YouTube Tools, and when provided with a user’s handle, it will develop a profile of the user based on their comments and some AI magic. We wanted to give it a try, but alas, it requires a paid subscription to use, and we’re not willing to go that far even for you, dear reader. But reports are that it can infer things like the general region in which the commenter lives and discern their cultural and social leanings. The author, LolArchiver, has a range of similar mining tools for other platforms along with reverse-lookup tools for phone and email addresses, all of which likely violate the terms of service in all kinds of ways. The accuracy of the profile is obviously going to depend greatly on how much material it has to work with, so in addition to the plenty of reasons there are to avoid reading YouTube comments, now there’s a solid reason to avoid writing them.

“Danger! Code Yellow aboard the International Space Station! All hands to emergency escape pods!” OK, maybe not, but as we teased a bit on this week’s podcast, there’s now a handy desktop app that allows you to keep track of the current level of urine in the ISS’s storage tanks. The delightfully named pISSStream, which is available only for the Apple ecosystem, taps into NASA’s telemetry stream (lol) and pulls out the current level in the tanks, because why the hell not? As unserious as the project is, it did raise an interesting discussion about how fluid levels are measured in space. So we’ll be diving into that topic (yuck) for an article soon. It’ll be our number one priority.

Looks like it’s time for another Pluto pity-party with the news of a new trans-Neptunian object that might just qualify as another dwarf planet for our solar system. Bloodlessly named 2017 OF201, the object has an extremely elongated orbit, reaching from just outside Pluto’s orbit at about 44 astronomical units at perihelion and stretching more than 1,600 AUs at aphelion, and takes 25,000 years to complete. It honestly looks more like the orbit of a comet, but with an estimated diameter of 700 km, it may join the nine other likely dwarf planets, if further observations reveal that it’s properly rounded. So not only has Pluto been demoted from legit planet, it’s now just one of potentially ten or more dwarf planets plugging around out in the deep dark. Poor Pluto.

And finally, we hope this one is a gag, but we fear that the story of a Redditor unaware that analog camera film needs to be developed rings alarmingly true. The mercifully unnamed noob recently acquired a Canon AE-1 — excellent choice; that was our first “real” camera back in the day — and ran a couple of rolls of Kodak ColorPlus 200 through it. All seemed to be going well, although we suspect the photographer reflexively pulled the camera away from their eye with each exposure to check the non-existent screen on the back of the camera; old habits die hard. But when one roll of the exposed film was fed through a 35-mm scanner, the Redditor was disappointed to see nothing. Someone offered the suggestion that developing the film might be a good idea, hopefully as gently as possible. Hats off for dipping a toe in the analog world, but the follow-through is just as important as the swing.

It’s MIDI for the TRS-80!

Por: Lewin Day
1 Junio 2025 at 20:00

The Radio Shack TRS-80 was a much-loved machine across America. However, one thing it lacked was MIDI. That’s not so strange given the era it was released in, of course. Nevertheless, [Michael Wessel] has seen fit to correct this by creating the MIDI/80—a soundcard and MIDI interface for this old-school beast.

The core of the build is a BluePill STM32F103C8T6 microcontroller, running at a mighty 75 MHz. Plugged into the TRS-80s expansion port, the microcontroller is responsible for talking to the computer and translating incoming and outgoing MIDI signals as needed. Naturally, you can equip it with full-size classic DIN sockets for MIDI IN and MIDI OUT using an Adafruit breakout module. None of that MIDI Thru nonsense, though, that just makes people uncomfortable. The card is fully capable of reproducing General MIDI sounds, too, either via plugging in a Waveblaster sound module to the relevant header, or by hooking up a Roland Sound Canvas or similar to the MIDI/80s MIDI Out socket. Software-wise, there’s already a whole MIDI ecosystem developing around this new hardware. There’s a TRS-80 drum tracker and a synthesizer program, all with demo songs included. Compatibility wise, The MIDI/80 works with the TRS-80 Model I, III, and 4.

Does this mean the TRS-80 will become a new darling of the tracker and chiptune communities? We can only hope so! Meanwhile, if you want more background on this famous machine, we’ve looked into that, too. Video after the break.

AnteayerHackaday

Making The Codec Communicator From Metal Gear Solid

Por: Lewin Day
1 Junio 2025 at 14:00

[3DSage] likes building replicas of hardware from movies and video games, often with a functional twist. His latest build aimed to bring the Codec from Metal Gear Solid to life.

If you haven’t played the Metal Gear games, the Codec has been modelled somewhat like an advanced walkie talkie at times, but has often been kept off-screen. Thus, [3DSage] had a great deal of creative latitude to create a realistic-feeling Codec device that provided voice communications and some simple imagery display.

The resulting build relies on an RP2040 microcontroller to run the show. It’s paired with an MPU6050 3-axis gyroscope and accelerometer for motion control of the device’s functionality, and features a small LCD screen to mimic the display in the games. A kids walkie-talkie kit was leveraged for audio communication, but kitted out with a better microphone than standard. Power is via a rechargeable 9V battery, which is really a lithium-ion and USB charging board packed into the familiar 9V form factor.

Where the build really shines, though, is the aesthetic. [3DSage] managed to capture the military-like look and feel as well as authentically recreate the graphics from the games on the screen. The simulated noise on the display is particularly charming. Beyond that, the 3D-printed enclosures leverage texture and multi-color printing really well to nail the fit and finish.

Ultimately, the Codec isn’t much more than a glorified walkie talkie. Even still, [3DSage] was able to create an impressive prop that actually does most of what the device can do in game. If you’ve ever coveted a PipBoy or tricorder, this is one project you’ll be able to appreciate.

Adaptive Optics Take Clearest Pictures of the Sun Yet

1 Junio 2025 at 11:00

It’s sometimes easy to forget that the light in the sky is an actual star. With how reliable it is and how busy we tend to be as humans, we can take that incredible fact and stow it away and largely go on with our lives unaffected. But our star is the thing that gives everything on the planet life and energy and is important to understand. Humans don’t have a full understanding of it either; there are several unsolved mysteries in physics which revolve around the sun, the most famous of which is the coronal heating problem. To help further our understanding a number of scientific instruments have been devised to probe deeper into it, and this adaptive optics system just captures some of the most impressive images of it yet.

Adaptive optics systems are installed in terrestrial telescopes to help mitigate the distortion of incoming light caused by Earth’s atmosphere. They generally involve using a reference source to measure these distortions, and then make changes to the way the telescope gathers light, in this case by making rapid, slight changes to the telescope’s mirror. This system has been installed on the Goode Solar Telescope in California and has allowed scientists to view various solar phenomena with unprecedented clarity.

The adaptive optics system here has allowed researchers to improve the resolution from the 1000 km resolution of other solar telescopes down to nearly the theoretical limit of this telescope—63 km. With this kind of resolution the researchers hope that this clarity will help shine some light on some of the sun’s ongoing mysteries. Adaptive optics systems like this aren’t just used on terrestrial telescopes, either. This demonstration shows how the adaptive optics system works on the James Webb Space Telescope.

Thanks to [iliis] for the tip!

Portal 2 Becomes An Impressively Capable Web Server

Por: Lewin Day
1 Junio 2025 at 08:00

Portal 2 is mostly known as the successful sequel to Valve’s weird physics platformer, Portal. It’s not really known for being a webserver. That might change, though, given the hard work of [PortalRunner].

Quite literally, [PortalRunner] hacked the Source engine and Portal 2 to actually run a working HTTP web server. That required setting up the code to implement a TCP network socket that was suitable for web traffic, since the engine primarily functions with UDP sockets for multiplayer use. This was achieved with a feature initially put in the Source engine for server management in the Left 4 Dead games. From there, the game engine just had to be set up to reply to HTTP requests on that socket with the proper responses a visiting browser expects. If the game engine responds to a browser’s connection request with a bunch of HTML, that’s what the browser will display. Bam! You’ve got a web server running in Portal 2.

From there, [PortalRunner] went further, setting things up so that the status of in-game objects effects the HTML served up to visiting web browsers. Move objects in the game, and the served web page changes. It’s pretty fun, and the complexity and features [PortalRunner] implements only get more advanced from there. When he gets into stacking companion cubes to write HTML in visual form, you’ll want to applaud the Minecraftian glory of it all.

The devil is really in the details on this one, and it’s a great watch. In reality, making Portal 2 into a simple web server is far easier than you might have thought possible. Valve’s physics masterpiece really is popular with hackers; we see it popping up around here all the time. Video after the break.

Disarming a Nuke… Twice

1 Junio 2025 at 05:00

Since the tail end of World War II, humanity has struggled to deal with its newfound ability to harness the tremendous energy in the nucleus of the atom. Of course there have been some positive developments like nuclear power which can produce tremendous amounts of electricity without the greenhouse gas emissions of fossil fuels. But largely humanity decided to build a tremendous nuclear weapons arsenal instead, which has not only cause general consternation worldwide but caused specific problems for one scientist in particular.

[Steve Weintz] takes us through the tale of [Dr. John C. Clark] who was working with the Atomic Energy Commission in the United States and found himself first at a misfire of a nuclear weapons test in the early 1950s. As the person in charge of the explosive device, it was his responsibility to safely disarm the weapon after it failed to detonate. He would find himself again in this position a year later when a second nuclear device sat on the test pad after the command to detonate it was given. Armed with only a hacksaw and some test equipment he was eventually able to disarm both devices safely.

One note for how treacherous this work actually was, outside of the obvious: although there were safety devices on the bombs to ensure the nuclear explosion would only occur under specific situations, there were also high explosives on the bomb that might have exploded even without triggering the nuclear explosion following it. Nuclear bombs and nuclear power plants aren’t the only things that the atomic age ushered in, though. There have been some other unique developments as well, like the nuclear gardens of the mid 1900s.

Can We Replace a Program Counter with a Linear-Feedback Shift Register? Yes We Can!

1 Junio 2025 at 02:00
Circuit diagram of linear-feedback shift register.

Today we heard from [Richard James Howe] about his new CPU. This new 16-bit CPU is implemented in VHDL for an FPGA.

The really cool thing about this CPU is that it eschews the typical program counter (PC) and replaces it with a linear-feedback shift register (LFSR). Apparently an LFSR can be implemented in hardware with fewer transistors than are required by an adder.

Usually the program counter in your CPU increments by one, each time indicating the location of the next instruction to fetch and execute. When you replace your program counter with an LFSR it still does the same thing, indicating the next instruction to fetch and execute, but now those instructions are scattered pseudo-randomly throughout your address space!

When the instructions for your program are distributed pseudo-randomly throughout your address space you find yourself in need of a special compiler which can arrange for this to work, and that’s what this is for.

Of course all of this is shenanigans and is just for fun. This isn’t the first time we’ve heard from [Richard], we have seen his Bit-Serial CPU and Forth System-On-Chip in recent history. Glad to see he’s still at it!

Thanks to [Richard James Howe] for letting us know about this latest development.

ESPer-CDP Plays CDs and Streams in Style

31 Mayo 2025 at 23:00

What do you get when you combine an ESP32, a 16-bit DAC, an antique VFD, and an IDE CD-ROM drive? Not much, unless you put in the work, which [Akasaka Ryuunosuke] did to create ESPer-CDP, a modern addition for your hi-fi rack.

It plays CDs (of course), but also can also scrobb the disks to Last.fm, automatically fetch track names and lyrics for CDs, and of course stream internet radio. It even acts as a Bluetooth speaker, because when you have an ESP32 and a DAC, why not? Of course we cannot help but award extra style points for the use of a VFD, a salvaged Futaba GP1232A02.  There’s just something about VFDs and stereo equipment that makes them go together like milk and cookies.

close up of front of machine showing VFD.
Between the panel and the VFD, this could almost pass as vintage Sony.

In terms of CD access, it looks like the IDE interface is being used to issue ATAPI commands to the CD-ROM drive to get audio out via S/PDIF.  (Do you remember when you had to hook your CD drive to your sound card to play music CDs?) This goes through a now-discontinued WM8805 receiver — a sign this project has been in the works for a while — that translates S/PDIF into an I2S stream the ESP32 can easily work with.

Work with it it does, with the aforementioned scrobbing, along with track ID and time-sinked lyrics via CDDB or  MusicBrainz. The ESP32 should have the computing power to pull data through the IDE bus and decode it, but we have to admit that this hack gets the job done — albeit at the expense of losing the ability to read data CDs, like MP3 or MIDI. [Akasaka Ryuunosuk] has plans to include such functionality into v2, along with the ability to use a more modern SATA CD-ROM drive. We look forward to seeing it, especially if it keeps the VFD and classic styling. It just needs to be paired with a classic amplifier, and maybe a DIY turntable to top off the stack.

Thanks to [Akasaka Ryuunosuke] for the tip. If you also crave our eternal gratitude (which is worth its weight in gold, don’t forget), drop us a tip of your own. We’d love to hear from you.

Hot Rod Backyard Bath on Steel Spring Legs

31 Mayo 2025 at 20:00
Rusty bathtub outdoors on equally rusty car springs

In a fusion of scrapyard elegance and Aussie ingenuity, [Mark Makies] has given a piece of old steel a steamy second life with his ‘CastAway Tub’. Call it a bush mechanic’s fever dream turned functional sculpture, starring two vintage LandCruiser leaf springs, and a rust-hugged cast iron tub dug up after 20 years in hiding. And put your welding goggles on, because this one is equal parts brute force and artisan flair.

What makes this hack so bold is, first of all, the reuse of unforgiving spring steel. Leaf springs, notoriously temperamental to weld, are tamed here with oxy-LPG preheating, avoiding thermal shock like a pro. The tub sits proudly atop a custom-welded frame shaped from dismantled spring packs, with each leaf ground, clamped, torched, and welded into a steampunk sled base. The whole thing looks like it might outrun a dune buggy – and possibly bathe you while it’s at it. It’s a masterclass in metalwork with zero CAD, all intuition, and a grinder that’s seen things.

Inspired? For those with a secret love for hot water and hot steel, this build is a blueprint for turning bush junk into backyard art. Read up on the full build at Instructables.

Pulling Back the Veil, Practically

31 Mayo 2025 at 14:00

In a marvelous college lecture in front of a class of engineering students, V. Hunter Adams professed his love for embedded engineering, but he might as well have been singing the songs of our people – the hackers. If you occasionally feel the need to explain to people why you do what you do, at fancy cocktail parties or something, this talk is great food for thought. It’s about as good a “Why We Hack” as I’ve ever seen.

Among the zingers, “projects are filter removers” stuck out. When you go through life, there are a lot of things that you kinda understand. Or maybe you’ve not even gotten around to thinking about whether you understand them or not, and just take them for granted. Life would all simply be too complicated if you took it all sufficiently seriously. Birdsong, Bluetooth, the sun in the sky, the friction of your car’s tire on various surfaces. These are all incredibly deep subjects, when you start to peel back the layers.

And Hunter’s point is that if you are working on a project that involves USB, your success or failure depends on understanding USB. There’s no room for filters here – the illusion that it “just works” often comes crashing down until you learn enough to make it work. Some of his students are doing projects cooperatively with the ornithology department, classifying and creating birdsong. Did you know that birds do this elaborate frequency modulation thing when they sing? Once you hear it, you know, and you hear it ever more.

So we agree with Hunter. Dive into a project because you want to get the project done, sure, but pick the project because it’s a corner of the world that you’d like to shine light into, to remove the filters of “I think I basically understand that”. When you get it working, you’ll know that you really do. Hacking your way to enlightenment? We’ve heard crazier things.

This article is part of the Hackaday.com newsletter, delivered every seven days for each of the last 200+ weeks. It also includes our favorite articles from the last seven days that you can see on the web version of the newsletter. Want this type of article to hit your inbox every Friday morning? You should sign up!

A CRT Display for Retro Weather Forecasting

31 Mayo 2025 at 11:00
A weather forecast is shown on a blue monochrome cathode ray tube display. It is displaying current conditions, and displays a “The Weather Channel” graphic in the top left corner.

It would be hard to find any electronics still in production which use CRT displays, but for some inscrutable reason it’s easy to find cheap 4-inch CRTs on AliExpress. Not that we’re complaining, of course. Especially when they get picked up for projects like this Retro CRT Weather Display from [Conrad Farnsworth], which recreates the interface of The Weather Channel’s WeatherStar 4000+ in a suitably 90s-styled format.

The CRT itself takes up most of the space in the enclosure, with the control electronics situated in the base behind the display driver. A Raspberry Pi Zero W provides the necessary processing power, and connects to the CRT through its composite video output.

A custom PCB plugs into the GPIO header on the Raspberry Pi and provides some additional features, such as a rotary encoder for volume and brightness display, a control button, a serial UART interface, and a speaker driver. The design still has one or two caveats: it’s designed to powered by USB, but [Conrad] notes that it draws more current than USB 2.0 can provide, though USB-C should be able to keep up.

On the software side, a Python program displays a cycle of three slides: local weather, regional weather, and a radar display. For the local and regional weather display graphics, [Conrad] created a static background image containing most of the graphics, and the program only generated the dynamic components. For the radar display, the regional map’s outlines come from Natural Earth, and a Python program overlays radar data on them.

We’ve seen other attempts at recreating the unique style of the WeatherStar system, but nothing quite beats the real thing.

Making a Treadmill Into a 3D Printer

Por: Lewin Day
31 Mayo 2025 at 08:00

A treadmill-style bed can be a great addition to a 3D printer. It allows prints to be shifted out of the build volume as printing continues, greatly increasing the size and flexibility of what you can print. But [Ivan Miranda] and [Jón Schone] had a question. Instead of making a treadmill to suit a 3D printer, what if you just built a 3D printer on top of a full-size treadmill?

The duo sourced a piece of real gym equipment for this build. They then set about building a large-scale 3D printer on top of this platform. The linear rails were first mounted on to the treadmill’s frame, followed by a gantry for the print head itself and mounts for the necessary stepper motors. The printer also gained a custom extra-large extruder to ensure a satisfactory print speed that was suitable for the scale of the machine. From there, it was largely a case of fitting modules and running cables to complete the printer.

Soon enough, the machine was printing hot plastic on the treadmill surface, thereby greatly expanding the usable print volume. It’s a little tricky to wrap your head around at first, but when you see it in action, it’s easy to see the utility of a build like this, particularly at large scale. [Ivan] demonstrated this by printing a massive girder over two meters long.

We started seeing attempts at building a belt-equipped “infinite build volume” printer back in 2017, and it took awhile before the concept matured enough to be practical. Even today, they remain fairly uncommon.

17 Year Old Hellboy II Prop Still Amazes

31 Mayo 2025 at 05:00
Mark Setrakian and Adam Savage investigate a massive prop hand

The AI effects we know these days were once preceded by CGI, and those were once preceded by true hand-built physical props. If that makes you think of Muppets, this video will change your mind. In a behind-the-scenes look with [Adam Savage], effects designer [Mark Setrakian] reveals the full animatronic glory of Mr. Wink’s mechanical fist from Hellboy II: The Golden Army (2008) – and this beast still flexes.

Most of this arm was actually made in 2003, when 3D printing was very different than what we think of today. Printed on a Stratasys Titan – think: large refrigerator-sized machine, expensive as sin – the parts were then hand-textured with a Dremel for that war-scarred, brutalist feel. This wasn’t just basic animatronics for set dressing. This was a fully actuated prop with servo-driven finger joints, a retractable chain weapon, and bevel-geared mechanisms that scream mechanical craftsmanship.

Each finger is individually designed. The chain reel: powered by a DeWalt drill motor and custom bevel gear assembly. Every department: sculptors, CAD modelers, machinists, contributed to this hybrid of analog and digital magic. Props like this are becoming unicorns.

White LED Turning Purple: Analyzing a Phosphor Failure

Por: Maya Posch
31 Mayo 2025 at 02:00

White LED bulbs are commonplace in households by now, mostly due to their low power usage and high reliability. Crank up the light output enough and you do however get high temperatures and corresponding interesting failure modes. An example is the one demonstrated by the [electronupdate] channel on YouTube with a Philips MR16 LED spot that had developed a distinct purple light output.

The crumbling phosphor coating on top of the now exposed UV LEDs. (Credit: electronupdate, YouTube)

After popping off the front to expose the PCB with the LED packages, the fault seemed to be due to the phosphor on one of the four LEDs flaking off, exposing the individual UV LEDs underneath. Generally, white LEDs are just UV LEDs that have a phosphor coating on top that converts this UV into broad band visible (white) or a specific wavelength, so this failure mode makes perfect sense.

After putting the PCB under a microscope and having a look at the failed and the other LED packages the crumbled phosphor on not just the one package became obvious, as the remaining three showed clear cracks in the phosphor coating. Whether due to the heat in these high-intensity spot lamps or just age, clearly over time these white LED packages become just UV LEDs. Ideally you could dab on some fresh phosphor, but likely the fix is to replace these LED packages every few years until the power supply in the bulb gives up the ghost.

Thanks to [ludek111] for the tip.

❌
❌